Ghostblade's Wishlist
-
XStatistics
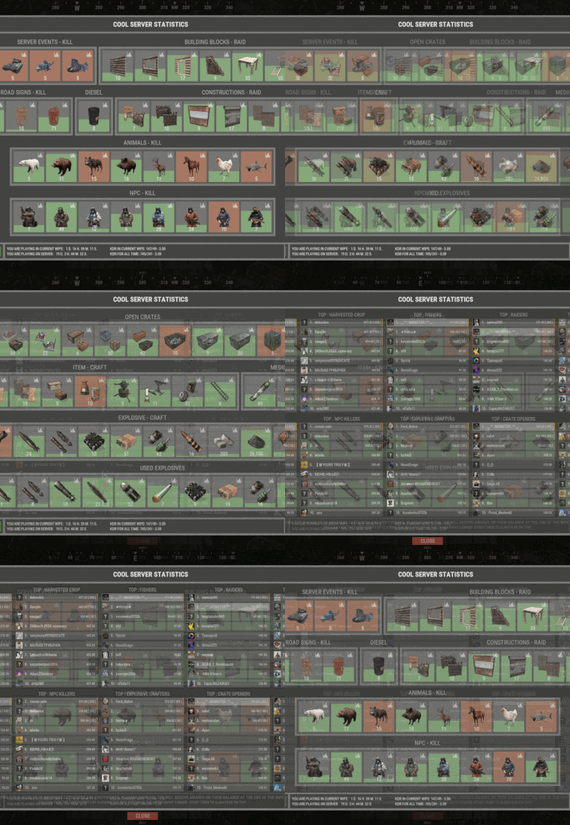
XStatistics - statistics for your server.
- Optimization of the interface for different monitor resolutions.
- Storing player data in - oxide/data/XDataSystem/XStatistics or MySQL or SQLite.
- There is a lang ru/en/uk/es.
- Sound effects when interacting with the menu.
- UI settings in the configuration.
- Display TOPs in game chat.
- Ability to customize the privacy of the default statistics.
- Ability to delete a player's stats after they have been banned.
- Ability to customize grades of building blocks. [ To be recorded in statistics. ]
- Ability to add a player to the blacklist. [ Player's statistics will not be displayed in the TOPs and will not be available to other players. ]
- Ability to use MySQL or SQLite database.
- Ability to automatically give awards and clear data after a WIPE. [ Settings in the configuration. ]
[ Plugin economics or any other. Also [ RU ] GameStores. ]
- A player can hide/open his statistics. [ Need permission. ]
- A player can view the statistics of other players. [ Need permission. ]
- A player can reset their statistics to zero. [ Need permission. ]
- The player can view the entire list of players and search. [ Need permission. ]
- Creating an unlimited number of categories, subcategories and pages.
- Creating custom TOPs, coefficients and awards. [ Unlimited number. ]
- Various admin commands to manage player statistics.
- Support and compatibility with many plugins.
- Server events (Bradley, Chinook, and Patrol Helicopter) count as stats for the player who did the most damage.
- Checking OwnerID of Building blocks, Constructions and other entities.
- Ability to create a Global TOP of your project. [ For this purpose it is enough to enter MySQL data and server name into the configuration.]
[ This TOP can be disabled in the configuration and only the TOP players of the server can be used. Or you can use two TOPs at the same time! ]
- Ability to use pages for categories with subcategories.
- Administrator Mode. [ View hidden player stats, open player search and more ].
- Automatic deletion of statistics of players who have not logged connection the server for N days.
- Ability for players to disable messages with the TOP players in chat.
If your server is visited by more than 500 players, it is recommended to use SQLite or MySQL.
Statistics were tested on a server with 120 online and 5000 players in the database. Excellent result on optimization.
To display player avatars you need to customize the configuration of the ImageLibrary plugin!
What are the statistics at this point?
Global TOP data is manually deleted from the MySQL database. [ It is important that the servers are turned off so that online players data is not written to the database ].
Or after all servers are wiped, run the command - player_stats_reset globaldata null - on one of the servers.
[ Also take into account the servers parameters, for a fair TOP they should be the same! ]
Shortnames to customize statistics
Permissions
xstatistics.use - access to the statistics menu. xstatistics.top - access to the TOPs of subcategories. xstatistics.coefficients - access to view the coefficients. xstatistics.player - access to view player statistics, player list and player search. xstatistics.resetwipe - access to the ability for a player to reset his statistics - WIPE. xstatistics.resetall - access to the ability for a player to reset his statistics - ALL TIME. xstatistics.shstats - access to the ability to hide/open your statistics. [ If the permission has been revoked, the statistics privacy will automatically change to default. ] xstatistics.admin - access to admin mode. Commands
/stat, /stats, /statistic, /statistics - to open the statistics menu. [ Commands can be changed in the config. ] Server console --- Admin commands. stats_ct <customTopName> - to see the top players. [ Custom TOP. ] stats_t <subcategoryName> - to see the top players. [ TOP subcategory. ] player_stats_reset statswipe <steamID> - to reset a player stats to zero - WIPE. player_stats_reset statsall <steamID> - to reset a player stats to zero - ALL TIME. player_stats_reset all <steamID> - to reset a player stats to zero - WIPE and ALL TIME. player_stats_reset global <steamID> - delete a player from the database Global TOP. [ Player must be offline! ] player_stats_reset globaldata null - Delete data from a table in a MySQL database - Global TOP. [ Use this command after all of your servers have been wiped. ] [ The command can be used on any of the Global TOP servers. ] player_actstats global true/false - change statistics privacy for all players. player_actstats <steamID> true/false - change statistics privacy for a player. stats_give_award - start giving out awards for TOPs. stats_clear_data_wipe - to clear all statistics - WIPE. [ Same as after a server wipe ] API
- void API_AddSubcategoryValue(BasePlayer player, string subcategoryName, long amount) - Add a value for the subcategory. player - must be online and not equal to null. - void API_SetSubcategoryValue(BasePlayer player, string subcategoryName, long amount) - Set a value for the subcategory. player - must be online and not equal to null. - bool API_CheckForSubcategory(ulong userID, string subcategoryName) - Check if a subcategory exists. - long API_GetSubcategoryValue(ulong userID, string subcategoryName) - Get the subcategory value. Config
-
Arctic Base Event
An event for the Arctic Research Base monument with a plot to rescue both a scientist and a pilot that have been captured by the security group who has been ordered to capture and deal with the attempted sabotage on the Arctic Base
Description
Welcome to a frosty new adventure in the more recently added Arctic Research Base to so many of our islands! This monument will now have an event with a storyline requiring you and your friends to rescue the Pilot, and the Scientist from their captivity by the Arctic Base security service. You don't want to know what will happen to these two if you don't save them!
Our new event begins with a notification (if enabled by default) for players to know that a sabotage is about to take place on the island. There is a plot to come collect biological samples from the burned corpse of one of the recently discovered NPCs, class: Sledge.
The players will soon find out that the sabotage has failed and that two of our team have been taken captive by the Artic Research security team! Players will need to free them both from this no prisoners no hostages situation, and protect the scientist while he finishes his portion of the mission.
Once the Scientist or Pilot are released, snowmobiles will arrive bringing NPCs, tasked simply with killing the Scientist so he will not be able to carry out his task of reverse engineering a way to continue to combat everything they throw at us!
Once the Scientist has completed his task, and the Pilot has been released and has prepped the escape helicopter, their evacuation can take place. The will get into their minicopter and begin their departure. Before you leave and as thanks, the Pilot is going to open up a warehouse full of supplies for you!
Once you reach this point in the event, there are several options with different amounts of loot within the stash. If you are able to protect the Scientist, and they are able to evacuate with the pilot, then we can better find things of value on comms with the team as they leave and the looting will be most efficient!
Be ready, this minicopter is an actual piece of... well it's Rusty! Let the pilot have some extra time if needed to make sure it is running smoothly before they take off. Here and now the security team will send everything they have at you and your friends. Protect the group from the attacks!
In the configuration for the plugin you can change timers, NPC settings and numbers, snowmobile and crate numbers, the Scientists health, and the loot tables! As always the configurations are extensive and the creativity is in your hands to customize this plugin to your liking.
Can you and your friends help make sure this sabotage takes place, and these rebels make it off the island?
Dependencies (optional, not required)
True PVE PveMode GUI Announcements Notify Discord Messages AlphaLoot CustomLoot NTeleportation Economics Server Rewards IQEconomic Kits
Chat commands (only for administrators)
/abstart - start the event
/abstop - end the event
Console commands (RCON only)
abstart - start the event
abstop - end the event
Plugin Config
en - example of plugin configuration in English ru - example of plugin configuration in Russian
Hooks
void OnArcticBaseEventStart() – called when the event starts
void OnArcticBaseEventEnd() – called when the event ends
void OnArcticBaseEventWinner(ulong winnerId) – called at the end of the event, where the winnerId is the player who did more actions to complete the event
My Discord: KpucTaJl#8923
Join the Mad Mappers Discord here!
Check out more of my work here!
- #arctic research base
- #ch47
- (and 21 more)
-
Quick Loot
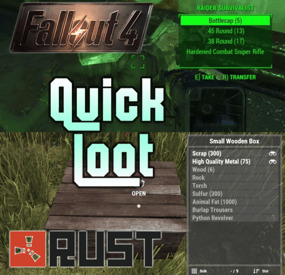
Adds a "quick loot" panel similar to that found in games such as Starfield and Fallout 4. This allows players to quickly view and loot items from containers without needing to open them first. Includes additional features such as item tracking and sorting.
View and loot items without needing to open a container Live updating quick loot panel when looking at a container Item tracking, which allows players to track certain items which will highlight them if they appear in a container Ability to sort items in the quick loot panel Customizable hotkeys Highly configurable UI
Install the plugin on your server Assign yourself (or your group) your desired permissions. For this tutorial I recommend assigning yourself all the permissions EXCEPT quickloot.ignorelocks. Once permissions are assigned, use the /ql command to open the quick loot settings menu. In the settings menu, follow the instructions for setting up key bindings, for this tutorial I recommend using the example keybindings. Each player WILL need to do this step themselves, but they will only have to do it once. Once key binding are setup, simply look at a container that you can open that has multiple items in it, the quick loot panel should appear. If you setup your keybindings according to the example, use the up and down arrow keys to page through items. You can "track" an item by paging over an item in the quick loot panel and pressing the right arrow key (if using example keybinds). Items you are tracking will appear highlighted at the top of the quick loot panel if they exist in the container. You can untrack these items by repressing the same key. You can "take" an item by paging over an item in the quick loot panel and pressing the left arrow key (if using example keybinds). This will loot the entire stack, if you want to loot a single item from the stack, hold down the sprint key (shift by default) while pressing the loot key.
/ql - Displays the Quick Loot settings menu. Requires the quickloot.menu permission.
These are commands that can be bound to keybindings. To do so press F1 then type "bind <key> <command>". For example if you want to bind the quick loot toggle to the "o" key, you can do "bind o ql.toggle". Rust plugins unfortunately cannot bind keys automatically. Each player will need to setup keybindings themselves, but once they do, they won't have to do it again. There are instructions for this in the /ql settings menu.
ql.close - Closes the quick loot settings menu. ql.down - Selects the next item in the quick loot panel. ql.up - Selects the previous item in the quick loot panel. ql.sort - Cycles to the next item sort mode. ql.loot - Loots the selected item from the quick loot panel. Hold "sprint" to select single items instead of a stack. ql.track - Tracks the selected item. Tracked items appear at the top of the quick loot panel if they exist in the container. ql.toggle - Toggles the visibility of the quick loot panel. You can click here for a list of key identifiers to use.
To try out the plugin, I recommend assigning players all the permissions EXCEPT "quickloot.ignorelocks".
quickloot.storage.take - View and take items from storage containers, such as chests, furnaces, and other deployables. quickloot.storage.view - Only view items in storage containers, such as chests, furnaces, and other deployables. quickloot.barrels.take - View and take items from roadside barrels. quickloot.barrels.view - Only view items from roadside barrels. quickloot.crates.take - View and take items from naturally spawned crates. quickloot.crates.take - Only view items from naturally spawned crates. quickloot.tracking - Ability to track items, so that they will appear highlighted in the quick loot panel. quickloot.menu - Needed to use the /ql command and open the Quick Loot settings menu. quickloot.ignorelocks - Locked containers will no longer prevent you from viewing or taking items from them. Nice for admins.
You can customize how the quick loot panel looks with a variety of options. To do so you will need to create a style preset. By default, this plugin auto-generates a few of them that you can use for reference. They are located within the "oxide/data/QuickLoot/styles" folder. To create a new style preset, simply copy one of them existing ones and edit the values. The load this preset, set the "StylePreset" property in the config file to the name of the preset file you created. I HIGHLY recommend creating your own preset instead of editing an existing one, because the existing ones may be overwritten if you have "GenerateDefaultStyles" set to "true" in the config.
Feel free to share your created presets in the discussion forum!
Q: I loaded the plugin, but the quick loot menu doesn't appear when I look at a container.
A: You need to assign yourself (or your group) the permissions in order to use the quick loot features.
Q: Hotkeys are not working for me.
A: Rust does not allow plugins to automatically bind keys for players. Each player will need to bind hotkeys themselves. The /ql command will provide instructions for how to do this.
Q: How can I loot a single item at a time instead of the entire stack?
A: You can hold down the "sprint" key (shift by default) to switch to single looting mode.
Q: Can I put items into the container via the quick loot panel?
A: Inserting items into a container is not currently a feature of this plugin.
Q: How do I change the look of the quick loot panel?
A: See the customization section.
Q: Some images are not loading, how do I fix this?
A: The images I provided for this plugin are hosted through Imgur, which means under peak load times, sometimes may not load correctly. I recommend hosting the images yourself and setting the URL in the config to avoid this issue.
Q: The quick loot panel is overlapping with the UI of another plugin.
A: You can change the position of the quick loot panel in style preset. Please see the customization section for more info.
Q: I have another plugin that uses the "/ql" command and it is conflicting with this one.
A: You can change this command in the configuration file. Make sure to update the localization text as well if you change it.
-
Sortify
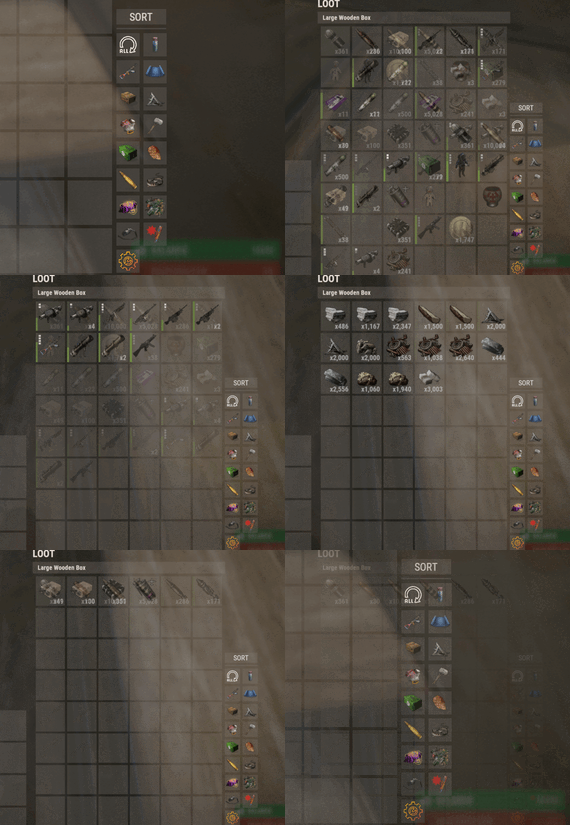
Introducing Sortify, the best plugin for making it easy to sort and filter boxes and containers from various plugins, all without the need for complex integrations. Sortify offers an intuitive solution to easily categorize your items, all within an elegant and efficient Rust-style user interface.
Key Features:
Custom Categories: With Sortify, you can create and customize your own categories to suit your unique needs. Rust style user interface: The plugin has a minimalistic and aesthetic Rust style user interface. Ease of Use: Sortify is designed with ease of use in mind. Whether you're a beginner or an experienced user, you'll find Sortify incredibly easy to use. It does not require complex training or any action on the part of the player, which allows the player to immediately begin organizing elements effectively.
Permissions:
sortify.allow - permission to use the plugin
Video at moment version 1.0.0 (after the sorting scheme was changed, see gif):
- #sorting
- #filtering
-
(and 6 more)
Tagged with:
-
Ferry Terminal Event
Want to spice up the Ferry Terminal location on your map? Look no further! Captors have taken hostages and are going to execute them if they cannot enslave them. Liberate the hostages while waves of backup arrive Johnny Blaze style on their motorcycles. They will be relentless and merciless. It's recommended that you bring a friend or two for this one!
Description
The event will begin with a notification that captors have taken hostages and will be trying to take them away to enslave them from the Ferry Terminal monument.
First you will want to dispatch as many of the enemies on site as possible without alerting them of your intent or presence. Once you are ready though, alarms will be sounded and they will attempt to call for backup.
Once the backup begins coming on motorcycle they will continue to send units to keep you from liberating the hostages, or execute them as opposed to letting you get them to freedom!
Each hostage will have a small radius and a configurable countdown will begin as you work on releasing them from their shackles. Once freed you will still need to escort them to a ferry nearby, and they will thank you by opening a hackable crate for you.
There are indicators that help highlight important event items such as the hostages. The configuration file gives plenty of options to customize the event, from NPCs, timers, rewards, and plenty of other options like integration with plugins you already own, in game UI, and more!
Dependencies (optional, not required)
True PVE Pve Mode GUI Announcements Notify Discord Messages Alpha Loot Custom Loot NTeleportation Economics Server Rewards IQEconomic XPerience Kits Better Npc Monument Owner
Chat commands (only for administrators)
/ftstart - start the event
/ftstop - end the event
/ftpos - determining the position coordinates for changing the location of NPCs and crates. It should write in the configuration (Attention! The event must be started, the current position of the administrator in relation to the monument is read)
Console commands (RCON only)
ftstart - start the event
ftstop - end the event
Plugin Config
en - example of plugin configuration in English ru - example of plugin configuration in Russian
Hooks
void OnFerryTerminalEventStart(Vector3 pos, float radius) – called when the event starts
void OnFerryTerminalEventEnd() – called when the event ends
void OnFerryTerminalEventWinner(ulong winnerId) – called at the end of the event, where the winnerId is the player who did more actions to complete the event
My Discord: kpuctajl
Join the Mad Mappers Discord here!
Check out more of my work here!
- #ferry terminal
- #ch47
- (and 25 more)

