
GangstaPichu's Wishlist
-
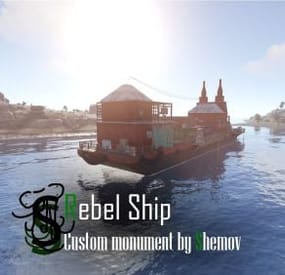
$9.30$7.90Rebel Ship | Custom Monument By Shemov
The Rebel ship is ready to go, the puzzle needs a blue card to get into the full loot.
Features:
Installation on water; Great detail; A lot of content; Loot is divided into rooms; Optimized fps. General Info:
Prefabs count: ~3k; Type: for looting; Modifiers: Topology. Loot:
Oil barrels 5; Food Crates: 5; Barrels: 30; Ordinary crates: 13; Military crates: 3; Elite crates: 1; and 1 red card. Other works:
- #rust custom
- #custom monument
- (and 5 more)
-

$19.99$15.99Cargo Plane Crash
Adds a cargo plane crash event to your server. The crash site is guarded by NPCs that patrol the area and can chase players.
You can also set up custom loot using the "SimpleLootTable" plugin.
Features:
Support for third-party plugins Great customization options in the config
Console commands:
callcargoplane - force the event to start callcargoplane {steamID/name} - the event will be reserved for one player crashcargoplane - force a cargo plane to crash cpc_stop - force the event to end
Chat commands(need admin privileges):
showcrashzone - displays the crash area setcrashzonecenter - set the center of the crash zone to where the player is callcargoplane - force the event to start callcargoplane {steamID/name} - the event will be reserved for one player crashcargoplane - force a cargo plane to crash cpc_calltome - force an event to start (the cargo plane will go to the player's coordinates) cpc_stop - force the event to end cpc_add_crashzone - adds a new zone at the location where the player is, can be used if you use multiple zones(you can set the name and radius - /cpc_add_crashzone "name" "radius") Hooks:
void CargoPlaneCrashStarted() // called when the event starts
void CargoPlaneCrashCrashed() // called when a cargo plane crashes
void CargoPlaneCrashEnded() // called when the event ends
void CargoPlaneCrashEventWinner(BasePlayer player) // called when a player loots any crate first
CargoPlaneCrash config:
{ "PVE mode (crates can only be looted by the player who first dealt damage to the NPC)": false, "Give event ownership to the owner's teammates if he is no longer the owner. Only if teammates are within the event radius (for PVE mode)": true, "Radius for event(for PVE mode)": 380, "Create a dome for PVE mode": false, "Dome transparency (the higher the value, the darker the dome, recommended 4)": 4, "Time after which the owner of the event will be deleted if he left the dome or left the server (for PVE mode)": 300, "Message when a player enters the event dome(only for PVE mode if there is a dome)": "You have entered the Cargo Plane Crash Event", "Message when the event owner leaves the event dome (only for PVE mode if there is a dome)": "Return to the event dome, otherwise after 300 seconds you will no longer be the owner of this event", "Do not allow other players into the event(only for PVE mode if there is a dome) Be careful, if the crash site is near the player's base and the player is not the owner of the event, he will be ejected from his base outside the dome": false, "Message when a player is ejected from the event dome(only for PVE mode if there is a dome)": "You cannot be here, you are not the owner of this event", "Allow admin to be in event dome (only for PVE mode if there is a dome)": true, "Triggering an event by timer (disable if you want to trigger the event only manually)": true, "Time to event start(in seconds)": 3600.0, "Random time to event start": false, "Minimum time to event start(in seconds)": 600, "Maximum time to event start(in seconds)": 10800, "CargoPlane speed(recommended 4 to 6)": 5.0, "Minimum amount of online players to trigger the event": 1, "Minimum crates amount(spawn after crash)": 1, "Maximum crates amount(spawn after crash)": 1, "Crate simple loot table name(plugin SimpleLootTable is required)": "", "Minimum number of items in a crate(plugin SimpleLootTable is required)": 0, "Maximum number of items in a crate(plugin SimpleLootTable is required)": 0, "Crates lifetime(in seconds). The crate will not be destroyed if it has been activated": 3600, "Crates timer(in seconds)": 900, "Remove crates after being looted by a player(in seconds)": 300, "Minimum airdrops amount(spawn after crash)": 1, "Maximum airdrops amount(spawn after crash)": 1, "Airdrop simple loot table name(plugin SimpleLootTable is required)": "", "Minimum number of items in an airdrop(plugin SimpleLootTable is required)": 0, "Maximum number of items in an airdrop(plugin SimpleLootTable is required)": 0, "Airdrops lifetime(in seconds)": 3600, "Fireballs amount(spawn after crash)": 5, "Passengers amount(spawn after crash)": 2, "Explosion marker on the map(spawn after crash)": true, "Explosion marker lifetime(in seconds)": 300, "Enable signal smoke(spawn after crash)": true, "Signal smoke lifetime(in seconds, max 214)": 214, "Map size(crash zone size), you can see the zone, use the chat command /showcrashzone": 4500.0, "Starting altitude, defaults to map size, can be increased if cargo plane hits high ground(no more than 10000 recommended)": 4500.0, "Crash zone center. Use chat command /setcrashzonecenter to set to player position. You can check crash zone center, use the chat command /showcrashzone": { "x": 0.0, "y": 0.0, "z": 0.0 }, "Use multiple zones": false, "Select a zone from the list sequentially(if false, then the crash zone will be chosen randomly)": false, "Zones list": [ { "name": "0", "radius": 300, "center": { "x": -300.0, "y": 0.0, "z": 0.0 } }, { "name": "1", "radius": 200, "center": { "x": 100.0, "y": 0.0, "z": 0.0 } } ], "Event message(if empty, no message will be displayed)": "CargoPlane event started", "Crash message(if empty, no message will be displayed)": "Cargo plane crashed", "Event end message(if empty, no message will be displayed)": "CargoPlaneCrash event ended", "Message about coordinates(will display the coordinates of the crash site. If empty, no message will be displayed)": "", "Kit name(you can use kits for passengers if you have Kits plugin)": "", "Passenger name": "Mister bot", "Use NPC prefab for passengers": false, "Minimum NPCs amount(spawn after crash)": 2, "Maximum NPCs amount(spawn after crash)": 2, "NPCs lifetime(in seconds)": 3600, "NPCs type(NPCs prefab, experimental setting, it is not known how the NPCs will behave) 0 - tunneldweller; 1 - underwaterdweller; 2 - excavator; 3 - full_any; 4 - lr300; 5 - mp5; 6 - pistol; 7 - shotgun; 8 - heavy; 9 - junkpile_pistol; 10 - oilrig; 11 - patrol; 12 - peacekeeper; 13 - roam; 14 - roamtethered; 15 - bandit_guard; 16 - cargo; 17 - cargo_turret_any; 18 - cargo_turret_lr300; 19 - ch47_gunner": 8, "NPCs health(0 - default)": 0, "NPCs damage multiplier": 1.0, "NPCs accuracy(the lower the value, the more accurate, 0 - maximum accuracy)": 2.0, "NPCs attack range": 75.0, "Radius of chasing the player(NPCs will chase the player as soon as he comes closer than the specified radius, must be no greater than the attack range)": 60.0, "Minimum distance to NPC damage": 75.0, "Message if the player attacks far away NPCs": "NPC is too far away, he doesn't take damage", "Kit for NPCs. The NPC will use the weapon that is in the first slot of the belt(requires Kits plugin)": "", "Default displayName for NPC(for SimpleKillFeed/DeathNotes plugin)": "Crashsite NPC", "List of displayNames for each NPC(for SimpleKillFeed/DeathNotes plugin)": [ "Crashsite NPC1", "Crashsite NPC2", "Crashsite NPC3" ], "Will NPCs attack zombies": true, "Remove NPC corpses": false, "Prohibit building near the crash site": false, "Building prohibition radius": 20.0, "How long construction is prohibited near the crash site(in seconds)": 1800, "Event marker on the map(spawn an event marker at the crash site)": false, "Display approximate end time of event on marker": false, "Event marker name": "Cargo plane crash site", "Event marker lifetime(in seconds)": 3600, "Event marker transparency(0-1)": 0.75, "Event marker radius": 0.5, "Event marker color.R(0-1)": 1.0, "Event marker color.G(0-1)": 0.0, "Event marker color.B(0-1)": 0.0, "Do not spawn crates and NPCs when a cargo plane falls under water (if the water depth is greater than)": 0.5, "Do not choose a crash site near monuments": false, "If possible, the crash site will not be chosen near player bases": true, "SteamID for chat message icon": 0, "Complete the event if all crates were destroyed after looting": false, "Use Notify plugin for messages": false, "Notify message type": 0 }- #event
- #cargoplane
- (and 18 more)
-

$5.99
Custom Rewards
Introduction
CustomRewards is a turnkey solution to reward player engagement. This plugin allows you to give a player any type of reward based on conditions you'll be able to configure. Whether you're a server admin aiming to boost player engagement or a developer creating complex reward systems, CustomRewards is your go-to solution.
Main Features:
Diversity of Rewards: Set up a huge variety of rewards for your players, ranging from items to special permissions, including server command execution. Reward Templates: Create different reward models for various events or scenarios, providing maximum flexibility to meet your server's needs. Award Conditions: Ensure only eligible players receive certain rewards by setting conditions based on groups, permissions, and more.
Integration with Other Plugins:
CustomRewards isn't just a standalone, it can also be seamlessly integrated with other externals plugins such as VoteSystem or PlaytimeTracker :
Vote System : By using Custom Reward with VoteSystem, your players will be able to obtain rewards by voting. PlayTime Reward (free) : By using CustomRewards with PlaytimeTracker, your players will be able to obtain rewards based on their playtime. Interface Customization
Provide your players with an appealing visual experience with a fully customizable user interface, custom reward images, and colorful themes.
Expandability for Developers
For those looking to delve deeper, CustomRewards offers a robust API, allowing you to integrate your own point system or even other plugins !
Plugin's Future:
We always listen to the community! If you have a specific plugin you'd like to see integrated with CustomRewards, please let us know. Our goal is to make CustomRewards as versatile and useful as possible for all users.
Support :
I am very often available and will respond as quickly as possible to all your questions, here or on my Discord: https://discord.gg/JJnxFgP27G.
Full Documentation :
Feel free to check out the complete documentation here.
Commands (chat) :
- /CustomRewards_Give <type> <player name or id> <quantity> : available only for administrators or with permission CustomRewards.Admin
- The commands to show the UI need to be implemented in the configuration.
Permissions :
- CustomRewards.Admin : enable admin commands if not administrator
- CustomRewards.<Type>.Use : Permission linked to the type (rewards template), users without the permission will not be able to use the command to display the UI. Therefore, it's important to add the permission to your groups once the template is created!
How To use API :
private void Give_API(string rewardType, ulong playerId, int quantity) // Add quantity points for player (for referenced rewardType) private int Get_API(string rewardType, ulong playerId) // Get quantity points for player (for referenced rewardType)
CustomRewards Configuration Tutorial
Step 1: Initial Setup :
- Ensure the CustomRewards_rewards folder is present in Oxide/Data. If not, the plugin will attempt to create it automatically, but it's good to check.
- Ensure
- For each reward type you want to configure, create a .json file in the CustomRewards_rewards folder. For instance, for a reward type called "VIP", you might have a VIP.json file.
Step 2: Basic Configuration In your .json file:
- "Enabled": Set this value to true to activate this reward type.
- "Commands for show UI": List of commands that will display the user interface for this reward type. For example: ["rewards_vip", "vip_rewards"].
Step 3: User Interface Configuration Under "UI Settings":
- Configure the appearance and layout of the user interface with properties like "Max Reward By Page", "Window Rect", etc.
- Set the theme colors under "Theme" using properties like "Colors". Each color is defined by an RGBA value.
- Configure rarity colors under "Rarity Colors".
- To modify the window title or description (above the rewards), go through the lang files (Oxide/Lang/<lang>/CustomRewards_<type>).
Example Lang file : { "Messages": { "Title": "Rewards", "Description": "Every time you earn points, you can claim your rewards here." } }
Step 4: Reward Configuration Under "Rewards Settings":
- "Rewards List": Here, you'll define each individual reward for this type.
- "Rarity (Common - Rare - Epic - Legendary)": Set the reward's rarity.
- "Quantity": If the reward is an item, set the quantity here.
- "Item Shortname (optional)": If the reward is an item, set its short name here.
- "Custom image URL (optional)": For a custom image for the reward.
- "Server command (optional)": Commands to execute when this reward is claimed.
- "Grant Permissions ": Permissions to grant when this reward is claimed.
- "Grant Groups": Groups to grant when this reward is claimed.
- "Nedded Permissions": Permissions needed to claim this reward.
- "Nedded Group ": Groups needed to claim this reward.
Step 5: Plugin Extensions Under PluginExtensions, you can configure integration with other plugins:
- For PlaytimeTracker, use properties under "PlayTimeTracker" like "Count Afk Time?", "Added points", and "Add point every (in seconds)".
Step 6: Save and Reload After completing your configuration, save the .json file and reload the plugin on your server. Here's a sample configuration file to help you get started:
-
$35.00
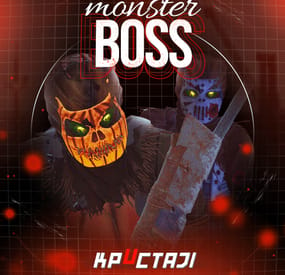
Boss Monster
This plugin adds to the game a variety of NPC bosses with different abilities and a very adaptable configuration
Description
Using this plugin you can add NPC bosses to any point on the map. You can set up any ability with the plugin configuration. If it is necessary, you can add multiple abilities to one boss.
Abilities are divided into two categories, ones take place in a certain radius from the NPC, and others are triggered by damaging from an NPC.
The map also displays the location of the actual bosses (their name and amount of health).
You can give any clothes and weapons for NPCs using the configuration.
Custom Map
Maps that have a configuration for the appearance of boss on their custom monuments
You can also download all these files for all maps here
Dark Ages Blue Tears All files for custom maps are stored in the folder oxide/data/BossMonster/CustomMap. You don't have to delete files from there, the plugin will understand by itself which map is currently installed on the server and will download only the necessary file if there is one in this folder. The plugin will tell you about this process in the console during the plugin loading. It will write in the console what file works on the current map, and what ones don’t work
If you want to create a custom place for the boss to appear on your custom map or on a map that is not in this list, you have to create the ID of this custom map. After that you need to place an item such as a RAND Switch on your map. It must be placed randomly, where it will not be visible to other players. You will get the identifier, if you add up the three coordinates of the position of this object from RustEdit (x, y and z) and write the resulting value in the parameter of your file (an example file can be taken from ready-made files) - ID
As an example, let's take the coordinates (26.896, -456.158, 527.258), then our identifier is 26.896 - 456.158 + 527.258 = 97.996
Then you need to indicate a list of bosses that will appear on your map. You need to copy the configuration data block for each boss. In the database parameters you will specify the name of the boss and a list of positions where it can appear
Dependencies (optional, not required)
GUI Announcements Notify Discord Messages AlphaLoot CustomLoot Economics Server Rewards IQEconomic PveMode
Chat commands (only for administrators)
/WorldPos - displays the actual player’s position on the map
/SavePos <name> - saves a new position to the configuration file for the boss with the name - name, relative to the nearest monument
/SpawnBoss <name> - spawn of the boss with the name - name in the coordinates of the administrator
Console commands (RCON only)
SpawnBoss <name> – spawn of the boss with the name – name
KillBoss <name> – kill all bosses with the name – name
Plugin Config
en - example of plugin configuration in English ru - example of plugin configuration in Russian
Boss Config
en - example of plugin configuration in English ru - example of plugin configuration in Russian
Custom Map Config
en - example of plugin configuration in English ru - example of plugin configuration in Russian
Hooks
void OnBossSpawn(ScientistNPC boss) - сalled when a boss appears on the map
void OnBossKilled(ScientistNPC boss, BasePlayer attacker) - сalled when a player kills a boss
API
ScientistNPC SpawnBoss(string name, Vector3 pos) - spawns a boss named name in position pos
void DestroyBoss(ScientistNPC boss) - destroys the boss
My Discord: KpucTaJl#8923
Join the Mad Mappers Discord here!
Check out more of my work here!
- #abilities
- #boss
- (and 16 more)
-
$14.99
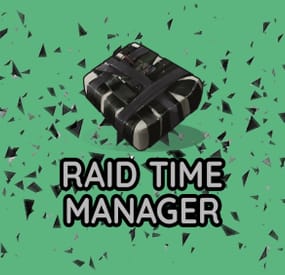
Raid Time Manager
🗒️Features:
Setting up safe and raid times 6 variations of GUI display for players Ability to configure blocked activities during safe time Ability to set the time for the day of the week (Used by default), and for a specific date Flexible and intuitive plugin settings Real-time UI(Has 6 variations) with date, time and raid/safe time info. A menu where players can find out the safe and raid times for any given day Convenient in-game menu for plugin settings You can set safe days after wipe
How to open setup RTM UI❔
Default command for open setup RTM UI: /rtm❕
📕Configuration:
{ "Command for open Raid Time Managment UI": "rtm", "Timezone(Difference between UTC and your time)": 60, "Time format for UI(True - 24H format, False - 12H format)": false, "Display UI": true, "Enable Alerts": true, "Allow players to close the UI": true, "[RaidableBases] Allow raiding RB bases in SafeTime": true, "[TruePVE] Safe Time RuleSet": "default", "[TruePVE] Raid Time RuleSet": "default", "[ZoneManager] The plugin will work on entities in the zones": "DISABLED", "[ZoneManager] Zone ID List": [], "UI Position": "UPPER_LEFT", "NPP amount": 0, "Block only offline raids": true, "Add safe days after wipe": 1, "Commands to be executed when raid time starts": [], "Commands to be executed when safe time starts": [], "Forbidden actions during the blocking of the raid": { "Default Raid By Player": true, "Damage Own Buildings": false, "Raid By Patrol Helicopter": true, "Raid By MLRS": true, "Using Ladders In Building Block": true, "Damage By Fire": true, "Build Ceiling In Building Block": true, "Build Turrets In 2x Building Block Radius": true, "Break down twig buildings": false }, "List of prefabs that can always be damaged": [], "Manage raids by day of the week (Used by default)": { "Monday": [ { "Start Raid Block(Hours)": 18, "Start Raid Block(Minutes)": 0, "Stop Raid Block(Hours)": 22, "Stop Raid Block(Minutes)": 0 } ], "Tuesday": [ { "Start Raid Block(Hours)": 14, "Start Raid Block(Minutes)": 0, "Stop Raid Block(Hours)": 22, "Stop Raid Block(Minutes)": 0 } ], "Wednesday": [ { "Start Raid Block(Hours)": 18, "Start Raid Block(Minutes)": 0, "Stop Raid Block(Hours)": 22, "Stop Raid Block(Minutes)": 0 } ], "Thursday": [ { "Start Raid Block(Hours)": 18, "Start Raid Block(Minutes)": 0, "Stop Raid Block(Hours)": 22, "Stop Raid Block(Minutes)": 0 } ], "Friday": [ { "Start Raid Block(Hours)": 18, "Start Raid Block(Minutes)": 0, "Stop Raid Block(Hours)": 22, "Stop Raid Block(Minutes)": 0 } ], "Saturday": [ { "Start Raid Block(Hours)": 10, "Start Raid Block(Minutes)": 0, "Stop Raid Block(Hours)": 22, "Stop Raid Block(Minutes)": 0 } ], "Sunday": [ { "Start Raid Block(Hours)": 8, "Start Raid Block(Minutes)": 0, "Stop Raid Block(Hours)": 22, "Stop Raid Block(Minutes)": 0 } ] }, "Raid management for specific days(Takes precedence over raid management by day of the week)": {} } 📕Explanation of some options:
"Default Raid by Player" : players will be able to use items for the raid 🏳️Lang:
{ "UI_ALERT": "ALERT", "UI_TURRETBLOCK": "You cannot place turrets in double TC radius during safe time", "UI_LADDERBLOCK": "You may not place ladders in a Building Block during safe times.", "UI_CEILINGBLOCK": "You cannot place ceilings in the Building Block during safe times.", "UI_CANDAMAGE": "You cannot damage other people's buildings during safe times", "UI_CANDAMAGEOWN": "You cannot damage own buildings during safe times", "UI_START_RAID_TIME": "Raid time has begun! All restrictions removed", "UI_STOP_RAID_TIME": "The raid time is over. Restrictions are in effect!", "CM_CLOSE_HUD": "You closed the RTM HUD, to open it again use the /rtm hud command", "UI_RAIDTIMESCHEDULE": "RAID TIME SCHEDULE", "UI_SAFE_TIME": "Safe Time", "UI_RAID_TIME": "Raid Time", "UI_Monday": "Monday", "UI_Tuesday": "Tuesday", "UI_Wednesday": "Wednesday", "UI_Friday": "Friday", "UI_Saturday": "Saturday", "UI_Sunday": "Sunday", "UI_AM": "AM", "UI_PM": "PM", "UI_January": "January", "UI_February": "February", "UI_March": "March", "UI_April": "April", "UI_May": "May", "UI_June": "June", "UI_July": "July", "UI_August": "August", "UI_September": "September", "UI_October": "October", "UI_November": "November", "UI_December": "December", "UI_Thursday": "Thursday" }