
AlaEddineYahia's Wishlist
-
$19.99$15.99Recycler Station
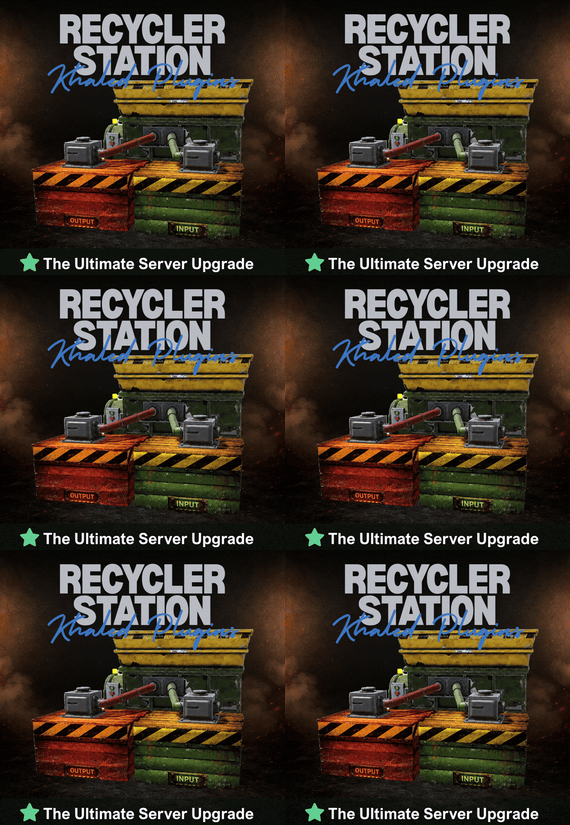
♻️ Recycler Station adds a deployable recycling station that allows players to recycle items directly from their base
The station uses a simple system with two containers:
INPUT - where players place recyclable items
OUTPUT - where all recycled resources are automatically moved
Items placed in the INPUT box are processed automatically by the recycler, creating a smooth and hands-free recycling workflow
The system is designed to feel natural in Rust while improving convenience for players and server owners
Take Your Rust Server to the Next Level
Premium performance, lightning-fast support, and an exclusive 30% OFF using code KHALED
- Features
- Dedicated INPUT and OUTPUT boxes - Safe pause handling when OUTPUT is blocked or full - Protected station parts - Tool Cupboard range and authorization checks - Purchase support for Resources, Economics, or ServerRewards - EN and RU language support - Permissions
- recyclerstation.use - Commands
- /rs buy - /rs help - Admin Commands - /rs give <player> [amount] - /rs remove - Config
{ "Debug": false, "UseVanillaSpeed": true, "CustomSpeedMultiplier": 1.0, "OutputResumeDelaySeconds": 8.0, "Purchase": { "Enabled": true, "UseResources": true, "UseEconomics": false, "UseServerRewards": false, "MaxPurchasesPerPlayer": 100, "ResourcesCost": [ { "Shortname": "scrap", "Amount": 500 }, { "Shortname": "metal.fragments", "Amount": 5000 }, { "Shortname": "metal.refined", "Amount": 50 }, { "Shortname": "gears", "Amount": 10 } ], "EconomicsCost": 2500.0, "ServerRewardsCost": 800 } }
-
$25.00
KillFeed
A kill feed your players actually notice.
Built in the game, not in a config.
Show who killed whom, with what, from how far, with both Steam avatars. Build the whole thing in a live in-game editor instead of opening a JSON file.
/kf.edit Open the full in-game editor with a preview that updates as you work. 01 - Built in the game, not in a config Edit against a live preview. No JSON, no reload cycle.
Move elements with steppers and an arrow pad, recolour them, reposition the feed and switch themes in the same editor. Every change updates while you type.
Position with intent Place the feed where it belongs using steppers and an arrow pad, then tune its direction and speed. Motion you can control New entries slide in. Expiring entries slide out and fade. Turn animation off entirely when you need a static feed. 02 - Steam avatars, zero dependencies Show the people behind the kill. Without another service to run.
KillFeed draws the killer's and victim's actual Steam avatars through the game UI. There is no ImageLibrary requirement, no Steam API key and nothing extra to install.
Icons for every encounter Bots, animals, Bradley and the patrol helicopter receive their own icons. Any entity can be mapped to a custom image. Private kills mode With one switch, each kill appears only to the killer and victim. Ideal for arenas, duels and private encounters. 03 - New: Discord live killfeed Bring the action to Discord. Without turning your channel into spam.
The optional companion bot plugin relays kills through the Discord Webhooks. Kills are grouped into one message on an interval you set from 1 to 60 seconds, which keeps the webhook inside Discord's rate limits on a busy server instead of being throttled into silence.
Embed or plain text Choose the output format, then set an embed title and colour. Configure it from the Discord section in the same in-game editor. Only the events you want Toggle PvP, NPC and animal kills, and deaths with no killer separately. Player names are escaped before sending. Line template placeholders {killer} {target} {weapon} {distance} {headshot} {killerid} {targetid} {reason} Use {reason} in the separate template for deaths with no killer. The companion plugin is optional, and the in-game feed works exactly as before without it.
04 - Three distinct themes Match your server's atmosphere. Keep the feed readable.
Start with Rust, Midnight or Neon. Each theme keeps the feed crisp while letting you configure colours and outlines to fit your server.
Rust Warm, grounded and familiar. Midnight Cool cyan for late-night servers. Neon Violet contrast with a sharper feel. 05 - Built for real servers Keep the feed where it belongs. Give players control.
Control which kills reach the feed, exclude sensitive areas and let players decide what they see or share.
Zones and monuments Use ZoneManager flags to hide kills involving players inside a chosen zone. Blacklist MonumentFinder monuments for arenas and event areas. Both filters are optional. Reliable and translatable One plugin file and bundled image pack. Use FileManager or ImageLibrary image loading, whichever you already run. Image references are validated on boot. English, Russian and German language files are included. 06 - Commands and permissions Simple to operate. Clear control for staff and players.
Use the editor to shape the feed, then expose only the controls each player needs.
Commands /kf.edit Open the in-game editor. Requires killfeed.admin. /killfeed Toggle your own feed on or off. Requires killfeed.use. Permissions killfeed.use See the feed and toggle it. killfeed.admin Open the in-game editor. killfeed.hidekillsfromfeed Hide this player's kills from everyone. killfeed.hidedeathsfromfeed Hide this player's deaths from everyone. -
$5.00
Discord Server Status
Discord Server Status Plugin
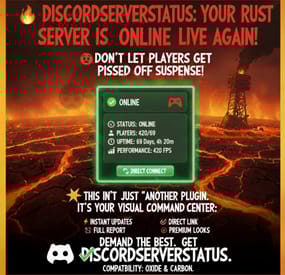
Keep your community informed with beautiful, real-time server status updates sent directly to Discord!
🌟 Features
📊 Rich Status Embeds
Beautiful embedded messages with customizable colors
Real-time player count and server information
Server uptime tracking
FPS and performance statistics
Online player list (configurable max count)
⚙️ Flexible Message Management
Edit Mode: Update the same message continuously (clean Discord channel)
New Message Mode: Create fresh messages with optional old message deletion
Auto-save message ID for persistent editing across server restarts
Customizable update intervals (minimum 15 seconds)
🎨 Full Customization
Custom embed colors for online/offline/warning states
Rich emoji support or fallback to Discord emoji codes
Custom server descriptions and footer text
Thumbnail and large image support
Direct connect button with custom text
Message content before embed
🔧 Advanced Options
Server name character limiting
Performance stats display toggle
Total connection counter
Automatic offline message on server shutdown
Configuration migration from older versions
Comprehensive error handling and logging
🛡️ Reliability & Compatibility
Compatible with Oxide and Carbon frameworks
Robust webhook validation
Graceful error handling
Automatic configuration validation
Migration support for config updates
📋 Configuration Options
The plugin offers extensive customization through its configuration file:
Message Handling
Choose between editing existing messages or creating new ones
Auto-update message IDs for seamless operation
Optional deletion of old messages
Display Settings
Toggle timestamps, uptime, connection counts
Enable/disable performance statistics
Rich emoji vs standard Discord emojis
Custom footer text and server descriptions
Advanced Features
Player list display (with max player limit)
Custom thumbnail and banner images
Direct connect URLs with custom headers
Performance monitoring (FPS display)
🚀 Setup Instructions
Install the plugin in your oxide/plugins folder
Get a Discord Webhook URL:
Go to your Discord server settings
Navigate to Integrations → Webhooks
Create a new webhook or use existing
Copy the webhook URL
Configure the plugin:
Edit the config file or let it generate defaults
Add your webhook URL
Customize colors, display options, and features
Restart your server and enjoy automated status updates!
💡 Use Cases
Community Discord Servers: Keep members informed about server status
Multi-Server Networks: Monitor multiple servers in different channels
Server Administrators: Quick server health monitoring
Clan/Group Servers: Show members when it's time to play
🔄 Update Modes
Edit Mode (Recommended)
Keeps Discord channel clean
Updates the same message continuously
Perfect for dedicated status channels
New Message Mode
Creates fresh messages for each update
Optional automatic deletion of old messages
Great for announcement-style updates
🎯 Version 1.2.6 Features
Enhanced configuration system with migration support
Improved error handling and validation
Rich emoji support with fallbacks
Performance statistics display
Total connection tracking
Advanced message management options
Better Discord API compliance
📞 Support
This plugin is actively maintained and includes comprehensive error logging to help diagnose any issues. The configuration system is designed to be user-friendly with clear option descriptions and automatic validation.
Perfect for server owners who want to keep their community engaged and informed!
Compatible with both Oxide and Carbon frameworks. Requires valid Discord webhook URL for operation.
-
$15.00
AnvilUpgrade
Add a working Anvil and a Metal Hammer to your server and let players reforge their gear. Drop an item onto the anvil, strike it with the hammer, and it transforms into an upgraded or reskinned version — with resource costs and chance-based outcomes you fully control.
⭐ Key Features
✅ Adds a custom Anvil deployable and a Metal Hammer tool as real in-game items ✅ Reforge system — place an item in the anvil and strike it with the hammer to convert it ✅ Chance-based results: one input can roll into several possible outputs (the default recipe turns an AK into ice, jungle, medical, diver, or a skinned variant) ✅ Fully configurable recipes — define the input item (shortname, skin, name, amount), its resource cost, the number of hammer strokes required, and the weighted result table ✅ Optional Metal Hammer durability, measured in strikes, with a found-condition range and repair support (can be turned off entirely) ✅ Tunable anvil entity: health, per-damage-type protection, optional invulnerability, and a lootable toggle ✅ Anvil decay with delay, duration, indoor decay, heal rate, and tick controls ✅ Anvil repair and pickup rules — require the hammer, require building privilege, and carry condition over on pickup ✅ Per-item world-model transform overrides so each item sits correctly on the anvil ✅ In-world UI that shows the resources needed for the current upgrade ✅ Localized into 31 languages out of the box
🔑 Permissions & Commands
None — AnvilUpgrade has no permissions or chat/console commands. Everything happens in the world: whoever holds the Anvil and Metal Hammer items can use them. Control access by choosing who receives those items.
⚙️ Configuration
A full config is generated on first load at oxide/config/AnvilUpgrade.json. Excerpt of the key sections (the per-damage-type protection table is generated automatically with sensible defaults):
{ "Config Version": 1, "Metal Hammer Item": { "Enable Condition": true, "Max Condition (durability / strikes)": 500.0, "Found Condition Fraction Min (0-1)": 0.1, "Found Condition Fraction Max (0-1)": 0.4, "Repairable": true, "Maintain Max Condition": true }, "Anvil Entity": { "Health": 1000.0, "Lootable": true, "Invulnerable": false, "Base Protection (per damage type, 0-1)": { "Generic": 0.98, "Bullet": 0.9999, "Explosion": 0.4998, "...": "remaining damage types generated automatically" }, "Decay": { "Enabled": true, "Decay Delay (hours)": 8.0, "Decay Duration (hours)": 8.0, "Decay Indoors": false, "Override Heal Rate": false, "Heal Rate": 1.0, "Decay Tick Override (seconds, 0 = default)": 0.0 }, "Repair": { "Enabled": true, "Resources": [ { "Short Name": "metal.refined", "Skin ID": 0, "Amount": 25 } ] } }, "Anvil Pickup": { "Enabled": true, "Require Hammer": true, "Require Building Privilege": true, "Item Count": 1, "Set Condition From Health": true, "Subtract Condition (0-1)": 0.25 }, "Configs": [ { "Requirements": { "Short Name": "rifle.ak", "Skin ID": 0, "Text": null, "Amount": 1, "Number of strokes (Min 1)": 10, "Resources": [ { "Short Name": "metal.refined", "Skin ID": 0, "Amount": 30 } ] }, "Collect resources on success only": false, "Result Items": [ { "Short Name": "rifle.ak.ice", "Skin ID": 0, "Chance (0-100)": 20.0 }, { "Short Name": "rifle.ak.jungle", "Skin ID": 0, "Chance (0-100)": 20.0 }, { "Short Name": "rifle.ak.med", "Skin ID": 0, "Chance (0-100)": 20.0 }, { "Short Name": "rifle.ak.diver", "Skin ID": 0, "Chance (0-100)": 20.0 }, { "Short Name": "rifle.ak", "Skin ID": 2436647042, "Chance (0-100)": 20.0 } ] } ], "World Item Transform Override": {} } Each result item also supports amount ranges and a condition range; add as many recipes to "Configs" as you like.
🌍 Localization
Ships with 31 languages, including English, Russian, German, French, Spanish, Portuguese, Italian, Polish, Turkish, Ukrainian, Chinese (Simplified & Traditional), Japanese, Korean, and more. Every message is editable under oxide/lang.
🧩 Dependencies
CustomItemDefinitions (required) — library that provides the custom Anvil and Metal Hammer items ServerPrefabs (required) — library that provides the custom anvil entity and hammer prefab
📥 Installation
Install the required libraries CustomItemDefinitions and ServerPrefabs. Drop AnvilUpgrade.cs into your oxide/plugins/ folder. Edit the generated config to define your recipes, then reload the plugin. Distribute the custom items to players — the Anvil (anvil) and Metal Hammer (hammer.metal) — through your kits, shop, or give system.
🙏 Credits
Prefab created by m1t1ngg.
💬 Support
Questions, ideas, or issues? Leave a comment or send me a DM here on Codefling.
-
$17.99
TeleportTerminal
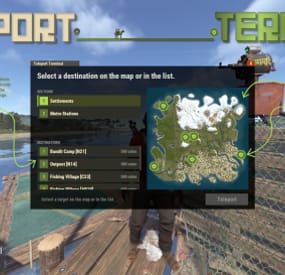
TeleportTerminal turns monuments into paid travel hubs.
Players walk up, see a map, pay and travel. Each destination price scales with distance and with how popular that route is right now.
READY ON DAY ONE
Preset destinations and preconfigured NPC terminals are already placed on monuments. Turn it on, then customize or add your own. 01 - What a player sees A route board, not a blind teleport.
Players approach a terminal and press E, or talk to its NPC. The panel makes each available route, its final price and its destination clear before they commit.
At the terminal What it means DESTINATION LIST Available destinations show their final price, including discounts and the current popularity surcharge. MAP VIEW An interactive monument or server map shows all destination markers, prices and zoom. CONFIRM ROUTE Click a marker or a row, confirm the trip and travel. 02 - Terminal types Choose the presence that fits the monument.
Teleport points can be placed on any monument, including train tunnels and lab modules. The plugin locates the correct spots on the map automatically.
Type Use at the location NPC GUARD Configure its name, kit, clothing and belt. DECORATIVE PROP Use a terminal model that suits the setting. INVISIBLE POINT Keep the interaction with no model at all. 03 - Pricing model Prices react to traffic, then settle back down.
A route begins with its distance, then becomes more expensive when everybody keeps using it. The result is a money sink players can read and respond to.
Order Price signal 01 Distance base. The base price comes from the distance to the destination. 02 Popularity surcharge. Every trip raises a temporary surcharge, so popular routes cost more and traffic spreads out. 03 Gradual decay. The surcharge declines over time, so routes that fall out of favour become cheaper again without a config change. 04 Permission discounts. Discounts are applied last. 04 - Payment providers One config line selects how players pay.
Switch providers without changing the terminal flow. If the selected economy plugin is missing, the terminal automatically falls back to Scrap instead of breaking.
Provider Availability SERVERREWARDS Optional economy provider ECONOMICS Optional economy provider IQECONOMIC Optional economy provider SCRAP Built in, and the automatic fallback 05 - Built for placement Monument-ready by default, with room to make it yours.
The preset network is usable immediately. When your server needs a different arrangement, the in-game tools take over without turning setup into a config-file task.
Full in-game editor
Create and move terminals, snap to the nearest monument, fine-tune position and rotation, manage destinations, set marker colour, size and icon, and edit NPC profiles. Changes save immediately. Visual prefab catalog
Pick terminal models from a searchable catalog with previews instead of typing prefab names from memory. Destination permissions
Gate any single destination behind a permission when certain routes should be reserved. Language files included
English and Russian ship with the plugin. Every message lives in the language files. 06 - What an admin sees A separate edit mode for running the network.
The same interface switches into a technical editing surface when an admin needs to place, tune or maintain terminals.
EDITOR MODE / TERMINAL NETWORK PLACEMENT Snap to the nearest monument, then use precise movement, rotation and grid snapping. ROUTES Add and remove terminals and destinations, including single-destination permission gates. MARKERS Set marker colour, size and icon to match the server. NPC PROFILE Edit the NPC's name, kit, clothing and gear. 07 - Dependencies Install the requirements before you place the first terminal.
HumanNPC and MonumentFinder are hard requirements. TeleportTerminal will not work without them.
Required - plugin will not work without these HUMANNPC Required for NPC-type terminals. MONUMENTFINDER Required to detect monument locations, including train tunnels and lab modules. Optional economy plugins SERVERREWARDS / ECONOMICS / IQECONOMIC
Install one only when you want payment through that provider instead of Scrap.- #teleport
- #teleportsystem
- (and 4 more)