AlaEddine Yahia's Wishlist
-
$40.00
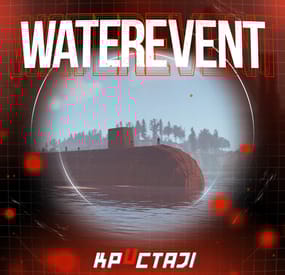
Water Event
A new event includes a lot of game mechanics
Description
The event starts with a warning in the chat: a submarine will soon be passed near the island.
A submarine will appear on the water when the time is up.
There are 4 floors in the submarine. 2 floors are over the water and 2 floors are under the water.
It is possible to get into the submarine on absolutely any transport. There are 4 outside entrances, 4 underwater entrances, and 2 submarine entrances (added in the Underwater Update).
There are about 50 NPCs outside the boat and two upper floors.
There are about 120 crates of items, rooms with blue and red doors, locked crates, recyclers, workbenches in the submarine (it is possible to set up in the configuration).
There are also 4 cameras on the submarine that you can connect to (Submarine1, Submarine2, Submarine3, Submarine4).
The number and location of all NPCs and crates can be changed in the plugin configuration. It is also possible to change the dropdown items in them.
It is necessary to blow up the doors on the submarine with explosives to get to the crates (it is possible to set up the amount of damage to the doors in the configuration).
When an event appears, a marker will display on the map (configurable in the configuration file).
It is possible to set up in the configuration the PVP zone for those who use the TruePVE plugin.
A timer with a countdown to the Event end and the number of crates and NPCs will display for all players in the Event zone.
The conditions for the completing event are the end of the timer or the end of the loot crates.
The submarine will disappear at the end of the event.
It is possible to set up an automatic event appear on the map. All timers can be set up in the configuration.
It is possible to lower the FPS on the server due to the large number of entities during the submarine appearance or the end of the event!
Dependencies Required
NpcSpawn
Dependencies (optional, not required)
True PVE PveMode GUI Announcements Notify Discord Messages AlphaLoot CustomLoot NTeleportation Economics Server Rewards IQEconomic Kits
Chat commands (only for administrators)
/waterstart - start the event
/waterstop - end the event
/waterpos - determining the position and rotation coordinates for changing the location of NPCs and crates.It should write in the configuration (Attention! The event must be started, the current position of the administrator in relation to the submarine is read)
Console commands (RCON only)
waterstart - start the event
waterstop - end the event
Plugin Config
en - example of plugin configuration in English ru - example of plugin configuration in Russian
Hooks
void OnWaterEventStart(HashSet<BaseEntity> entities, Vector3 position, float radius) – called when the event starts
void OnWaterEventEnd() – called when the event ends
void OnWaterEventWinner(ulong winnerId) – called at the end of the event, where the winnerId is the player who did more actions to complete the event
My Discord: KpucTaJl#8923
Join the Mad Mappers Discord here!
Check out more of my work here!
The submarine is designed by Jtedal
-

$24.99
Item Perks
By imthenewguy in Plugins
Item Perks is a plugin that enhances everyday weapons, tools and armour with over 50 different types of perks.
Items with perks can be obtained a variety of ways, including:
Finding them randomly in crates or barrels during your morning scrap farm. Randomly crafting an enhanced version of your equipment while you roof camp noobs from your base. Recycling enhanced equipment and finding enhancement kits stuck in the teeth of the recycler. Using a console or chat command that can be ran through seedy plugin traders like GUIShop.
The plugin gives a large amount of control to server owners when it comes to implementation. You can:
Enable/disable perks, or modify the minimum and maximum values that they roll when applied to gear. Blacklist or whitelist items to each perk, so they will be exclusively excluded or included (based on the list you choose). Adjust the weight of each perk, so it is more or less likely to be seen on gear., or adjust the chances amount of perks that items can potentially have. Fully adjust or disable the chance for item drops to be found, or enable the enhancement kit system so players can recycle gear. So much more (watch the configuration section of the video below to see the full extent).
There are over 50 perks included with the plugin. The following list will describe briefly what each perk does.
Name: Prospector Description: This perk increases your mining yield when mining stone, metal and sulfur nodes. Name: Lumberjack Description: This perk increases your woodcutting yield when chopping living or dead trees. Name: Butcher Description: This perk increases the resources gained from skinning humans and animals. Name: Horticulture Description: This perk increases the amount of resources gained when harvesting grown plants. Name: Forager Description: This perk increases the amount of resources gained when picking up map generated collectibles. Name: Angler Description: This perk increases the amount of fish you receive upon a successful catch. Name: BeastBane Description: This perk increases the damage dealt to animals. Name: ScientistBane Description: This perk increases the damage dealt to scientists. Name: FlakJacket Description: This perk reduces the damage received from explosions. Name: Elemental Description: This perk reduces damage from received from cold and heat sources. Name: Scavenger Description: This perk provides you with a chance to find additional scrap from crates and barrels. Name: Manufacture Description: This perk increases the speed of your crafting. Name: Durable Description: This peark reduces the durability damage of all equipped items. Name: BeastWard Description: This perk reduces the damage received from animals. Name: ScientistWard Description: This perk reduces the damage received from scientists. Name: Builder Description: This perk provides you with a chance for your building upgrades to be free. Name: Thrifty Description: This perk provides you with a chance for your crafting components to be refunded upon a successful craft. Name: Fabricate Description: This perk provides you with a chance to duplicate an item upon a successful craft. Name: Pharmaceutical Description: This perk increases the amount of healing received from all sources. Name: MeleeWard Description: This perk reduces the damage received from melee weapons. Name: Academic Description: This perk provides you with a chance to receive a scrap refund when researching an item at the research bench. Name: FallDamage Description: This perk reduces the impact damage received from falling. Name: Lead Description: This perk reduces the damage from radiation. Name: Smasher Description: This perk will provide you with a chance to instantly destroy barrels with any amount of damage. Name: Environmentalist Description: This perk will increase the speed of recyclers that you activate. Name: Smelter Description: This perk will increase the smelting speed of furnaces you activate. Name: Paramedic Description: This perk provides players that you revive with additional health. Name: Prepper Description: This perk provides you with a chance to not consume food when eating. Name: Regeneration Description: This perk will passively regenerate you. Name: SharkWard Description: This perk will reduce the amount of damage received from sharks. Name: SharkBane Description: This perk will increase the amount of damage dealt to sharks. Name: Deforest Description: This perk provides you with a chance to cut down nearby trees when successfully cutting a tree down. Name: BlastMine Description: This perk provides you with a chance to mine out nearby nodes when successfully mining out a node. Name: Tanner Description: This perk provides you with a chance to skin nearby corpses when successfully skinning out a corpse. Name: Vampiric Description: This perk will heal you for a percentage of the damage dealt to certain enemies. Name: Reinforced Description: This perk will reduce the the amount of damage that your vehicles receive when mounted. Name: ComponentLuck Description: This perk will provide you with a chance to receive additional components when looting barrels and crates. Name: ElectronicsLuck Description: This perk will provide you with a chance to receive additional electronics when looting barrels and crates. Name: UncannyDodge Description: This perk provides you with a chance to dodge incoming damage, reducing it to 0. Name: LineStrength Description: This perk increases the tensile strength of your fishing line. Name: HealShare Description: This perk will share healing effects with nearby players. Name: Attractive Description: This perk will provide you with a chance to automatically pick up components when destroying barrels. Name: WoodcuttingLuck Description: This perk provides you with a chance to find a random item when you cut down a tree. Name: MiningLuck Description: This perk provides you with a chance to find a random item when you mine out a node. Name: SkinningLuck Description: This perk provides you with a chance to find a random item when you skin out a corpse. Name: FishingLuck Description: This perk provides you with a chance to find a random item when you catch a fish. Name: Sated Description: This perk will increase the amount of calories and hydration you receive from food and water sources. Name: IronStomach Description: This perk provides you with a chance to negate negative effects when consuming food. Name: TreePlanter Description: This perk will provide a chance for a tree to instantly regrow when cut down. Name: RockCycler Description: This perk will provide a chance for a node to instantly respawn when mined out. Name: BradleyDamage Description: This perk increases the damage dealt to Bradley Tanks. Name: HeliDamage Description: This perk increases the damage dealt to Patrol Helicopters. Name: Thorns Description: This perk reflects a % of the damage done back to the attacker
Command: ipgive
Type: console/chat
Parameters: <target ID/Name> <optional: shortname> <optional: perks>
Description: Gives the target player an enhanced item. If shortname is specified, it will base the enhancement off of that item. If perks are specified, it will add only those perks to the item.
Command: ipgivekit
Type: console/chat
Parameters: <target ID/Name> <perk>
Description: Gives an enhancement kit to the target.
itemperks.use - Required to receive any benefit from enhanced items. itemperks.loot - Required to loot enhanced items from crates and barrels. itemperks.craft - Required for a chance to received enhanced versions of crafted gear. itemperks.admin - Required to use admin commands. itemperks.enhance - Required to add enhancement kits to items via the workbench. itemperks.recycle - Required to receive enhancement kits from recycling enhanced items.
IPAPI_CreateItem - creates and returns an enhanced item using the details fed into the method. If shortname is left blank, it will pick a random valid item. If api_perks is null it will pick random perk(s) and add them.
Returns Item
[HookMethod("IPAPI_CreateItem")] public object IPAPI_CreateItem(string shortname = null, ulong skin = 0, Dictionary<string, float> api_perks = null) { List<KeyValuePair<Perk, float>> perks = Pool.GetList<KeyValuePair<Perk, float>>(); foreach (var perk in api_perks) { Perk _perk; if (parsedEnums.TryGetValue(perk.Key, out _perk)) perks.Add(new KeyValuePair<Perk, float>(_perk, perk.Value)); } var result = CreateItem(shortname, skin, perks); Pool.FreeList(ref perks); // Returns an Item class return result; } Example usage:
[ChatCommand("testipapi")] void TestIPAPI(BasePlayer player) { Dictionary<string, float> perks = new Dictionary<string, float>() { ["Prospector"] = 1f, ["Lumberjack"] = 1f, ["Butcher"] = 1f, ["Horticulture"] = 0.5f }; var item = (Item)ItemPerks.Call("IPAPI_CreateItem", "hammer.salvaged", (ulong)2830083288, perks); if (item == null) { Puts("Failed"); return; } item.name = "tool of the trade"; player.GiveItem(item); }
- #items
- #enhancement
- (and 6 more)
-
$35.00
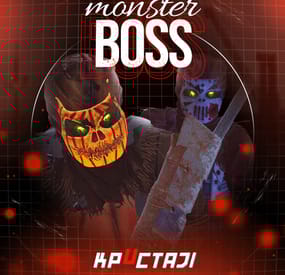
Boss Monster
This plugin adds to the game a variety of NPC bosses with different abilities and a very adaptable configuration
Description
Using this plugin you can add NPC bosses to any point on the map. You can set up any ability with the plugin configuration. If it is necessary, you can add multiple abilities to one boss.
Abilities are divided into two categories, ones take place in a certain radius from the NPC, and others are triggered by damaging from an NPC.
The map also displays the location of the actual bosses (their name and amount of health).
You can give any clothes and weapons for NPCs using the configuration.
Custom Map
Maps that have a configuration for the appearance of boss on their custom monuments
You can also download all these files for all maps here
Dark Ages Blue Tears All files for custom maps are stored in the folder oxide/data/BossMonster/CustomMap. You don't have to delete files from there, the plugin will understand by itself which map is currently installed on the server and will download only the necessary file if there is one in this folder. The plugin will tell you about this process in the console during the plugin loading. It will write in the console what file works on the current map, and what ones don’t work
If you want to create a custom place for the boss to appear on your custom map or on a map that is not in this list, you have to create the ID of this custom map. After that you need to place an item such as a RAND Switch on your map. It must be placed randomly, where it will not be visible to other players. You will get the identifier, if you add up the three coordinates of the position of this object from RustEdit (x, y and z) and write the resulting value in the parameter of your file (an example file can be taken from ready-made files) - ID
As an example, let's take the coordinates (26.896, -456.158, 527.258), then our identifier is 26.896 - 456.158 + 527.258 = 97.996
Then you need to indicate a list of bosses that will appear on your map. You need to copy the configuration data block for each boss. In the database parameters you will specify the name of the boss and a list of positions where it can appear
Dependencies (optional, not required)
GUI Announcements Notify Discord Messages AlphaLoot CustomLoot Economics Server Rewards IQEconomic PveMode
Chat commands (only for administrators)
/WorldPos - displays the actual player’s position on the map
/SavePos <name> - saves a new position to the configuration file for the boss with the name - name, relative to the nearest monument
/SpawnBoss <name> - spawn of the boss with the name - name in the coordinates of the administrator
Console commands (RCON only)
SpawnBoss <name> – spawn of the boss with the name – name
KillBoss <name> – kill all bosses with the name – name
Plugin Config
en - example of plugin configuration in English ru - example of plugin configuration in Russian
Boss Config
en - example of plugin configuration in English ru - example of plugin configuration in Russian
Custom Map Config
en - example of plugin configuration in English ru - example of plugin configuration in Russian
Hooks
void OnBossSpawn(ScientistNPC boss) - сalled when a boss appears on the map
void OnBossKilled(ScientistNPC boss, BasePlayer attacker) - сalled when a player kills a boss
API
ScientistNPC SpawnBoss(string name, Vector3 pos) - spawns a boss named name in position pos
void DestroyBoss(ScientistNPC boss) - destroys the boss
My Discord: KpucTaJl#8923
Join the Mad Mappers Discord here!
Check out more of my work here!
- #abilities
- #boss
- (and 16 more)
-
$20.00
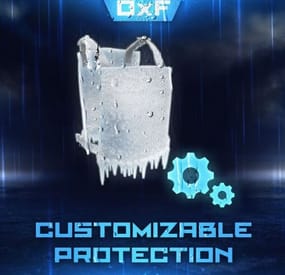
Customizable Protection
This is a powerful tool that allows you to customize the protection of wearable items in the game. With this plugin, admins can create their own items with their own protection values and customize the protection of existing items. This means that players can adjust the protection to their playing style, which gives them an advantage in combat.
One of the distinguishing features of the plugin is its ability to allow players to take damage from NPCs on PVE servers depending on the equipment worn. This adds a new level of realism to the game, as players must carefully consider their defense when interacting with NPCs. It also encourages players to invest time and resources into building better gear, as better gear means better protection.
The ability to customize protection values, create custom items, and enable NPC damage on PVE servers makes it an indispensable tool for any Rust server.
Features
Appearance of item protection for players on PVE servers from NPC damage
Detailed adjustment of protection for any wearable item
Item setup files are all separately in their own file and folder, making it easy to customize items
Setting up a defense for a player without everything
The ability to create your own items, with their own protection, name and skinid
Permissions
customizableprotection.give for give command customizableprotection.icon.show customizableprotection.icon.hide
Console Commands
cp.give <custom item name> - Give yourself a custom item cp.give <steamid> <custom item name> - Give the player a custom item cp.create - Add a custom item based on the image of another item cp.reload - Quick reloading of items File hierarhy:
• CustomizableProtection ↳ • Custom ↳ example1.json ↳ example1.json ↳ • Default ↳ attire.banditguard.json ↳ attire.bunny.onesie.json ↳ attire.bunnyears.json ↳ attire.egg.suit.json ↳ attire.hide.boots.json ↳ attire.hide.helterneck.json ↳ attire.hide.pants.json ↳ attire.hide.poncho.json ↳ attire.hide.skirt.json ↳ ... etc.
Custom item settings:
{ "Shortname": "partyhat", "Unique SkinId": 111, "Name": "Cap of Fortune", "Description": "Even though it looks silly, it can save!", "UI Settings": { "Name Color (or use <color></color> in name)": "1 1 1 1", "Frame Color": "0.94 0.75 0.15 1" }, "Protection": { "Hunger": 0.0, "Thirst": 0.0, "Cold": 0.0, "Drowned": 100.0, "Heat": 0.0, "Bleeding": 0.0, "Poison": 0.0, "Suicide": 0.0, "Bullet": 0.0, "Slash": 0.0, "Blunt": 0.0, "Fall": 100.0, "Radiation": 0.0, "Bite": 0.0, "Stab": 0.0, "Explosion": 0.0, "RadiationExposure": 100.0, "ColdExposure": 100.0, "ElectricShock": 0.0, "Arrow": 0.0, "OxygenExposure": 100.0 } }
Default item settings:
{ "Hunger": 0.0, "Thirst": 0.0, "Cold": 0.0, "Drowned": 0.0, "Heat": 0.0, "Bleeding": 0.0, "Poison": 0.0, "Suicide": 0.0, "Bullet": 10.0, "Slash": 15.0, "Blunt": 15.0, "Fall": 0.0, "Radiation": 0.0, "Bite": 45.0, "Stab": 10.0, "Explosion": 0.0, "RadiationExposure": 2.0, "ColdExposure": 25.0, "ElectricShock": 0.0, "Arrow": 10.0, "OxygenExposure": 0.0 }
Default Config:
{ "Icon Position (0 - Off | -1 - left by 1 slot, 1 - right by 1 slot | ..)": -1, "Lock values at normal values": true, "Protection Multipliers": { "Common": 1.0, "Types": { "Hunger": 1.0, "Thirst": 1.0, "Cold": 1.0, "Drowned": 1.0, "Heat": 1.0, "Bleeding": 1.0, "Poison": 1.0, "Suicide": 1.0, "Bullet": 1.0, "Slash": 1.0, "Blunt": 1.0, "Fall": 1.0, "Radiation": 1.0, "Bite": 1.0, "Stab": 1.0, "Explosion": 1.0, "RadiationExposure": 1.0, "ColdExposure": 1.0, "ElectricShock": 1.0, "Arrow": 1.0, "OxygenExposure": 1.0 } }, "Default Protection": { "Hunger": 0.0, "Thirst": 0.0, "Cold": 0.0, "Drowned": 0.0, "Heat": 0.0, "Bleeding": 0.0, "Poison": 0.0, "Suicide": 0.0, "Bullet": 0.0, "Slash": 0.0, "Blunt": 0.0, "Fall": 0.0, "Radiation": 0.0, "Bite": 0.0, "Stab": 0.0, "Explosion": 0.0, "RadiationExposure": 0.0, "ColdExposure": 0.0, "ElectricShock": 0.0, "Arrow": 0.0, "OxygenExposure": 0.0 } }- #custom
- #protection
- (and 6 more)
-
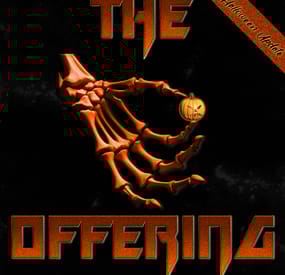
$29.99$19.49The Offering
Get your Entire Server to Grind towards a Common Goal.
With The Offering, Set Item Requirement amounts, either custom or vanilla.
REQUIRED FOR UI - IMAGELIBRARY
REQUIRED FOR MAPMARKER - MARKERMANAGER
Top Contributors can now be rewarded via Commands in Config.
What will you reward your Players with?
Skill Points? Unload TruePVE and let a purge play out? Or just run a command for Economics deposit and fill everyone's account to congratulate everyone's hard work.
At Offering Fulfilled you can run as many commands as you like to reward your Players.
You can also Utilize The Offering to get rid of excess items. Maybe Players have too much scrap at the end of the wipe, add scrap as a requirement and let the excess scrap serve a purpose.
Upon Valid Item Deposit, The Box shoots a flame and accepts The Offering, Invalid Items get tossed back out of the Box for the player to recollect.
Players can utilize an optional UI to track resources that are needed towards completion.
It can be toggled on via /OUI or disabled by clicking the x on the UI Tab.
UI position can be easily set via UI Location Config Option.
Update interval for multiple item requirements can be set, to update the UI to show the other unfulfilled items.
If there is a placeholder image and it doesn't retrieve, you can use the custom URL for a PNG as well. This is also useful for custom items.
Skin for the box can be set in config.
Discord Tracking of the Offering Box Status can be set in config.
If an Offering is complete, you have the option to respawn the box at a certain time frame, or disable the respawn completely and have it a one off event, or an event whenever you feel like holding it.
MULTIPLIER INFORMATION
Default Multiplier in config can be used to quick modify your requirement amounts.
You can have this dynamically increase on Offering Completions by enabling this option.
Default Multiplier of 1 is a 1:1 of your current requirements.
If you increment by .5, Your multiplier becomes 1.5 on the next offering.
Keep in mind giving items with 1 value, you can't issue half of an AK.
Requirements will round up or down depending on the amount when the math is done.
Max Multiplier will never be passed, and will always reset to this value upon it being hit.
A multiplier can dynamically effect your Global Commands and Top Contributor Rewards.
Use {x} to modify the amount, for example - a command for economics. "deposit * 1000{x}"
Use {x}{d} or {x}{u} to round a decimal value if needed. Some commands will not parse a float.
This will multiply that integer value by your current multiplier, More info can be seen in default config below.
This can also be used in your Rewards Description field, if you want to say, Everyone will get 100{x} SP.
Multiplier does not apply towards Rush Mode.
Multiplier Demonstration
Rush Mode Info
Rush is an optional mode, it uses separate reward methods and requirements for a condensed version of The Offering for small events.
The player with the highest score (If point mode is on) Or Deposits.
Will win x Commands you issue.
If the plugin unloads an early end will trigger and issue commands to the winners you specify in config.
If the plugin is unloading during a server reboot, the plugin will save those commands to run on next boot due to some plugins being unloaded, by the time The Offering is unloaded.
The Item Amount in the Rush Requirement is a field you can ignore. Since highest deposits are what counts, item deposits are unlimited.
If discord logging is enabled, it will log your top contributors, and will also notify if an event ended during a shutdown.
NEW COMMANDS FOR RUSH MODE ARE FOUND BELOW IN THE COMMANDS SECTION
Video Demos
clip_1,739,245,073,739.mp4
https://youtube.com/clip/Ugkxz8_UG6AqGRZSrwF5JVippAvCPIgWfIHs?si=IKL6D46gwn5MHDrw
COMMANDS
CONSOLE COMMAND - RESETMULTIPLIER - RESETS YOUR MULTIPLIER TO YOUR DEFAULT VALUE
/OUI - Toggles the UI on or off
/beginoffering - console or chat, To start an offering if one isnt pending respawn, or if one isnt ongoing in the world, only Works with Dynamic Spawn.
/ConvertToOffering - Allows you to convert an already placed Large Wooden Box, To an Offering Box - THEOFFERING.ADMIN - PERMISSION REQUIRED
/RemoveOffering - Removes The Offering Box you are looking at - THEOFFERING.ADMIN - PERMISSION REQUIRED
/givebox - Gives the player a placeable box that will convert to an offering box on placement - THEOFFERING.ADMIN - PERMISSION REQUIRED
/offeringstatus - Will print the offering status to the executing player
/offeringtop - Will print the top offering contributors to the executing player
/giveofferingitems - Will Send all your offering items to your inventory - admin
/myofferingstats - Will show the players current standings if any.
/offeringleaderboard - Will show the top standings via UI,, with different banner text depending on point mode or regular mode.
/rush on - Will reload the plugin with rush enabled, use beginoffering or place a box if you don't have a dynamic pos enabled.
/rush off- Will reload with regular offering mode enabled
NOTE - IF RUSH ON / OFF IS RAN WHILE IT IS IN THAT MODE, IT WONT SWAP MODES
/offeringwhere - If an offering is active, it will ping the location to the player.
HOOKS
OnOfferingActive - Void
OnOfferingInactive - Void
OnOfferingSatisfied - Returns a StorageContainer to run custom code at container at end.
OnOfferingRushModeStarted - Void
OnOfferingRushModeEnded - Void
Support for ServerPanel by Mevent - To Set up - Type - "Plugin" - Hook - "OpenOfferingLeaderboard"
CONFIG
{ "Box Options": { "Enable Incrementing Requirements on Regular Offering Completions?": true, "Starting Multiplier - Default 1 - This Value is used even if Increment Requirements is Disabled, it can be used to Quick Increase each needed Item totals": 1.0, "Increase Multiplier by This Value on Completion, A Starting Multiplier of 1 Incremented by 0.5 will be a 1.5 multiplier resulting in a 50% Requirement Increase": 0.5, "Maximum Offering Multiplier to Reach by Incrementing": 5.5, "Allow Multiplier to Multiply Global Commands? (Int Value must be followed with {x} - Ex:10{x})": true, "Allow Multiplier to Multiply Top Contributor Commands? (Int Value must be followed with {x} - Ex:10{x})": true, "Enable UI on Offering Box Open?": true, "Path for Image on Offering Box Opened": "https://www.dropbox.com/scl/fi/2zkykpsa05q2nn9xfhxlg/OfferingBox.png?rlkey=dmmropc8u5x2wqo1ot7ad00l1&st=qldojnor&dl=1", "Enable Effect on Box Open?": true, "Path for Effect on Offering Box Opened": "assets/content/vehicles/attackhelicopter/effects/pfx_flares_attackhelicopter.prefab", "Enable Point Mode for Leaderboard?": false, "Enable The Offering Rush Mode? (This mode does not Data Track, Is meant for quick, Contribution Competitions)": false, "Rush Mode Duration?": 600, "Dynamic Spawn Of The Box Enabled?": false, "Dynamic Spawn at this Monument (Requires your Position Input to be set to match Monument if Changing from Default.)": "assets/bundled/prefabs/autospawn/monument/medium/compound.prefab", "Dynamic Spawn Point (Relative to Monument)": { "x": -18.17, "y": 0.42, "z": 20.64 }, "Dynamic Spawn Rotation Correction": 90.0, "Offering Box Skin Id": 1900496901, "Placeholder SkinID for /givebox Command, Box Reverts to the above skin on placement.": 3174587477, "Respawn Offering Box a Few Seconds after Previous Box Completion?": true, "Respawn Delay in Seconds": 10, "Clear Data on Wipe?": false }, "Rush Mode Options": { "Item Requirements": [ { "Item Shortname": "blood", "Amount Of This Item Required": 0, "Point Value": 1, "Custom SkinID": 0, "Item Custom Name": "", "Item Image URL (For UI)": "" }, { "Item Shortname": "sticks", "Amount Of This Item Required": 0, "Point Value": 1, "Custom SkinID": 0, "Item Custom Name": "", "Item Image URL (For UI)": "" } ], "Contributor Rewards": [ { "Rank Rewards (1 for 1st place, 2 for 2nd, etc.)": 1, "Commands to Run for this Contributor": [ "inventory.giveto {id} rifle.ak 1" ] }, { "Rank Rewards (1 for 1st place, 2 for 2nd, etc.)": 2, "Commands to Run for this Contributor": [ "inventory.giveto {id} rifle.ak 1" ] }, { "Rank Rewards (1 for 1st place, 2 for 2nd, etc.)": 3, "Commands to Run for this Contributor": [ "inventory.giveto {id} rifle.ak 1" ] } ], "Rush Mode Rewards Description": "Top Players Will Receive x Commands Upon Offering Rush Win" }, "Items Needed For Fulfillment Message Cooldown Time in Seconds?": 30, "Items Added to Box Message Cooldown Time in Seconds?": 5, "Item Fulfilled Message Cooldown Time in Seconds?": 30, "Enable UI?": true, "UI Location (top right, lower top right, bottom right, top left, lower top left, bottom left": "lower top right", "UI Update Interval In Seconds": 30, "Announcement Interval In Seconds": 600, "Use Announcement FX?": false, "Broadcast Updates on Status To Discord?": false, "Broadcast Top Contributors To Chat?": false, "Amount of Players to Announce on Top Contributors?": 5, "Discord Webhook URL?": "", "Item Requirements": [ { "Item Shortname": "blood", "Amount Of This Item Required": 100, "Point Value": 1, "Custom SkinID": 0, "Item Custom Name": "", "Item Image URL (For UI)": "" }, { "Item Shortname": "sticks", "Amount Of This Item Required": 100, "Point Value": 1, "Custom SkinID": 0, "Item Custom Name": "", "Item Image URL (For UI)": "" } ], "Commands To Run On Offering Satisfied": { "Commands List": [ "say The offering has been satisfied!", "say Another command goes here", "say Yet another command", "here you can unload TruePve", "say The Current Offering Multiplier is 1{x}", "say depositing 1000{x} to all", "deposit * 1000{x}" ] }, "Rewards Description": "The server will award 1000{x} XP Upon Offering Satisfied", "Enable Top Contributor Rewards?": true, "Top Contributor Rewards": [ { "Rank Rewards (1 for 1st place, 2 for 2nd, etc.)": 1, "Commands to Run for this Contributor": [ "inventory.giveto {id} sulfur 10{x}" ] }, { "Rank Rewards (1 for 1st place, 2 for 2nd, etc.)": 2, "Commands to Run for this Contributor": [ "inventory.giveto {id} rifle.ak 1{x}" ] }, { "Rank Rewards (1 for 1st place, 2 for 2nd, etc.)": 3, "Commands to Run for this Contributor": [ "inventory.giveto {id} rifle.ak 1{x}" ] }, { "Rank Rewards (1 for 1st place, 2 for 2nd, etc.)": 4, "Commands to Run for this Contributor": [ "say Add More Like Me!", "say You can Run Multiple Commands!", "say Target players id with {id}", "say you can use 1{x} to multiply your reward by your multiplier" ] } ] }
Thank you to @Chill Roleplay for the help testing.
ATTRIBUTION FOR GIF - https://www.vecteezy.com/free-videos/money-on-fire
- #community goal
- #commands
- (and 3 more)