About AI Translation (PRO)
AI Translation plugin is the best powered-AI translation solution for Rust Servers. Enjoy the power of AI by automatically translating all your language files, or the messages exchanged by players in the chat!
ALL languages, without exception, are accepted.
!! Important: The plugin requires the use of OpenAI's API, which includes fees for each request (see the dedicated section for more details) !!
Free Version :
A free version (but limited) is available.
 Easy to Use with Minimal Configuration
There is almost no setup required; everything is straightforward to handle.
 Open AI & Request Costs
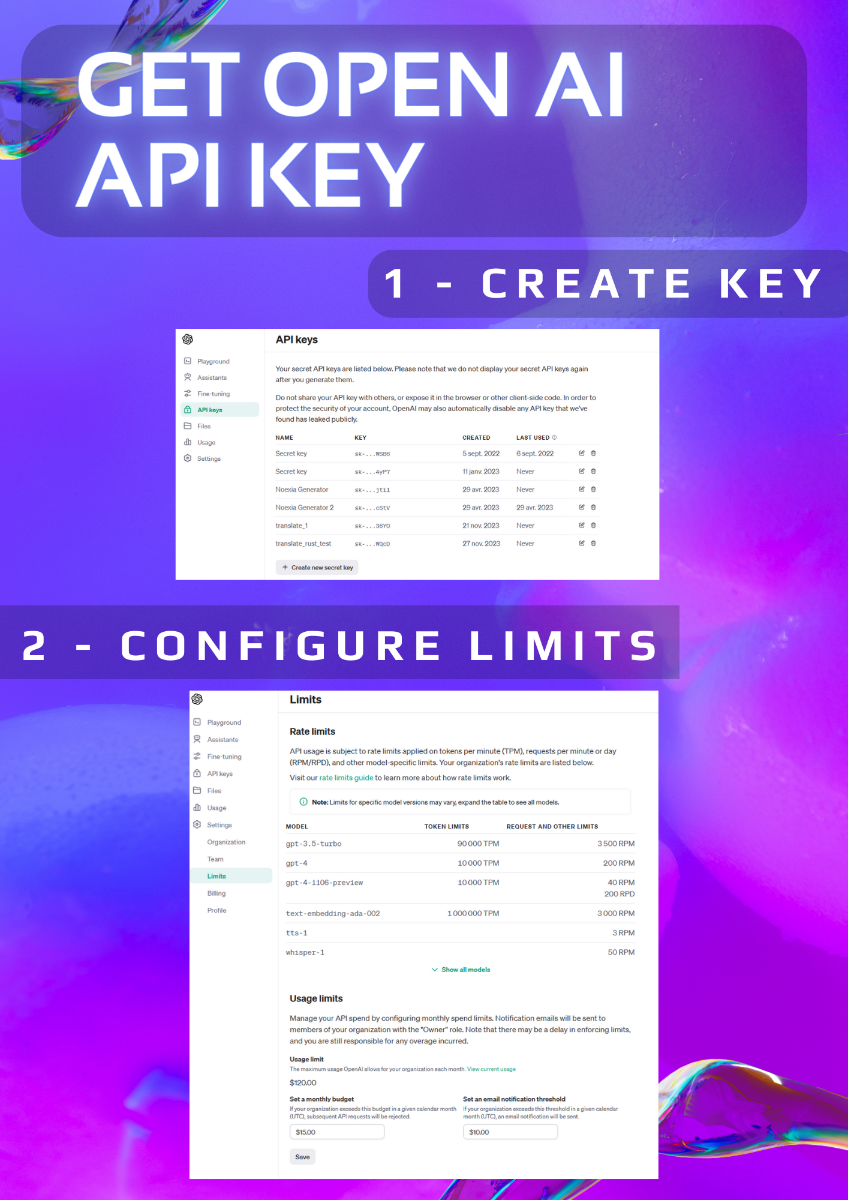
- You need to register for the OpenAI API to retrieve a token. Signing up and getting the token is very simple and takes just a few seconds.
- Translating language files will only cost a few cents for about a hundred files.
-
It's difficult to quantify the cost of translating chat; expect around $1 for thousands of translated messages (this is a purely theoretical value).
 Something to consider if your language files are long: It is possible that some files may arrive incomplete. To solve this issue, you need to increase the token limit of your model (in the configuration). The limit depends on the OpenAI model used, but generally, you can go up to 4096. More information on tokens can be found here.
 Support Available
I am available for all your questions, whether it's support here or on Discord (d.0ne_)
More information at the bottom of the page.


.png.5fb3b2a41c7a25278bce4a33643c9ff6.png)
 Commands
-
ait.translateplugin <plugin> <lang1> <lang2>: Requires the plugin to have a default language file (in English). Specify all desired languages in ISO639-1 format.
Example: "ait.translateplugin MyPlugin fr ru" -
ait.translateallplugins <lang1> <lang2>: Operates the same way but will do so for all plugins.
Permission
-
aitranslationpro.chat.use: permission that allows users to see the translation in the chat
OPEN AI API Registration (2mn):
1 - Visit the OpenAI Website:
- Go to OpenAI's official website.
- Click on the "API" section in the navigation menu.
2 - Create an Account:
- If you don’t already have an OpenAI account, you will need to create one.
- Click on the "Sign Up" button.
- Fill in your details such as email, name, and password.
- Follow any additional prompts to complete the registration process.
3 - Verify Your Email:
- Check your email for a verification link from OpenAI.
- Click on the link to verify your email address.
4 - Log in to Your OpenAI Account:
- Once your email is verified, log in to your OpenAI account.
- Navigate back to the API section.
5 - Apply for API Access:
- Depending on OpenAI's current policies, you might need to apply for API access.
- Fill out any required forms or surveys.
- Submit your application.
6 - Access the API Dashboard:
- Once approved, you can access the API dashboard.
- This dashboard is where you can manage your API usage.
7 - Generate an API Token:
- In the API dashboard, look for an option to create a new API token.
- Click on "Create Token" or a similar button.
- Follow the prompts to generate a new token.
8 - Secure Your Token:
- Once your token is generated, make sure to copy it and store it securely.
- Never share your API token publicly as it gives access to your OpenAI account.


.thumb.gif.ab067f88fcfbfb310085ab8fd62983d6.gif)
.thumb.gif.719eacf214a8acc817bfbaa9f8192f08.gif)


.thumb.gif.be4d7c48ffb8b6bd133b250f73404356.gif)


