
GangstaPichu's Wishlist
-
$14.90
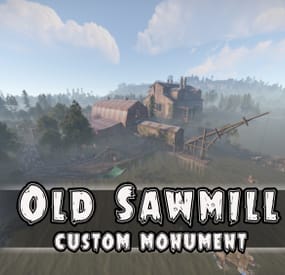
Old Sawmill
I bring to your attention the 4th foggy location for battles and loot extraction by the players of your server. This location is an abandoned sawmill. The tree for this sawmill is delivered from the swamps. Also on the sawmill itself there is a pool with soaking logs. In the central building you will find wood-processing machines and much more. From the front of the monument you will find a dilapidated bridge, which is a small dam. The size is comparable to a Large Excavator
This prefab/monument is constantly supported and updated for the current version of the game with all updates!
Features
Prefab Count – 5000
Size – comparable to a Large Excavator
Puzzles with blue and red cards
Loot:
Crate Normal 2 – 26 crate
Crate Normal Random – 1 crate
Crate Normal – 4 crate
Elite Crate – 3 crate
Barrels – 71 barrel
Modifications:
Splat Mask
Height Mask
Topology Mask
Biom Mask
-
$14.90
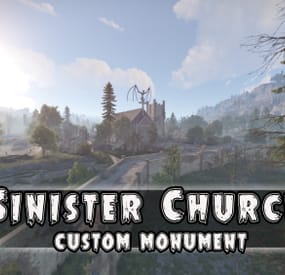
Sinister Church
A very scary church with a torture cellar and a red card puzzle. In the backyard you can see the old cemetery. The size is similar to Outpost
Sinister Church
Another similar location from the game Hunt Shadowdown. There is plenty of room for mining and exploration in this place. This place is suitable as a special monument for mining. You can place your Zombies on this monument and they will look very good against this background.
Features
Prefab Count – 5300
Size – About like Outpost
Loot:
Crate Normal 2 – 18 crate
Crate Normal – 5 crate
Elite Crate – 1 crate
Barrels – 48 barrel
Modifications:
Splat Mask
Height Mask
Topology Mask
Biom Mask
-
$1.49
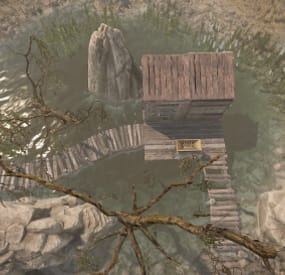
Murderer Camp
By squishy288 in Monuments
A small camp with an angry murderer, a green door, and a bluecard.
-
$12.90
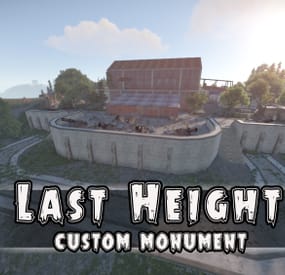
Last Height
Last Height is an outpost of the last hope to protect your positions. This monument is the last of my series of locations from the game Hunt: Shadowdown. This monument is perfectly stylized for the conditions of the warriors who fought at these heights. Lots of barracks, kitchen, toilet and so on. You will also find puzzles with blue, red cards. The central building also contains an armory, a 3rd workbench and a second floor.
This prefab/monument is constantly supported and updated for the current version of the game with all updates!
Features
Prefab Count – 6500
Size – comparable to a Outpost
Puzzles with blue and red cards
Loot:
Crate Normal 2 – 16 crate
Crate Normal – 6 crate
Elite Crate – 2 crate
Barrels – 34 barrel
Modifications:
Splat Mask
Height Mask
Topology Mask
Biom Mask
-
$35.90
Weyland Center
Weyland Center is a Monument-Map inspired by the Aliens film series. This Monument contains a wide variety of decorations simulating fictional scenarios from the Weyland-Yutani corporation. - FEATURES
Size: 1400. Objects: 33788. Monument protection add-on included. - CONTENTS
Safe Zones. Lobby. Puzzle. Helicopter Tower. Casino. Shops. Helicopter salesperson. Island. Weyland Logo. Alien Creature. Ovomorph (egg). P-5000 Motorized Loader. M577 Armored Personnel Carrier. Bunker entrance with automatic doors. - TIPS
Players will spawn in the Lobby by default. Remove the respawn points from Rustedit so that players spawn on the beach. Have fun! 🙂 - SUPPORT: https://discord.gg/ASxJynGndj