
100chilly's Wishlist
-
$20.00
Admin Map
Admin Map is an innovative plugin for the game of Rust, designed to make server administration easier and improve the quality of the gaming experience. Focused on optimization and functionality, this plugin provides admins with the tools to effectively control players, minimizing the negative impact on the server and other participants.
Main features:
Interactive map with players: Admin Map provides server admins with a detailed and user-friendly map showing the positions of all players. This allows admins to easily monitor player activity and movements, and quickly detect suspicious activity. Large variety of different admin map layers:
- Marker,
- Text ,
- Sleeper,
- TC,
- Stash,
- Sleeping Bag Quick Commands on Players: The plugin allows admins to perform quick actions on players directly from the map. Send messages, punish or help players in real time, minimizing reaction time and increasing interaction efficiency. Minimal server load: One of the key features of Admin Map is its low server load. All processing takes place solely on the client side, which means that the plugin will not slow down the server or create additional delays for players. This makes it an ideal choice even for servers with high traffic. Ease of use: The plugin's intuitive user interface provides admins with easy access to functionality. Navigating the map, sending commands and monitoring players is done with minimal effort, making server administration easy. Customization: Admin Map provides admins with the option to customize the functionality to suit their needs. Scanning area, available commands, buttons, permissions and other options. Hardcore bypass: Admins will be able to access the map on servers with the hardcore game mode installed.
After permission is granted, it is necessary to rejoin the server Support in RUST+: You will be able to view players online on the map directly in your phone without going to the server! Admin Map is an innovative solution that combines convenience, functionality and optimization. It provides administrators with tools to effectively manage players without negatively impacting gameplay and other server participants. The Admin Map plugin is an essential asset for any Rust server administrator looking to create a comfortable and safe gaming environment.
Permissions:
adminmap.allow - for use adminmap and hardcore bypass adminmap.<button perm> - any permissions specified in the button settings adminmap.teleport2marker - teleportation by marker via CTRL+RMB adminmap.invis - hide player from the player map adminmap.rust+ - enable rust+ admin map adminmap.rust+.invis - hide from rust+ admin map (recommended in case of giving the map to players)
Commands:
/amap - show sidebar /amap off - disable everything and hide the sidebar
Color designations on the cupboards map:
Default Config:
{ "Auto show sidebar panel": true, "Open the admin menu instead of the action menu": false, "Text Map Settings": { "Font size": 8.0, "Use color generation for teams?": true, "Color for team": "ffaf4d", "Color for solo player": "9bd92f", "Color for sleeper": "404040" }, "Command Buttons": [ { "Permission (adminmap.<perm>)": "", "Label": "TP", "Command": "teleport {steamid}", "Color": "1 1 1 1" }, { "Permission (adminmap.<perm>)": "", "Label": "TP2ME", "Command": "teleport {steamid} {admin.steamid}", "Color": "1 1 1 1" }, { "Permission (adminmap.<perm>)": "", "Label": "INV", "Command": "/viewinv {username}", "Color": "1 1 1 1" }, { "Permission (adminmap.<perm>)": "", "Label": "SPECTATE", "Command": "spectate {steamid}", "Color": "1 1 1 1" }, { "Permission (adminmap.<perm>)": "", "Label": "KILL", "Command": "kill {steamid}", "Color": "0.9 0.1 0.25 1" }, { "Permission (adminmap.<perm>)": "", "Label": "KICK", "Command": "kick {steamid}", "Color": "0.9 0.1 0.25 1" }, { "Permission (adminmap.<perm>)": "", "Label": "SHOW\nTEAMMATES", "Command": "adminmap.cmd show_player_teammates {steamid}", "Color": "1 1 1 1" }, { "Permission (adminmap.<perm>)": "", "Label": "SHOW\nPRIVLIDGES", "Command": "adminmap.cmd show_player_privlidges {steamid}", "Color": "1 1 1 1" }, { "Permission (adminmap.<perm>)": "", "Label": "SHOW\nSLEEPING\nBAGS", "Command": "adminmap.cmd show_player_sleepingbags {steamid}", "Color": "1 1 1 1" }, { "Permission (adminmap.<perm>)": "", "Label": "SHOW\nSTASHES", "Command": "adminmap.cmd show_player_stashes {steamid}", "Color": "1 1 1 1" } ] }
Button Library:
Give item to player for AdminMenu by k1lly0u | Minimum required version 1.0.1 { "Permission (adminmap.<perm>)": "", "Label": "GIVE", "Command": "adminmenu.callback {steamid}.4;adminmenu.callback {steamid}.4", "Color": "1 1 1 1" } Permanent ban
{ "Permission (adminmap.<perm>)": "", "Label": "BAN", "Command": "ban {steamid}", "Color": "1 0 0 1" } View backpack (for Backpack Pro)
{ "Permission (adminmap.<perm>)": "", "Label": "Backpack", "Command": "/b {steamid}", "Color": "1 1 1 1" } View backpack (for Backpacks plugin from uMod)
{ "Permission (adminmap.<perm>)": "", "Label": "Backpack", "Command": "viewbackpack {steamid}", "Color": "1 1 1 1" } Spectate
{ "Permission (adminmap.<perm>)": "", "Label": "SPECTATE", "Command": "spectate {steamid}", "Color": "1 1 1 1" }
If you want to add buttons here, message me on my discord server
-
$19.95$15.95Skip Night
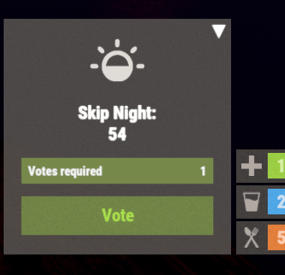
The best plugin that allows you to skip the night on the server. In addition to instant night skipping, you can use night acceleration. You can turn on white nights (under the full moon). Your players will love it!
Features:
Beautiful interface Voting is automatic (at the specified time in the config, without a command) Easy customization (time settings, text, interface, colors, etc.) Speeding up the day Speeding up the night White Nights (Full Moon)
Commands
sn.admin start_manually – Start voting manually
Permissions
skipnight.admin - for command "sn.admin"
Video:
FAQ:
Where can I ask questions/get help quickly? My Discord: Mevent#4546
How do I turn on the full moon? 1. Enable nights with a full moon in the config.
"Night with a full moon": true, 2. Configure the dates of the full moon in the config (you can get them from https://www.timeanddate.com/moon/phases/usa/new-york?year=2024)
"Full Moon Dates": [ "2024-01-25T00:00:00", "2024-02-24T00:00:00", "2024-03-25T00:00:00", "2024-04-23T00:00:00", "2024-05-23T00:00:00", "2024-06-21T00:00:00", "2024-07-21T00:00:00", "2024-08-19T00:00:00", "2024-09-17T00:00:00", "2024-10-17T00:00:00", "2024-11-15T00:00:00", "2024-12-15T00:00:00" ]
Config
{ "Time Settings": { "Day Start": "06:00", "Night Start": "18:00", "Voting time": 60, "Voting start time (time to check)": "20:00", "Time until which hour the voting will take place (time to check)": "21:00", "Time after voting (to which the night passes)": "08:00", "Fast skip the night": true, "Length of the night (minutes)": 5.0, "Length of the FAST night (minutes)": 2.0, "Length of the day (minutes)": 45.0, "Night with a full moon": true, "Full Moon Dates": [ "2024-01-25T00:00:00", "2024-02-24T00:00:00", "2024-03-25T00:00:00", "2024-04-23T00:00:00", "2024-05-23T00:00:00", "2024-06-21T00:00:00", "2024-07-21T00:00:00", "2024-08-19T00:00:00", "2024-09-17T00:00:00", "2024-10-17T00:00:00", "2024-11-15T00:00:00", "2024-12-15T00:00:00" ] }, "UI Settings": { "Destroy Time": 5.0, "Show Image?": true, "Image": "https://i.imgur.com/uNSAY42.png", "Image Width": 42.0, "Image Height": 33.0, "Image Up Indent": 16.0, "Left Indent": 212.0, "Bottom Indent": 16.0, "Width": 178.0, "Height for default version": 82.0, "Height for unfolded version": 184.0, "Background Color": { "HEX": "#F8EBE3", "Opacity (0 - 100)": 4.0 }, "Background Materal": "assets/content/ui/uibackgroundblur-ingamemenu.mat", "Voting Button": { "Width": 150.0, "Height": 30.0, "Bottom Indent": 15.0 }, "Progress Bar": { "Width": 150.0, "Height": 20.0, "Bottom Indent": 55.0 }, "Colors": { "Color 1": { "HEX": "#ABE04E", "Opacity (0 - 100)": 100.0 }, "Color 2": { "HEX": "#595651", "Opacity (0 - 100)": 75.0 }, "Color 3": { "HEX": "#74884A", "Opacity (0 - 100)": 95.0 }, "Color 4": { "HEX": "#FFFFFF", "Opacity (0 - 100)": 100.0 } } }, "Votes Settings": { "Number of votes": 5, "Use a percentage of the online?": true, "Percentage of the online": 30.0 } }
-

$19.99
Heli Signals
Heli Signals allows players with permission to call an Attack Helicopter to their location with a custom Supply Signal, where it will engage players and patrol, allowing players to fight it to win the valuable Heli crates.
The plugin comes with 8 default heli profiles, Easy, Medium, Hard and Elite, with a duplicate profile of each set up for calling multiple helis at once for each tier. In addition there is also 2 Wave Heli profiles, which will call in a wave of different helis one after the other. Each default profile has it's own custom supply signal skin (below). Server owners can add as many profiles as they like in the config by copying and pasting an existing profile within the config and editing to suit. This may require the server owner to create their own custom skin for the inventory item.
If you are setting up Multi heli signals, set the global and player limit in the config accordingly to accommodate higher numbers of helicopters per player.
There is also an option to have a BotReSpawn profile spawn at the crash site, just set the BotReSpawn profile name in the config.
IMPORTANT:
Each heli profile or wave profile in the config MUST have its own unique name and skin ID, otherwise you will have issues.
NOTE ABOUT SHOPS:
The profile name in the config should match the Custom Supply Signal name which the shop gives the player. The Helicopter Name is separate and can be set independently from the Signal item. Also, when giving players items from shop plugins, if available, I always recommend adding the item to the shop using custom name, skinID etc, rather than the console command, but either will work.
NOTE ABOUT DEEP SEA:
There are config options to allow or disallow calling a Heli Signal while in the Deep Sea. There is also a config option to retire a players active Heli Signals if they teleport to Deep Sea. If you allow players to teleport to Deep Sea with active helis and you have return to player set to true, the heli will eventually (after a good few minutes of flying) reach the players location in the Deep Sea.
Plugin default Supply Signal Skin ID's to add items to various shops, loot plugins, kits etc are:
Heli Signal (Easy) : 2920175997
Heli Signal (Medium) : 2920176079
Heli Signal (Hard) : 2920176050
Heli Signal (Elite) : 2920176024
Heli Signal (Expert) : 3099117081
Heli Signal (Nightmare) : 3099117372
Multi Heli (Easy) : 3083234542
Multi Heli (Medium) : 3083234833
Multi Heli (Hard) : 3083234755
Multi Heli (Elite) : 3083234647
Multi Heli (Expert) : 3099124338
Multi Heli (Nightmare) : 3099124426
Heli Wave Signal : 3099117224
Heli Wave Signal (Normal): 3104667036
Heli Wave Signal (Hard): 3104666951
Default Permissions:
helisignals.admin (to use give|hsclearcd command) helisignals.buy (to use /hsbuy command) helisignals.bypasscooldown helisignals.easy helisignals.medium helisignals.hard helisignals.elite helisignals.easy_multi helisignals.medium_multi helisignals.hard_multi helisignals.elite_multi helisignals.wave_normal helisignals.wave_hard Please note: Permissions above are with default config, permission for each Heli profile can be customised in the config.
Commands (Prefix with / to use in game):
hsgive <Profile ShortName> <Steam64ID> <Amount> hsbuy list hsbuy <Profile Shortname> hsreport (Get details of all active helis) hsretire (Retire all a player or their teams called Helis, no refunds) hsclearcd (clear all cooldowns) hsclearcd <SteamID|Name> (clear cooldown for player) (Buy and Retire command customisable in config)
Please note correct usage for Supply Signal name and Helicopter display name. These values CAN be different if you wish:
Loot Options:
Use the loot item example entries in the default config to create custom loot tables for crates.
How to Add Loot Table Items (Example):
For Other Developers:
The following hook is available to use in your plugins to check custom Supply Signals or Patrol Helicopters to avoid conflict with your plugins:
object IsHeliSignalObject(ulong skinID)
This will return true if the item is a Bradley Drop item/entity, or null if not.
Call it directly without referencing the plugin:
if (Interface.Call("IsHeliSignalObject", skinID) != null) return true; // IsHeliSignalObject Or reference my plugin and call like this:
[PluginReference] Plugin HeliSignals; if (HeliSignals.Call("IsHeliSignalObject", skinID) != null) return true; // IsHeliSignalObject To return some basic info about a Heli Signal object:
object GetHeliSignalData(Patrolhelicopter heli)
Returns object as Dictionary<string, object>.
Returned data is:
["heliProfile"] // string - Actual heli profile (from config) ["heliName"] // string - Heli display name ["skinId"] // ulong ["heliId"] // ulong (Net.ID.Value) ["owner"] // BasePlayer ["lastAttacker"] // BasePlayer ["calledPosition"] // Vector3 ["callingTeam"] // List Example usage:
var hdata = HeliSignals.Call("GetHeliSignalData", heli) as Dictionary<string, object>; string _heliProfile = hdata["heliProfile"]; string _heliName = hdata["heliName"]; string _heliSkin = hdata["skinId"]; string _owner = hdata["owner"]; etc
- #helicopter
- #helicopters
- (and 17 more)
-
$9.99
Wormholes
By imthenewguy in Plugins
Transform your Rust map with dynamic wormholes that open up thrilling new possibilities for players! This plugin introduces randomly spawning, paired wormholes that create instant portals between two locations on the map.
Admins can also create static wormhole pairs between locations.
Randomized Spawns: Wormholes appear at random intervals, based on configurable timer ranges. Paired Portals: Each wormhole is linked to another, allowing seamless teleportation between the two. Customizable Settings: Time Limits: Control how long wormholes remain active. Usage Limits: Set how many times a wormhole can be used before it despawns. Condition Restrictions: Prevent players from using wormholes when they are Bleeding Starving Dehydrated Cold/Hot Wounded Irradiated Escape/Raid/Combat blocked
Spice up gameplay, encourage exploration, and create chaotic or strategic opportunities for your players to interact with the world in new ways.
Perfect for servers looking to add a touch of unpredictability and fun!
Permission required to use the plugin: wormholes.access
Admin permission: wormholes.admin
Command: wormhole.spawn <grid coordinate> <grid coordinate>
Type: Chat
Permission: wormholes.admin
Description: Forces a pair of wormholes to spawn in each grid coordinate. For example wormhole.spawn b2 c5 would spawn a wormhole in a random location in b2, with the other side of the wormhole at a random location in c5. Both coordinates need to contain valid spawn points.
Command: whgrid
Type: Chat
Permission: wormholes.admin
Description: Draws all valid spawn positions that the plugin has cached to the user. Requires level 1 auth.
Command: dbwh
Type: Chat
Permission: wormholes.admin
Description: Debugs all active wormholes on the map. Draws lines between each wormhole pair.
Command: statichole.add <optional: name>
Type: Chat
Permission: wormholes.admin
Description: Creates a wormhole at the players position with the designated name if applicable. Requires the command to be run twice at 2 different locations for the wormholes to appear.
-
$12.99
Personal Marketplace
Let your players shop from the safety of their own bases. Give them the ability to place & pickup their own drone Marketplaces, plus they look cool! With all the necessary configurable options, players will love this on any type of server, PvP or PvE.
To add Marketplaces to server shops, I recommend adding the item rather than the command. You can do this with the following:
Shortname: box.wooden.large SkinID: 2859284352
Features.
Support for Friends, Clans, Teams Works with rewards shops like Server Rewards, Economics etc. Force on foundation (optional) Pickup by hitting a terminal with a hammer or chat command Allow multiple marketplaces (optional) Allow players to craft (optional) Configurable crafting cost More control with optional permissions Drop item if building underneath destroyed (optional) Lose condition on pickup (optional) Checks for space before placing (prevents clipping through structures) Config option to add vending machines to Marketplaces Option to block damage to attached vending machines Important Note: Rotate attached vending machines by hitting with a hammer.
In-Game Commands (Remove / Prefix in F1 Console).
/marketplace.give (give to self) /marketplace.give <PlayerName> or <SteamID> (give to player) /marketplace.craft /marketplace.pickup (Or hit a terminal with hammer) /marketplace.clear (Clear ALL stored marketplace data) /marketplace.clear <SteamID> (Remove marketplace data for player) Console/RCON Command.
marketplace.give <PlayerName> or <SteamID> (give to player) marketplace.clear (Clear ALL stored marketplace data) marketplace.clear <SteamID> (Remove marketplace data for player) (Use console command in reward shops or give custom skinned item)
Permissions (Optional).
personalmarketplace.admin (Required for give & clear commands) personalmarketplace.deploy personalmarketplace.pickup personalmarketplace.craft API:
Plugin devs can prevent conflict with this plugin by utilizing the following:
Interface.CallHook("MarketplaceCheck", skinID)
(where skinID = the skinID of the entity you are checking e.g. entity.skinID)
Returns true if the given entity's skinID matches an item used by this plugin (deployable wooden box item, or Marketplace entity) or null if it is not. Plugin devs can use this to prevent conflict with their plugins if dealing with large wooden boxes or other items which maybe be Marketplace related, now or in the future.
How to Place.
As there is no deployable marketplace item in Rust, the plugin uses the large wooden box planner to help guide and align the Marketplace where you want to place it. Keep in mind the marketplace is a very large item, so it is only a guide to help align it. Make sure to place it far away from where you stand and from buildings, if there is not enough room you will not be able to place and you will get a chat message to tell you this. If you don’t get the position right first time, no worries, just pick it up and try again until happy with the placement. Use caution if marketplace condition is enabled, picking up the marketplace too many times will cause it to break and it is NOT repairable!
Marketplaces are better placed in the middle of a 3x4 or larger foundation for best placement (see below image), but can be placed on open terrain or floors if allowed as such in the config:
Inventory item:
Custom Icon (to use in reward shops etc): https://rustynuts.gg/pmicon.png
- #rust
- #marketplace
- (and 8 more)