Search the Community
Showing results for tags 'all in one'.
Found 8 results
-
Version 3.0.3
1,265 downloads
The main functionality of this egg is to have the ability to switch seamlessly between all Carbon builds, Oxide, and Vanilla. If you launch the egg with an Oxide build, you can then switch right on over to Carbon, and it will handle all of the removal and clean up of all of the Oxide files for you. If you switch to Vanilla from either Carbon or Oxide, it will make sure those files are cleaned up as well. You also have the ability to set a "Modding Root" folder. This folder is very important, as it allows you to have different plugins, configs, and data for different wipes or maps. Say you are running a proc gen map, and you are running a set of plugins that makes sense to have on a proc gen map, then you decide on wipe day to switch to a spooky, Halloween themed map. Obviously you'll probably want to have some different plugins running on that custom Halloween themed map. You can make that switch easily by just specifying the "Modding Root" folder that you want to use, instead of having to delete files, configs, etc. This guide assumes that you have already installed Pterodactyl panel, and are familiar with how to set up servers. You should also already have a location, a node, and ports already allocated on that node. If you don't know how to do any of this, or you missed a step, please refer to the Pterodactyl Panel installation instructions below. A link to their Discord server is also below for you to get support during installation. They however do not support Carbon specific questions, only questions relating to Pterodactyl panel itself. Just keep that in mind. Pterodactyl Installation Instructions Pterodactyl Discord Check Out The Carbon Docs This egg is now officially on the Carbon documentation page! That documentation can be found here: https://docs.carbonmod.gg/docs/server-hosting/pterodactyl Difference Between Carbon Builds The difference between the Production, Preview, and Edge builds of Carbon are: Production - The most stable version of Carbon. Updated once every few weeks. Preview - Updated frequently, contains future features for testing, and you will run into a few bugs here and there. Edge - Like living on the edge? This is the most current version of Carbon, and it used mainly by developers and server owners to test brand new features of Carbon that are still in the Beta development stage. Expect some bugs. One other thing is the difference between the Minimal and Standard versions of Carbon. The minimal version of Carbon does not contain the Admin Module, CarbonAuto, or the Zip Dev Script Processor. Its basically a lightweight version of carbon, stripping away the QoL features and focuses only on plugin execution. Its not like minimal is faster then the Standard build, it just has less "clutter". Adding The Egg To The Nest First we need to add the egg to the Rust nest. Here are the steps. Login to the admin dashboard of your Pterodactyl panel installation. Click on the "Nests" link in the side bar on the left. Since there is already a "Rust" nest, we don't have to create a new one. Lets just go ahead and add the egg to the nest. Click on the green "Import Egg" button on the right. Select the Custom Carbon Egg that you just downloaded by clicking browse, then navigate to the location you saved the egg to, and double click the file. Next we need to select the "Rust" nest under the "Associated Nest" field. Now all we have to do is click on "Import". Installing the Server This server installation guide is very similar to the Custom Rust Egg by MikeHawk, with some key differences. Some of the steps for installation might be the same. Please make sure to read these installation instructions throughly. Log into your admin dashboard of your panel. Navigate to your Servers by clicking on "Servers" on the side bar. Click the "Create New" button on the right Configure your server details in the "Core Details" section For your port allocations you are going to need 1 main port, and 3 additional allocations. These allocations are for the Query Port, RCON Port, and App Port. Configure your "Application Feature Limits" and "Resource Management" sections to your liking Under "Nest Configuration", select the "Rust" Nest Then if your "Egg" field does not already say "Rust Carbon", change it to "Rust - All Carbon Builds". The "Docker Configuration" section can be skipped. Next is the big part. The "Startup Configuration" section. In this section, you can fill out everything pretty much to your liking. However there are a few new options here that are not apart of the Default Rust Egg. Under the "Modding Framework" variable, you can choose different options for either Carbon, Oxide, or Vanilla. This is a combined version of the "Carbon Build" and "Minimal" variables from the other Custom Rust Egg by MikeHawk. The key difference here is this egg is also set up for the staging branch of Rust as well. See the "Difference Between Carbon Builds" section at the top of this page for more information. Lastly, the major difference between the Default Rust egg, and the Carbon Rust egg, is that you can set an IP address for your Rust+ App. This is critical in ensuring that your Rust+ connection is able to connect to the Rust+ API. Set this value to the public IP address of your server. Additionally, you can configure different Carbon/Oxide root directories. This is good if you want to run a certain set of plugins on one map, but don't want to go through the hassle of copying and pasting over different configs for that map. All you have to do is just change your Carbon directory, and it will automatically switch over to those plugins, configs, and data files. An important thing to note is that the "Modding Root" variable should be set appropriately. If you're running a build of Carbon, your "Modding Root" should have the word "carbon" in it. Same thing for Oxide. If you're running Oxide, your "Modding Root" variable should have the word "oxide" in it. The vanilla option does not need to have the variable set. Do not forget to set your RCON, Query, and App ports to the appropriate ports that you assigned under the "Core Details" section. These ports should be equal to one of the three ports you assigned under your "Additional Ports" section. Start your server by clicking the green "Create Server" button at the bottom of the page. And that's it! You now have a Rust server installed and ready to use! Credits to @BippyMiester for helping me create the egg Want to help contribute to the project? Visit our GitHub Pages! https://github.com/SturdyStubs/pterodactyl-images/ https://github.com/SturdyStubs/AIO.EggFree- 13 comments
- 2 reviews
-
- 9
-

-

-
- #pterodactyl
- #pterodactyl panel
- (and 7 more)
-
.thumb.gif.b68fcc45abe70ab7d7235dffc8a0c770.gif)

Version 1.0.3
45 downloads
This coastal monument is a mini space saving all in one containing outpost, bandit camp, fishing village & stables/ranch. Nothing is missing you have all vending machines and vendors and npc mission givers as well as recyclers, workbench, refinery, poker room, drone station, helicopter shop, boat shop, horse shop. Perfect for one grid or smaller size maps with the smaller footprint plus at only 1238 objects. Fully Working Hostile Warning! This monument when used on a map without any default outpost, bandit camp, fishing village & stables/ranch has a fully working safe zone hostile warning icon. Quick Start Extract the zip file into your RustEdit install folder. Make sure you have VendingPresets and CustomPrefabs Folder from the zip file. Start Rust Edit. Click on Prefabs at the top & open up your Prefab List. Under the Custom category you will now find RobJs Premium Prefabs. Double click on the prefab file and it will spawn it into the map for you. Drag it to the general area you want to place it and click on Snap To Terrain Apply the Height Mask, Topology Mask, and Splat Mask. Needs https://github.com/k1lly0u/Oxide.Ext.RustEdit installed and running. Contact And Help If you need to contact me discord is best: RobJ2210#2553 For help/support my discord group is best: Join RustMaps Discord FAQ$19.99- 1 comment
-
- 3
-
-
-

-
- #all in one
- #safezone monuments
- (and 8 more)
-
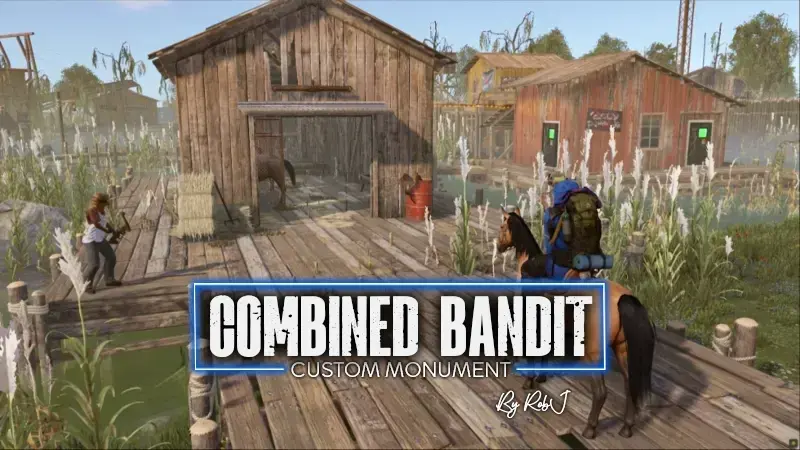
Version 1.0.0
3 downloads
Welcome to my Combined Bandit, Outpost & Stables prefab! This prefab allows you to transform any standard bandit camp into a all-in-one bandit camp. It includes all the amenities of each location, complete with shopkeepers, vending machines, an Airwolf dealer, and a horse seller. Horse Seller Plugin This plugin includes features that allow you to interact with the horse seller, purchase saddles, and buy your own horse. RustMaps.com An empty map is included with the compound and prefab, ready for upload to RustMaps. Install Video Manual Install Video Quick Start Extract the zip file into your RustEdit install folder. Start Rust Edit. Click on Prefabs at the top & open up your Prefab List. Under the Custom category, you will now find RobJs Premium Prefabs. Double-click on the prefab file, which will spawn it into the map for you. Drag it to the general area you want to place it on top of compound. Rotate and line up the three rocks. Contact And Help If you need to contact me discord is best: RobJ2210#2553 For help/support my discord group is best: Join RobJ Maps Discord$11.99-
- 3
-
-
- #combined outpost
- #combined bandit camp
- (and 4 more)
-
Version 1.0.2
26 downloads
Welcome to my Christmas Combined Outpost, Bandit & Stables prefab! This prefab allows you to transform any standard compound into a all-in-one compound. It includes all the amenities of each location, complete with shopkeepers, vending machines, an Airwolf dealer, and a horse seller. Horse Seller Plugin This plugin includes features that allow you to interact with the horse seller, purchase saddles, and buy your own horse. RustMaps.com An empty map is included with the compound and prefab, ready for upload to RustMaps. Video Install Guides Manual Install Video RustMaps Install Video Contact And Help If you need to contact me discord is best: RobJ2210#2553 For help/support my discord group is best: Join RobJ Maps Discord$9.99- 3 comments
- 1 review
-
- 2
-
-
-
- #xmas
- #all in one
- (and 3 more)
-
.thumb.gif.3e15502e64f7fdb1cccaf7ad7ed649d2.gif)
Version 1.0.2
15 downloads
Continuing on with cobalt's great work I introduce the airship all in one containing all vendors from Outpost, Bandit & Fishing Village and the mission givers as well as recyclers, poker room, helicopter shop, boat shop. With it being a sky monument its perfect for saving space on your map leaving more room for building or other monuments. **Horse seller not present due to being a sky monument. Quick Start Extract the zip file into your RustEdit install folder. Make sure you have VendingPresets and CustomPrefabs Folder from the zip file. Start Rust Edit. Click on Prefabs at the top & open up your Prefab List. Under the Custom category you will now find RobJs Premium Prefabs. Double click on the prefab file and it will spawn it into the map for you. Drag it to the general area you want to place it Done Needs https://github.com/k1lly0u/Oxide.Ext.RustEdit installed and running. Contact And Help If you need to contact me discord is best: RobJ2210#2553 For help/support my discord group is best: Join RustMaps By RobJ Discord FAQ$18.99 -
Version 1.0.3
30 downloads
I introduce the Medieval All In One containing all vendors from Outpost, Bandit, Stables & Fishing Village and the mission givers as well as recycler, helicopter shop, boat shop & horse seller. With it being a compact all in one its perfect for saving space on your map leaving more room for building or other monuments. Docked Airship The airship can be removed if your after a more authentic medieval setting. Versions Two versions are included a auto turret guarded version and a none guarded version for you to use ether BotReSpawn or BetterNPC to add your own peacekeeper guards. Quick Start Extract the zip file into your RustEdit install folder. Make sure you have VendingPresets and CustomPrefabs Folder from the zip file. Start Rust Edit. Click on Prefabs at the top & open up your Prefab List. Under the Custom category you will now find RobJs Premium Prefabs. Double click on the prefab file and it will spawn it into the map for you. Drag it to the general area you want to place it Apply the Height Mask, Topology Mask, and Splat Mask. Needs https://github.com/k1lly0u/Oxide.Ext.RustEdit installed and running. Contact And Help If you need to contact me discord is best: RobJ2210#2553 For help/support my discord group is best: Join RustMaps By RobJ Discord Credits Designed by Cobalt & RobJ In a collaboration and featured in Timelines & Clockworks Maps. FAQ$18.99-
- 1
-
-
- #medieval
- #all in one
- (and 7 more)
-
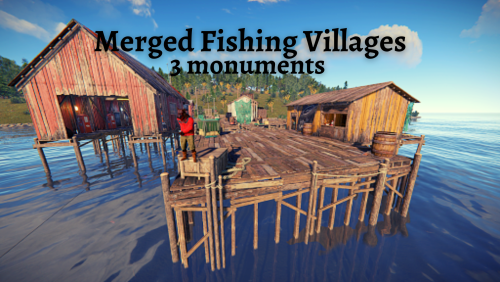
Version 1.0.0
251 downloads
This Prefab can replace Outpost and Bandit Town Includes 3 different prefabs Merged Fishing Village A Merged Fishing Village B Merged Large Fishing Village Includes: Air Wolf vendor Boat vendor Drone shop Spinning wheel game Slot machines Outpost & Bandit Town vending machines Recyclers Oil refinery Mission provider NPCs Tier 1 workbench Standalone prefabs Contact me via Discord if you have any questions or concerns: pixy#0335Free -
Version 1.0.7
66 downloads
This monument is a mini space saving all in one outpost and bandit camp. Nothing is missing you have all vending machines and bandit vendors as well as recyclers, workbench, refinery, helicopter shop on the roof and even a poker room + drone station. Perfect for one grid or smaller size maps with the smaller footprint. HDRP Compatible 2 Versions Included: HDRP Bandit and Outpost 2 in 1 HDRP Outpost Only Version Quick Start Extract the zip file into your RustEdit install folder. Start Rust Edit. Click on Prefabs at the top & open up your Prefab List. Under the Custom category you will now find RobJs Premium Prefabs. Double click on the prefab file and it will spawn it into the map for you. Drag it to the general area you want to place it and click on Snap To Terrain Apply the Height Mask, Topology Mask, and Splat Mask. Bandit version needs https://github.com/k1lly0u/Oxide.Ext.RustEdit installed and running. Contact And Help If you need to contact me discord is best: RobJ2210#2553 For help/support my discord group is best: Join RustMaps Discord$16.00- 9 comments
- 1 review
-
- 3
-
-
- #all in one
- #bandit
- (and 7 more)