
igraes's Wishlist
-
$40.00
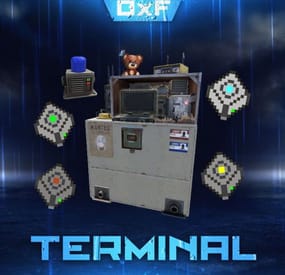
Terminal
Terminal is an indispensable item that will allow players to manage the resources of the house in one place! Just as importantly, it is not just a conditional button on the screen or something similar, but a complete new item that is placed in the house, which gives a nice user experience to any player that likes interaction. Its multifunctionality will allow the player to use it for a variety of purposes, from simple resource management to building a terminal-only resource factory. Interested? Then let's get to the details.
Examples of uses:
Getting remote access to resources, the ability to take resources from several storages at once, as well as put them in them. The ability to use the terminal as one big chest thanks to the cells of different levels, available import and export pipes will allow to realize the delivery of resources to the production tools Building a plant powered by terminal alone Many other clever uses, like a chest in the buffer of the house connected to the terminal. Combining uses Features:
Similar type items are displayed combined in one slot, where you can see the total quantity and take the required quantity. Two modes of operation: wireless and cellular. Full-featured new placeable item Works with industrial pipes Ability to create different cells (by standard there are 4 levels) Cells have their own stack size just for them. Intelligent movement that will not allow you to store more items in the boxes than allowed The terminal has a convenient search for items in the user's language, not only in English
Demo Video:
Installation instructions
Installing dependencies CustomEntities. Go to Github, click Clone -> Download ZIP, then transfer CustomEntities.cs to the folder with plugins.
CustomItemDefinitions. Go here, download and install in the plugins folder. Download purchased this plugin and install it in the plugins folder the same way. Done
Quick Start:
Prompt commands: give terminal give storage_cell.level1 give storageadaptor.wireless Place terminal, put the cell in the cell storage, install the adapter on the chest, enjoy. More about items:
[Terminal]
Terminal is a placeable item, with the ability to be placed both outside and in the house, serves for convenient management of all resources in the house. It has a certain amount of health (default 500), as well as the ability to pick up with a loss of strength. It has 2 modes of operation, wireless and cell, can work with industrial, by means of pipes to import and export items from cells.
The server owner can decide where to get this item from, it has its own short name and can be used in all plugins, the best option is to craft it.
The shortname of the item - terminal
Command to give:
give terminal
How to pick up a terminal?
For this we must have authorization in the cabinet.
Holding a mallet in your hand, point at the part of the terminal where the inscription Authorize appears, press the R button and select Turn.
How to switch modes of operation?
It is possible to do this by pressing the switch on the left side of the laptop, it looks like this:
What is needed to work in wireless mode?
To start working you need the item "Wireless Storage Adapter”, this item is part of the plugin. Can be obtained by any method of the server owner's choice.
The short name of the item - storageadapter.wireless.
Command to give out:
give storageadaptor.wireless Next, install the wireless storage adapter on the storage item you need. Such as: chests, furnaces, refineries, etc.
Next, select the wireless mode on the terminal by pressing the switch.
After entering the laptop, it will display all the items that are connected to the adapter in the range of the wireless mode of the terminal (customizable).
What is needed to work in the cell mode?
The first thing you need are the cells themselves, they can be obtained in any way the server owner chooses.
The short name of the item - storage_cell.{name from the config, by default it is level1-4}
Command to give out:
give storage_cell.level1 Cells should be put in the terminal cell storage, it looks like this:
It is recommended to put any kind of lock on the cell storage, otherwise they can be stolen!
Next, select the cell mode on the terminal by pressing the switch.
After entering the laptop, where you can now see what is in the cells, how many slots are available and you can put things there.
[Wireless Storage Adaptor]
Used for the wireless mode of the terminal. Installed on all storage items for which a regular storage adapter is available. Does not require additional connection.
The server owner can decide where to get this item from, it has its own short name and can be used in all plugins, the best option is to craft it.
The short name of the item - storageadapter.wireless.
Command to give out:
give storageadapter.wireless
[Storage Cells]
Cells hold items, have a certain number of slots and a maximum stack in each slot. These are special slots and only in them items can be stacked to their maximum. The maximum stack works on the principle of 1 type - 1 slot. That is, if the maximum stack is 5000 and the player puts there 10 new machine guns, they will occupy 1 slot and such can be put another 4990, if he puts a slightly broken machine gun, it will take another slot and will store the same machine guns. This is how it works with all items.
Another example; a level 1 cell has a maximum stack of 5000 and 8 slots, and if you store only sulfur in it, you can eventually store 40000 sulfur in it. Higher level cells have more stacks and slots.
Don't worry, the configured max stack won't be knocked down, items will unstack when they are laid down and taken out of the cell.
The server owner can decide where to get this item from, it has its own short name and can be used in all plugins, the best option is to craft it.
The short name of the item - storage_cell.{name from the config, by default it is level1-4}
Command to give out:
give storage_cell.level1
-

$12.99
Town Wars
This plugin adds a war for map's monuments.
About
Any clan can start capturing monuments, if the marker on the map is green, after the start of the capture, points are awarded for each player in the zone every 1 second, any clan can join the capture, even if it did not start, for this you just need to enter any clan member into the capture zone. After the end of the capture of the monument, the clan that scored the most points captures it and items from the config are added to the inventory (which is in the / tw menu) every N seconds.
Settings
You can choose the type of work Team (game teams), when this parameter is selected, if the team completely disintegrates, then it will lose the inventory of awards, so the advice is to wipe the inventory after the wipe for this parameter
Solo works well for Solo servers
Clans support for clans, suitable for the server where the clan system is installed
Setting up rewards for each monument Support for custom rewards Setting the frequency of issuing rewards Duration of capture and cooldown until the next capture 3D text in the game itself with all the information when entering the capture area Dynamic markers on the map allow you to visually assess the state of the monument Detailed setting of markers on the map Interface customization Plugin localization for EN and RU languages Commands
/ tw - allows you to open a menu to take items from the inventory and start capturing the monument Video
Config
{ "General settings": { "Plugin type of work: Team - game teams, Solo - for solo server, Clans - clan support ClanReborn(Chaos), ClansUI(RP), Clans(Umod), Clans(CF)": "Clans", "Frequency of distribution of awards in seconds": 1800, "Items from the inventory can only be taken by the head of the clan": false, "Only the leader of a clan or group can start a capture": false, "Whether to delete inventory of items after wipe": true, "Waiting until the next capture in seconds": 14400, "How many seconds does the capture take": 1800, "Whether to add visible spheres to indicate the capture boundaries": true, "Minimum players on the server to start capturing (0 - off)": 0 }, "Marker settings": { "Marker radius": 0.5, "Marker transparency": 0.4, "Marker color when monument can be captured": "#10c916", "Marker color when monument is captured": "#ed0707", "Marker color when monument cannot be captured": "#ffb700", "Added marker to the map with the name of who last captured monument": true }, "Monuments settings": { "assets/bundled/prefabs/autospawn/monument/large/trainyard_1.prefab": { "Monument name": "Train Yard", "What distance from the center of the monument to gain capture points": 85, "Rewards": [ { "Item shortname": "stones", "Item amount": 10000, "Item skinID": 0, "Item name (if custom)": "", "Link to picture (if custom)": "", "Command to execute %STEAMID% (to upload a picture, think of any number skinID and shortname)": "" }, { "Item shortname": "sulfur", "Item amount": 5000, "Item skinID": 0, "Item name (if custom)": "", "Link to picture (if custom)": "", "Command to execute %STEAMID% (to upload a picture, think of any number skinID and shortname)": null }, { "Item shortname": "rifle.ak", "Item amount": 1, "Item skinID": 0, "Item name (if custom)": "", "Link to picture (if custom)": "", "Command to execute %STEAMID% (to upload a picture, think of any number skinID and shortname)": "" }, { "Item shortname": "techparts", "Item amount": 10, "Item skinID": 0, "Item name (if custom)": "", "Link to picture (if custom)": "", "Command to execute %STEAMID% (to upload a picture, think of any number skinID and shortname)": "" }, { "Item shortname": "lmg.m249", "Item amount": 1, "Item skinID": 0, "Item name (if custom)": "", "Link to picture (if custom)": "", "Command to execute %STEAMID% (to upload a picture, think of any number skinID and shortname)": "" }, { "Item shortname": "weapon.mod.8x.scope", "Item amount": 1, "Item skinID": 0, "Item name (if custom)": "", "Link to picture (if custom)": "", "Command to execute %STEAMID% (to upload a picture, think of any number skinID and shortname)": "" }, { "Item shortname": "glue", "Item amount": 10, "Item skinID": 2409891781, "Item name (if custom)": "$", "Link to picture (if custom)": "https://i.imgur.com/jBaVKHu.png", "Command to execute %STEAMID% (to upload a picture, think of any number skinID and shortname)": "" } ] }, "assets/bundled/prefabs/autospawn/monument/large/airfield_1.prefab": { "Monument name": "Airfield", "What distance from the center of the monument to gain capture points": 55, "Rewards": [ { "Item shortname": "stones", "Item amount": 10000, "Item skinID": 0, "Item name (if custom)": "", "Link to picture (if custom)": "", "Command to execute %STEAMID% (to upload a picture, think of any number skinID and shortname)": "" }, { "Item shortname": "sulfur", "Item amount": 5000, "Item skinID": 0, "Item name (if custom)": "", "Link to picture (if custom)": "", "Command to execute %STEAMID% (to upload a picture, think of any number skinID and shortname)": "" }, { "Item shortname": "rifle.ak", "Item amount": 1, "Item skinID": 0, "Item name (if custom)": "", "Link to picture (if custom)": "", "Command to execute %STEAMID% (to upload a picture, think of any number skinID and shortname)": "" }, { "Item shortname": "glue", "Item amount": 10, "Item skinID": 2409891781, "Item name (if custom)": "$", "Link to picture (if custom)": "https://i.imgur.com/jBaVKHu.png", "Command to execute %STEAMID% (to upload a picture, think of any number skinID and shortname)": "" } ] }, "assets/bundled/prefabs/autospawn/monument/xlarge/launch_site_1.prefab": { "Monument name": "Launch Site", "What distance from the center of the monument to gain capture points": 100, "Rewards": [ { "Item shortname": "stones", "Item amount": 10000, "Item skinID": 0, "Item name (if custom)": "", "Link to picture (if custom)": "", "Command to execute %STEAMID% (to upload a picture, think of any number skinID and shortname)": "" }, { "Item shortname": "sulfur", "Item amount": 5000, "Item skinID": 0, "Item name (if custom)": "", "Link to picture (if custom)": "", "Command to execute %STEAMID% (to upload a picture, think of any number skinID and shortname)": "" }, { "Item shortname": "rifle.ak", "Item amount": 1, "Item skinID": 0, "Item name (if custom)": "", "Link to picture (if custom)": "", "Command to execute %STEAMID% (to upload a picture, think of any number skinID and shortname)": "" }, { "Item shortname": "glue", "Item amount": 10, "Item skinID": 2409891781, "Item name (if custom)": "$", "Link to picture (if custom)": "https://i.imgur.com/jBaVKHu.png", "Command to execute %STEAMID% (to upload a picture, think of any number skinID and shortname)": "" } ] }, "assets/bundled/prefabs/autospawn/monument/xlarge/military_tunnel_1.prefab": { "Monument name": "Military Tunnel", "What distance from the center of the monument to gain capture points": 50, "Rewards": [ { "Item shortname": "stones", "Item amount": 10000, "Item skinID": 0, "Item name (if custom)": "", "Link to picture (if custom)": "", "Command to execute %STEAMID% (to upload a picture, think of any number skinID and shortname)": "" }, { "Item shortname": "sulfur", "Item amount": 5000, "Item skinID": 0, "Item name (if custom)": "", "Link to picture (if custom)": "", "Command to execute %STEAMID% (to upload a picture, think of any number skinID and shortname)": "" }, { "Item shortname": "rifle.ak", "Item amount": 1, "Item skinID": 0, "Item name (if custom)": "", "Link to picture (if custom)": "", "Command to execute %STEAMID% (to upload a picture, think of any number skinID and shortname)": "" }, { "Item shortname": "glue", "Item amount": 10, "Item skinID": 2409891781, "Item name (if custom)": "$", "Link to picture (if custom)": "https://i.imgur.com/jBaVKHu.png", "Command to execute %STEAMID% (to upload a picture, think of any number skinID and shortname)": "" } ] }, "assets/bundled/prefabs/autospawn/monument/large/powerplant_1.prefab": { "Monument name": "Power Plant", "What distance from the center of the monument to gain capture points": 85, "Rewards": [ { "Item shortname": "stones", "Item amount": 10000, "Item skinID": 0, "Item name (if custom)": "", "Link to picture (if custom)": "", "Command to execute %STEAMID% (to upload a picture, think of any number skinID and shortname)": "" }, { "Item shortname": "sulfur", "Item amount": 5000, "Item skinID": 0, "Item name (if custom)": "", "Link to picture (if custom)": "", "Command to execute %STEAMID% (to upload a picture, think of any number skinID and shortname)": "" }, { "Item shortname": "rifle.ak", "Item amount": 1, "Item skinID": 0, "Item name (if custom)": "", "Link to picture (if custom)": "", "Command to execute %STEAMID% (to upload a picture, think of any number skinID and shortname)": "" }, { "Item shortname": "glue", "Item amount": 10, "Item skinID": 2409891781, "Item name (if custom)": "$", "Link to picture (if custom)": "https://i.imgur.com/jBaVKHu.png", "Command to execute %STEAMID% (to upload a picture, think of any number skinID and shortname)": "" } ] }, "assets/bundled/prefabs/autospawn/monument/large/water_treatment_plant_1.prefab": { "Monument name": "Water Treatment Plant", "What distance from the center of the monument to gain capture points": 85, "Rewards": [ { "Item shortname": "stones", "Item amount": 10000, "Item skinID": 0, "Item name (if custom)": "", "Link to picture (if custom)": "", "Command to execute %STEAMID% (to upload a picture, think of any number skinID and shortname)": "" }, { "Item shortname": "sulfur", "Item amount": 5000, "Item skinID": 0, "Item name (if custom)": "", "Link to picture (if custom)": "", "Command to execute %STEAMID% (to upload a picture, think of any number skinID and shortname)": "" }, { "Item shortname": "rifle.ak", "Item amount": 1, "Item skinID": 0, "Item name (if custom)": "", "Link to picture (if custom)": "", "Command to execute %STEAMID% (to upload a picture, think of any number skinID and shortname)": "" }, { "Item shortname": "glue", "Item amount": 10, "Item skinID": 2409891781, "Item name (if custom)": "$", "Link to picture (if custom)": "https://i.imgur.com/jBaVKHu.png", "Command to execute %STEAMID% (to upload a picture, think of any number skinID and shortname)": "" } ] }, "assets/bundled/prefabs/autospawn/monument/small/sphere_tank.prefab": { "Monument name": "Sphere Tank", "What distance from the center of the monument to gain capture points": 40, "Rewards": [ { "Item shortname": "stones", "Item amount": 10000, "Item skinID": 0, "Item name (if custom)": "", "Link to picture (if custom)": "", "Command to execute %STEAMID% (to upload a picture, think of any number skinID and shortname)": "" }, { "Item shortname": "sulfur", "Item amount": 5000, "Item skinID": 0, "Item name (if custom)": "", "Link to picture (if custom)": "", "Command to execute %STEAMID% (to upload a picture, think of any number skinID and shortname)": "" }, { "Item shortname": "rifle.ak", "Item amount": 1, "Item skinID": 0, "Item name (if custom)": "", "Link to picture (if custom)": "", "Command to execute %STEAMID% (to upload a picture, think of any number skinID and shortname)": "" }, { "Item shortname": "glue", "Item amount": 10, "Item skinID": 2409891781, "Item name (if custom)": "$", "Link to picture (if custom)": "https://i.imgur.com/jBaVKHu.png", "Command to execute %STEAMID% (to upload a picture, think of any number skinID and shortname)": "" } ] }, "assets/bundled/prefabs/autospawn/monument/small/satellite_dish.prefab": { "Monument name": "Satellite Dish", "What distance from the center of the monument to gain capture points": 40, "Rewards": [ { "Item shortname": "stones", "Item amount": 10000, "Item skinID": 0, "Item name (if custom)": "", "Link to picture (if custom)": "", "Command to execute %STEAMID% (to upload a picture, think of any number skinID and shortname)": "" }, { "Item shortname": "sulfur", "Item amount": 5000, "Item skinID": 0, "Item name (if custom)": "", "Link to picture (if custom)": "", "Command to execute %STEAMID% (to upload a picture, think of any number skinID and shortname)": "" }, { "Item shortname": "rifle.ak", "Item amount": 1, "Item skinID": 0, "Item name (if custom)": "", "Link to picture (if custom)": "", "Command to execute %STEAMID% (to upload a picture, think of any number skinID and shortname)": "" }, { "Item shortname": "glue", "Item amount": 10, "Item skinID": 2409891781, "Item name (if custom)": "$", "Link to picture (if custom)": "https://i.imgur.com/jBaVKHu.png", "Command to execute %STEAMID% (to upload a picture, think of any number skinID and shortname)": "" } ] } }, "UI settings": { "Background color": "0 0 0 0.3", "Outline color": "0.75 0.60 0.20 1.00", "'Start Capture' button color": "0.00 0.17 0.33 1", "'Inventory' button color": "0.00 0.17 0.33 1" }, "Config version": { "Major": 1, "Minor": 0, "Patch": 3 } }
-
$19.99
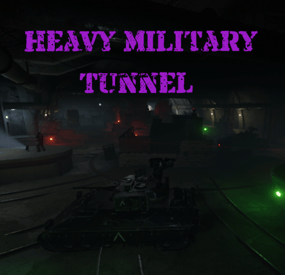
Heavy Military Tunnel Event
Heavy Military Tunnel Event is a configurable plugin that allows for a new type of random event. Randomly a message will appear letting players know that a heavy unit is now guarding Military Tunnel
The Military Tunnel will then be equipped with extra scientists both light and heavy, auto turrets, and Bradleys. Players must try to clear the military tunnel and find the scientist who drops the code to disable the auto turrets OR destroy all the turrets. If the code is found, it can be entered into the code lock hidden in a room to disable the turrets. Once the turrets and scientists are dealt with, players must defeat the Bradleys that guard the hackable crates. Finally, once the Bradleys are defeated, players can collect all the loot. That's if someone else doesn't get to it first!
This is a great event to add to your server to give it a little more variety. It can be a fun PVP zone or a PVE event for non PVP servers.
EASY OPTIONAL SETUP - NO SETUP REQUIRED
You can simply drop the plugin in as-is and it will start the random event every 1 to 2 hours OR you can modify the config to your specific needs.
Configuration
Example - en
Admin Only Commands
/HmtStart
/HmtStop
/HmtPos
Hooks
void HeavyMilitaryTunnelEventStarted()
void HeavyMilitaryTunnelEventStopped()
Customization
Spawn locations as well as the total number turrets, scientists, hackable crates, & APCbradleys can be modified. Simply go to the location in game you want to place the new item and use the command /HmtPos. It will message you the location. You can the add that location to the config in the appropriate section for want you want to modify. Reload the plugin and you're good to go!
Support
Create a support ticket here or message me on discord: cahnu
-
$29.99
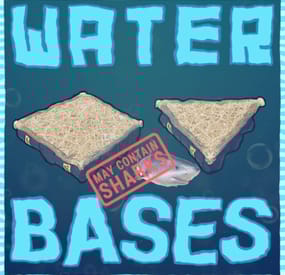
Water Bases
Water Bases rust plugin enables players with permissions to construct and expand structures on and underwater without the need for pillars, incorporating vanilla-like mechanics, special features like underwater nettings, and customizable settings for different player tiers.
Questions? Support? Join the discord: https://discord.nikhub.dev
In short
This Rust plugin enables players with the right permissions to construct structures on the water's surface and even extend them below water in a way that feels natural and in keeping with the game's original style. There's no need for tall, unstable pillars reaching down to the seabed; simply place your foundation on the water and use a building plan or hammer to expand it.
These aquatic constructions adhere to the same principles of stability, upkeep, and decay as traditional bases on your server but also introduce unique elements like underwater nettings for gathering random items (with fully customizable loot tables) and innovative building techniques.
The plugin accommodates various configuration profiles based on permissions, offering an excellent method to reward VIP players across different levels. It grants you control over who is allowed to build on the water, the size of their constructions, their proximity to the shore, and the highest tier of building blocks they can use, among other aspects.
Additionally, the plugin is designed to alert players if their construction interferes with the Cargo Ship's route. With the Submarine update on the horizon, it's time to prepare your server for aquatic adventures with Water Bases!
Watch the video below to see what water bases are all about.
"What about Cargo Ship, will it destroy structures in the way?"
By default, players will get a warning if they try to to build a water foundation in the path of the cargo ship, but their water foundation will stay. You can change this setting from "Warn" to "Prevent", and the player won't be able to build it in first place. Changing it to "None" will skip this check. Every ocean path node creates a "bubble" with a configurable radius. See Admin chat commands section below to visualise those bubbles and guide your players to areas where they will be able to build without issues.
Quick start (for players and admins)
Upload the WaterBases.cs file to your oxide/plugins folder and you should be good to go, it's all plug-and-play. No need to restart your server! Before you can build on water, you need some Water Foundations. Water foundations are re-skinned Inner Tube items (Shortname: innertube / Item ID: -697981032 ; mind the minus sign, it matters!) with a skin ID 2484982352 (https://steamcommunity.com/sharedfiles/filedetails/?id=2484982352) or 2485021365 (https://steamcommunity.com/sharedfiles/filedetails/?id=2485021365). That info is just in case you'd like to include those in your own Kits/Server Rewards shops/loot tables/custom crafting plugins. How to obtain those within the plugin?
Crafting water base foundations (with Building Planner)
By default, all players will be able to craft, deploy, expand and reinforce water foundations. More on the limits and how to change them (how far/close to the shore, min and max depth of the water, how many water foundations allowed per building etc) in the section Advanced Config. When a player equips a Building Plan, a small GUI will show in the bottom right (positions/colours etc can be changed in the config too). There, players will be able to craft deployable water foundations - both square and triangle. Those crafted items will also be consumed when players expand their already deployed foundations or reinforce them. The default permission profile requires a player to be close to a Level 2 Workbench - this requirement can be edited in the config to change the level needed, or you can turn off the need for a workbench altogether, per permission profile. If you don't want your players to be able to craft foundations - so they have to find them/buy them/earn them instead - you can disable it per-profile. In that case, they won't see the GUI.
Giving with chat commands (admins only)
Type /give_square [amount] or /give_triangle [amount] to give yourself some foundations of that type. If you don't specify an amount, you will only receive 1.
Deploying a "starter" foundation on water
Go out to the lake/ocean, select the water foundation as your active item and using the doughnut-shaped guide, deploy it on the water surface. After trying to deploy/expand upon an existing water foundation, a couple of checks will be performed according to global config and individual permission profile for that player:
Does the player have permission to deploy the first foundation/expand existing one? Is the player building blocked? How far is the player trying to build from shore (based on the map topology)? Too close/too far? How deep is the water where the player is trying to build? Is it too deep/too shallow? Is the player trying to build too close to the path of cargo/Oil Rig? Is the player allowed to have this many water foundations in the building? If all the checks have been successful, a new twig floor, with a stability 100% (like normal foundations) will be built. It will have some indestructible floatation barrels attached to it, partially covering the water foundation's soft side (the bottom). Then, a water foundation can be expanded, upgraded, protected with a Tool Cupboard (like any other buildings, really), or reinforced.
Expanding
Once you've deployed your first "starter" water foundation, all the subsequent foundations will be placed using vanilla building mechanics - just take a building plan and build some floors neighbouring your water foundation on the sides! If you have enough water foundation items of the required kind in your inventory, those newly placed floors will also turn into water foundations. And they can call be demolished/upgraded, just like normal twig structures, as soon as you place a Tool Cupboard. Expanding a single-sided water foundation requires 1 proper water foundation item, expanding a double sided water foundation (reinforced one) requires two.
Reinforcing
Reinforcing a water foundation means making it double sided - so it fully covers the soft side AND gives you the ability to build from the surface down, to the seabed/lakebed! To reinforce, make sure a built water foundation is fully repaired, and them hit it with a hammer. If you have a required water foundation item in your inventory, it will be consumed and the foundation will be reinforced: you will see another floor with floatation barrels attached upside down. If you try to expand a reinforced foundation (by attaching a floor at the bottom, reinforced side) and there's no water foundation above it (normal orientation), it will try to create one, provided you have enough items in your inventory. Reinforcements (upside down water foundations) are always associated with the water foundation they're attached to and cannot exist on their own - if you destroy the water foundation, its reinforcement will be destroyed too. However, destroying the reinforcement will not destroy is water foundation.
Upgrading Water base structures
Building blocks inside your water bases have certain tier limits associated with them - it's to help balance things out. By default, non-VIP and non-admin players will be able to upgrade water foundations to sheet metal tier, floor frames and wall frames to stone tier, and everything else (including walls, floors and reinforcement foundations) to wood tier. You can easily decide which permission profile has which max tier (per type of building block) in the config.
Water Base exclusive features
Because water foundations are treated as floors with the stability of a foundation, you can place roofs at "ground level", which is not possible with normal foundations! Similarly, you can leave a "hole" where a water foundation would be and place a floor frame with a hatch instead - now you can enter your base from the bottom, underwater! Reinforcing a water foundation means you'll be able to build down from the surface to the bottom of the water to create extra layers of protection, or... Nettings deployed in wall frames underwater will collect random junk items with editable loot tables, including fish and diving equipment! This feature is heavily configurable and can even be disabled. But also Sharks! Read just below.
NEW IN 1.0.5: Beware the Netting Sharks!
If enabled, Sharks will randomly spawn around Nettings underwater. Especially ones that have accumulated a lot of items, but only if there's at least 1 player within the distance of 100 meters from the Netting. As soon as the first item is caught in an empty Netting, a random silent timer will be set. Every additional item spawning reduces the timer left by a certain percentage (default by 8%). When it hits 0, AND local/global Netting Shark population limits haven't yet been reached (all in the config), a Shark will spawn somewhere near that Netting. The sharks have a configurable aggro distance and multipliers for speed and health. They will linger around the position of the netting that attracted them and try to pursue anyone in sight. Harvesting a Netting Shark corpse with a proper tool will yield some free items from its entrails - by default 5 times more than you'd normally get from a netting full of items from the default loot tables. Of course the default Shark loot tables in the config are, just like the Netting loot tables, completely configurable - check the config section below.
All in all, it's like any other base... just on water, without annoying seafloor supports.
The stability of the water foundation is always 100% and goes down the higher you built. The stability of a reinforcement foundation also starts at 100% and goes down the deeper towards the seafloor you build. All the decaying things (walls, floors, doors etc) will require appropriate upkeep materials in the Tool Cupboard. Structures can be repaired, demolished, upgraded and removed using plugins. Bases can be raided, taken over or left to decay.
Water Bases Permissions (Oxide.Grant user YourName [permission name starting with waterbases.])
By default, the plugin generates 3 permission profiles in the config - one for admins, one for normal players with no specific permissions (default) and one for VIP. More on permission profiles and config values they can handle can be found in the section Advanced Config. Unless you have added more permission profiles, only these two below are going to be used by your config:
waterbases.admin
Holders of the admin permission will also be able to run the /wb_cfg, /give_square and /give_triangle commands. Also, by default, they will be associated with the permission profile that has no limits on placing water foundations.
waterbases.vip1
Holders of this permission will follow settings and limits associated with with that permission profile. The permissions below are also registered, but not used by default. To use them, just create some permission profiles with those permissions as the key.
waterbases.vip2 waterbases.vip3 waterbases.vip4 waterbases.vip5
Admin chat commands (must have ownerid/moderatorid/waterbases.admin permission)
/give_square [optional arg: amount of items to receive] Will give the player a given amount of square-shaped water foundations. If no amount is provided, only 1 will be received. /give_triangle [optional arg: amount of items to receive] Will give the player a given amount of triangle-shaped water foundations. If no amount is provided, only 1 will be received. /draw_cargo This will draw a "bubble" (only for you, not every player) around every path node, and the bubble's radius will be taken from your config. If a player tries building inside one of these bubbles, they might get a warning or get prevent from doing so (because cargo ship destroys all structures in its way). Useful to visualise where your players can and cannot build, based on the cargo ship path. /shore_distance This will show you the current distance from the shore, to help you decide how close to/far from the shore to allow players to build. The unit used by Rust to measure shore distance is not in meters, it's something roughly equivalent to 1/10th of a map grid length. Mind you though, it's based off of the map's topology, so it should be fine on procgens, but if you have a custom map without topology layers reflecting the actual shoreline, you might want to disable relying on shore distance in your config. Admin console / chat command
This command will work both from the chat (in that case, prefix it with a forward slash / ) and the console, (F1 or server/RCON console). Running this command as a player will require the waterbases.admin permission for players that are not moderatorid/ownerid enabled.
wb.give [square/triangle] [partial player name or full steam ID] If a player executes it in the chat or console in-game and they don't specify a recipient, it will be given to the player executing this command. Executing from the server console requires specifying the player.
Configuration (oxide/config/WaterBases.json and /wb_cfg chat command)
Vast majority of the settings can be configured with the /wb_cfg chat command. Typing it in the chat with no parameters should dump a rundown of config fields and their values. In order to run any of the config commands, you will need to have ownerid or moderatorid (or the waterbases.admin permission).
/wb_cfg RelyOnShoreDistance [logical values (true or false)] /wb_cfg GlobalOceanLevelCheckBeforePlacing [logical values (true or false)] /wb_cfg GlobalOceanLevelBaseline [fractions (like 1.2345) between -1000.00 and 1000.00] /wb_cfg CargoShipPathHandling ["Warn", "Prevent" or "None"] /wb_cfg MinDistanceFromCargoShipNode [fractions (like 1.2345) between 0.00 and 10000.00] /wb_cfg UnderwaterNetsCollectJunk [logical values (true or false)] /wb_cfg UnderwaterNetsRandomTimerMin [fractions (like 1.2345) between 0.00 and 10000.00] /wb_cfg UnderwaterNetsRandomTimerMax [fractions (like 1.2345) between 0.00 and 10000.00] /wb_cfg UnderwaterNetsItemLimit [integers (like 12345) between 0 and 100] /wb_cfg UnderwaterNetsSpawnSharks [logical values (true or false)] /wb_cfg UnderwaterNetsSharkRandomTimerMin [fractions (like 1.2345) between 1.00 and 100000.0] /wb_cfg UnderwaterNetsSharkRandomTimerMax [fractions (like 1.2345) between 1.00 and 100000.0] /wb_cfg UnderwaterNetsSharkTimerShortenByPercent [fractions (like 1.2345) between 1.00 and 100000.0] /wb_cfg UnderwaterNetsSharkSpawningMinDistance [fractions (like 1.2345) between 2.00 and 100000.0] /wb_cfg UnderwaterNetsSharkSpawningMaxDistance [fractions (like 1.2345) between 2.00 and 100000.0] /wb_cfg UnderwaterNetsSharkPopulationLimitLocal [integers (like 12345) between 0 and 1000] /wb_cfg UnderwaterNetsSharkPopulationLimitGlobal [integers (like 12345) between 0 and 1000] /wb_cfg UnderwaterNetsSharkSleepDespawnTimer [fractions (like 1.2345) between 2.00 and 100000.0] /wb_cfg UnderwaterNetsSharkHealthMultiplier [fractions (like 1.2345) between 0.001 and 100.0] /wb_cfg UnderwaterNetsSharkSpeedMultiplier [fractions (like 1.2345) between 0.001 and 100.0] /wb_cfg UnderwaterNetsSharkAggroRange [fractions (like 1.2345) between 0.001 and 100.0] /wb_cfg SharkHarvestingLootEnabled [logical values (true or false)] /wb_cfg GuiNEW1AnchorMinX [fractions (like 1.2345) between 0.00 and 1.00] /wb_cfg GuiNEW2AnchorMinY [fractions (like 1.2345) between 0.00 and 1.00] /wb_cfg GuiNEW3AnchorMaxX [fractions (like 1.2345) between 0.00 and 1.00] /wb_cfg GuiNEW4AnchorMaxY [fractions (like 1.2345) between 0.00 and 1.00] /wb_cfg GuiNEW5OffsetMinX [fractions (like 1.2345) between 0.00 and 1.00] /wb_cfg GuiNEW6OffsetMinY [fractions (like 1.2345) between 0.00 and 1.00] /wb_cfg GuiNEW7OffsetMaxX [fractions (like 1.2345) between 0.00 and 1.00] /wb_cfg GuiNEW8OffsetMaxY [fractions (like 1.2345) between 0.00 and 1.00] /wb_cfg GuiTextSize [integers (like 12345) between 0 and 100] /wb_cfg GuiButtonColor [hexadecimal numbers WITHOUT preceding # (like 3db4b3)] /wb_cfg GuiTextColor [hexadecimal numbers WITHOUT preceding # (like 3db4b3)] /wb_cfg GuiButtonAlpha [fractions (like 1.2345) between 0.00 and 1.00] /wb_cfg GuiTextAlpha [fractions (like 1.2345) between 0.00 and 1.00] /wb_cfg EnableBarrelEntities [logical values (true or false)]
Advanced config (only editable through oxide/config/WaterBases.json) Water foundation crafting cost
Here you can adjust how much it costs to craft water foundations. Make it more expensive, less expensive, or add/remove required materials. The cost will stay the same for all permission profiles. A full list of short names for items can be found at https://www.corrosionhour.com/rust-item-list/
"CraftingCostSquare": [ { "Shortname": "wood", "Amount": 100 }, { "Shortname": "metal.fragments", "Amount": 200 } ], "CraftingCostTriangle": [ { "Shortname": "wood", "Amount": 50 }, { "Shortname": "metal.fragments", "Amount": 100 } ], Shortname should belong to one of the available items in-game. The amount should be a whole number larger than 0 and smaller than the limit of a signed 32-bit integer (2 147 483 647).
Permission profiles
Using profiles you can quickly create/edit different permissions for different players, for example, if you have more than 1 VIP tier on your server - just add some new profiles. Different players can have different limits and permissions associated with building water bases. To check which permission profile the player should fall under, the plugin goes through all permission profiles and checks whether the player has that permission granted. The permissions are checked in order, meaning that if the player doesn't have the first permission, it will try the next permission on the list, etc (similar to how Auto Kits checks which kit to give to a player based on their permissions in order). If the player doesn't have any permissions from the list granted, they will fall back to the "default" profile. That's the only one that you shouldn't remove! If you remove it, a new one with default values will be created. So if you don't want your default, non-VIP players to build water bases, don't remove the default profile, just take away privileges in that profile (like deploying/expanding/reinforcing). You don't have to use the built-in VIP permissions - any permission from any plugin will do just fine! By default, three permission profiles are generated in the config: default, waterbases.admin and waterbases.vip1. The default permission profile will apply to any player who doesn't have any permissions listed in the profile list - let's have a look at it:
"PermissionProfiles": { "default": { "PermissionRequired": "default", "MaxBuildingGradeGeneric": "Wood", "MaxBuildingGradeFrames": "Stone", "MaxBuildingGradeWaterFoundations": "Metal", "WaterDepthMin": 2.0, "WaterDepthMax": 100.0, "MaxWaterFoundationsPerBuilding": 25, "MinDistanceFromOilrig": 200.0, "MinDistanceFromShore": 2.0, "MaxDistanceFromShore": 20.0, "CanDeployWaterFoundations": true, "CanReinforceWaterFoundations": true, "CanExpandWaterFoundations": true, "CanExpandReinforcedFoundations": true, "CanCraftWaterFoundations": true, "RequireMaterialsForCrafting": true, "WorkbenchLevelRequired": 2.0, "CanDeployUnderwaterNets": true, }
PermissionRequired should contain an already existing permission registered by any plugin in the form of pluginname.permissionname MaxBuildingGradeGeneric, MaxBuildingGradeFrames andMaxBuildingGradeWaterFoundations define the highest allowed grade for a particular part of a water base. Generic means anything that's not a water foundation or a door/floor frame (that includes normal floors, walls, half walls, and inverse foundations). For those 3 settings, the accepted options are "Twigs", "Wood", "Stone", "Metal" or "TopTier". Set all of them to "TopTier" if you don't want any tier limits on water bases. WaterDepthMin and WaterDepthMax define the allowed range for water depth when placing water foundations - to make sure that certain players are not building in water that is too shallow/too deep. The unit meters. MaxWaterFoundationsPerBuilding is what it sounds like it will prevent a player under this permission profile from adding more water foundations to a water base, limiting their size. Set to a large value like 100000 for virtually no limits. MinDistanceFromOilrig will define the minimum distance from the closest oilrig (in meters) that has to be respected before placing a water foundation down. Decrease to let players build closer, increase to make them build farther away. MinDistanceFromShore and MaxDistanceFromShore both rely on your map topology. If you're sure that you're quite close to the shore, but the /shore_distance command shows you ridiculous values, it means your map does not have the topology map painted properly (contact the map dev and let them know!). In that case, you should set the RelyOnShoreDistance option in the config to false and instead rely on water depth (if shore distance is enabled, it will rely on both). The unit here is not a meter, but roughly 1/10th of a map grid (around 15 meters). CanDeployWaterFoundations if set to true, will allow players using this profile to deploy newly started foundations (using the doughnut guide, provided they have a properly shaped water foundation item to be consumed). CanReinforceWaterFoundations if set to true, will allow players using this profile to reinforce water foundations by hitting them with a hammer (provided they have a properly shaped water foundation item to be consumed). CanExpandWaterFoundations if set to true, will allow players using this profile to build more water foundations upon already existing ones by placing neighboring floors with their building plan (provided they have a properly shaped water foundation item to be consumed). CanExpandReinforcedFoundations if set to true, will allow players using this profile to attach a floor to the side of a reinforcement foundation - and as long as they have 2 water foundation items in their inventory, they will expand that reinforced foundation along with its water foundation. CanCraftWaterFoundations if set to true, will allow players using this profile to craft water foundations using a GUI in the bottom-right (showing while a Building Plan is equipped). Profiles with this setting set to false won't display those GUIs and players will have to find other ways of obtaining water foundations (loot, kits, server rewards etc). RequireMaterialsForCrafting if set to true, players using this profile will need to have required crafting materials in their inventory when trying to craft a Water Foundation. If set to false, the player will be able to craft an infinite amount of water foundations for free, so use them with caution. WorkbenchLevelRequired Set to 0.0 (no workbench nearby required), 1.0 (Level 1 required), 2.0 (Level 2 required) or 3.0 (Level 3 required) for crafting Water Foundations. CanDeployUnderwaterNets if set to true, players will be able to deploy nettings in underwater wall frames. Those settings will slowly accumulate underwater junk items if the feature is enabled on your server - look below for the loot table configuration.
Underwater junk & Netting Shark loot tables
If you have not disabled underwater nets collecting junk, this is where you can adjust the kind and rarity of certain items. You can even remove entries and add your own, including a custom skin and item name! A "loot table" is perhaps not the right term, as the list contains individual chances of a "caught" item being of a particular kind. There can be only 1 item caught at a time, and the table defines random weights for every possible entry. The larger the weight (compared to the sum of all weights), the bigger chance of encountering a particular item. So if you have 10 entries and each of them have a weight of 1, each item will have an equal 10% chance of being one of the random entries in the list (as the weights sum up to 10). Thus you can have some items really common, and some of them really rare. Here are 2 sample entries from the list:
{ "Shortname": "innertube", "CustomName": null, "SkinID": 2484982352, "RandomChanceWeight": 1.0, "MinRandomAmount": 1, "MaxRandomAmount": 1 }, { "Shortname": "innertube", "CustomName": null, "SkinID": 2485021365, "RandomChanceWeight": 1.0, "MinRandomAmount": 1, "MaxRandomAmount": 1 },
Shortname is the most important bit - make sure it's correct! You can find a link to a full list of those names above. CustomName lets you give items caught in the netting different names. You can leave that null to leave a default item name. In this example, the two items are water foundations - the proper name for those items will be applied automatically by the plugin anyway. Whatever you type there, make sure to encompass it in quotes, like "CustomName": "My Custom Item Name" if it's not null! SkinID is pretty self-explanatory - it's the long number in the URL of a Steam Workshop item. By default, it's 0 (no skin). RandomChanceWeight lets you decide the item's rarity when spawning - relative to the rarity of other items. Increase or decrease this number (it can be fractional) to make the item more or less rare. MinRandomAmount and MaxRandomAmount are what they sound like - they should both be larger than 0 (whole numbers) and when that particular item is caught, the stack will contain an amount between these two numbers.
Translation support (oxide/lang/en/WaterBases.json)
Almost every string the players see, including names for the water foundation items and messages displaying in the chat and the GUI, can be edited. Just load the plugin and let it generate the file - after you edit it, reload the plugin.
-

$21.00$16.80NpcRaiders
They will raid your base tell they find the tc or the time set in the config runs out or you kill all npc waves.
Only People authorized on the tc they are going after can kill the npc and only the npc can attack them.
You can use kits plugin from umod to kit them with clothing and guns See config example below.
Perms are set in config per raid type.
Permissions
npcraiders.use - Needed to use /raidme chat command.
npcraiders.admin - Needed to use /raidme reload chat command.
npcraiders.nocooldown - Disable the setting of your cooldown.
npcraiders.nocost - Disable the being charged.
Chat Command
/raidme - Will show raid help menu.
/raidme buy - Will show raid buy help menu and costs.
/raidme buy <type> - To start raid of the type.
/raidme reload player <playerName> = Will cancel there raid event.
/raidme reload all - Will cancel all events.
/raidme terrain - Get Terrain name your standing on.
/raidme loot - Generate a loot profile with all the items in your inventory
Loot Profiles
/raidme loot add <profileName> - Create or add more items to a profile
/raidme loot clear <profileName> - Clear all information from a profile
When you create a loot profile you will need to edit its datafile and set the min and max amount of items to give.. There you can change other min/max for item ammounts default is 1 to Amount when created
Config BuyType
ByTypes can be "Itemid" , "ServerRewards", or "Economics"
Default is scrap "-932201673"
Config.RewardType
RewardType can be "Itemid" , "ServerRewards", "Economics" , or "kit"
Config.AutoTurretDamage
"AutoTurretDamage": 0.0 - Disable targeting the npc.
"AutoTurretDamage": 1.0 - Full damage to the npc / Range is 0.0 to 1.0.