
Xenia87's Wishlist
-
$21.99$17.59CustomMedical
🧪 CustomMedical Take control of how medical items work on your server! CustomMedical lets you turn syringes, bandages, largemedkit item into fully customized healing kits — with configurable boosts, usage limits, permissions, timed effects, commands, and even loot drops. Perfect for RPG-style servers, PvE heal systems, and VIP reward kits.
✨ Features Unlimited customization: Rename syringes/bandages/largemedkit, give them custom skins, and show [Uses:X] right on the item. Usage limits: Configure how many times each item can be used before it’s consumed. Boost system: Add health, hydration, calories, comfort, or radiation effects — with optional timers and automatic reset. Status UI integration: Show a live “Medical Time” bar via SimpleStatus (optional dependency). Timed permissions: Grant temporary permissions or groups on use with TemporaryPermissions (optional dependency). Commands on use: Run one or multiple chat/console commands when the item is used. Loot integration: Configure loot crates, heli crates, and Bradley crates to spawn your custom items at custom rates. Anti-stack protection: Prevents players from stacking custom medical items (no “dupe” exploits). Prefix & color customization: Fully configurable chat prefix with color tags.
🎥 Showcase Video
💬 Commands /givesyringe <id|name> [amount] → Give yourself a configured medical item. /givesyringe <player> <id|name> [amount] → Give a configured item to another player. (Also available as console command givesyringe.)
📁 Example Configuration
🔑 Permissions custommedical.admin → Allows use of /givesyringe and console give commands. You can define per-item permissions in the config (e.g., custommedical.vipheal), then grant them with oxide.grant user <name> custommedical.vipheal.
🎯 Why Choose CustomMedical? Because sometimes vanilla healing just isn’t enough. This plugin gives you full control — from simple rebalanced syringes to complex RPG-style healing kits with timed buffs, effects, and rewards. -
$49.99
Shoppy Stock
By ThePitereq in Plugins
RUST Plugin Test Server
TEST MY PLUGINS THERE!
connect play.thepitereq.ovh:28050
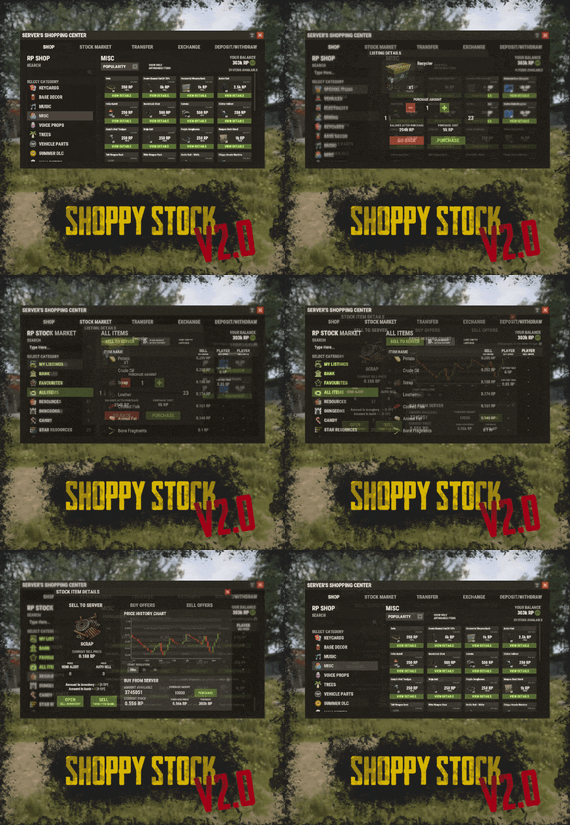
Shoppy Stock is a powerful and versatile economy system designed to enrich your Rust server with shops, stock markets, transfers, exchanges, and deposit features.
This plugin makes it easy to create multiple shops with unique currencies, set up dynamic stock markets with item listings, and manage a fully customizable server selling center—plus many more advanced options.
Plugin package (zip) contains:
ShoppyStock plugin ShoppyConverter plugin (Converts 1.x config to 2.0 config)
Global
Includes over 17 detailed Rust-themed GUI windows. Optimized for performance—actions are lightweight and won’t burden your server. Highly expandable, limited only by your imagination. Fully customizable popup messages through the PopUp API. Comprehensive command and API support for currency management. Full language support for all messages and items. Supports NoEscape integration. Complete UI color customization. NPC interaction support for shops and stock markets. Page memory feature remembers your position in the shop when reopened. Deposit and withdraw currencies to and from items. Currency exchange between different types. Built-in currency leaderboard. Shops
Create multiple shops, each using different currencies. Easily import your old currency from other economy plugins. Organize items into categories with custom icons for seamless browsing. Unified search bar across all categories. Buy exactly the amount of items you need. Full custom item support. If currency is item-based, allow deposits into the shop as virtual currency and withdrawals back to items. Granular permission system configurable for each action. Daily or wipe purchase limits. Purchase cooldowns. Configurable discount system. Random offer rotations with customizable listings. Progressive pricing — prices can increase by set values or multipliers on each purchase. Stock Market
Create multiple markets with different currencies. Favorite items tab for quick access. Automatic listing of all vanilla Rust items with blacklist support. Multiple sorting options for better market management. Buy and sell request creation. Configurable server sell price history. Permission-based limits on how many listings each player can create. Listings can be canceled, refunded, or returned to the market at no cost. Customizable taxes on market actions. Support for extra item info like durability and plant genes. Timed price rolls to adjust prices at set hours. Demand-based pricing that adjusts based on item popularity (DiscordCore required for messages). Advanced selling center with a price calculator using over 15 variables (e.g., amount sold, online player count). Stock Market Broker system—players can store or refund items, set alert prices, and even auto-sell resources while offline. Custom categories and full custom item support. Web API support for price checks or integration into server tools (requires web server). Statistics module for fine-tuning your economy. Timed listings with configurable availability durations. Ability to buy back resources sold to the market. Listing taxes based on listing time. Dynamic price history graphs. Individual configuration for server buy/sell offers per item. Generation of historical price data. Transfer
Send currencies to other players, whether they’re online or offline. Configurable transfer limits and taxes.
The following core permission is static and cannot be changed. However, the configuration files include hundreds of customizable permissions covering nearly every action.
shoppystock.admin - Grants full access to admin commands and management tools.
All commands can be fully customized in the configuration. Below are the default commands included with the plugin:
/shop or /s — Opens the main Shoppy Stock interface. /adminshop — Opens the admin shop management panel. (Available in version 2.1) /deposit — Opens the currency deposit inventory. /mshop or /goldshop — Opens a specific shop. /market — Opens the stock market interface for a specific currency (defaults to “money”). /sell — Opens the sell inventory to sell items directly to the server (defaults to “money”). /list — Opens the interface to list a new item on the stock market (defaults to “money”). /bank — Opens the bank interface for a specific stock market (defaults to “money”). /stockcode <code> — Displays a private listing using a code shared by the listing owner. updateprices — Console command showing details on rolling or updating item prices in the stock market.
Shoppy Stock is packed with powerful features, and configuring everything the first time can feel overwhelming.
This guide provides a quick walkthrough to help you get started and understand key parts of the plugin.
Optional Supported Currency Plugins
Economics ServerRewards BankSystem IQEconomic
Moving from V1 to V2.
Shoppy Stock V2 has been almost completely rewritten from scratch, reusing less than 10% of the old code.
The new configuration is redesigned to be more intuitive and feature-rich.
To help you migrate, use the provided ShoppyConverter, which can convert about 95% of your old configs and data files to the new format.
After converting, always review your new configs carefully — V2 includes dozens of new options that won’t automatically adjust to your preferred settings.
How to convert:
Place ShoppyConverter.cs in your plugins folder. Follow console instructions to move files to the required location. Run the conversion command as instructed. Once converted, place the new files in the correct folders as indicated.
Configuration Files
The plugin’s extensive features are divided across several files and folders:
/config/ShoppyStock.json
Main config containing default settings for currencies, shops, stock markets, and global options. /data/ShoppyStock/playersData.json
Stores global plugin data and player currencies. /data/ShoppyStock/Shops/Configs/<shopName>.json
Shop configs, including available categories and items. /data/ShoppyStock/Shops/Statistics/
Data on daily limits, unique purchases, and more. /data/ShoppyStock/StockMarkets/Configs/<stockName>.json
Stock market configs. /data/ShoppyStock/StockMarkets/Listings/
Player buy and sell offers. /data/ShoppyStock/StockMarkets/PlayerData/
Alert data, favorites, banked items, etc. /data/ShoppyStock/StockMarkets/PriceCache/
Historical price data and current server sell prices. /data/ShoppyStock/StockMarkets/Statistics/
Data on items sold to the server and total currency earned.
Main Config Highlights
Web API
You can use the Web API to show market prices on your website.
Requires web hosting with PHP support.
Download apiupdate.php by CLICKING HERE.
Place it in the directory set by your “Web Price API - Link” config.
Make sure it has permission to create api.html.
The generated file will be accessible at <Web Price API - Link>/api.html.
Server-Selling Items → Default Sell Amount Calculation (DSAC)
DSAC helps define the average number of items sold in a period, based on your server’s player activity. The period is an one price roll time.
Example: a PvE x10 server with ~20–30 players might set wood’s DSAC to 1,800,000 — based on my some calculations, but adjust based on your own stats and server needs.
Always Run Timer on Hour Minute
Controls when the plugin rolls stock prices.
For example:
Values: 0, 30, 60 → rolls at x:00 or x:30. Values: 0, 20, 40, 60 → rolls at x:00, x:20, or x:40.
Stock Market - Default Categories
By default, the stock market includes these categories:
Favourites MyListings Bank AllItems Use these codenames in your configs to customize display order.
Stock Market Item Text Info Display Method
If your server supports item.text, you can toggle this option to show listed item text info.
Currently plugin supports two ways of displaying data. You can enable them based on the config number:
0 - Disabled 1 - Reads raw item.text field and shows on screen 2- Reads item.text as Dictionary<string, string> and supports key translation, currently experimental. If your plugin works on item.text info and any of the solutions above doesn't fit you, feel free to message me to create another implementation!
Items - Custom Detail Info (skinId: languageKey)
You can add custom info tags in listings (similar to showing tool condition or clone genes).
For example, tag certain items as “Upgrade Ingredients.”
Redeem Inventory Name
Make sure to create a storage with this name in RedeemStorageAPI — otherwise, items from certain actions could disappear, and errors may occur.
Generating Shop Config With All Vanilla Items
To automatically add all vanilla RUST items to a shop:
In /config/ShoppyStock.json, set Generate Config With All Default RUST Items to true in the desired shop section. Delete the existing shop config file in /data/ShoppyStock/Shops/Configs/. Reload the plugin—this will generate a new config containing all default items.
Shop Data Config Highlights
Shop Items - Commands
Supports few types of dynamic variables in commands:
{userId} → buyer’s Steam ID {userName} → buyer’s nickname {userPosX}, {userPosY}, {userPosZ} → buyer’s coordinates
A collection of answers to common questions about demand systems, price multipliers, stock market trends, and developer API.
Multiplier Events & Demand System
Q: How does the demand system work? What is “weight”?
A: The demand system uses “Multiplier Events” defined in the main config. Each event has a weight that determines its chance to be chosen during a price roll. How often demands appear is configured in your stock market file at: /data/ShoppyStock/StockMarket/Configs/<shopName>.json. Make sure names in the main config and stock market config match exactly.
Q: How do “minimal” and “maximal” work?
A: These define a range for random price multipliers.
Example: if minimal is 1.4 and maximal is 1.8, and the original price is 1.4, the final rolled multiplier might be ~1.685 → final price becomes ≈ 2.359.
If the random roll goes above max or below min, it’s clamped to min/max.
Stock Market - Timestamps & Trends
Q: What are timestamps used for?
A: The plugin stores historical price data which appears in charts for players with the correct permission.
Tip: set a reasonable timestamp retention value even if you don't plan to show players now—this lets you start collecting useful data early.
Data Folder, Stock Market Config
Q: Blocked Multiplier Listing Keys
A: Certain items you want excluded from permission price multipliers.
Price Calculator
Q: Price Change - Price Fluctuation Percentage
A: Adds random small price changes to keep the market realistic when no other events run.
Q: Price Change - Same Price Actions Min/Max
A: Controls how many rolls prices must go up or down in sequence, making trends look more natural.
Q: Price Change - Chances To Increment Based On Current Price Percentage
A: It's the chance to run the action listed above. It's made in "<price percentage>": <price increase chance (percentage)> format. It's made to make prices go higher more easily when they are low and harder when they are high.
Q: Price Drop - Amount Sell Values Penalty Multiplier
A: When many items are sold fast, price roll becomes negative × penalty multiplier, making it drop quicker.
Q: Price Drop - Amount Sold Max Price Penalty
A: If a huge amount of an item (e.g., 10000% of DSAC) is sold, price is locked to e.g., 25% of original value for a period (e.g., 24 price rolls).
Q: Price Increase - DSAC Not Achieved
A: When item demand is too low (<100% DSAC sold), price increases faster to encourage farming, e.g., by x1.5.
Q: Default Sell Amount Calculation - Players Online Multiplier
A: Automatically scales DSAC based on current player count (checked each price roll). Useful if online population varies greatly.
Q: Price Multipliers - Minimal Time Distance Between Events
A: Sets a cooldown between multiplier events to avoid price spikes.
Q: Price Multipliers - Chance To Appear Based On Sold Amount
A: Lets multipliers trigger more often when few or many items are sold.
Q: Price Multiplier Events
A: Defines how many price rolls the price-increase/decrease event should last.
Server Sell Items
Q: What is the price parent system?
A: Lets you set base items (e.g., Metal Ore) and refined items (e.g., Metal Fragments) so that fragments always stay more valuable than ore by a set difference, encouraging refining.
int GetCurrencyAmount(string shopName, BasePlayer player) - Returns player's balance rounded down to integeer. If not found returns 0. int GetCurrencyAmount(string shopName, ulong userId) - Returns player's balance rounded down to integeer. If not found returns 0. float GetCurrencyAmountFloat(string shopName, BasePlayer player) - Returns player's balance. If not found returns 0. float GetCurrencyAmountFloat(string shopName, ulong userId) - Returns player's balance. If not found returns 0. bool TakeCurrency(string shopName, BasePlayer player, int amount) - Takes player currency. Returns true if taken and false if not. bool TakeCurrency(string shopName, BasePlayer player, float amount) - Takes player currency. Returns true if taken and false if not. bool TakeCurrency(string shopName, ulong userId, int amount) - Takes player currency. Returns true if taken and false if not. bool TakeCurrency(string shopName, ulong userId, float amount) - Takes player currency. Returns true if taken and false if not. void GiveCurrency(string shopName, ulong sellerId, int amount) - Gives player currency. void GiveCurrency(string shopName, ulong sellerId, float amount) - Gives player currency. string FormatCurrency(string shopName, BasePlayer player) - Returns player's formatted balance.
Video Configuration
Contains all configuration files shown on video.
My private configuration created for my purposes.
Note: many custom item features won’t work directly on your server—they're specific to the author’s private setup.
Example Configuration.zip
Default Main Config
CLICK HERE!
Default Shop Data Config
CLICK HERE!
Default Stock Market Data Config
CLICK HERE!
-
$41.95$31.95OPERATION FORTRESS
Introducing OperationFortress, the ultimate PvE base assault event plugin for Rust servers! Experience intense tactical combat as you and your team infiltrate a heavily fortified enemy base at the Airfield monument. With dynamic NPC encounters, strategic tower captures, and epic boss battles, OperationFortress delivers an immersive military operation experience that will challenge even the most skilled players.
⭐ Features of Operation Fortress
Epic Base Assault: Infiltrate a heavily fortified enemy base at the Airfield monument with multiple defensive towers and strategic positions. Dynamic Tower System: Capture 6 strategically placed guard towers, each with unique NPC defenders and electric switches to disable the base's security system. Intelligent NPC Combat: Face off against elite enemy forces with advanced AI, including snipers, assault troops, machine gunners, and grenadiers. Boss Battle: Confront the powerful "Fortress" commander in the main base with enhanced health and elite weaponry. Reinforcement System: Experience dynamic combat as enemy reinforcements spawn after capturing towers, adding intensity to the operation. Rich Loot System: Collect valuable rewards from captured towers, defeated NPCs, and the commander's personal safe. PvE Mode Integration: Seamless integration with PvE mode systems for fair loot distribution and team-based gameplay. Customizable Difficulty: Adjust the number of required towers to access the main base, event duration, and NPC configurations. Visual Markers: Clear map markers show tower status, base location, and event progress for easy navigation. Automatic Scheduling: Set up automatic event scheduling with customizable intervals and preparation times. Team Support: Full support for team-based gameplay with shared loot rights and coordinated assaults. Performance Optimized: Efficient NPC spawning and cleanup systems ensure smooth gameplay even with large player bases.
📊 Event Overview
Operation Fortress transforms the Airfield monument into a hostile military installation controlled by the "Fortress" faction. Players must work together to:
Capture Guard Towers: Infiltrate and secure 6 strategically positioned guard towers, each defended by elite NPC forces. Disable Security System: Activate electric switches in captured towers to disable the base's security system and gain access to the main facility. Assault Main Base: Breach the heavily fortified main base located in one of the Airfield's large hangars. Eliminate Commander: Face off against the powerful "Fortress" commander and his elite bodyguards in an epic final battle. Secure Rewards: Collect valuable loot from defeated enemies, captured positions, and the commander's personal safe.
🖼️ Showcase
🎮 Commands
operation.start - Manually start the Operation Fortress event (requires admin permissions) operation.stop - Stop the current Operation Fortress event (requires admin permissions)
🛡️ Permissions
operationfortress.start - Permission to start Operation Fortress events operationfortress.stop - Permission to stop Operation Fortress events
📚 FAQ
Q: Can players use their own weapons and equipment?
A: Yes! Players use their own weapons, armor, and equipment during the event. No special gear is provided, making it a true test of player preparation and skill.
Q: How does the loot system work?
A: Loot is collected manually from defeated NPCs, captured towers, and the commander's safe. The PvE mode integration ensures fair loot distribution among team members based on damage contribution.
Q: Can the event be played solo?
A: Yes! The event is designed to scale with player count. Solo players can complete the operation, though it will be more challenging. Team play is recommended for optimal experience.
Q: How often does the event occur?
A: The event can be configured to run automatically at customizable intervals, or it can be started manually by administrators using the provided commands.
Q: What happens if players fail to complete the event?
A: If the event timer expires or all players are eliminated, the event ends automatically. Players can attempt the operation again when it becomes available.
Q: Does the event interfere with other Airfield activities?
A: The plugin includes options to disable other NPCs and events at the Airfield during Operation Fortress to prevent conflicts and ensure smooth gameplay.
Q: Can I customize the NPC types and weapons?
A: Yes! The plugin includes extensive NPC configuration options, allowing you to customize health, weapons, behavior patterns, and reinforcement types for each tower and the main base.
Q: How does the PvE mode integration work?
A: The plugin integrates with PvE mode systems to ensure fair loot distribution among team members. Players who contribute more damage to NPCs have priority access to loot, while still allowing team coordination.
📡 Plugin Integration
OperationFortress is designed to work seamlessly with other popular Rust plugins:
PvE Mode: Full integration for fair loot distribution and team-based gameplay NpcSpawn: Utilizes advanced NPC spawning and AI systems for realistic enemy encounters Notify/UINotify: Integrated notification system for event announcements and player updates BetterNpc: Compatible with enhanced NPC systems for improved AI behavior MonumentOwner: Integration with monument ownership systems for enhanced gameplay
🧪 TEST SERVER
Join our test server to experience Operation Fortress firsthand!
Copy the IP Address below to start playing!
connect 155.103.86.38:28015
🛠️ API / Hooks
OnOperationFortressStart()
Triggered when the Operation Fortress event starts. OnOperationFortressStop()
Triggered when the Operation Fortress event stops (ends or is canceled). OnOperationFortressEnter(BasePlayer player)
Triggered when a player enters the event zone. OnOperationFortressLeave(BasePlayer player)
Triggered when a player leaves the event zone or dies inside it. OnOperationFortressWin(BasePlayer player)
Triggered when the boss is defeated and the victory chest is opened. player is the boss killer/owner.- #event
- #rust event
- (and 1 more)
-
$24.99
Skinner
By Whispers88 in Plugins
Premium Item Skinning · Oxide + Carbon SKINNER v3.1.6 Skin every item like it’s worth keeping — 60x faster, 200x leaner.
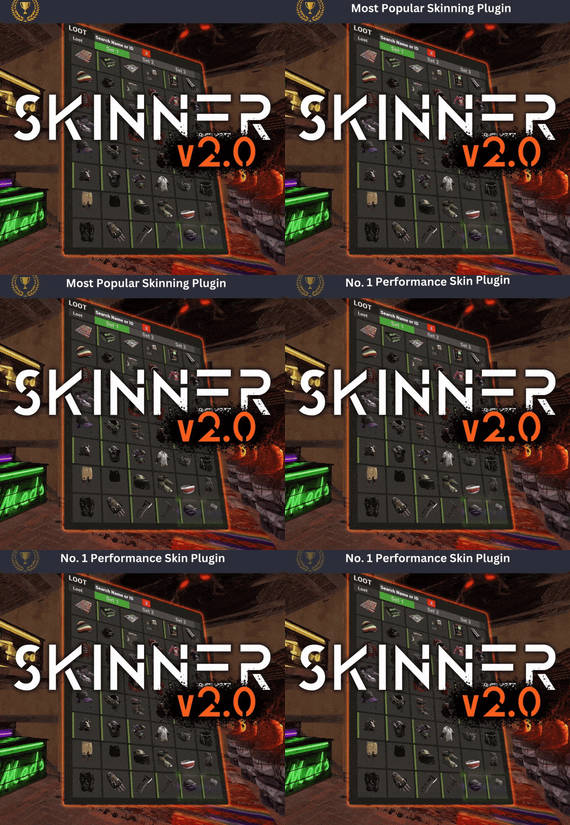
The unrivalled no.1 performance skinning plugin. Skin any item in the game with a unique skinbox — live skinning, auto skinning, and skin sets.
The numbers, not the noise Measured, not marketed
Skinner 2.0 delivers unrivalled efficiency. In standard testing versus the closest performing plugin, runtime was 60x faster and memory use 200x more efficient.
What’s new in 3.0 Skinner 3.0 is here — a full visual overhaul with dynamic, permission-based UI menus.
✓Visual overhaul with dynamic, permission-based UI menus ✓Automatic skin filtering and dev modes for the new TOS ✓Permission-based skin sets ✓Team-share skins ✓Auto-unlock owned skins Features Everything skinner does
Live skinning Skin items in place without moving them. Auto import Automatically import and use all game-approved skins. Skin sets Create a variety of skin sets for any item. Skin requests Players request skins; admins approve them in game. Auto skins Apply selected skins to every item that enters your inventory. Team share Skin your whole team’s inventory from your own sets. See it running Live demo
Live-skin any item in your inventory. Skin deployables you’re looking at. Commands Every command
Skin menu
/skin /s, /skinbox, /sb Live-skin any item in your inventory by picking a skin. /skincraft /sc Build skin sets used by the auto, team, and base commands. /skinitem /si, /skindeployed, /sd Skin a deployable you are looking at. Args: 1, 2 or 3 to use a skin set. Automatic
/skincon /scon Skin every item in the container you are looking at. Args: 1/2/3 (optional). /skininv /sinv Skin every item in your inventory. Args: 1/2/3 (optional). /skinauto /sauto Auto-skin every item as it enters your inventory. Args: 1/2/3 (optional). /skinteam /st Skin your inventory and your team’s. Args: 1/2/3. Use /skinteam toggle to opt in or out. /skinbase /skinbuilding Skin all deployables in your base. Args: item filter, e.g. /skinbase sleepingbag. /skinall /sa Skin all items in every container in your base. Args: shortname, e.g. /skinall rifle.ak. /skinset /ss Set your currently selected skin set. Import & requests
/skinimport /sip Import a custom workshop skin. Args: WorkshopID, e.g. /skinimport 2397648701. /colimport /cip Import a workshop collection. Args: Collection ID, e.g. /colimport 2921147807. /skinrequest /sr Request a skin be added — shows in the requests box. Args: WorkshopID. /skinrequests /srs Open the approval box. Try = copy the item, Approve = add the skin, Deny = remove it. Permissions Grant exactly what you want
Player
skinner.default /skin skinner.items /skinitem skinner.craft /skincraft skinner.skinauto /skinauto skinner.skincon /skincon skinner.skininv /skininv skinner.skinbase /skinbase skinner.skinteam /skinteam skinner.skinall /skinall skinner.skinrequest /skinrequest Admin
skinner.import Enables /skinimport, /colimport, and /skinrequests. skinner.bypassauth Skips the building-auth check when using /skinitem. skinner.permskintry Enables Try in /skinrequests. Trying a skin copies the item — admins only. Auto-assigned
skinner.skinautotoggled A player disables skinauto. skinner.skinteamblock A player opts out of team skins. Cooldowns Grant skinner.<command><seconds> (e.g. skinner.default30) to enforce the cooldowns set in the config. No cooldown permission = no cooldown. If a player has several, the shortest wins. Importing skins Five ways to add skins
Via config Add workshop IDs to the Imported Skins List; reload and shortnames/display names auto-populate. Via collections Add whole workshop collection IDs; every skin imports automatically on load. Via commands /skinimport <WorkshopID> and /colimport <CollectionID> from chat, the F1 console, or RCON. Via skin requests Players /skinrequest; admins Try/Approve/Deny in the requests box. Requests log to a Discord webhook. From other plugins Convert data from SkinBox, xSkins, and SkinController with the SkinDataConverter tool, then paste into the config. Get the converter → Configuration Tune every behaviour
{ "Auto import approved skins": true, "Remove player data after inactivity (days)": 14, "Apply names of skins to skinned items": true, "Add Search Bar UI": true, "Override spraycan behaviour": false, "Use spraycan effect when holding spraycan and skinning deployables": true, "Blacklisted Skins (skinID)": [], "Blacklisted Items (itemID)": [], "Import Skin collections (steam workshop ID)": [], "Imported Skins List": { "861142659": {}, "2617744110": {} } } Developer API Hook into Skinner
A small, stable surface for reading the cached skin data and resolving redirect items from your own plugin.
//Get all cached skins public Dictionary<int, List<ulong>> GetAllCachedSkins() => _cachedSkins; //Check if a skin is a redirect item public bool IsRedirectID(ulong uID) => HasMask(uID); //Convert a redirect ID to its item ID public int RedirectIDtoItemID(ulong uID) => (int)UnsetMask(uID); //Get the list of skins for an item public List<ulong>? GetSkinsItemList(int itemid) { _cachedSkins.TryGetValue(itemid, out List<ulong>? cachedSkins); return cachedSkins; } Watch See Skinner in action
http://youtu.be/ewKlNILTwv8
Skin every item like it’s worth keeping.
The unrivaled no.1 performance skinbox for Rust — 60x faster, 200x leaner. Oxide + Carbon.
Join the Discord → Skinner v3.1.6 · by Whispers88 · Oxide + Carbon · 5/5 from 50 reviews · 69 versions · on Codefling since March 2022 -

$22.00
Abandoned Military Base Event
An exciting event at the desert military base. The essence of the event is to find the special explosive among the NPCs spawning in waves and use it to blow up the convoy consisting of three vehicles.
The plugin does not contain permissions.
RCON Commands:
amstart
amstop
Hooks:
void OnMilitaryBaseEventEventStart() void OnMilitaryBaseEventStop() Contact:
Additional free plugins created by me are available on Discord:https://discord.gg/C5CehdJMdK
Config:
{ "Version": { "Major": 1, "Minor": 0, "Patch": 0 }, "Automatic event start": true, "Minimum time for event start": 3600.0, "Maximum time for event start": 7200.0, "Duration of the event": 2800.0, "Warning messages before event start": 300.0, "Warning messages before event end": 300.0, "Chat icon": 0, "Chance that Convoy Killer C4 will drop from NPCs (Minimum 10% recommended) ": 30.0, "Convoy Killer C4 skinID:": 3587480685, "Convoy Killer C4 name:": "Convoy Killer C4", "Military detonator skinID:": 3588005672, "Military detonator name:": "Military Detonator", "Disable BetterNpc plugin npc's for the duration of the event?": false, "Messages setting": { "Use event message?": true, "Message before the event starts.": "Everyone be careful, the <color=#ff0000>Abandoned Military Event</color> is about to start.", "Warning message before the event stop.": "The Abandoned Military Event will end soon!!", "Use Game Tip?": true, "Game TIP message:": "Look for the <color=#f2D705>convoy killer C4</color> and the <color=#f2D705>miltary detonator</color> in the NPCs.", "GUI message": "Blow up the convoy with <color=#f2D705>Convoy Killer C4!</color>", "Message when someone event owner": "has become the owner of <color=#ff0000>Abandoned Military Event</color>!", "Start message": "<color=#ff0000>Abandoned Military Event</color> has started!!", "Stop message": "<color=#ff0000>Abandoned Military Event</color> end!", "Map marker name": "Abandoned Military Event", "Map marker radius": 0.6, "Color": { "r": 1.0, "g": 0.0, "b": 0.0 } }, "How many crates should fall out of the modular cars?": 3, "List of modulacar lootable crates": { "Are you deleting the original loot from the crate?": false, "Use custom loot?": false, "CustomLoot": { "Minimum items": 1, "Maximum items": 1, "Use minimum - maxium?": false, "List of items": [ { "ShortName": "xmas.present.small", "Minimum": 3, "Maximum": 6, "Chance": 100.0, "Give blueprint?": false, "SkinID": 0, "Displayname": "" } ] } }, "How many crates should fall out of the MLRS?": 3, "List of Mlrs lootable crates": { "Are you deleting the original loot from the crate?": false, "Use custom loot?": false, "CustomLoot": { "Minimum items": 1, "Maximum items": 1, "Use minimum - maxium?": false, "List of items": [ { "ShortName": "xmas.present.small", "Minimum": 3, "Maximum": 6, "Chance": 100.0, "Give blueprint?": false, "SkinID": 0, "Displayname": "" } ] } }, "Npcs settings": { "Minimum": 5, "Maximum": 6, "NPCs setting": { "Name": "Military Guard", "Health": 150.0, "Roam Range": 30.0, "Chase Range": 30.0, "Attack Range Multiplier": 2.0, "Sense Range": 40.0, "Target Memory Duration [sec.]": 60.0, "Scale damage": 0.6, "Aim Cone Scale": 1.5, "Detect the target only in the NPC's viewing vision cone? [true/false]": false, "Vision Cone": 135.0, "Speed": 7.5, "Disable radio effects? [true/false]": false, "Is this a stationary NPC? [true/false]": false, "Use custom loot?": false, "CustomLoot": { "Minimum items": 1, "Maximum items": 1, "Use minimum - maxium?": false, "List of items": [ { "ShortName": "xmas.present.small", "Minimum": 3, "Maximum": 6, "Chance": 100.0, "Give blueprint?": false, "SkinID": 0, "Displayname": "" } ] }, "Wear items": [ { "ShortName": "metal.facemask", "SkinID (0 - default)": 3566806303 }, { "ShortName": "pants", "SkinID (0 - default)": 2425765853 }, { "ShortName": "hoodie", "SkinID (0 - default)": 1674441601 }, { "ShortName": "roadsign.jacket", "SkinID (0 - default)": 2305545961 }, { "ShortName": "roadsign.kilt", "SkinID (0 - default)": 2305553897 }, { "ShortName": "shoes.boots", "SkinID (0 - default)": 3566804523 } ], "Belt items": [ { "ShortName": "smg.mp5", "Amount": 1, "SkinID (0 - default)": 0, "Mods": [], "Ammo": "" }, { "ShortName": "syringe.medical", "Amount": 2, "SkinID (0 - default)": 0, "Mods": [], "Ammo": "" } ] } }, "Sniper Npcs settings": { "Minimum": 2, "Maximum": 2, "NPCs setting": { "Name": "Military Guard", "Health": 150.0, "Roam Range": 30.0, "Chase Range": 30.0, "Attack Range Multiplier": 2.0, "Sense Range": 50.0, "Target Memory Duration [sec.]": 60.0, "Scale damage": 0.6, "Aim Cone Scale": 1.5, "Detect the target only in the NPC's viewing vision cone? [true/false]": false, "Vision Cone": 135.0, "Speed": 7.5, "Disable radio effects? [true/false]": false, "Is this a stationary NPC? [true/false]": true, "Use custom loot?": false, "CustomLoot": { "Minimum items": 1, "Maximum items": 1, "Use minimum - maxium?": false, "List of items": [ { "ShortName": "xmas.present.small", "Minimum": 3, "Maximum": 6, "Chance": 100.0, "Give blueprint?": false, "SkinID": 0, "Displayname": "" } ] }, "Wear items": [ { "ShortName": "metal.facemask", "SkinID (0 - default)": 0 }, { "ShortName": "pants", "SkinID (0 - default)": 3468431914 }, { "ShortName": "hoodie", "SkinID (0 - default)": 3468432155 }, { "ShortName": "roadsign.jacket", "SkinID (0 - default)": 3472579116 }, { "ShortName": "roadsign.kilt", "SkinID (0 - default)": 3472577950 }, { "ShortName": "shoes.boots", "SkinID (0 - default)": 916448999 } ], "Belt items": [ { "ShortName": "rifle.bolt", "Amount": 1, "SkinID (0 - default)": 0, "Mods": [], "Ammo": "" }, { "ShortName": "syringe.medical", "Amount": 2, "SkinID (0 - default)": 0, "Mods": [], "Ammo": "" } ] } }, "PVE Mode Setting (only for users PveMode plugin)": { "Use PveMode plugin?": false, "Required damage to the event owner": 500.0, "The event is a right of ownership, to obtain it you need damage multiplier.": { "Npc": 1.0 }, "Non owner can loot the crates?": false, "Non owner can loot the Npc's?": false, "Non owner can damage Npc's?": false, "Non owner can be attacked by Npc's?": false, "Non owner, can you enter the event zone?": false, "Allow a player who has an active cooldown of the Event Owner to enter the event zone?": true, "The time that the Event Owner may not be inside the event zone.": 300, "The time until the event owner can return to the event zone.": 60, "Block the RestoreUponDeath plugin in the event zone.": true, "After all this time, an event owner can be an event owner again.": 86400.0, "Darkening the sphere.": 15 } }