
will007's Wishlist
-
$25.00$20.00Dungeon Events
Dungeon Events adds fully procedural dungeon raids to your Rust server, creating high-replayability PvE content with unique layouts every time.
Each dungeon is dynamically generated with randomized rooms, corridors, NPCs, bosses, animals, auto turrets, loot crates, custom visuals, and portal access. Whether you want automated world events or private player-purchased dungeon runs, this plugin gives you full control over difficulty, rewards, access, and cleanup.
Perfect for servers that want challenging, customizable, and rewarding endgame-style PvE content.
Main Features
Procedural Dungeon Generation - Every dungeon is generated dynamically, so each run feels different. Multiple Difficulty Tiers - Create fully customizable tiers such as Easy, Normal, Medium, Hard, Nightmare, Impossible, or anything you want, with per-tier rooms, size, limits, cooldowns, rewards, visuals, and purchase settings. Custom NPCs, Bosses & Animals - Configure NPCs, bosses, and dungeon animals with custom health, damage, gear, names, movement limits, attack distance, loot, prefab chances, speed, sense range, and spawn limits. Auto Turrets - Add dangerous turret encounters with configurable health, weapons, and behavior. Visual Customization - Customize dungeon building grades, skins, container colors, garage door skins, dungeon lights, marker names, marker colors, and dungeon time-of-day overrides per tier. Custom Per-Tier Loot System - Each dungeon tier has its own data files for NPC loot, boss loot, and loot box rewards, making it easy to create different reward pools for every difficulty. Buyable Private Dungeons - Let players purchase their own dungeon using Economics, ServerRewards, or a custom item like scrap. Access Control - Lock dungeons to the buyer or first player, with optional support for teams and friends. Portal Protection Bubble - Protect the portal area with configurable radius, build/deploy rules, vehicle protection, and optional damage blocking to help reduce portal camping on PvP servers. Anti-Abuse Dungeon Rules - Block selected commands inside dungeons, prevent unwanted pickup/build/deploy actions, prevent backpack drops, teleport players outside on death, and optionally close dungeon doors when a player dies. Auto Spawn & Manual Spawn - Spawn dungeons automatically, by admin command, player purchase, or console/RCON. Smart Spawn Checks - Avoid bad locations, terrain issues, safe zones, rocks, monuments, and plugin-controlled areas. Advanced Spawn Control - Configure global and per-tier active dungeon limits, buy cooldowns, auto-spawn delay, post-wipe tier unlocks, dungeon height, map marker settings, and retry behavior when a valid location cannot be found. Automatic Cleanup - Remove dungeons when inactive, expired, or fully cleared. Per-Entity & Clear Rewards - Reward players for NPCs, animals, turrets, loot boxes, and full dungeon clears using Economics, ServerRewards, and SkillTree XP, including optional SkillTree XP team sharing. Live Dungeon UI & Map Markers - Show remaining time, entity counts, and map markers for active dungeons.
Commands
All default chat and console command names can be customized in the config.
Admin
/createdungeon <tierName> /removeinactivedungeons /removealldungeons /forceremovealldungeons /de.removenearest /de.reloadconfig /de.toggle Players
/buydungeon /buydungeon <tierName> /removedungeon Console
buydungeon <tierName> <playerID> spawnrandomdungeon spawnfixeddungeon <tierName> spawnfixeddungeon <tierName> <playerID>
Permissions
dungeonevents.admin dungeonevents.buy dungeonevents.enter
Per-Tier Loot Configuration
Dungeon Events uses separate data files for loot configuration, making it much easier to manage rewards for each difficulty tier.
Each tier has its own loot files inside:
oxide/data/DungeonEvents/<TierName>/
Available loot files per tier:
npc_loot.json - Loot dropped by regular dungeon NPCs.
boss_loot.json - Loot dropped by dungeon bosses.
lootbox.json - Loot spawned inside dungeon loot containers.
This allows you to create completely different reward pools for each tier. For example, Easy dungeons can have basic loot, while Hard, Nightmare, or Impossible dungeons can have much stronger rewards.
If a tier loot file is empty, the plugin can fall back to the default loot file:
oxide/data/DungeonEvents/Default_Loot.json
Hooks
void OnDungeonSpawn(ulong OwnerID, Vector3 Position, string Grid, string TierName) void OnDungeonDespawn(ulong OwnerID, Vector3 Position, string Grid, string TierName) void OnDungeonWin(ulong playerID, string tierName)
Supported Integrations
Economics ServerRewards Friends Notify NightVision ZoneManager Duelist RaidableBases AbandonedBases RestoreUponDeath SkillTree
Languages
EN PT-BR DE ES RU If you want a powerful, replayable PvE dungeon system with deep customization and strong plugin integration, Dungeon Events is built to deliver exactly that.
The plugin includes a deep configuration system where you can customize tiers, room counts, room sizes, dungeon visuals, loot tables, NPCs, bosses, animals, turrets, portal protection, access rules, cooldowns, active dungeon limits, spawn validation, auto-removal conditions, command blocking, economy settings, SkillTree XP rewards, map markers, and more.
-
$24.00
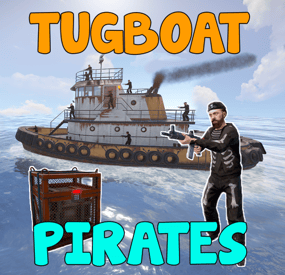
Tugboat Pirates
By The_Kiiiing in Plugins
Experience the thrill of high-seas plunder with "Tugboat Pirates". Encounter a Tugboat, brimming with NPC pirates protecting their valuable loot. Engage in intense battles, eliminate the captain for an access code, and seize the treasure.
Features
Tugboat with Pirate NPCs and loot patrols the ocean Kill the captain to get access to the loot room Fully configurable boat interior Boat location marked on the map Fully customizable NPCs (you can even give them rocket launchers in their kits) Event starts automatically (configurable time, can be disabled) Announcements via gametip and/or chat NPC are turret NPC that do not move from their station on the Tugboat
Door code of the loot room can be found in the captain's corpse (pirate quotes can be changed in the config)
Commands
All Commands require the admin permission
tugboatstart - Manually start the event tugboatstop - Manually end the event tugboatentity - Add entitys to the tugboat config. Documented below.
Tugboat Editor
The tugboat editor can be used to add entites to the configuration file without manually editing it.
Make sure you have the permission tugboatpirates.admin, Place an entity where you want it on a tugboat, look at it and use the command tugboatentity add Save the entity to the config file with tugboatentity save, Reload the plugin for the changes to take effect
Hooks
(void) OnTugboatPiratesStarted() // Called when the event has started (void) OnTugboatPiratesCompleted(ulong steamId) // Called when the event has been completed (void) OnTugboatPiratesEnded() // Called after the event has ended
Permissions
tugboatpirates.admin - Required to use admin commands
Configuration
{ "Time between events (minutes, set to -1 to disable scheduled events)": 60, "Event duration (seconds)": 3600, "Show toast when event starts": true, "Announce event in chat": true, "Boat leave time before despawning (seconds)": 120, "Time before boat despawn when captain is killed (seconds)": 1200, "Boat configurations": [ { "Location offset (used when spawning multiple boats)": { "x": 0.0, "y": 0.0, "z": 0.0 }, "Npc profile for captain (must be a valid profile)": "captain", "Npc spawn locations and profiles": { "back_right": "pirate_lr", "back_left": "pirate_lr", "upper_front_right": "pirate_lr", "upper_front_left": "pirate_lr", "upper_back_right": "pirate_lr", "upper_back_left": "pirate_lr", "roof_back": "pirate_lr", "entrance_right": "pirate_lr", "entrance_left": "pirate_lr", "roof_right": "pirate_lr", "roof_left": "pirate_lr", "front": "pirate_lr", "right": "pirate_mp5", "left": "pirate_mp5" }, "Interior objects (crates, decoration, etc.)": [ { "Prefab path": "assets/prefabs/deployable/chinooklockedcrate/codelockedhackablecrate.prefab", "Rotation": 180.0, "Position on boat": { "x": 0.0, "y": 2.0, "z": 4.2 }, "Skin id": 1394363785, "Loot profile (only for crates, leave empty for default loot)": "" }, // Removed some lines for readability reasons ] } ], "Npc profiles": { "pirate_lr": { "name": "Pirate", "health": 200.0, "enableRadio": true, "senseRange": 50.0, "visionCone": 135.0, "damageScale": 1.0, "memoryDuration": 60.0, "lootProfile": "pirate", "kit": "", "Clothing items": [ { "shortName": "hat.boonie", "amount": 1, "skinId": 965553937 }, { "shortName": "hoodie", "amount": 1, "skinId": 2984978438 }, { "shortName": "pants", "amount": 1, "skinId": 2984977257 }, { "shortName": "attire.hide.boots", "amount": 1, "skinId": 861468674 } ], "Belt items": [ { "shortName": "rifle.lr300", "amount": 1, "skinId": 0 } ] }, "pirate_mp5": { "name": "Pirate", "health": 150.0, "enableRadio": true, "senseRange": 50.0, "visionCone": 135.0, "damageScale": 1.0, "memoryDuration": 60.0, "lootProfile": "pirate", "kit": "", "Clothing items": [ { "shortName": "hat.boonie", "amount": 1, "skinId": 965553937 }, { "shortName": "hoodie", "amount": 1, "skinId": 2984978438 }, { "shortName": "pants", "amount": 1, "skinId": 2984977257 }, { "shortName": "attire.hide.boots", "amount": 1, "skinId": 861468674 } ], "Belt items": [ { "shortName": "smg.mp5", "amount": 1, "skinId": 0 } ] }, "captain": { "name": "Captain", "health": 100.0, "enableRadio": false, "senseRange": 0.0, "visionCone": 0.0, "damageScale": 1.0, "memoryDuration": 0.0, "lootProfile": "pirate", "kit": "", "Clothing items": [ { "shortName": "hat.boonie", "amount": 1, "skinId": 965553937 }, { "shortName": "tshirt", "amount": 1, "skinId": 811762477 }, { "shortName": "pants.shorts", "amount": 1, "skinId": 849256923 }, { "shortName": "attire.hide.boots", "amount": 1, "skinId": 861468674 } ], "Belt items": [ { "shortName": "mace.baseballbat", "amount": 1, "skinId": 0 } ] } }, "Loot profiles": { "crate_2": [ { "Short name": "scrap", "Min amount": 2, "Max amount": 20, "Chance": 1.0, "Skin id": 0 }, { "Short name": "metal.refined", "Min amount": 4, "Max amount": 8, "Chance": 0.5, "Skin id": 0 }, { "Short name": "gears", "Min amount": 1, "Max amount": 3, "Chance": 0.2, "Skin id": 0 }, { "Short name": "sewingkit", "Min amount": 1, "Max amount": 3, "Chance": 0.2, "Skin id": 0 }, { "Short name": "rope", "Min amount": 1, "Max amount": 3, "Chance": 0.2, "Skin id": 0 }, { "Short name": "sheetmetal", "Min amount": 1, "Max amount": 2, "Chance": 0.2, "Skin id": 0 }, { "Short name": "grenade.molotov", "Min amount": 1, "Max amount": 2, "Chance": 0.1, "Skin id": 0 }, { "Short name": "grenade.f1", "Min amount": 1, "Max amount": 4, "Chance": 0.1, "Skin id": 0 }, { "Short name": "telephone", "Min amount": 1, "Max amount": 1, "Chance": 0.1, "Skin id": 0 }, { "Short name": "multiplegrenadelauncher", "Min amount": 1, "Max amount": 1, "Chance": 0.1, "Skin id": 0 } ], "pirate": [ { "Short name": "scrap", "Min amount": 2, "Max amount": 6, "Chance": 1.0, "Skin id": 0 }, { "Short name": "bottle.vodka", "Min amount": 1, "Max amount": 1, "Chance": 0.7, "Skin id": 0 }, { "Short name": "pistol.eoka", "Min amount": 1, "Max amount": 1, "Chance": 0.2, "Skin id": 0 }, { "Short name": "ammo.handmade.shell", "Min amount": 5, "Max amount": 10, "Chance": 0.2, "Skin id": 0 }, { "Short name": "rope", "Min amount": 1, "Max amount": 3, "Chance": 0.3, "Skin id": 0 }, { "Short name": "sewingkit", "Min amount": 1, "Max amount": 2, "Chance": 0.3, "Skin id": 0 } ] }, "Priate quotes (inluded in captain's note)": [ "If rum can’t fix it, ye are not using enough rum.", "But… why is the rum gone?", "Be who you arrrr...", "All for rum and rum for all!", "Land was created to provide a place for boats to visit.", "If ye can read this ye be stupid." ] }
-
$20.00
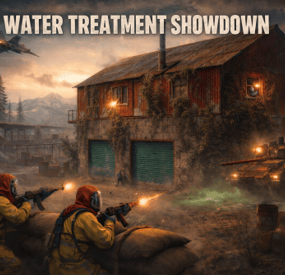
Water Treatment Showdown Event
By Yac Vaguer in Plugins
The Water Treatment Event plugin transforms the Water Treatment Monument into a high-stakes adventure. This event introduces a series of challenges, including zombie hordes, military defenses, and a dramatic escape sequence.
Overview
Event Details Location: Water Treatment Monument
Event Trigger: An explosion occurs following experimental activities within the monument, resulting in the infestation of zombies in the main building.
Security Measures To add a layer of difficulty, the monument is secured by:
Bradley APC Guards: Armed personnel stationed at key points. Snipers: Positioned to cover strategic locations.
Player Objectives
Acquire the Loot: Players must infiltrate the main building to retrieve valuable loot.
Escape Before the Nuke: After securing the loot, an F15 jet will approach and drop a nuclear bomb, causing radiation to spread across the monument. Players must evacuate the area before the nuke detonates.
Configuration Options
Server owners can customize the event settings, such as:
Zombie Density: Adjust the number of zombies in the main building. Guard Strength: Modify the health and equipment of the guards and snipers. Timing: Set the duration between loot acquisition and the nuke drop. Activation: The event can be triggered manually or set to run on a schedule. Sam Sites: On/Off And Several others see below for configuration example
PVE Configuration
We are compatible with two PVE Solutions, Simple PVE Sphere and PVE Mode
PVE Mode is a way better solution but it is also paid version, in order to avoid people to buy another tool to use this plugin I release Simple PVE Sphere that you need to install in your server in order to work.
Simple PVE Sphere is a way simplified version of the sphere, if you have any issue please report it in the Issues on the plugin directly.
In the configuration you can activate one of them and remember that the plugin need to exists in your server.
DO NOT ATTEMPT TO ACTIVATE BOTH AT THE SAME TIME !!!
"PVE Mode cofiguration": { "Use the PVE mode of the plugin? [true/false]": false, "The amount of damage that the player has to do to become the Event Owner": 500.0, "Damage Multipliers for calculate to become the Event Owner": { "Npc": 1.0, "Bradley": 2.0 }, "Can the non-owner of the event loot the crates? [true/false]": false, "Can the non-owner of the event hack locked crates? [true/false]": false, "Can the non-owner of the event loot NPC corpses? [true/false]": false, "Can the non-owner of the event deal damage to the NPC? [true/false]": false, "Can the non-owner of the event do damage to Bradley? [true/false]": false, "Can an Npc attack a non-owner of the event? [true/false]": false, "Can Bradley attack a non-owner of the event? [true/false]": false, "Allow the non-owner of the event to enter the event zone? [true/false]": false, "Allow a player who has an active cooldown of the Event Owner to enter the event zone? [true/false]": true, "The time that the Event Owner may not be inside the event zone [sec.]": 300, "The time until the end of Event Owner status when it is necessary to warn the player [sec.]": 60, "Prevent the actions of the RestoreUponDeath plugin in the event zone? [true/false]": true, "The time that the player can`t become the Event Owner, after the end of the event and the player was its owner [sec.]": 86400.0, "Darkening the dome (0 - disables the dome)": 12 }, "Simple PVE Mode cofiguration": { "Use the Simple PVE mode of the plugin? [true/false]": false, "Darkening the dome (0 - disables the dome)": 12 },
Integrations
You can assign rewards using:
Economics ServerRewards SkillTree You can also send message using GUI Announcements
Dependencies Required
NPC Spawn
Console Commands
wtestart This manually trigger the start of the event
wtestop Force to stop the event
Chat Commands
/wtestart This manually trigger the start of the event
/wtestop Force to stop the event
Permissions to run the console commands
watertreatmentevent.admin
Hooks of the Event
OnWaterTreatmentEventStart //Triggered when Event Start
OnWaterTreatmentEventEnded //Triggered when Event Finished
Backlog
Animation scene when the event start Improve FX Animation scene when the event ends Trigger hooks for other developers Different Awards for the winners PVE Mode
Icons for Server HUD
Thank you @Dead Nasty for the designs
-

$22.00
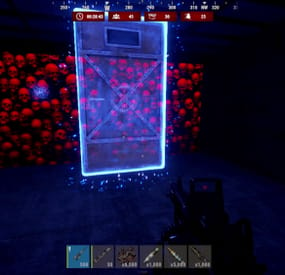
The Dome Event
The Dome Event plugin, the idea is to get on top of the Dome. In the meantime, defeat a tank and turrets. Inside the dome you will find a Locked Crate. When you click on it, a patrol helicopter spawns and a blue card reader appears on top of the Dome. If you kill the helicopter and the Npc's on top of the Dome and use the card reader then the finale is coming.
Support PveMode plugin.
Support BotReSpawn plugin.
Chat and Consolecommand available to admins only.:
destart destop Hooks:
void OnDomeEventStart();
void OnDomeEventStop();
Contact:
Additional free plugins created by me are available on Discord: https://discord.gg/C5CehdJMdK
If you want to try out this plugin, you can do so on the test server. IP: 212.73.137.3:27195
My public Rust server IP: 136.243.135.46:28050
Video:
Config:
{ "Version": { "Major": 1, "Minor": 0, "Patch": 4 }, "Automatic event start": true, "Minimum time for event start": 3600.0, "Maximum time for event start": 7200.0, "Duration of the event": 2800.0, "Warning messages before event start": 300.0, "Warning messages before event end": 300.0, "Chat icon": 0, "Locked crate hack time": 900.0, "Disable BetterNpc plugin npc's for the duration of the event?": false, "Spawn NpcSpawn Scientist?(Required: NpcSpawn plugin!)": true, "Spawn BotReSpawn Scientist?(Required: BotReSpawn plugin!)": false, "BotReSpawn profil name:": "", "BotReSpawn Npc's number": 10, "Messages setting": { "Message before the event starts.": "Everyone be careful, the <color=#ff0000>Dome Event</color> is about to start.", "Warning message before the event stop.": "The Dome event will end soon!!", "Message when someone event owner": "Someone has become the owner of Dome Event.", "Start message": "<color=#ff0000>Dome Event</color> has started!!", "Stop message": "<color=#ff0000>Dome Event</color> end!", "Map marker name": "Dome Event", "Map marker radius": 0.6, "Color": { "r": 1.0, "g": 0.0, "b": 0.0 } }, "Bradley setting": { "Bradley health": 1000.0, "Number of crate to spawn when the bradley dies": 3, "Number of Npc spawning from Bradely": 3 }, "Patrolhelicopter setting": { "Patrolhelicopter health": 10000.0, "Number of crate to spawn when the helicopter dies": 3 }, "AutoTurret setting": { "Health": 300.0, "Weapon ShortName": "rifle.ak", "Ammo ShortName": "ammo.rifle", "Number of ammo": 5000 }, "List of lootable crates": [ { "Prefab": "assets/bundled/prefabs/radtown/crate_elite.prefab", "Position": "(2.567, 47.640, -7.085)", "Rotation": "(0, 337.426, 0)", "Use custom loot?": false, "CustomLoot": { "Minimum items": 1, "Maximum items": 1, "Use minimum - maxium?": false, "List of items": [ { "ShortName": "xmas.present.small", "Minimum": 3, "Maximum": 6, "Chance": 100.0, "Give blueprint?": false, "SkinID": 0, "Displayname": "" } ] } }, { "Prefab": "assets/prefabs/npc/patrol helicopter/heli_crate.prefab", "Position": "(-6.099, 47.640, 4.679)", "Rotation": "(0, 303.510, 0)", "Use custom loot?": false, "CustomLoot": { "Minimum items": 1, "Maximum items": 1, "Use minimum - maxium?": false, "List of items": [ { "ShortName": "xmas.present.small", "Minimum": 3, "Maximum": 6, "Chance": 100.0, "Give blueprint?": false, "SkinID": 0, "Displayname": "" } ] } }, { "Prefab": "assets/prefabs/npc/m2bradley/bradley_crate.prefab", "Position": "(19.550, 65.059, -9.339)", "Rotation": "(0, 289.162, 0)", "Use custom loot?": false, "CustomLoot": { "Minimum items": 1, "Maximum items": 1, "Use minimum - maxium?": false, "List of items": [ { "ShortName": "xmas.present.small", "Minimum": 3, "Maximum": 6, "Chance": 100.0, "Give blueprint?": false, "SkinID": 0, "Displayname": "" } ] } }, { "Prefab": "assets/bundled/prefabs/radtown/crate_elite.prefab", "Position": "(-25.683, 65.179, -6.666)", "Rotation": "(0, 79.714, 0)", "Use custom loot?": false, "CustomLoot": { "Minimum items": 1, "Maximum items": 1, "Use minimum - maxium?": false, "List of items": [ { "ShortName": "xmas.present.small", "Minimum": 3, "Maximum": 6, "Chance": 100.0, "Give blueprint?": false, "SkinID": 0, "Displayname": "" } ] } }, { "Prefab": "assets/bundled/prefabs/radtown/crate_elite.prefab", "Position": "(-3.239, 71.638, 6.203)", "Rotation": "(0, 331.058, 0)", "Use custom loot?": false, "CustomLoot": { "Minimum items": 1, "Maximum items": 1, "Use minimum - maxium?": false, "List of items": [ { "ShortName": "xmas.present.small", "Minimum": 3, "Maximum": 6, "Chance": 100.0, "Give blueprint?": false, "SkinID": 0, "Displayname": "" } ] } }, { "Prefab": "assets/bundled/prefabs/radtown/crate_elite.prefab", "Position": "(-2.268, 71.638, -6.717)", "Rotation": "(0, 17.623, 0)", "Use custom loot?": false, "CustomLoot": { "Minimum items": 1, "Maximum items": 1, "Use minimum - maxium?": false, "List of items": [ { "ShortName": "xmas.present.small", "Minimum": 3, "Maximum": 6, "Chance": 100.0, "Give blueprint?": false, "SkinID": 0, "Displayname": "" } ] } } ], "Floor Npcs settings inside": { "Minimum": 6, "Maximum": 6, "List of position": [ "(1.654, 71.638, -6.538)", "(-6.142, 71.638, -3.089)", "(-0.235, 71.638, 7.514)", "(6.279, 71.638, 3.544)", "(-22.664, 65.172, -2.128)" ], "NPCs setting": { "Name": "Dome Guard", "Health": 200.0, "Roam Range": 10.0, "Chase Range": 30.0, "Attack Range Multiplier": 3.0, "Sense Range": 30.0, "Target Memory Duration [sec.]": 60.0, "Scale damage": 1.0, "Aim Cone Scale": 0.6, "Detect the target only in the NPC's viewing vision cone? [true/false]": false, "Vision Cone": 135.0, "Speed": 7.5, "Disable radio effects? [true/false]": false, "Is this a stationary NPC? [true/false]": false, "Use custom loot?": false, "CustomLoot": { "Minimum items": 1, "Maximum items": 1, "Use minimum - maxium?": false, "List of items": [ { "ShortName": "xmas.present.small", "Minimum": 3, "Maximum": 6, "Chance": 100.0, "Give blueprint?": false, "SkinID": 0, "Displayname": "" } ] }, "Wear items": [ { "ShortName": "riot.helmet", "SkinID (0 - default)": 1136847802 }, { "ShortName": "pants", "SkinID (0 - default)": 2469702450 }, { "ShortName": "hoodie", "SkinID (0 - default)": 2472131751 }, { "ShortName": "metal.plate.torso", "SkinID (0 - default)": 2462023997 }, { "ShortName": "shoes.boots", "SkinID (0 - default)": 1192621630 } ], "Belt items": [ { "ShortName": "smg.mp5", "Amount": 1, "SkinID (0 - default)": 0, "Mods": [], "Ammo": "" }, { "ShortName": "syringe.medical", "Amount": 2, "SkinID (0 - default)": 0, "Mods": [], "Ammo": "" } ] } }, "Ground Npcs settings outside": { "Minimum": 8, "Maximum": 8, "List of position": [ "(8.450, 5.677, -39.192)", "(42.784, 5.677, 5.506)", "(-31.383, 5.808, 33.135)", "(-43.109, 5.677, -23.131)" ], "NPCs setting": { "Name": "Dome Guard", "Health": 150.0, "Roam Range": 30.0, "Chase Range": 30.0, "Attack Range Multiplier": 2.0, "Sense Range": 40.0, "Target Memory Duration [sec.]": 60.0, "Scale damage": 0.6, "Aim Cone Scale": 1.5, "Detect the target only in the NPC's viewing vision cone? [true/false]": false, "Vision Cone": 135.0, "Speed": 7.5, "Disable radio effects? [true/false]": false, "Is this a stationary NPC? [true/false]": false, "Use custom loot?": false, "CustomLoot": { "Minimum items": 1, "Maximum items": 1, "Use minimum - maxium?": false, "List of items": [ { "ShortName": "xmas.present.small", "Minimum": 3, "Maximum": 6, "Chance": 100.0, "Give blueprint?": false, "SkinID": 0, "Displayname": "" } ] }, "Wear items": [ { "ShortName": "coffeecan.helmet", "SkinID (0 - default)": 1164355094 }, { "ShortName": "pants", "SkinID (0 - default)": 2115326845 }, { "ShortName": "hoodie", "SkinID (0 - default)": 1133942186 }, { "ShortName": "sunglasses", "SkinID (0 - default)": 0 }, { "ShortName": "roadsign.jacket", "SkinID (0 - default)": 1164353601 }, { "ShortName": "roadsign.kilt", "SkinID (0 - default)": 1164357032 }, { "ShortName": "shoes.boots", "SkinID (0 - default)": 916448999 } ], "Belt items": [ { "ShortName": "smg.2", "Amount": 1, "SkinID (0 - default)": 0, "Mods": [], "Ammo": "" }, { "ShortName": "syringe.medical", "Amount": 2, "SkinID (0 - default)": 0, "Mods": [], "Ammo": "" } ] } }, "PVE Mode Setting (only for users PveMode plugin)": { "Use PveMode plugin?": false, "Required damage to the event owner": 500.0, "The event is a right of ownership, to obtain it you need damage multiplier.": { "Npc": 1.0, "Bradley": 1.0 }, "Non owner can loot the crates?": false, "Non owner can loot the Npc's?": false, "Non owner can damage Npc's?": false, "Non owner can be attacked by Npc's?": false, "Non owner, can you enter the event zone?": false, "Allow a player who has an active cooldown of the Event Owner to enter the event zone?": true, "The time that the Event Owner may not be inside the event zone.": 300, "The time until the event owner can return to the event zone.": 60, "Block the RestoreUponDeath plugin in the event zone.": true, "After all this time, an event owner can be an event owner again.": 86400.0, "Darkening the sphere.": 15 } }
-
$37.99$29.00Quest System
XDQuest: A comprehensive and customizable quest system for your RUST server!
XDQuest is a powerful and flexible plugin that introduces a comprehensive and dynamic quest system into your game world.
With 31 different types of missions available for players, the possibilities are almost limitless.
Players receive various rewards for completing missions, adding even more incentive to accomplish tasks.
At the moment, this is the largest and only quest system available!
XDQuest is your key to creating endless adventures in the world of RUST.
List of features:
(The description briefly outlines the functionality and includes screenshots.)
Interactive website for creating quests:
XDQuest-Creater - On my website, you can easily and quickly create quests. Forget about manually editing JSON files — my user-friendly interface will make the quest creation process simple and enjoyable!
The plugin offers four types of rewards:
Items Blueprints Custom items Commands It integrates perfectly with various economic systems, and also supports Skill Tree and ZLevels.
List of missions
Mission setup
Reward setup Detailed instructions and settings on the website:
XDQuest-Creater - My website features clear and informative instructions that will help you configure the plugin and master all types of missions.
You will gain access to it immediately after purchasing the plugin.
Discover the simplest and most effective way to configure using my guide!
Beautiful and modern UI:
The stylish and intuitive interface makes using XDQuest simple and enjoyable.
There is a mini-quest list that allows your players to remotely track the progress of their missions.
UI
UI
Mini quest list
Example of UI customization
(Rusty Wasteland PvE)
Capabilities and NPC settings:
NPCs have their own voice-overs; currently, they can respond to the user on 4 triggers:
1.Greetings
2.Farewells
3.Task acceptance
4.Task completion You can also upload and use your own sounds for any of these 4 triggers, and the website will assist you with this as well. Dress your NPC however you like and create a unique appearance for them. There is an option to change the location of the NPC. Your NPC resides in a unique dwelling created in accordance with their character and backstory. Available types of missions:
Currently, there are 24 different types of tasks available:
(The types of missions are constantly being updated)
(16 pre-set quests included)
Command:
Chat commands: /quest.saveposition - saves a custom position (available only to administrators). /quest.saveposition.outpost - saves a custom position within the bounds of a peaceful town (available only to administrators). /quest.tphouse - teleport to a building (available only to administrators). Console commands: xdquest.stat - publishes statistics. xdquest.player.reset [steamid64] - Clears all of a player's missions and everything associated with them. Configuration:
Discord - DezLife
Website editor - xdquest.skyplugins.ru
- #customizablequests
- #dezlife
- (and 5 more)