
Tikomatura's Wishlist
-
$32.99
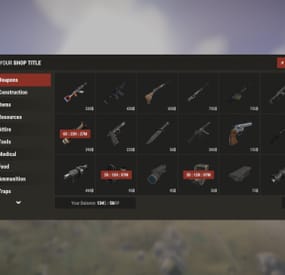
Shop UI
Well rounded shop, with various features. It's standalone plugin which is compatible with WelcomePanel, HumanNpc.
This plugin also supports selling commands, wipe block, no escape, sales, permission access.
Multi-currency support
Use different currencies for different items. Economics and ServerRewards (RP) is supported as well as scrap or any other ingame item.
Restrictions
Combat, raid, spawn and building block supported alongside with basic cooldowns and wipe block. NoEscape is required for combat and raid block.
Appearance
Simple and clean design to ensure smooth user experience for your players. Additionally Shop can be inserted into WelcomePanel to achieve "all in" server panel.
Customization
Widely customizable and feature rich Shop which will fit all needs of your community.
Field Tested
Plugin made by experienced developer, tested by hundreds of server owners and used by some big organizations.
Discord
Customer support available on discord,
Installation
- unzip downloaded package and place Shop.cs file into your plugin folder.
- after succesfuly loading the plugin, data folder oxide/data/Shop will be generated
- take data files provided in plugin package and drop them into your Shop data folder
After finishing these steps your shop is ready to used.
Server Currency
If you don't wish to use ingame items as currency make sure you use either Economics or ServerRewards as you currency management as only those two plugins are compatible with Shop. Default currency setting is Economics ("eco"), if you wish to change it navigate to "oxide/data/Shop/Items.json", open this file in some text editor (VSC recommended) and simply select "eco" and mass replace for desired value. (video here)
"eco" for Economics
"rp" for ServerRewards
"scrap" or any other ingame item
Shop Categories
To remove, change or add new categories open "oxide/data/Shop/Categories.json" file. There you will find all categories alongside with items lists. If you wish to remove certain items from category, just head over to item list and delete from there.
Items
Changing prices
In "oxide/data/Shop/Items.json" you will find every item with their properties, to quick search for specific items press "CTRL + F". By leaving BuyPrice or SellPrice at 0 you will disable selling or buying of said item. Due to multi-currency support prices can be set only in whole numbers, no decimals. To offset for this, you can set minimal amount requirement. For example instead of selling one piece of wood for 0.01$ you can set minimal amount of 100x wood for 1$.
Removing items
If you wish to remove some items from Shop, you can do that directly in "data/Shop/Categories.json" file. Removing items from "Items.json" is not needed as they have no effect unless they are listed in some category.
Adding new items
To add new item you must first head over to "Items.json" data file and create new entry by copy pasting some of the existing ones. Once done with that you can add the item into category. To add multiple versions of same item can be created by simply adding unique tag behind shortname, for example "rifle.ak{1}", "rifle.ak{2}", etc...
Commands
Adding new commands
Commands can be create at "data/Shop/Commands.json". Plugin can only run server side console commands and then parse steam id or player name with tags {steamid} and {playername}. There are two examples shown in default data file. Server side console commands are common thing and almost all plugins utilize them.
Listing commands in categories
Simply type in one of your command names into category item list like this "cmd/yourCommandName". Slash cmd in front of command name is there to make difference between ingame item and command.
Cooldowns
These are very basic, cooldown is triggered when buy/sell action is triggered. By using minimal amount requirement for items you can manage how much player buy and how often. Cooldowns are managed in "data/Shop/Cooldowns.json". Default data file contains two example of cooldowns but it's simply shortname and amount of seconds.
Restrictions
Raid and Combat Block
Managed by NoEscape plugin, option to enable these two block can be found in config file.
Building Block
Prevents players from using shop while they are building block, option can be found in config file.
Spawn Block
Prevents players from using shop after they respawn, amount of seconds can be set in config file, 0 = disabled.
Wipe Block
Prevents players from buying specific items after wipe. Settings are located in "data/Shop/ItemsWipeBlock.json", similar as cooldowns.
Sales
By Permission (config file)
Discount on every item in the shop assigned by permission, multiple permission can be created with their own discount values.
By Category (categories data file)
Discount for every item within specified category.
By Item
Discount for specific item in the shop. If item is already in discounted category, higher discount will be applied.
WelcomePanel integration
To integrate this plugin into WelcomePanel simply use one of the four configs included in download package. These config were premade for each WelcomePanel template (goes from 1 to 4). In case you have own highly customized layout for WelcomePanel you will have to adjust "Layout Container" in Shop config file by yourself.
-
$20.00
Admin Map
Admin Map is an innovative plugin for the game of Rust, designed to make server administration easier and improve the quality of the gaming experience. Focused on optimization and functionality, this plugin provides admins with the tools to effectively control players, minimizing the negative impact on the server and other participants.
Main features:
Interactive map with players: Admin Map provides server admins with a detailed and user-friendly map showing the positions of all players. This allows admins to easily monitor player activity and movements, and quickly detect suspicious activity. Large variety of different admin map layers:
- Marker,
- Text , (It's still there, but it no longer looks the same due to the Facepunch update on August 6.)
- Sleeper,
- TC,
- Stash,
- Sleeping Bag Quick Commands on Players: The plugin allows admins to perform quick actions on players directly from the map. Send messages, punish or help players in real time, minimizing reaction time and increasing interaction efficiency. Minimal server load: One of the key features of Admin Map is its low server load. All processing takes place solely on the client side, which means that the plugin will not slow down the server or create additional delays for players. This makes it an ideal choice even for servers with high traffic. Ease of use: The plugin's intuitive user interface provides admins with easy access to functionality. Navigating the map, sending commands and monitoring players is done with minimal effort, making server administration easy. Customization: Admin Map provides admins with the option to customize the functionality to suit their needs. Scanning area, available commands, buttons, permissions and other options. Support in RUST+: You will be able to view players online on the map directly in your phone without going to the server! Admin Map is an innovative solution that combines convenience, functionality and optimization. It provides administrators with tools to effectively manage players without negatively impacting gameplay and other server participants. The Admin Map plugin is an essential asset for any Rust server administrator looking to create a comfortable and safe gaming environment.
Permissions:
adminmap.allow - for use adminmap and hardcore bypass adminmap.<button perm> - any permissions specified in the button settings adminmap.teleport2marker - teleportation by marker via CTRL+RMB adminmap.invis - hide player from the player map adminmap.rust+ - enable rust+ admin map adminmap.rust+.invis - hide from rust+ admin map (recommended in case of giving the map to players)
Commands:
/amap - show sidebar /amap off - disable everything and hide the sidebar
Color designations on the cupboards map:
Default Config:
{ "Auto show sidebar panel": true, "Open the admin menu instead of the action menu": false, "Text Map Settings": { "Font size": 8.0, "Use color generation for teams?": true, "Color for team": "ffaf4d", "Color for solo player": "9bd92f", "Color for sleeper": "404040" }, "Command Buttons": [ { "Permission (adminmap.<perm>)": "", "Label": "TP", "Command": "teleport {steamid}", "Color": "1 1 1 1" }, { "Permission (adminmap.<perm>)": "", "Label": "TP2ME", "Command": "teleport {steamid} {admin.steamid}", "Color": "1 1 1 1" }, { "Permission (adminmap.<perm>)": "", "Label": "INV", "Command": "/viewinv {username}", "Color": "1 1 1 1" }, { "Permission (adminmap.<perm>)": "", "Label": "SPECTATE", "Command": "spectate {steamid}", "Color": "1 1 1 1" }, { "Permission (adminmap.<perm>)": "", "Label": "KILL", "Command": "kill {steamid}", "Color": "0.9 0.1 0.25 1" }, { "Permission (adminmap.<perm>)": "", "Label": "KICK", "Command": "kick {steamid}", "Color": "0.9 0.1 0.25 1" }, { "Permission (adminmap.<perm>)": "", "Label": "SHOW\nTEAMMATES", "Command": "adminmap.cmd show_player_teammates {steamid}", "Color": "1 1 1 1" }, { "Permission (adminmap.<perm>)": "", "Label": "SHOW\nPRIVLIDGES", "Command": "adminmap.cmd show_player_privlidges {steamid}", "Color": "1 1 1 1" }, { "Permission (adminmap.<perm>)": "", "Label": "SHOW\nSLEEPING\nBAGS", "Command": "adminmap.cmd show_player_sleepingbags {steamid}", "Color": "1 1 1 1" }, { "Permission (adminmap.<perm>)": "", "Label": "SHOW\nSTASHES", "Command": "adminmap.cmd show_player_stashes {steamid}", "Color": "1 1 1 1" } ] }
Button Library:
Give item to player for AdminMenu by k1lly0u | Minimum required version 1.0.1 { "Permission (adminmap.<perm>)": "", "Label": "GIVE", "Command": "adminmenu.callback {steamid}.4;adminmenu.callback {steamid}.4", "Color": "1 1 1 1" } Permanent ban
{ "Permission (adminmap.<perm>)": "", "Label": "BAN", "Command": "ban {steamid}", "Color": "1 0 0 1" } View backpack (for Backpack Pro)
{ "Permission (adminmap.<perm>)": "", "Label": "Backpack", "Command": "/b {steamid}", "Color": "1 1 1 1" } View backpack (for Backpacks plugin from uMod)
{ "Permission (adminmap.<perm>)": "", "Label": "Backpack", "Command": "viewbackpack {steamid}", "Color": "1 1 1 1" } Spectate
{ "Permission (adminmap.<perm>)": "", "Label": "SPECTATE", "Command": "spectate {steamid}", "Color": "1 1 1 1" }
If you want to add buttons here, message me on my discord server
-
$14.99
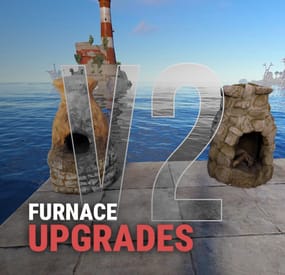
Furnace Upgrades
By Iftebinjan in Plugins
Upgrades your furnaces, ovens, refinery, mixing table & etc to beyond.
⭐ Key Features
Upgrade each attribute of your furnace; Supports different oven types; It is possible to define default attributes for all ovens on the server; You can set a default value for all base ovens (replacing quicksmelt); You can enable/disable any features you want; Option to keep attributes when removing the furnace; Option to auto split ores; Automatic fuel calc based on the upraded oven attributes; Now BBQ and Campfire can also be improved; Option so that only the furnace owner can upgrade it; Option so that only owner's teammates can upgrade it; A new completely redesigned UI; NEW Supports Mixing Table NEW Permission based upgrade furnaces 🎬 Video Showcase
📜 Permissions
furnaceupgrades.use - This is the unique permission. required for all players to upgrade furnaces ⚙️ Configuration
💬 Support
-
$30.00
Admin Menu
Manage your Rust server easier and more efficiently with the AdminMenu plugin. Track players, interact with them, edit their data and permissions, as well as change server convars and manage plugins.
Features:
Menu retains its state after closing, you won't lose everything you did before. Ability to fully translate the menu into any language. Large range of permissions for each action, will allow you to flexibly customize the admin menu for each group of administrators. Quick menu that allows you to perform quick actions Full list of players with the ability to filter by online, offline, admins and moderators. Also has a frame of different colors depending on the level of authorization. Wide range of information and actions for the selected player. Editing convars with search. Has a complete list of editable convars with descriptions for some of them. Extensive issue menu by category, with easy management of name, skin and amount (manual, +1, +100, +1000, +10000). Plugin management menu. It is possible to reload, unload or load a plugin easily and quickly. Updates occur in real time. Ability to create your own custom buttons that execute several commands Quick Start:
You install the plugin in the plugins folder. Give yourself the adminmenu.fullaccess permission.
Commands, use one of your choice, one for the player and one for the admin group: o.grant user [name or steamid] adminmenu.fullaccess o.grant group admin adminmenu.fullaccess Press the X button (swap seat button) or type adminmenu in the console. Enjoy
Useful stuff:
You can quickly open a player in the admin menu. To do this, point at the player and press X.
You don't have to hover over the player exactly, you will be able to open players within a certain radius of the place you are looking at.
CUSTOM BUTTONS
Custom buttons are buttons that when pressed will execute commands on behalf of the administrator, commands can be several, below will be the details.
At the moment, custom buttons can be created in two places: in the quick menu and in the menu when selecting a player. These places are separated in the config.
Button Fields:
"Execution as server" - Call the command on behalf of the server, not the administrator "Label" - Text that will be on the button, for each such inscription creates a field in the lang file, accordingly you can translate this text into several languages. "Commands" - Array of commands that will be executed on behalf of the administrator. Chat commands require a special entry, see examples. "Permission"- permission to display and use the button. You need to write the permission that will be after "adminmenu.".
Example: if you enter the permission "test" the permission will be adminmenu.test "Position" - The location for the button, the first number is responsible for the row number, the second for the position within the row, starts from 0.There are limits of locations, if you have gone beyond the limit - the button will not be displayed. Common Tags: {adminUID} - administrator's id. {position} - administrator coordinates (underfoot) {view_position} - the position where the administrator is looking (can be used for spawning or something similar) {view_direction_forward} - forward view direction of the administrator {view_direction_backward} - the direction the administrator is looking backwards {view_direction_left} - direction of the administrator’s view to the left {view_direction_right} - administrator’s view direction to the right Tags for target only: {steamid}, {steamID}, {userID}, {STEAMID}, {USERID} - mean the same thing, namely the id of the selected player. {target_position} - target coordinates (underfoot)
Example of commands:
chat.say \"/{chat command}\" vanish ban {steamID} teleport {steamID} {adminUID}
More information about the grant menu:
The grant menu includes the full list of items including hidden items as well as custom items created by the CustomItemDefinitions library.
The menu can be accessed from the navigation or from the menu of the selected player. When issuing itself has categories.
Search works in any registry by any part of the name or short name.
Has a page system at any stage.
More information about the buttons in the Quick Menu:
[Teleport to 0 0 0] - Teleport to coordinates 0 0 0.
Requires adminmenu.quickmenu.teleportto000 permission [Teleport to Deathpoint] - Teleport to your deathpoint.
Requires adminmenu.quickmenu.teleporttodeath permission [Teleport to Spawn point] - Teleport to a random spawn point.
Requires adminmenu.quickmenu.teleporttospawnpoint permission [Kill Self] - Kill Self, kills even when immortal.
Does not require permission. [Heal Self] - Fully heal yourself.
Requires adminmenu.quickmenu.healself permission [Call Heli] - Call Helicopter to yourself (arrives in time).
Requires adminmenu.quickmenu.helicall permission [Spawn Bradley] - Spawn bradley on yourself.
Requires adminmenu.quickmenu.spawnbradley permission More information about the buttons in the menu of the selected player:
[Teleport Self To] - Teleport yourself to the selected player.
Requires adminmenu.userinfo.teleportselfto permission [Teleport To Self] - Teleport the selected player to yourself.
Requires adminmenu.userinfo.teleporttoself permission [Teleport To Auth] - Teleportation to random authorization (TC).
Requires adminmenu.userinfo.teleporttoauth permission [Teleport to Deathpoint] - Teleportation to a player's deathpoint. Requires adminmenu.userinfo.teleporttodeath permission [Heal] - Full healing, including metabolism.
Requires adminmenu.userinfo.fullheal permission [Heal 50%] - Half healing.
Requires adminmenu.userinfo.halfheal permission. [View Inventory] - View and edit player's inventory.
Requires adminmenu.userinfo.viewinv permission [Strip Inventory] - Clear player's inventory.
Requires adminmenu.userinfo.stripinventory permission [Unlock Blueprints] - Unlock all Blueprints.
Requires adminmenu.userinfo.unlockblueprints permission [Revoke Blueprints] - Reset all Blueprints.
Requires adminmenu.userinfo.revokeblueprints permission. [Kill] - Kill a player.
Requires adminmenu.userinfo.kill permission [Kick] - Kick a player.
Requires adminmenu.userinfo.kick permission [Ban] - Ban a player.
Requires adminmenu.userinfo.ban permission More information about the buttons in the menu of the selected group:
[Remove Group] - Remove group, has confirmation.
Requires adminmenu.groupinfo.removegroup permission [Clone Group] - Clone group with the ability to copy users.
Requires adminmenu.groupinfo.clonegroup permission Permissions:
adminmenu.use - Ability to use admin menu with basic set. Open tab quick menu (each button has its own permission, without permissions is present only kill yourself button) and the list of players. adminmenu.fullaccess - Full access to all functions without the need for each permission, includes also adminmenu.use. It is recommended to give only to the main administrators. adminmenu.quickmenu.teleportto000 - Access to the button in the quick menu, teleportation to coordinates 0 0 0 0. adminmenu.quickmenu.teleporttodeath - Access to the button in the quick menu, teleportation to the point of your death. adminmenu.quickmenu.teleporttospawnpoint - Access to the button in the quick menu, teleportation to a random spawn point. adminmenu.quickmenu.healself - Access button in quickmenu, heal yourself completely. adminmenu.quickmenu.helicall - Access to the button in the quick menu, call a helicopter to yourself (arrives in time). adminmenu.quickmenu.spawnbradley - Access button in quickmenu, spawn bradley. adminmenu.userinfo.teleportselfto - Access to the button in the menu of the selected player, teleportation to the selected player. adminmenu.userinfo.teleporttoself - Access to the button in the menu of the selected player, teleport the selected player to himself. adminmenu.userinfo.teleporttoauth - Access to the button in the menu of the selected player, teleportation to random authorization (TC). adminmenu.userinfo.teleporttodeath - Access to the button in the menu of the selected player, teleportation to the place of death of the player. adminmenu.userinfo.fullheal - Access to the button in the menu of the selected player, full healing, including metabolism. adminmenu.userinfo.halfheal - Access to the button in the menu of the selected player, half healing. adminmenu.userinfo.viewinv - Access to the button in the selected player's menu, view and edit the player's inventory. adminmenu.userinfo.stripinventory - Access to the button in the menu of the selected player, clear the player's inventory. adminmenu.userinfo.unlockblueprints - Access the button in the menu of the selected player, unlock all drafts. adminmenu.userinfo.revokeblueprints - Access to the button in the menu of the selected player, reset all drafts. adminmenu.userinfo.kill - Access the button in the selected player's menu to kill the player. adminmenu.userinfo.kick - Access the button in the selected player's menu to kick the player. adminmenu.userinfo.ban - Access to the button in the menu of the selected player, ban the player. adminmenu.groupinfo.removegroup - Access to the button in the menu of the selected group, the ability to remove the group. adminmenu.groupinfo.clonegroup - Access to the button in the menu of the selected group, the ability to clone the group. adminmenu.convars - View and edit convars. adminmenu.permissionmanager - View and edit permissions in groups, player groups, create, delete and clone groups (requires additional permissions from these buttons). adminmenu.pluginmanager - Access to plugin management, reloading, unloading, loading plugins. adminmenu.give - Access to give resources, as well as yourself and the selected player. -
$14.99
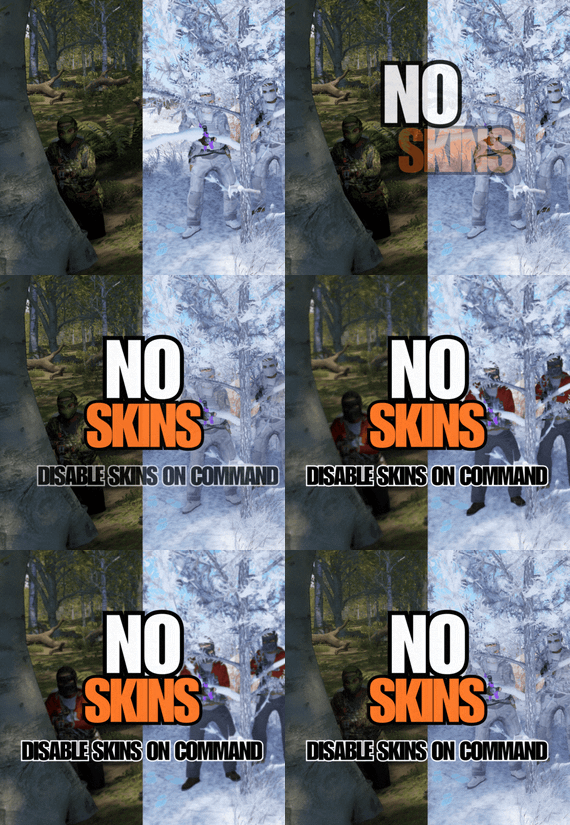
NoSkins
By Whispers88 in Plugins
NoSkins gives your players the power to control if they want to see skins or not. By removing clothing skins with the /noskin command players can disable clothing skins of other players.
Ability to remove other players clothing skins Keeps visuals of your own skins Deployables are not effected! Instant results! Using the command will instantly disable or enable other players clothing skins Light weight and performance based.
/noskin - will instantly toggle clothing skins on and off Multiple command aliases can be added via the config.
noskins.allow - allows a player to use the noskin command noskins.on - sets the default toggle of noskins being toggle on