ohimbobert's Wishlist
-
$24.99
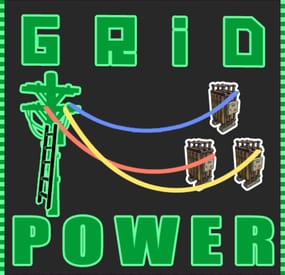
Grid Power
Grid Power rust plugin allows players to harness electricity directly from the Power Grid on any map by climbing Power line Poles to upgrade Transformers with components and protect their grid section, while also enhancing vanilla visuals with realistic, adjustable slack on hanging wires and lights.
Questions? Support? Join the discord: https://discord.nikhub.dev
In short
Draw electricity straight from the Power Grid in Rust - on any map, be it a procedurally generated or a custom one! Ladder up the Power line Poles to upgrade their Transformers with components like Root Combiners (to replace missing/stolen/destroyed outlets that you plug into) and Tech Trash (to permanently upgrade power output level, up to a configurable point). Maintain the service with long-lasting Fuses. But most importantly, protect your precious part of the grid from vandalism, theft and sabotage that will inevitably come from those jealous players! Whatever you do, just be careful up there... high voltage happens to be highly dangerous. Always wear protective gear (like a hazmat suit) and don't touch the wires while they're live! As a bonus, this plugin also improves vanilla visuals with realistically hanging wires / hoses / Xmas lights, the slack of which (how loose they appear to be hanging) can be adjusted while placing. And this feature is completely optional, too. Goodbye, straight lines that look like steel rods - hello, actual laws of physics!
But don't take my word for it - let the video speak for itself:
Still not convinced? Check out this in-depth, 20+ minutes long review and tutorial by srtbull!
1.0.2 UPDATE: Introducing working Street Lights for eligible poles! The lights go on between between 20:00 and 8:00 by default.
Quick start (for admins)
Upload the GridPower.cs file to your oxide/plugins folder and you should be good to go, it's all plug-and-play. No need to restart your server! If you're loading it for the first time or it's a new map wipe, the plugin will automatically locate all Power Line Prefabs on your map, randomly choose some of them (according to chances set in the default config) and attach extra electrical entities to them to make them functional. Those entities should persist throughout the wipe and will be replaced if missing, on every plugin reload/server restart. Each Power line Pole will be assigned a number and its position will be stored in the data. This will work on any map that contains at least one of the following prefabs:
assets/bundled/prefabs/autospawn/decor/powerline-small/powerline_pole_a.prefab assets/content/props/powerline_poles/powerline_pole_a.prefab
Quick start (for players)
Locating functional Transformers
Not all Power Line Poles were made equally. Only a percentage of them (by default, 33% on average) will be functional. How do you recognise a functional one? Look up - if you see a Button attached to the top of the Pole, and maybe even some pre-existing Root Combiner Outlets, that's it! [insert image here, maybe a player looking at a powerline pole with binoculars]
Laddering Up
Now that you have located a functional pole, you need to climb it. Normally you cannot deploy Ladders on Power Line Poles and many other places (but oddly enough, you CAN deploy them on the horizontal planks at the top of a Pole!). However, Grid Power re-implements all the client-sided deployment logic to allow bypassing of that arbitrary-seeming limitation. If you try to deploy a Ladder on a Power Line Pole, don't be discouraged by the fact that the "ghost guide" is red instead of blue/amber. Click anyway and it will force it through! Ignore the message in the chat saying that the deployment failed - just like the colour of the ghost guide, it's all client-sided and as such there's nothing the plugin can do about it, visually speaking. But trust me, everything works as intended, despite what the client messages are telling you. The Ladders can then be destroyed/picked up to be reused.
Maintenance
A Transformer can have up to 4 Outlets (Root Combiners). That's where the players draw the electricity from. Those Root Combiners can be damaged/destroyed/repaired/picked up with a hammer (if you have Building Privilege) any time. If there's less than 4 Outlets, right-click on a Root Combiner Item in your inventory or drag it into the Fuse Box of the Transformer. You will hear a deployment effect and the Root Combiner will be deployed on the pole. In order to be able to draw power from that Transformer, you need to put a Fuse inside. Right-click a Fuse in your inventory or drag it directly to the Fuse Box. Don't worry - inside of the Transformers, those Fuses will last for much, MUCH longer than inside regular monument Fuse Boxes. By default, a brand new Fuse inside of a Transformer Fuse Box will last you for 12000 seconds (= 200 minutes, = 3.33 hours). This value can be increased or decreased in the config. You can see how much time a fuse has left in the Transformer GUI. By default, the Power Grid will produce electricity between 8 AM and 8 PM. The power output will follow a smooth curve, being the lowest in the morning/evening, and peaking at 2 PM. Exactly how much RWs will be produced on each Outlet is determined by the Transformer's Tech Trash level. By default, each Tech Trash inserted increases the peak power output by 5 RWs (up until a certain point - by default, that level is capped at 50, which translates to 250 RWs per Outlet at peak hours). Upgrade the level by right-clicking the Tech Trash item in your inventory or dragging it directly into the Fuse Box. Inserting Root Combiners/Tech Trash is still possible even if there's already a Fuse inside of the Fuse Box. The Fuse won't be replaced as the sole Item in the slot, since Root Combiners/Tech Trash are consumed immediately.
Hooking Up & Hanging Out
Once there's at least 1 Outlet present, you have a Fuse at hand, and the Grid is currently producing power - you're all set. Take a Wire Tool, pick your favourite wire colour with the [RELOAD] button, typically R, and connect to the outputs of the Root Combiner Outlets to your own electrical devices, usually a Battery or another Root Combiner. You will notice the text on top of your screen telling you what the current Slack of your wire tool / hose tool is. You can increase it with the [DUCK] button, typically CTRL, and decrease it with the [SPRINT] button, typically SHIFT. Larger Slack value means that the wire/hose will appear to be hanging more loosely. Smaller values will make it look tighter. Values close to zero will make it look like they look in vanilla Rust - i.e. not so good in comparison 😉 The final Slack value will be applied the moment you finalise your wire/hose connection. This hanging improvement applies to anything you do with Wire Tools/Hose Tools, not just Transformer Outlet connections! For the Advanced Xmas Lights, it's even better: you can adjust the Slack of each segment individually! After you place the Advanced Xmas Lights segment down, and you're just about to place the next segment, adjust the Slack of the segment you have just placed down with [DUCK] and [SPRINT] buttons. You will see a preview of what it will make the segment look like. Placing the next segment down confirms the Slack for the segment before it.
Danger! High Voltage!
If the Grid is currently producing Power (by default, during daytime) AND a Fuse is inserted in the Transformer, all Root Combiner Outlets are considered live on that Transformer. You can tell whether a Transformer is live or not: first, check your electric devices plugged in directly to the Grid. If they're not currently receiving any charge, they're not live. Similarly, you can look at the diodes on the Root Combiner Outlets. If they're not on, the Transformer is not live either. Lastly, it's pretty clear from the Transformer GUI. If a player tries to connect/disconnect a wire to/from a live Outlet, or they're trying to pick up the Root Combiner Outlet with a hammer, and they're not wearing one of the items on a pre-approved list (see the Advanced Config section below), there is a 1.0 (100%) chance they will get electrocuted to death. Another way to guarantee electrocution is trying to clear connections named INTERNAL. Leave those alone! Wearing protective clothing reduces that chance to 1 in 10 (10%, according to the default permission profile - see below). You can set that chance to 0.0 (0%) if you want to give your players a peace of mind. Another way to guarantee 0% electrocution chance is making sure the Transformer is not live: either wait for the Grid to stop producing Power or take out the Fuse before doing anything else.
Permissions (Oxide.Grant user YourName [permission name starting with gridpower.])
By default, the plugin generates 3 permission profiles in the config - one for admins, one for normal players with no specific permissions (default) and one for VIP. More on permission profiles and config values they can handle can be found in the section Advanced Config. Unless you have added more permission profiles, only these two below are going to be used by your config:
gridpower.admin
Holders of the admin permission will also be able to run the /gp_cfg and /gp_emergency_cleanup commands
gridpower.vip1
Holders of this permission will follow settings and limits associated with with that permission profile. The permissions below are also registered, but not used by default. To use them, just create some permission profiles with those permissions as the key.
gridpower.vip2 gridpower.vip3 gridpower.vip4 gridpower.vip5
Automatic street lights
Depending on your map design, some power line poles might have lamps on them. All those lamps will now emit light, by default between 20:00 an 8:00, which just so happens to be the time when the grid production goes back to 0. You can also set the street lights to be always on, regardless of the time of day. The time settings for the street lights are independent of your power production time settings - they can overlap, one can start before midnight and end after midnight while the other one does not, etc. Those street lights will work even on non-functional power line poles, e.g those without a button on top of them. When on, the lights will flicker from time to time. How often they will flicker and how long individual flickers are going to be depends on your config - look below.
Admin F1 console/chat commands (must have ownerid/moderatorid/gridpower.admin permission)
If you're typing those commands from the F1 console or the server console, drop the preceding slash in the command name.
/gp_cfg Will allow the admins to change non-permission profile related config values on the fly (see below) /gp_emergency_cleanup Instantly kills all the plugin-related entities: fuseboxes, admin generators, root combiners and buttons. It won't remove the power line entries in your data, however. All the killed entities will be re-generated according to your current generation settings in the config next time your server restarts or the plugin reloads. If you want to permanently get rid of them, unload the plugin, delete your oxide/data/GridPower.json, and load it back in. /gp_pole [add/remove] This command will allow admins to add or remove functional power line poles at any time. Just look directly at the pole you want to modify and type the command with an argument (either "add" or "remove", depending on what you want to achieve). If you want to add a pole and it already is functional, or if you want to remove a pole, but it isn't functional - you will get a warning. Same if you try to add a pole, but the pole you're looking at is building blocked by a nearby monument. "Ent killing" (or using a plugin like Remover) the power line fusebox is the equivalent of permanently removing it from the data and it won't be re-generated any more on next reload. Wiping your save file also automatically removes all the extra components and replaces them with new ones tailored to your map, in accordance to your generation settings.
Configuration (oxide/config/GridPower.json and /gp_cfg console/chat command)
Vast majority of the settings can be configured with the /gp_cfg chat command. Typing it in the chat/console with no parameters should dump a rundown of config fields and their values. In order to run any of the config commands, you will need to have ownerid or moderatorid (or the gridpower.admin permission).
/gp_cfg GridConstantPower [logical values (true or false)] If set to true, the Grid will always produce electricity at its peak (100%), 24 hours a day (DEFAULT: false) /gp_cfg GridProductionStartAtHour [fractions (like 13.37) between 0.00 and 24.00] The hour of the day when the power production starts climbing up from 0 (DEFAULT: 8.0) /gp_cfg GridProductionEndAtHour [fractions (like 0.69, nice) between 0.00 and 24.00] The hour of the day when the power production settles back at 0 (DEFAULT: 20.0) /gp_cfg StreetlightsConstantPower [logical values (true or false)] If set to true, the Streetlights will be on 24 hours a day. (DEFAULT: FALSE) /gp_cfg StreetlightsTurnOnAtHour [fractions (like 20.4) between 0.00 and 24.00] The hour of the day when the street lights turn on (DEFAULT: 20.0) /gp_cfg StreetlightsTurnOffAtHour [fractions (like 8.2) between 0.00 and 24.00] The hour of the day when the street lights turn off (DEFAULT: 8.0) /gp_cfg StreetlightsReliability [fractions (like 0.5) between 0.00 and 1.00] The reliability of the streetlight. The less it is, the more often it will flicker. At 1, which represents 100%, it never flickers. (DEFAULT: 0.95) /gp_cfg StreetlightsFlickerLengthMin [fractions (like 1.2) between 0.00 and Positive Infinity] The minimum random length of the flicker, in seconds (DEFAULT: 0.1) /gp_cfg StreetlightsFlickerLengthMax [fractions (like 2.4) between 0.00 and Positive Infinity] The maximum random length of the flicker, in seconds (DEFAULT: 0.5) /gp_cfg GeneratorChancePowerlineFunctional [fractions (like 0.5) between 0.00 and 1.00] The chance that a valid Power Line Pole will be made functional during generation. (DEFAULT: 0.33) /gp_cfg FuseRequired [logical values (true or false)] If set to false, the Transformers won't need Fuses to produce power, just the right time of the day (if power is not 24/7) (DEFAULT: TRUE) /gp_cfg BuildingBlockPreventsButtonPress [logical values (true or false)] If set to true, if there's any Tool Cupboards in the range of the Transformer, you need to be authorised on all of them to open the Transformer GUI (DEFAULT: TRUE) /gp_cfg GeneratorInitialLevelMin [integers (like 7) between 0 and 1000] The lower limit for the random Tech Trash level of valid Power Line Poles during generation (DEFAULT: 1) /gp_cfg GeneratorInitialLevelMax [integers (like 7) between 0 and 1000] The upper limit for the random Tech Trash level of valid Power Line Poles during generation (DEFAULT: 5) /gp_cfg GeneratorInitialOutletsMin [integers (like 1) between 0 and 4] The lower limit for the random number of Outlets of valid Power Line Poles during generation (DEFAULT: 0) /gp_cfg GeneratorInitialOutletsMax [integers (like 3) between 0 and 4] The upper limit for the random number of Outlets of valid Power Line Poles during generation (DEFAULT: 4) /gp_cfg PowerlinePowerPerTechTrash [integers (like 7) between 0 and 1000] How much RWs at peak hours are provided per 1 Tech Trash Level upgrade (DEFAULT: 5) /gp_cfg PowerlineMaxTechTrashLevel [integers (like 7) between 0 and 1000] The maximum level that a Transformer can be upgraded to (DEFAULT: 50) /gp_cfg PowerlineFuseDurationSeconds [fractions (like 420.69, nice) between 0.0 and Infinity] How long (in seconds) a brand new Fuse inserted in the Transformer Fusebox will last (DEFAULT: 12000.0) /gp_cfg FuseItemShortname [strings (like "fuse")] The shortname of the item that acts as the Fuse for Transformer Fuseboxes, must be a valid Rust item shortname /gp_cfg FuseItemGuiName [strings (like "Transformer Fuse")] The custom GUI display name of the item that acts as the Fuse for Transformer Fuseboxes, can be anything, or left blank for default /gp_cfg FuseItemSkinID [positive long integers (like 2783151202)] The skin ID of the Fuse item if using custom, leave at 0 to accept any items of the shortname specified by FuseItemShortname
Protective clothing (only editable through oxide/config/GridPower.json)
"ProtectiveClothing": { "hazmatsuit": null, "scientistsuit_heavy": null, "hazmatsuit_scientist": null, "hazmatsuit_scientist_peacekeeper": null, "hazmatsuit.spacesuit": null, "boots.frog": null, "hazmatsuit.nomadsuit": null, "pants": [ 1581896222 ], "hoodie": [ 1581890527, 1582492745 ] }, Each entry has a key (the item shortname in quotes) and a value. If the value is null, it means all possible skins for that item shortname are accepted. In the example above, we're allowing all rubbery one-pieces (value is null, so any skin) and we're also allowing pants with 1 possible skin or a hoodie with 2 possible skins to be treated as protective clothing. You will see that there's no comma after the last entry on the list. BEFORE SAVING, ALWAYS VALIDATE YOUR JSON WITH A TOOL LIKE JSON LINT!
Permission profiles
Using profiles you can quickly create/edit different permissions for different players, for example, if you have more than 1 VIP tier on your server - just add some new profiles. Different players can have different limits and permissions associated with using the Power Grid. To check which permission profile the player should fall under, the plugin goes through all permission profiles and checks whether the player has that permission granted. The permissions are checked in order, meaning that if the player doesn't have the first permission, it will try the next permission on the list, etc (similar to how Auto Kits checks which kit to give to a player based on their permissions in order). If the player doesn't have any permissions from the list granted, they will fall back to the "default" profile. That's the only one that you shouldn't remove! If you remove it, a new one with default values will be created. So if you don't want your default, non-VIP players to use the power grid, don't remove the default profile, just take away privileges in that profile (like upgrading/deploying ladders/pressing the button). You don't have to use the built-in VIP permissions - any REGISTERED permission from any plugin will do just fine! By default, three permission profiles are generate in the config: default, gridpower.admin and gridpower.vip1. The default permission profile will apply to any player who doesn't have any permissions listed in the profile list - let's have a look at it:
"PermissionProfiles": { "default": { "PermissionRequired": "default", "GridCanDeployLadder": true, "GridCanDeployRootCombiners": true, "GridCanConnectDisconnect": true, "GridCanPressButton": true, "GridCanUpgrade": true, "GridDangerousWireElectricutionChance": 0.1, "HangingXmasLights": false, "HangingWiresAndHoses": false, "SubdivisionsPreview": 10, "SubdivisionsFinal": 50, "SlackMax": 5.0 },
PermissionRequired should contain an already existing permission registered by any plugin in the form of pluginname.permissionname GridCanDeployLadder allows players to deploy ladders on Power Line Poles GridCanDeployRootCombiners allows players to deploy Root Combiners on Power Line Pole transformers by inserting them into the Fuse Box GridCanConnectDisconnect allows players to use a Wire Tool to connect their own electrical devices to the Grid GridCanPressButton allows players to access the Transformer GUI GridCanUpgrade allows the players to upgrade the Transformer peak output by inserting Tech Trash into the Fuse Box GridDangerousWireElectricutionChance defines how likely it is that a player will die from electrical accidents, even while wearing protective clothing HangingXmasLights allows the players more control over how much the Advanced Xmas Lights will be hanging (purely visual) HangingWiresAndHoses allows the players more control over how much the Wires/Hoses will be hanging (purely visual) SubdivisionsPreview is the number of intermediary points used while showing the hanging Xmas Lights preview catenary curve of the last placed segment. The more points, the smoother it looks. (purely visual) SubdivisionsFinal is it the number of intermediary points used for the final catenary curve of the hanging wires/hoses/xmas lights. The more points, the smoother it looks (purely visual) SlackMax sets the maximum "looseness" of the wire/hose/xmas lights that the player is allowed. The more the slack, the longer the wire appears overall.
API hooks (for plugin developers)
All methods utilise the [HookMethod] attribute, which means you don't call them through Interface.Call, you need to first create this field in your plugin's main class...
[PluginReference] private Plugin GridPower; Then, call the hooks like so. It's pretty self-explanatory what information they will provide you with.
bool isPowerConstant = (bool) GridPower.Call("GridPowerIsConstant"); bool isGridProducing = (bool) GridPower.Call("GridIsProducing"); float productionHourStart = (float) GridPower.Call("GridGetProductionHourStart"); float productionHourEnd = (float) GridPower.Call("GridGetProductionHourEnd"); float currentGridEfficiency = (float) GridPower.Call("GridGetEfficiency"); bool areStreetlightsAlwaysOn = (bool) GridPower.Call("StreetlightsPowerIsConstant"); bool areStreetlightsOn = (bool) GridPower.Call("StreetlightsAreOn"); float streetlightsHourStart = (float) GridPower.Call("StreetlightsGetTurnOnHour"); float streetlightsHourEnd = (float) GridPower.Call("StreetlightsGetTurnOffHour");
Translation support (oxide/lang/en/GridPower.json)
Almost every string the players see, including the text displaying in the chat and the GUI, can be edited. Just load the plugin and let it generate the file - after you edit it, reload the plugin.
-
$49.90
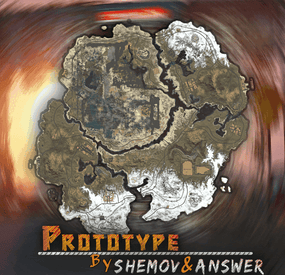
Prototype: Infected Zone | Rust Custom Map By Shemov & Answer
This map features a large city monument inspired from the prototype game, where the city is divided into distinct zones representing the different stages of infection in New York City due to the viral outbreak. The Green Zone is the least affected area, where the military and uninfected civilians maintain relative normalcy. It serves as a zone with minimal viral presence, heavily fortified by the military. The Yellow Zone is a transitional area, marked by chaos, quarantines, and growing infection, where military forces struggle to maintain control, and civilians are at risk. The Red Zone is the most dangerous, fully overrun by the virus, where infected creatures roam freely, and the city is in complete ruin. The dark, gritty atmosphere of the city enhances the thrill of exploration, making it feel both vast and claustrophobic as you uncover secrets and evade relentless enemies.
> Each zone offers distinct challenges and environments, contributing to the city's atmosphere of escalating tension and danger.
FEATURES
- Map size: 4500;
- Prefab count: ~95k;
- Compatible with BetterNPC plugins (Config for bots in the file), and Train Homes;
- Underground railway;- Double-track surface railway with 2 entrances to the metro with separate branches for spawn trains;
- Ring road (compatible with event plugins);
- Evenly spaced monuments to spread the FPS load of client;
- Custom building sites (X on the minimap);
- Custom places for building in the subway (XU on the minimap);
- Bridges are designed for easy tugboat access;
- Custom waterfalls, lakes, canyons
CUSTOM MONUMENTS
- Prototype City;
- Deserted town;
- Plane Crash;
- RW Station;
- Stranded Cargoship;
- Chemical Silo;
- Custom build spots: marked with X or XU;
- Unmarked mini monuments;
- Dive site;
- Bunker.
FACEPUNCH MONUMENTS
- Combined Outpost;
- Harbour (2/2);
- Ferry Terminal;
- Radtown;
- Abandoned Supermarket;
- Oxum's Gas Station;
- Launch Site;
- Airfield;
- Water treatment plant;
- Trainyard;
- Power Plant;
- Arctic Research Base;
- Desert Military Base;
- Giant Excavator Pit
- Stone, Sulfur & HQM quarries;
- Satellite Dish;
- Small & Large Oil Rig;
- Underwater Lab.
NOTES
- The password for the map is included, just in case you want to edit it.
- Need help? You can contact Shemov or Answer
- #rust custom
- #custom map
- (and 9 more)
-
$8.00
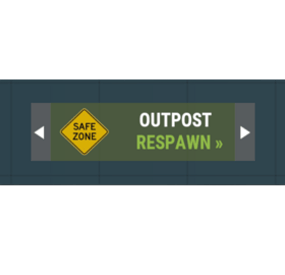
Outpost Respawn Plus
By RIPJAWBONES in Plugins
This is a great addition to Rust servers that provides players with a convenient respawn option. Upon death, players are presented with buttons on the death screen that allows them to respawn at the outpost or bandit camp, offering a strategic advantage in gameplay. This feature enhances the overall player experience by streamlining the respawn process and encouraging outpost and bandit camp utilization. This plugin has been used since 2019 on some popular servers, players enjoy the option of spawning in a safe zone.
If you cannot afford to pay for this plugin wishlist it and send me a message asking for it and I will give it to you for free.
Features:
Supports your own set spawn locations. Supports all monuments and custom monuments. Supports custom map locations. Player cooldowns. Removes players hostile timer when they respawn at outpost or bandit camp. Ability to set the players spawn Health, Calories and hydration when they respawn using the custom button. Ability to set a spawn kit or multiple spawn kits for when players respawn at the outpost or bandit camp, must be using a Kits plugin.
(If you choose to have multiple spawn kits in the config it will choose a random one when a player respawns using the custom button.) User-Friendly UI: The respawn button is presented in an intuitive and visually appealing manner, ensuring ease of use for players. Optimized Performance: The plugin is designed with efficiency in mind to ensure minimal impact on server performance.
Permissions:
outpostrespawn.outpost
Players with this permission can respawn at the outpost.
outpostrespawn.bandit
Players with this permission can respawn at the bandit camp.
Admin Chat Commands:
/savemonument - This saves the monument that the admin is standing at to the config.
/setmonument - This saves the monument spawn location the admin is standing at to the config.
/setcustommonument - This saves the custom monument spawn location the admin is standing at to the config.
/setcustomspawn - This saves the custom map location the admin is standing at to the config.
-

$25.00
Industrial Recycler
♻️ Industrial Recycler – The Ultimate Automated Recycling System for Rust!
Supercharge your Rust server’s recycling experience with the Industrial Recycler plugin!
Empower your players to automate, optimize, and control every aspect of item recycling, whether they want a plug-and-play setup or deep customization.
⚡ Core Features
Automated Industrial Recycling
Fully automate resource processing! Industrial recyclers can be linked to input/output storage and adapters, allowing seamless recycling and transfer between containers.
Standard Recycler Option
Prefer a classic touch? Standard recyclers are also available—simple and reliable, with or without automation.
🛒 Shop, Give, and Upgrade Commands
/buyindustrialrecycler – Buy an industrial recycler (Permission: industrialrecycler.buyindustrial)
/buyrecycler – Buy a standard recycler (Permission: industrialrecycler.buystandard)
/giveindustrialrecycler & /givestandardrecycler – Instantly give recyclers to any player (Permission: industrialrecycler.give)
/upgraderecycler – Instantly upgrade a standard recycler to industrial (Permission: industrialrecycler.give)
/irec or /virtualrec – Open your personal virtual recycler from anywhere (Permission: industrialrecycler.virtual)
🏆 VIP & Admin Benefits
Tiered Ownership Limits
Customizable limits for Standard, VIP1, VIP2, and Admins (Admins enjoy unlimited recyclers).
Configurable Purchase Costs
Set any item or currency as the price for purchasing recyclers in your shop.
🔒 Advanced Access Control
Permissions for Everything
Decide who can buy, give, place, upgrade, or pick up recyclers with flexible permissions.
Ownership Security
Limit recycler usage to owner only, or expand to team/friends (via Friends plugin).
NoEscape Integration
Automatically restrict virtual recycling if players are raid-blocked or in combat (optional).
🖥️ Interactive & User-Friendly UI
Intuitive Panels
Jump between recycler, input, and output with a click—no more clunky menus!
Layout Toggle
Owners can switch between layout styles instantly, right from the UI (with permission).
Shop & Purchase UI
Players buy recyclers via an in-game panel with clear costs and confirmation.
💻 Virtual Recycler (Anywhere Recycling!)
Personal Recycler
Players with permission can access a virtual recycler from anywhere with commands like /irec—no need to place a recycler at their base!
🏗️ Placement & Pickup
Place on Foundations, or Tugboats (Standard only)
Pick Up Easily
Use a hammer to pick up your recycler or its adapters (if permitted)—items inside will be safely returned.
🚀 Customization & Flexibility
Change the Base Item
Make the recycler any deployable you want—match your server’s style!
Custom Skins
Industrial and Standard versions each use their own skin for clear identification.
Hide Storage Containers
For minimalistic servers, hide storage visuals for a cleaner look.
🌎 Full Localization Support
Available Languages: English, Portuguese, German, Spanish
All chat and UI messages are ready for your global player base.
🧠 Smart Quality-of-Life
Dropped Item Protection
If recyclers are destroyed or picked up, any leftover items are safely dropped for the owner.
Recycler Speed Tiers
Special permissions allow VIPs/Admins to recycle at faster speeds.
🚦 Why Choose Industrial Recycler?
Transform recycling into a powerful, automated experience. Perfect for PVE, PVP, RP, and creative servers. Easy to set up, ultra-configurable, and packed with features for admins and players alike. Embrace the future of recycling in Rust—install Industrial Recycler today!
Configuration File:
- #recycler
- #industrial
- (and 2 more)
-

$34.99$19.99Shipwreck
This plugin will allow players to visit the depths of the ocean to discover 3 new locations included in this plugin: a Sunken Cargo Ship, Submerged Ore Farm, and a Shipwrecked Barge.
In the wreckage you will find a high concentration of loot. Just be careful! The COBALT group has already arrived and is exploring the site.
They have submarines and divers already in the water!
Patrol Submarines
Subs do a LOT of damage, but they have low visibility and low accuracy. Very unreliable at Titanic depths. Subs are a serious threat if you arrive in a submarine yourself. Try to sneak up behind them and destroy them, you don't want to be the one to sink, trust me!
Cobalt NPC Divers
High accuracy, but not much armor and don't pack a huge punch. Almost harmless if you arrive in a submarine, but they are still a threat! Keep your eyes on these guys, it might just be you or them!
Killer Sharks
These sharks have smelled all the blood in the water, after being drawn to the area already by all of the disturbance. They are here, they are mad, and they are bloodthirsty and hungry!
The plugin includes 3 locations:
Shipwrecked Cargo Ship
There are three rooms in the Sunken Cargo Ship location that are opened with a keycard. The map type can be selected within the configuration file.
Sunken Barge
A great place to find some Shipping Containers, as well as Killer Sharks! The Cobalt group has been busy in this area, they must have taken this Barge down recently as well.
Submerged Ore Farm
An ore rich location with multiple farmable ore nodes, as well as some other scattered loot including fuel barrels.
Chat commands (only for administrators)
/shipwreckstart – launches the event in a random configuration /shipwreckstart <shipwreckstart> – launches the event in the <eventPresetName> configuration /shipwreckstartmyloc – launches the event in a random configuration in your location /shipwreckstartmyloc<shipwreckstart> – launches the event in the <eventPresetName> configuration in your location /shipwreckstop – stops the event /screatepath– starts recording the route for the npc/shark/sub /ssavepath <npc/shark/subPresetName> – saves route for npcs/sharks/sub /scancelpath – cancels route recording Console commands (RCON only)
shipwreckstart – launches the event in a random configuration shipwreckstart <shipwreckstart> – launches the event in the <eventPresetName> configuration shipwreckstop – stops the event Config
plugin_en – example of plugin configuration in English location_en – example of location configuration in English plugin_ru – example of plugin configuration in Russian location_ru – example of location configuration in Russian Dependencies (optional, not required)
True PVE PveMode GUI Announcements Notify DiscordMessages AlphaLoot CustomLoot Economics Server Rewards IQEconomic Hooks
void OnShipwreckStart() void OnShipwreckStop()
My Discord: adem9554
Join the Mad Mappers Discord here!
Check out more of my work here!