
Forbidden Lands Rust's Wishlist
-
$20.00
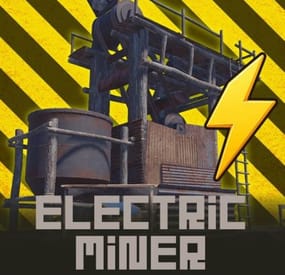
Electric Miner
By NINJA WORKS in Plugins
Electric Miner
Why not convert your excess electricity into a resource?
Electric Miner brings the Mining Quarry and the Pump Jack to life as fully automated, electricity-powered machines that players can build wherever they want. There's no need to fight over a monument quarry anymore. Just place a machine on your own base, run a wire to it, choose what you want it to produce, and let it work. Each machine has a clean animated interface, an engine you can upgrade for bigger yields, and a liquid system on the Pump Jack for pumping water where you need it.
Two placeable machines: the Electric Miner (a mining quarry) and the Electric Pump Jack (an oil and liquid pump). Both are handed to players as a deployable item. A live placement guide draws the machine's footprint with marker spheres as you aim, so you always know exactly where it will land before you commit. Placement is checked against slope, water depth, roads, monuments, safe zones, no-build zones, nearby obstructions, and other players' building privilege. Machines run on real power. They only start once you've wired them to a power source and flipped the switch, and they draw from the upstream battery while they run. Players choose what each machine produces from an in-game menu, whether that's the ore the Miner digs or the liquid the Pump Jack outputs. An engine upgrade system lets players spend materials to push the machine through several tiers, each one raising the yield multiplier. Upgrading plays a sound and fills an animated progress gauge. The Pump Jack stores liquid internally and can feed it out through a hose to a water container or sprinkler, which is handy for irrigation and base setups. Machine lights turn on by themselves whenever there's power, giving you an instant visual cue that everything is connected. Only the owner, their team, and admins can flip the switch, open the menu, or pick a machine up. Nobody else can touch it. Pick a machine back up with a hammer and it returns to your inventory as an item, as long as it's healthy enough, and any stored contents drop to the ground. The selected resource, engine tier, stored liquids, chosen output liquid, and durability are all saved and survive server restarts. The interface animates open and closed, uses a clean card layout for selections, and supports your own custom background image. Built-in translations for English, Japanese, Simplified Chinese, Traditional Chinese, Russian, Ukrainian, and French. English (en), Japanese (ja), Simplified Chinese (zh-CN), Traditional Chinese (zh-TW), Russian (ru), Ukrainian (uk), and French (fr). Every message and menu label can be edited in the oxide/lang files.
1. Get the item. An admin gives out the machines (see Commands below), or you can sell them through a shop or hand them out in a kit using the skin IDs.
2. Place it. Hold the item and look at flat ground. The footprint guide appears, and a left-click drops the machine in. The item is used up and the full quarry or pump jack spawns in its place.
3. Power it. Take out the in-game Wire Tool, click an output on your power source (a battery, generator, and so on), then click the machine's power switch to join them. The default wire limit is 100 m.
4. Choose a resource. Press USE on the machine to open the menu and pick what it should mine or output.
5. Turn it on. Flip the power switch. As long as it has enough power and the output isn't full, the machine runs and produces on the interval you set.
6. Upgrade it (optional). Press USE on the engine to open the upgrade menu and spend materials to raise the yield.
7. Collect or pack up. Loot the output container as it fills, or hit the machine with a hammer to take it back as an item.
A note on the Pump Jack
The Pump Jack collects oil and water-type liquids into its own internal tank, which holds up to 500,000 ml by default. To move that water elsewhere, point the Wire Tool at the Pump Jack's fluid switch and run a hose to a water container or sprinkler. From there it pushes liquid out at the rate you set in the config (300 ml/s by default).
{ "Wire/hose max distance (m)": 100.0, "Durability": 2000.0, "Pickup minimum durability percent": 80.0, "Required power (consumed per minute)": 50, "Liquid storage capacity (ml)": 500000, "Fluid output per second (ml)": 300, "UI background image URL": "https://i.imgur.com/WMefGKk.jpg", "Electric Mining": { "Item display name": "Electric Miner", "Mineable resources": [ { "Item shortname": "metal.ore", "Item skin ID": 0, "Display name": null, "Amount per cycle": 10, "Interval (seconds)": 15.0 }, { "Item shortname": "sulfur.ore", "Item skin ID": 0, "Display name": null, "Amount per cycle": 10, "Interval (seconds)": 20.0 }, { "Item shortname": "hq.metal.ore", "Item skin ID": 0, "Display name": null, "Amount per cycle": 1, "Interval (seconds)": 60.0 }, { "Item shortname": "stones", "Item skin ID": 0, "Display name": null, "Amount per cycle": 10, "Interval (seconds)": 10.0 } ], "Upgrade tiers": [ { "Yield multiplier": 1.1, "Upgrade costs": { "scrap": 300, "metal.refined": 50, "gears": 10, "metalblade": 20 } }, { "Yield multiplier": 1.2, "Upgrade costs": { "scrap": 500, "metal.refined": 100, "gears": 20, "metalblade": 40 } }, { "Yield multiplier": 1.5, "Upgrade costs": { "scrap": 800, "metal.refined": 200, "gears": 30, "metalblade": 50 } }, { "Yield multiplier": 2.0, "Upgrade costs": { "scrap": 1000, "metal.refined": 400, "gears": 50, "metalblade": 80 } } ] }, "Electric Pump Jack": { "Item display name": "Electric Pump Jack", "Mineable resources": [ { "Item shortname": "crude.oil", "Item skin ID": 0, "Display name": null, "Amount per cycle": 1, "Interval (seconds)": 20.0 }, { "Item shortname": "water", "Item skin ID": 0, "Display name": null, "Amount per cycle": 800, "Interval (seconds)": 10.0 }, { "Item shortname": "water.salt", "Item skin ID": 0, "Display name": null, "Amount per cycle": 1000, "Interval (seconds)": 10.0 }, { "Item shortname": "water.radioactive", "Item skin ID": 0, "Display name": null, "Amount per cycle": 500, "Interval (seconds)": 10.0 } ], "Upgrade tiers": [ { "Yield multiplier": 1.1, "Upgrade costs": { "scrap": 300, "metal.refined": 50, "gears": 10, "metalblade": 20 } }, { "Yield multiplier": 1.2, "Upgrade costs": { "scrap": 500, "metal.refined": 100, "gears": 20, "metalblade": 40 } }, { "Yield multiplier": 1.5, "Upgrade costs": { "scrap": 800, "metal.refined": 200, "gears": 30, "metalblade": 50 } }, { "Yield multiplier": 2.0, "Upgrade costs": { "scrap": 1000, "metal.refined": 400, "gears": 50, "metalblade": 80 } } ] } } DEFAULT PRODUCTION
Electric Miner
Metal Ore .......... 10 every 15s
Sulfur Ore ......... 10 every 20s
HQM Ore ............ 1 every 60s
Stones ............. 10 every 10s
Electric Pump Jack
Crude Oil ......... 1 every 20s
Water ............. 800 ml every 10s
Salt Water ....... 1000 ml every 10s
Radioactive Water . 500 ml every 10s
Engine Upgrade Tiers (default, both machines)
Tier 2 x1.1 300 Scrap, 50 HQM, 10 Gears, 20 Metal Blades
Tier 3 x1.2 500 Scrap, 100 HQM, 20 Gears, 40 Metal Blades
Tier 4 x1.5 800 Scrap, 200 HQM, 30 Gears, 50 Metal Blades
Tier 5 x2.0 1000 Scrap, 400 HQM, 50 Gears, 80 Metal Blades
All amounts, intervals, multipliers, costs, resources, and tier counts are fully editable in the config.
Config field reference
- Wire/hose max distance (m): How far a power wire or fluid hose is allowed to reach.
- Durability: The machine's health.
- Pickup minimum durability percent: How healthy the machine has to be before it can be picked up as an item.
- Required power (consumed per minute): How much power the machine needs to run, and how much it draws each minute while running.
- Liquid storage capacity (ml): The size of the Pump Jack's internal tank.
- Fluid output per second (ml): How fast liquid is pushed through a connected hose.
- UI background image URL: The background image shown behind the menu. Swap in your own to match your server.
- Item display name: The name shown on the item and in the menu.
- Mineable resources: Everything the machine can produce. Item skin ID and Display name are optional.
- Upgrade tiers: Each tier sets a yield multiplier and its material cost. Add or remove tiers as you like; the number of tiers is the max level.
The give commands are restricted to admins. To hand item to regular players, an admin uses the give command, or you distribute the items through a shop / kit plugin using the skin IDs below.
Chat command (Admin Only)
/ElectricMiner Gives the player one Electric Miner AND one Electric Pump Jack item
Console command
giveminer <mining | pumpjack> <SteamID> Gives the chosen machine to the specified player (must be online).
Ex. Give the pumpjack to 76562442829013221
giveminer pumpjack 76562442829013221
Item details (for shops / kits)
Electric Miner shortname: watchtower.wood skin: 3750459142
Electric Pump Jack shortname: watchtower.wood skin: 3750459320
Q: Do these have to go near a monument?
A: Not at all, and that's the point. You can build them anywhere valid on the map, whether that's flat ground or shallow water up to 3 m deep, as long as you keep clear of monuments, roads, safe zones, and other players' building privilege.
Q: How do players power a machine?
A: With the in-game Wire Tool. Click an output on a power source such as a battery or generator, then click the machine's power switch. It needs enough power to run (50 by default) and draws from the battery the whole time it's working.
Q: My machine won't start. What's wrong?
A: A machine only runs when three things are true: the switch is on, it has enough power, and the output container isn't full. Check all three. The lights are a quick tell, since they only come on once the machine has power.
Q: Can other players use or steal my machine?
A: No. Only the owner, their team, and admins can flip the switch, open the menu, or pick it up.
Q: How do I get my machine back?
A: Hit it with a hammer. As long as it's above the durability threshold (80% by default), it returns to your inventory as an item and anything stored inside drops to the ground.
Q: How does upgrading work?
A: Press USE on the engine to open the upgrade menu, then spend the listed materials to move up a tier. Each tier raises the yield multiplier (x1.1 up to x2.0 by default), and your tier is saved per machine through restarts.
Q: What can the Pump Jack do with liquids?
A: It keeps the liquid it produces in its own tank and can push water out through a hose to a water container or sprinkler, which is great for irrigation. You pick the output liquid from the menu.
Q: Can I change what each machine makes, how fast, and what upgrades cost?
A: Yes. Resources, amounts, intervals, multipliers, tier counts, and costs are all set per machine in the config.
Q: How do I give the items to regular players?
A: Use the admin /ElectricMiner or giveminer command, or sell and gift them through your shop or kit plugin using the shortname watchtower.wood and the skin IDs above.
Q: Do placed machines and their settings survive a restart or wipe?
A: Your settings (selected resource, engine tier, stored liquids, output liquid, and durability) carry over through restarts. Like any deployable, the machines themselves are cleared on a map wipe.
Q: Can I use my own background image in the menu?
A: Yes. Just point the "UI background image URL" setting at your own image.
VOID / NINJA WORKS
DISCORD : https://discord.gg/U8uxePjSyA
MADE IN JAPAN
-
.thumb.gif.79aeca56ceff35f53b912f02158a0898.gif)
$17.99
Easy Workshop Skins Adder Browser Extension
I got tired of manually copying and pasting skin IDs, so I threw this extension together. It lets you send Rust skins directly from the Steam Workshop straight to your server with a single click using Web RCON.
If you're a server owner, this is going to save you a ton of time. Adding massive skin collections is completely effortless now, and you don't have to keep tabbing back and forth. It works with Chrome, Opera, Opera GX, Edge, Brave, or pretty much any Chromium-based browser.
Here is what it adds:
Grid Buttons – Drops a quick "+" button directly onto the Workshop grid tiles so you can rapidly grab skins while browsing. Item Page Button – Adds a big "Send Skin to Server" button right next to the voting controls on individual item pages. Accepted Skin Flags – Automatically slaps a banner and a red button on officially accepted Rust skins so you can easily spot what's actually in the game. Quick Shortcut – Clicking the extension icon instantly opens up the Rust Workshop in a new tab. Must Settings
Your Rust server must have Web RCON enabled for this extension to connect. Make sure you have +rcon.web 1 (or rcon.web true) set in your server startup config! Most server have this set by default.
Plugin Compatibility
Currently, I've got it wired up to work right out of the box with both Skinbox Plugin and Skinner Plugin You can pick which one your server uses right in the extension's settings menu.
Installation
Since this is a custom extension, it only takes a minute to install: Download and extract the extension ZIP file. Inside, you'll find a second ZIP file. Open your browser's Extensions page (you can type chrome://extensions into the address bar). Enable Developer mode using the toggle in the top-right corner. Simply drag and drop the second ZIP file directly into the Extensions page, and the browser will install the extension automatically. Install Video
Contact And Help
If you need to contact me discord is best: robjp2210
For help/support my discord group is best: Join RustMaps By RobJ Discord
-
$15.00
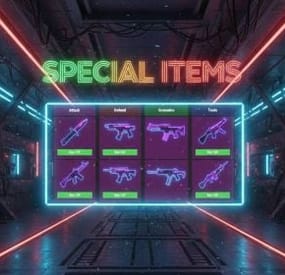
Special Items Z
With this plugin you can sell and put to loot containers the special items for players.
Boost your server with special weapons, clothing, grenades, and tools. All devices can be customized in the config.
It can be added to the Shop, with the itemID and skinID.
Added spawn Special Items to Loot container after spawn.
Config
{ "Command_and_General_Settings": { "Command": "sishop", "Cost_Type__1_Scrap__2_Economics__3_ServerRewards": 1, "VIP_Cost_Multiplier__1_0__default__0_5__50_": 0.5, "Can_Attack_Other_Players_Entities_": false, "UI_Size__default__1_": 1.0 }, "Weapons": { "_1_hit_npc_Knife": { "Cost__0_disable": 1, "Damage_Multiplier": 1, "Loot_Chance_Percent__0_disable": 1, "Loot_Amount": 1 }, "SMG": { "Cost__0_disable": 1, "Damage_Multiplier": 2, "Loot_Chance_Percent__0_disable": 1, "Loot_Amount": 1 }, "Semi_automatic": { "Cost__0_disable": 1, "Damage_Multiplier": 2, "Loot_Chance_Percent__0_disable": 1, "Loot_Amount": 1 }, "MP5": { "Cost__0_disable": 1, "Damage_Multiplier": 2, "Loot_Chance_Percent__0_disable": 1, "Loot_Amount": 1 }, "LR300": { "Cost__0_disable": 1, "Damage_Multiplier": 2, "Loot_Chance_Percent__0_disable": 1, "Loot_Amount": 1 }, "M39": { "Cost__0_disable": 1, "Damage_Multiplier": 2, "Loot_Chance_Percent__0_disable": 1, "Loot_Amount": 1 }, "AK47": { "Cost__0_disable": 1, "Damage_Multiplier": 3, "Loot_Chance_Percent__0_disable": 0, "Loot_Amount": 0 }, "m249": { "Cost__0_disable": 1, "Damage_Multiplier": 3, "Loot_Chance_Percent__0_disable": 0, "Loot_Amount": 0 } }, "Armor": { "Facemask": { "Cost__0_disable": 1, "Damage_Absorption_Percent": 25, "Loot_Chance_Percent__0_disable": 1, "Loot_Amount": 1 }, "Chest_Plate": { "Cost__0_disable": 1, "Damage_Absorption_Percent": 25, "Loot_Chance_Percent__0_disable": 1, "Loot_Amount": 1 }, "Kilt": { "Cost__0_disable": 1, "Damage_Absorption_Percent": 25, "Loot_Chance_Percent__0_disable": 1, "Loot_Amount": 1 }, "Boots": { "Cost__0_disable": 1, "Damage_Reflection_Percent": 10, "Loot_Chance_Percent__0_disable": 1, "Loot_Amount": 1 }, "Gloves": { "Cost__0_disable": 1, "Damage_Reflection_Percent": 10, "Loot_Chance_Percent__0_disable": 1, "Loot_Amount": 1 }, "TShirt": { "Cost__0_disable": 1, "Damage_Reflection_Percent": 10, "Loot_Chance_Percent__0_disable": 1, "Loot_Amount": 1 }, "Pants": { "Cost__0_disable": 1, "Damage_Reflection_Percent": 10, "Loot_Chance_Percent__0_disable": 1, "Loot_Amount": 1 }, "Animal_Gloves": { "Cost__0_disable": 1, "Damage_to_Healing_Conversion_Percent": 10, "Loot_Chance_Percent__0_disable": 0, "Loot_Amount": 0 } }, "Grenades": { "Trap_Grenade": { "Cost__0_disable": 1, "Radius": 4.0, "Loot_Chance_Percent__0_disable": 1, "Loot_Amount": 1 }, "Wall_grenade": { "Cost__0_disable": 1, "Radius": 4.0, "Loot_Chance_Percent__0_disable": 1, "Loot_Amount": 1 }, "Door_grenade": { "Cost__0_disable": 1, "Radius": 3.0, "Loot_Chance_Percent__0_disable": 1, "Loot_Amount": 1 }, "Tank_grenade": { "Cost__0_disable": 1, "Radius": 10.0, "Loot_Chance_Percent__0_disable": 1, "Loot_Amount": 1 }, "Cluster_grenade": { "Cost__0_disable": 1, "Radius": 15.0, "Spawn_Grenades_Amount": 20, "Loot_Chance_Percent__0_disable": 1, "Loot_Amount": 1 }, "Spawn_landmines_grenade": { "Cost__0_disable": 1, "Radius": 20.0, "Spawn_Mines_Amount": 10, "Loot_Chance_Percent__0_disable": 1, "Loot_Amount": 1 }, "Basic_rocket_grenade": { "Cost__0_disable": 1, "Radius": 30.0, "Spawn_Rockets_Amount": 25, "Loot_Chance_Percent__0_disable": 0, "Loot_Amount": 0 }, "MLRS_grenade": { "Cost__0_disable": 1, "Radius": 40.0, "Spawn_Rockets_Amount": 35, "Loot_Chance_Percent__0_disable": 0, "Loot_Amount": 0 } }, "Utility_Tools": { "Repair_hammer": { "Cost__0_disable": 1, "Repair_Radius": 20.0, "Loot_Chance_Percent__0_disable": 0, "Loot_Amount": 0 }, "Remover_hammer": { "Cost__0_disable": 1, "Loot_Chance_Percent__0_disable": 0, "Loot_Amount": 0 } }, "Gathering_Tools": { "Golden_hatchet": { "Cost__0_disable": 1, "Gather_Multiplier": 2, "Loot_Chance_Percent__0_disable": 1, "Loot_Amount": 1 }, "Golden_icepick": { "Cost__0_disable": 1, "Gather_Multiplier": 2, "Loot_Chance_Percent__0_disable": 1, "Loot_Amount": 1 }, "Diamond_hatchet": { "Cost__0_disable": 1, "Gather_Multiplier": 4, "Loot_Chance_Percent__0_disable": 0, "Loot_Amount": 0 }, "Diamond_icepick": { "Cost__0_disable": 1, "Gather_Multiplier": 4, "Loot_Chance_Percent__0_disable": 0, "Loot_Amount": 0 }, "Rubin_hatchet": { "Cost__0_disable": 1, "Gather_Multiplier": 8, "Loot_Chance_Percent__0_disable": 0, "Loot_Amount": 0 }, "Rubin_icepick": { "Cost__0_disable": 1, "Gather_Multiplier": 8, "Loot_Chance_Percent__0_disable": 0, "Loot_Amount": 0 } }, "Lootcontainer_Settings": { "Custom_Spawn_Shortnames": [ "bradley_crate", "heli_crate", "codelockedhackablecrate" ] } } Language: 31 file
Permissions
SpecialItemsZ.use //player can open ui SpecialItemsZ.vip SpecialItemsZ.freebuy Required plugin:
Imagelibrary.cs Usable plugin:
ServerRewards.cs, Economics.cs
I guarantee the functionality of the plugin as described. However, I cannot take responsibility for conflicts or issues arising from incompatibility with third-party plugins or themes. Please take this into account before purchasing. I will list all known compatibility details in the product description.
-
$25.00
Lighthouse Outpost
Video demo:
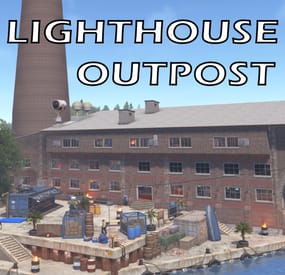
Lighthouse Outpost is a combined outpost and bandit camp monument that lives on the sea. It provides the perfect stop for teams going to the deep sea, oil riggers, or ocean dwellers.
Lighthouse Outpost Features:
1 Boat Vendor
1 Heli Vendor
All outpost and bandit camp vending machines
All mission providers
Drone marketplace
3 Poker tables
5 blackjack machines
6 slot machines
1 spinning wheel for gambling
1 refinery
1 shop front
1 zipline
1 clan table
A place to take a piss
And much much more!
-
$11.99
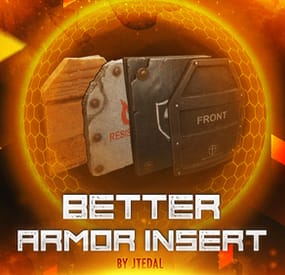
Better Armor Insert
This plugin allows you to add and customize custom Armor Inserts to clothing items. Each such insert has its own parameters that give an additional percentage of protection from different types of damage to the standard indicators of the plate, and can also be configured to fall out of different boxes with a given probability. The plugin is easily managed through the configuration file, where you can set the damage and chance of failure for each insert.
The main features of the plugin:
You can create an unlimited number of custom armor insert variations. For each custom item, you can set the percentage of protection for absolutely any damage (more on this below) You can customize the dropout of each custom item in the crates or add them to the preset of the custom interface for crafting items that cannot be done through the standard menu. How does it work?
The values specified in the configuration file DO NOT REPLACE the standard percentage of damage protection, but only add their own value to it. That is, if the armor insert indicates that it provides 2% protection against bullets, and in the config you have, for example, the entry "Bullet": 2.0, this means that this armor insert will have 4% protection. Everything is very easy, the standard percentage of protection + the one that you specify in the config
Plugin Config
config How to configure the plugin correctly
To set up a custom item correctly, you must specify the type of damage and the percentage of protection against it in the "Damage type and scale (0-100) for it". Keep in mind that you should not focus on the description that we see in the game, because you can see one line of the record, and in fact it means the percentage of protection for several types of damage at once. Therefore, I strongly recommend that you use the plaque that I will provide below with all the damage types that you could customize.
Types of damage and their description:
"Hunger" : "Hunger damage" "Thirst" : "Water shortage damage" "Cold" : "Cold damage" "Drowned" : "Suffocation damage" "Heat" : "Heat damage" "Bleeding" : "Bleeding damage" "Poison" : "Poison damage" "Bullet" : "Bullet damage" "Slash" : "Melee weapon damage" "Blunt" : "Melee weapon damage" "Fall" : "Fall damage" "Radiation" : "Radiation damage" "Bite" : "Animal bite damage" "Stab" : "Melee damage from NPCs" "Explosion" : "Explosion damage" "RadiationExposure" : "Radiation exposure damage" "ColdExposure" : "" "ElectricShock" : "Electric shock damage" "Arrow" : "Arrow damage" "AntiVehicle" : "Transport damage" "BeeSting" : "Bee damage" Console Command (RCON only)
giveinsert <StemID|Player name> (wooden|asbestos|lead|metal) <SkinID> <Amount> - gives the player a custom armor insert
For each custom item in the config, there is a table in the format [Damage type] = [Additional percentage of protection]
Check out more of my work here JTedal's library.
Come see our whole teams work Mad Mapper Library.
Come by the Mad Mapper Discord for support, feedback, or suggestions!
- #jtedal
- #mad mappers
- (and 11 more)