Chill Roleplay's Wishlist
-
$24.99
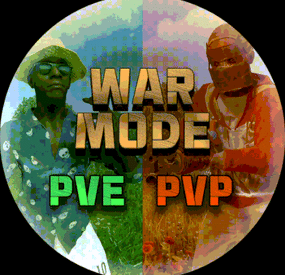
War Mode PVP/PVE
Allows both PVE and PVP players to exist on a server at the same time. PVE players will have certain configurable protections and restrictions. You can have players use a command to flag themselves as PVP/PVE or you can assign it to them when they first spawn. If you have ZoneManager you can also designate specific zones to force player's to be PVE or PVP. Plugin is also compatible with SimpleStatus.
Note: Video is outdated, see documentation for a full list of new features!
Documentation:
A full readme including permissions, commands, and config options is available in this google doc link.
Disclaimer:
Like all of my plugins - this plugin is sold as is. I will be happy to take feature requests into consideration but make no guarantees about which ones get implemented. Please refer to the feature list before you make your purchase!
Developer API:
API Methods
// Returns the mode of the given entity. Also takes into account if the entity is in a forced mode zone. string GetEntityMode(BaseEntity entity); // Returns the group name for the given mode. For example if given 'pve' will return 'warmodepve' string GetModeGroup(string modeId); // Returns the target type for a given entity. Target types are the category that an entity falls into. // For example, if given a BasePlayer entity, it will return 'players'. If given a horse entity is will // return 'horses'. string GetEntityTargetType(BaseEntity entity); Hooks - place these in your plugin and WarMode will call them.
// Called when a player's mode has been updated or config changes have ocurred that may affect the mode. private void WarMode_PlayerModeUpdated(string userid, string modeId) // Used to override WarMode logic for taking damage. // If true/false is returned then WarMode logic will be skipped. Return null to continue WarMode logic. private object CanEntityTakeDamage(BaseCombatEntity target, HitInfo info) // Used to override WarMode logic for targeting. // If true/false is returned then WarMode logic will be skipped. Return null to continue WarMode logic. private object CanEntityBeTargeted(BasePlayer target, BaseEntity attacker, bool skipVendingCheck) // Used to override WarMode logic for triggering a trap. // If true/false is returned then WarMode logic will be skipped. Return null to continue WarMode logic. private object CanEntityTrapTrigger(BaseTrap trap, BasePlayer basePlayer) // Used to override WarMode logic for looting an entity. // If true/false is returned then WarMode logic will be skipped. Return null to continue WarMode logic. private object CanEntityLoot(BasePlayer looter, BaseEntity target, bool skipVendingCheck)
FREE Extension Plugins:
War Mode Admin Panel
Use the /warmode.config or /wmc command to open a panel that allows admins to update mode rules in game without having to reload the pluign. Requires the warmode.admin permission to use.
I HIGHLY recommend you use this extension!
WarModeAdminPanel.cs
War Mode Spawn UI
Provides a UI that is shown to players when they first spawn that prompts them to choose whether they want to be PVP or PVE. Also supports custom modes. Localization and config options available. This can also be configured to appear when players use the /flag command.
WarModeSpawnUI.cs
War Mode Rules UI
Using the /rules command (which is configurable) players can see a list of what restrictions they have for their current mode. These ruling will update dynamically based on your config settings.
WarModeRulesUI.cs
War Mode Badges
Customizable UI elements that will appear on the player's HUD to indicate what their current mode is.
WarModeBadges.cs
-

$10.00
Jail
What is it?
A simple and nice utility for admins to punish players.
Usage
Punish minges and bad player's behaviour with this simple plugin!
Command
/jail (playerName/playerID) (duration in seconds) -- Jail specified player for the amount of time /unjail (playerName/playerID) -- Unjail specified player /jail.save -- Force save Jail data
Permission
jail.use - Gives player permission for all Jail commands
Features
Once a player gets jailed a cage appears around him, player cannot even avoid it by reconnecting, when the player disconnects the cage automatically disappears and when he connects back, it appears again.
(Configurable) You can choose if the player can take damage or not while jailed
(Configurable) You can set if the cage can take damage or not
(Configurable) You can set if the player is allowed to use commands while jailed
(Configurable) You can set if player should be teleported back into cage whenever he escapes it
API
API Calls public bool IsJailed(ulong playerId) // Returns true if the player is jailed, else returns false API Hooks private void OnPlayerJail(ulong playerId, double time) // Gets called when player gets jailed private void OnPlayerUnjail(ulong playerId) // Gets called when player gets unjailed
Config:
{ "Should player take dmg if jailed?": false, "Should jail cage take dmg?": false, "Should block player's commands when jailed?": true, "Ensure player stays in cage? (Teleports him back if he's outside)": true }
Localization:
{ "Syntax": "Syntax: /jail (playerName/steamID) (timeInSeconds)", "NoPlayer": "Couldn't find that player", "AlreadyJailed": "{0} is already jailed ({1}sec left)", "Unjail": "You have been unjailed", "CantDoJail": "You can't do this while jailed", "SyntaxUnjail": "Syntax: /unjail (playerName/steamID)", "JailCmd": "You have jailed {0} for {1}secs", "UnjailCmd": "You have unjailed {0}", "NotJailed": "{0} is not jailed", "Jail": "You have been jailed for {0}secs" }
-
.thumb.png.6bd94973fb47c8cccfc0c3cc4d626f8a.png)
$20.00
Upgrader
By copcopekcro in Plugins
ABOUT UPGRADER :
Allows players to upgrade various item categories, including weapons, armor, and tools, each with unique upgrade options.
Extensive configuration options for server admins to adjust :
What items will be upgradable (Only items what you chose to put in config will have upgrades )
What upgrades will item have ( you dont need to put all upgrades on item ,only what upgrades you chose for a item)
Upgrade costs (you can put what ever custom/default item,and amount for cost)
Levels (you can choose how much upgrade will have levels)
Values of upgrades (you can choose value of each upgrade ,example "damage" Lv1 2% damage, Lv2 5%)
There is a easy way to control your upgrades , all about items can be done in UI.
Adding,removing items can be done by UI.
You can modify items true UI : upgrade types, levels ,values ,cost .
In chosing cost there is also custom category tab , you need to add those items in config at bottom of config file !
There is Inspection button where you can see stats of upgraded item in inventory.
UPGRADES :
Each category have their own upgrades :
Wepons : Armor : Tools :
Damage, Defense, GatherYield,
MagazineSize, Durability, Durability,
Durability, RadiationProtection, Deforestation,
LifeSteal, ResurrectionChance InstantMine,
CritChance, RestoreItems Smelting
InstaReload
Each category have RenameName of a item .
HOW TO USE :
Simple put Upgrader.cs to your plugin folder .
Add/remove items from config or true UI .
Chose upgrades for items (levels,cost,values) .
In Game :
Add permissions.
When player put item in Repair Bench he will see Upgrade button .
UI will open with upgrades.
Inspection button is below belt inventory ,when player click on it it will open inspection mode ,so he will be able to see item upgrades in small UI.
INFOPANEL :
Admins can change text in config file for a ServerName and Info .
For more explanations to player or what ever text you need .
DIAMONDS :
4 custom items (diamonds) .They can be used for cost of upgrades.
You can chose stacksize ,where they will spawn(lootboxes),chance to spawn in boxes ,and amount.
You can change theirs DisplayName , SkinId .
You can use them or not ,its a option .
COMMANDS :
Chat Command : /additem ( it opens Ui where you can modify upgrades )
Chat Command : /giveupgradeditem [playerID/name] <itemUID> ( when you upgrade item ,you can see his UID in DataFile ! )
Console Command : giveupgradeditem [playerID/name] <itemUID>
Chat Command : /givediamond "name" "amount"
Console Command - wipeupgradedata
PERMISSION SYSTEM/COMMANDS :
upgrader.button - allow to see button in repair bench for upgrade
upgrader.weapon - allow weapon upgrades
upgrader.armor - allow armor upgrades
upgrader.tool - allow tool upgrades
upgrader.bypasscost - free upgrades
upgrader.diamondgive - allow to use command /givediamond "name" "amount"
upgrader.additem - allow to use command /additem
upgrader.giveitem - allow to use command /giveupgradeditem [playerID/name] <itemUID>
console command - giveupgradeditem [playerID/name] <itemUID>
CONFIG EXAMPLE :
Upgrader.json
DATA :
There is data file what stores upgrades of items.
You can delete data items with command in console .
Console Command - wipeupgradedata
API :
[HookMethod("API_HasUpgrades")]
public bool API_HasUpgrades(Item item)
[HookMethod("API_GetUpgrades")]
public Dictionary<string, int> API_GetUpgrades(Item item)
[HookMethod("API_ApplyUpgrades")]
public void API_ApplyUpgrades(Item item, Dictionary<string, int> upgrades)
-

$12.00
Action Camera
By boostypunk in Plugins
Take your Rust gameplay to the next level with Action Camera! 📹
Want to feel like you're the center of attention? With Action Camera your Rust actions will be available for viewing in real time! Show off your playstyle to the world and add a little show to every match.
These cams aren't visible for players. The photos in the preview are made for clarity!
Now you can hang the camera on your head, shoulder and chest. Before you start using the plugin, I advise you to choose the option you like best!
What makes Action Camera special? 👀
You're always in the center of the action. Your friends and viewers can watch your every move, whether it's base building, battles, or raids. Now every moment will be truly unforgettable! Unique experience. Rust has never been like this! With Action Camera, you experience every moment together with other players, because they can see everything that's happening around you. New game situations. Imagine how spectators are watching you in the thick of battle or on a raid. All the tension, every decision - now it's a real performance that unfolds before the eyes of the audience. Creating bright moments. Now your friends can record your most epic moments from completely new angles, creating unique videos of your survival. Add intrigue and spectacle to your game with Action Camera! Feel the real thrill of knowing you're being watched. Make every Rust session unique and memorable.
Install Action Camera - you'll love it! 💖
Permissions:
actioncamera.wear - you can configure who will have an action camera. Camera won't be created without it
actioncamera.use - allows you to use /cams
- #creative
- #mechanics
- (and 9 more)
-

$10.00
Bomb Vest
The BombVest plugin allows you to spawn a vest and a specialized chair within the game world, designed to instill fear and chaos among players. When a player dons the BombVest, they can trigger an explosion using an RF Transmitter, adding a strategic element to gameplay.
HOW IT WORKS
Putting the vest on and using an RF Transmitter will make the vest explode Letting a player sit in the BombChair will activate the bomb timer on the player with hood and cuffs on (forced)
CONFIG
{ "Allow player Damage in TruePVE": true, "Player Vest Auto time": 10.0, "Enable Item spawn?": true, "Drop Settings": [ { "Object Short prefab name": "crate_elite", "Minimum item to drop": 1, "Maximum item to drop": 1, "Item Drop Chance": 10.0 }, { "Object Short prefab name": "codelockedhackablecrate", "Minimum item to drop": 1, "Maximum item to drop": 1, "Item Drop Chance": 10.0 } ] }
CONSOLE COMMANDS
givechair <playername/ID> givevest <playername/ID>
SKINIDS
VEST = 860210174 (metal armour)
CHAIR = 1739815544 (chair.)