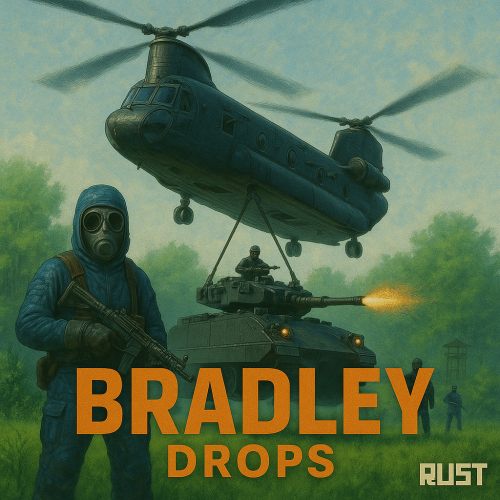
About Bradley Drops [UPDATED]
NEW for 1.3.0:
Please make sure you are updating from version 1.2.7, or your config may be corrupted.
New completely custom Bradley AI for a much more immersive and real experience! Each battle is different and fun! No more cheesing the event or hiding from Bradley!
PLEASE CHECK OUT THE NEW CONFIG STRUCTURE AND OPTIONS!
- Bradley can now dynamically path find, re-path when stuck and actively hunt players who try and hide or retreat.
- New Fireball config options for damage, lifetime, chance to spread, etc
- Many new CH47 options, such as health, homing missile actions, can now use flares to counter homing missiles! Can now also specify Hackable crates to drop when destroyed.
- CH47 Scientist gunner options, such as health, damage, aimcone, kits, etc.
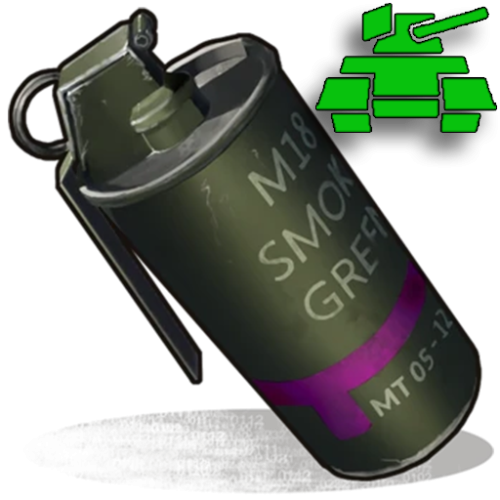
- Bradley can now counter high risk targets with smoke grenades, making it harder for them to target, with cooldown options in config. (players with rocket launchers, timed explosives, satchels etc)
- Bradley can now damage more obstacles by ramming, which is fully configurable in the config file
- Crate loot capacity is now resizable and can take up to 48 items for both Bradley and Hackable crates.
Please carefully check config options for "Allow Players to Call Bradleys at Monuments". This config option has changed slightly. You can set allow at monuments true or false, then the monument list is to either block selected monuments when allowed is true, or allow when use at monuments is false. The monuments list is therefore now an exception to allow exception to the "Allow Players to Call Bradleys at Monuments" rule. Check this still works as you require. If you are unsure, reach out to me for help.
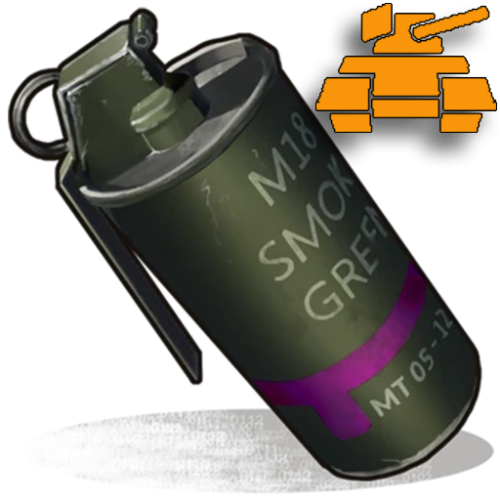
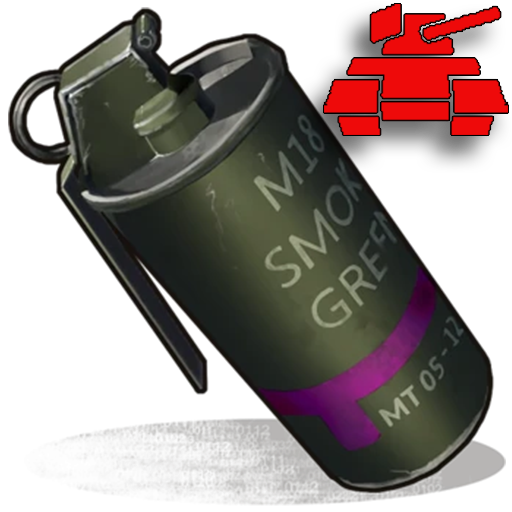
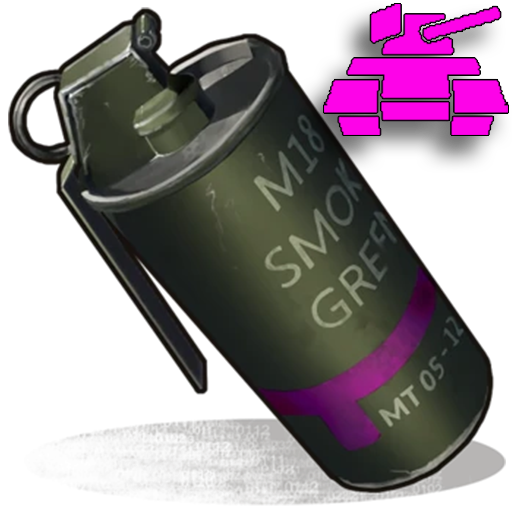
Bradley Drops allows players with permission to call a Bradley APC to their location with a custom Supply Signal, where it will patrol a set distance for a set time, allowing players to fight it to win the valuable Bradley crates.
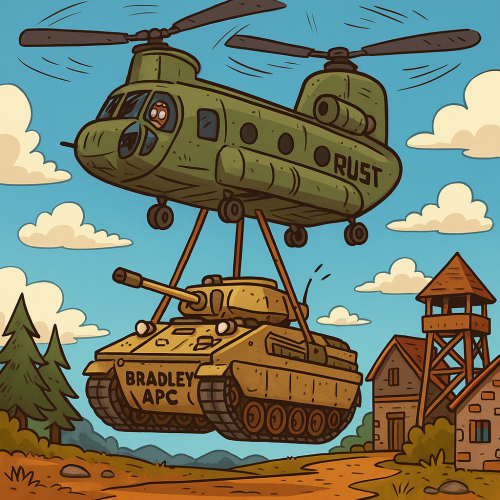
A cargo plane will deliver and drop the APC via parachutes. The APC can be configured in different ways and there are many config options to suit all servers.
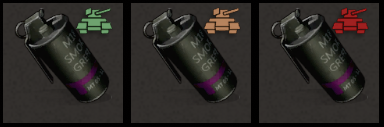
The plugin comes with 4 default settings for Bradley Drops, Easy, Medium, Hard and Elite, each with their own custom supply signal skin. But server owners can add as many options as they like in the config by copying and pasting an existing profile within the config. This would however require the server owner to create their own custom skin for the inventory item. (I will add more custom skins in the near future for this.)
BotReSpawn compatibility, with the option to specify a BRS spawn profile at the Bradley kill site.
IMPORTANT:
Each bradley profile or wave profile in the config MUST have its own unique name and skin ID, otherwise you will have issues.
NOTE ABOUT SHOPS:
The profile name in the config should match the Custom Supply Signal name which the shop gives the player. The Bradley Name is now separate and can be set independently.
Plugin default Supply Signal Skin ID's to add items to various shops, loot plugins, kits etc are:
- Bradley Drop (Easy) : 2905355269
- Bradley Drop (Medium) : 2905355312
- Bradley Drop (Hard) : 2905355296
- Bradley Drop (Elite) : 2911864795
- Bradley Drop (Expert) : 3361673979
- Bradley Drop (Nightmare) : 3361674045


- Bradley Drop Wave (Normal): 3502926194
- Bradley Drop Wave (Hard): 3502926112
Default Permissions:
- bradleydrops.admin (to use give|hsclearcd command)
- bradleydrops.buy (to use /bdbuy command)
- bradleydrops.bypasscooldown
- bradleydrops.easy
- bradleydrops.medium
- bradleydrops.hard
- bradleydrops.elite
Commands (Prefix with / to use in game):
- bdgive <Profile ShortName> <Steam64ID> <Amount>
- bdbuy <Profile Shortname>
- bdbuy list
- bdreport (list all active Bradleys and their state)
- bddespawn (Despawn all Bradleys called by a player or their team, no refunds)
- bdclearcd (clear all cooldowns)
- bdclearcd <SteamID|Name> (clear cooldown for player)
(Buy, Report and Despawn command can be customised in the config)
Please note correct use in config file for supply signal name and Bradley APC display name. These values CAN be different if you wish:

Custom Loot:
Check out the example loot items in the default config below to see how to add custom loot items to crates.
How to Add Custom Loot Table Item:
Quote{ "ShortName": "example.shortname1", "Chance (0 - 100)": 50.0, "Min amount": 1, "Max Amount": 2, "SkinID": 1234567890, "Display Name": "Example Display Name 1" },
Config:
Quote{ "General Options": { "Use Friends": false, "Use Clans": false, "Use Teams": false, "Allow Dynamic PVP to Create PVP Zones": false, "Allow Epic Loot to add items to crates": false, "Chat Prefix": "<color=orange>[Bradley Drops]</color>", "Use Chat Prefix": true, "Custom Chat Icon (Default = 0)": 0, "Supply Signal Fuse Length (Rust Default = 3.5)": 3.5, "Supply Signal Smoke Duration (Rust Default = 210)": 210.0, "Bradley Drop Delivery Method (CH47 | Balloon)": "CH47", "Min Distance From Building Privilege To Use Signals (Important: Greater or Equal To Proximity Check Radius)": 20.0, "Strict Proximity Check (Checks for objects close to signal, prevents APC landing on objects)": true, "Strict Proximity Check Radius": 20.0, "Remove Entities In Landing Zone Radius (Requires Strict Proximity Check Enabled)": false, "Remove Timed Explosives In Landing Zone Radius (Requires Strict Proximity Check Enabled)": false, "Disable vanilla Bradley APC at Launch Site": false, "Use this plugin to control stacking/combing Bradley Drop signal items": true, "Command to Show Details of Players Own Active Bradleys (Admin Perm Allows to See ALL Active Bradleys)": "bdreport", "Enable Debug Logging": true }, "Cargo Plane Delivery Options": { "Skip cargo plane & spawn a delivery above the location according to plane height setting": false, "Map Scale Distance Away to Spawn Cargo Plane for Balloon Delivery (Default: 2 = 2 x Map Size Distance)": 2.0, "Cargo Plane Speed for Balloon Delivery (Rust Default = 35)": 50.0, "Cargo Plane Height Above The Heighest Point On The Map for Balloon Delivery": 50.0, "Bradley Drop Falling Drag (Lower = Faster. Default: 0.6)": 0.6 }, "CH47 Chinook Delivery Options": { "Map Scale Distance Away to Spawn CH47 (eg: 1.0 = 1 x Map Size Distance)": 0.1, "Height of CH47 When it Spawns (Increase if it Spawns in Terrain)": 150.0, "Minimum Height of CH47 as it Approaches Landing Zone (Increase if it Hits Terrain)": 40.0 }, "Announce Options": { "Announce When Player Calls a Bradley Drop in chat": true, "Announce Bradley Kill In Chat": true, "Announce Damage Report In Chat": true, "Announce Server/Vanilla Bradley Kill in Chat": false, "Announce Server/Vanilla Bradley Damage Report in Chat": false, "Announce Server/Vanilla Bradley Display Name": "Bradley APC", "Announce Server/Vanilla Bradley Owner Name": "Cobolt (SERVER)", "Max Number Players Displayed in Damage Report": 5, "Announcements Also Go To Global Chat (false = Player/Team Only)": true }, "Discord Options": { "Discord WebHook URL": "https://support.discordapp.com/hc/en-us/articles/228383668-Intro-to-Webhooks", "Custom Discord Bot Name": "BradleyDrops Bot", "Custom Discord Bot Avatar URL": "", "Use Custom Discord Bot Avatar (false = Use plugin default)": false, "Announce to Discord when Bradley is called": false, "Announce to Discord when Bradley is killed": false, "Announce to Discord when Bradley de-spawns": false }, "Reward Options": { "Rewards Plugin (ServerRewards | Economics)": "ServerRewards", "Currency Unit Displayed e.g: RP | $": "RP", "Enable Rewards": false, "Share Reward Between Players Above Damage Threshold": false, "Plugin to Use For Awarding XP (SkillTree | XPerience)": "SkillTree", "Enable XP Reward": false, "Share XP Between Players Above Damage Threshold": false, "Award XP Including Players Existing Boosts": false, "Enable Scrap Reward": false, "Share Scrap Between Players Above Damage Threshold": false, "Enable Custom Reward Currency": false, "Share Custom Reward Between Players Above Damage Threshold": false, "Custom Reward Currency Item": { "ShortName": "item.shortname", "SkinID": 0, "Custom Display Name (leave blank unless creating custom items)": "" }, "Rewards multipliers by permission": { "bradleydrops.examplevip1": 1.25, "bradleydrops.examplevip2": 1.5, "bradleydrops.examplevip3": 1.75 } }, "Purchasing Options": { "Player Buy Command (Chat or F1 Console)": "bdbuy", "Purchasing Currency (ServerRewards|Economics|Custom)": "ServerRewards", "Currency Unit Displayed e.g: RP | $ (Not Used for Custom Currency)": "RP", "Custom Currency": [ { "ShortName": "scrap", "SkinID": 0, "Display Name": "Scrap" } ] }, "Bradley APC Options": { "Player Give Up and Despawn Command (Despawns All of That Players Bradleys, NO Refund Given)": "bddespawn", "Team Can Deswpan Bradleys Using the Command (Requires Use Friends/Clans/Teams option)": false, "Global Bradley Limit (0 = No Limit)": 2, "Player Bradley Limit (0 = No Limit)": 1, "Max Distance Bradley Can Be Damaged By Any Player (0 = Disabled)": 1000.0, "Use Explosion Effect When Bradley Despawns": true, "Despawn if Attacking Player is Building Blocked, While 'Block Damage to Other Players Bases' is True": false, "Despawn Warning Threshold (Number of Warnings Allowed Before Despawning)": 25, "Use NoEscape": false, "Player Cooldown (Seconds) Between Bradley Drop Calls (0 = No Cooldown)": 3600.0, "Player Cooldowns Apply to Each Tier Seperately": true, "Cooldown Applies to Clan/Team/Friends (Requires Use Friends/Use Clan/Use Teams)": true, "Allow Players to Damage Bradleys With Remote Auto Turrets": true, "Bradley Attacks Player Controlled Auto Turrets if Majority Damage Comes From Them": true, "Bradley Targets and Attacks Players Inside or Behind Vehicles": true, "How Long Attacks On Player Controlled Auto Turrets Lasts Before Changing Target": 20.0, "Cooldown Before Bradley Can Attack Player Controlled Turrets Again (Seconds)": 30.0, "Penalize Players With Majority Damage From Auto Turrets by This Percentage (0 = No Penalty)": 0.0, "Allow Players to Call Bradleys at Monuments": false, "Minimum Distance From Monuments When Allow at Monuments is False": 50.0, "Monuments (Prefabs) to Either Block or Allow When Allow at Monuments is Either True or False": [ "assets/bundled/prefabs/autospawn/monument/arctic_bases/arctic_research_base_a.prefab", "assets/bundled/prefabs/autospawn/monument/harbor/ferry_terminal_1.prefab", "assets/bundled/prefabs/autospawn/monument/harbor/harbor_1.prefab", "assets/bundled/prefabs/autospawn/monument/harbor/harbor_2.prefab", "assets/bundled/prefabs/autospawn/monument/large/airfield_1.prefab", "assets/bundled/prefabs/autospawn/monument/large/excavator_1.prefab", "assets/bundled/prefabs/autospawn/monument/large/military_tunnel_1.prefab", "assets/bundled/prefabs/autospawn/monument/large/powerplant_1.prefab", "assets/bundled/prefabs/autospawn/monument/large/trainyard_1.prefab", "assets/bundled/prefabs/autospawn/monument/large/water_treatment_plant_1.prefab", "assets/bundled/prefabs/autospawn/monument/large/trainyard_1.prefab", "assets/bundled/prefabs/autospawn/monument/lighthouse/lighthouse.prefab", "assets/bundled/prefabs/autospawn/monument/medium/junkyard_1.prefab", "assets/bundled/prefabs/autospawn/monument/medium/nuclear_missile_silo.prefab", "assets/bundled/prefabs/autospawn/monument/medium/radtown_small_3.prefab", "assets/bundled/prefabs/autospawn/monument/military_bases/desert_military_base_a.prefab", "assets/bundled/prefabs/autospawn/monument/military_bases/desert_military_base_b.prefab", "assets/bundled/prefabs/autospawn/monument/military_bases/desert_military_base_c.prefab", "assets/bundled/prefabs/autospawn/monument/military_bases/desert_military_base_d.prefab", "assets/bundled/prefabs/autospawn/monument/offshore/oilrig_1.prefab", "assets/bundled/prefabs/autospawn/monument/offshore/oilrig_2.prefab", "assets/bundled/prefabs/autospawn/monument/roadside/gas_station_1.prefab", "assets/bundled/prefabs/autospawn/monument/roadside/supermarket_1.prefab", "assets/bundled/prefabs/autospawn/monument/roadside/warehouse.prefab", "assets/bundled/prefabs/autospawn/monument/small/satellite_dish.prefab", "assets/bundled/prefabs/autospawn/monument/small/sphere_tank.prefab", "assets/bundled/prefabs/autospawn/monument/swamp/swamp_a.prefab", "assets/bundled/prefabs/autospawn/monument/swamp/swamp_b.prefab", "assets/bundled/prefabs/autospawn/monument/swamp/swamp_c.prefab", "assets/bundled/prefabs/autospawn/monument/tiny/water_well_a.prefab", "assets/bundled/prefabs/autospawn/monument/tiny/water_well_b.prefab", "assets/bundled/prefabs/autospawn/monument/tiny/water_well_c.prefab", "assets/bundled/prefabs/autospawn/monument/tiny/water_well_d.prefab", "assets/bundled/prefabs/autospawn/monument/tiny/water_well_e.prefab", "assets/bundled/prefabs/autospawn/monument/xlarge/launch_site_1.prefab" ], "VIP/Custom Cooldowns": { "bradleydrops.examplevip1": 3000.0, "bradleydrops.examplevip2": 2400.0, "bradleydrops.examplevip3": 1800.0 }, "Protected Prefab List (Prefabs Listed Here Will Never Take Damage)": [ "assets/prefabs/deployable/large wood storage/box.wooden.large.prefab", "assets/prefabs/deployable/planters/planter.large.deployed.prefab" ], "Bradley Wave Options": { "Bradley Drop Wave (Normal)": { "SkinID": 3502926194, "Profile shortname (for use in permission and give command)": "wave_normal", "Enable purchasing using custom currency via the buy command": false, "Cost to purchase (using buy command)": 10000, "Cooldown delay between waves (seconds)": 120.0, "Bradley Wave Profile List (Bradleys Called in Order From Top to Bottom)": [ "Bradley Drop (Easy)", "Bradley Drop (Medium)", "Bradley Drop (Hard)", "Bradley Drop (Expert)", "Bradley Drop (Nightmare)" ] }, "Bradley Drop Wave (Hard)": { "SkinID": 3502926112, "Profile shortname (for use in permission and give command)": "wave_hard", "Enable purchasing using custom currency via the buy command": false, "Cost to purchase (using buy command)": 20000, "Cooldown delay between waves (seconds)": 240.0, "Bradley Wave Profile List (Bradleys Called in Order From Top to Bottom)": [ "Bradley Drop (Easy)", "Bradley Drop (Medium)", "Bradley Drop (Hard)", "Bradley Drop (Expert)", "Bradley Drop (Nightmare)" ] } }, "Profiles": { "Bradley Drop (Easy)": { "Init & Setup Options": { "Bradley display name": "Bradley Drop (Easy)", "Skin ID of the custom Supply Signal": 2905355269, "Profile shortname (for use in permission and give command)": "easy", "Enable purchasing via the buy command": true, "Cost to purchase (using buy command)": 500, "Starting health": 1000.0, "Number of patrol points": 4, "Patrol radius": 20.0, "Search range": 60.0, "Stuck detection time (seconds)": 3.0, "Stuck detection threshold (meters)": 1.0, "Prevent damage while falling": true, "Throttle response (1.0 = default)": 1.0, "Kill if APC goes in SafeZone": true, "Despawn timer": 1800.0 }, "Targeting & Damage": { "Attack owner": true, "Target sleeping players": false, "Target memory duration (default = 20.0)": 20.0, "Only owner can damage (and team if enabled) ": false, "Allow Bradley to target other players": true, "Block damage to calling players bases": false, "Block damage to other players bases": false, "Block damage to other players": false, "Block damage ALWAYS to entities in the protected prefab list": false }, "Crate Options": { "Number of crates to spawn": 3, "Bradley crate despawn time (seconds)": 900.0, "Disable fire on crates": false, "Crate fire duration (seconds)": 300.0, "Number of locked hackable crates to spawn": 0, "Hack time for locked crate (seconds)": 900.0, "Locked crate despawn time (seconds)": 7200.0, "Lock looting crates to owner": false, "Unlock looting crates to others after time in seconds (0 = Never)": 300.0 }, "Weapons Options": { "Counter players using rocket launchers & timed explosives with smoke grenades": true, "Smoke grenade cooldown (seconds)": 60.0, "Coax machine gun burst delay (turret mounted machine gun, default = 1.0)": 1.0, "Coax machine gun fire rate (default = 0.05)": 0.05, "Coax machine gun burst length (default = 15)": 15, "Coax machine gun aim cone (default = 3.0)": 3.0, "Coax machine gun target range (default = 40.0)": 40.0, "Tank gun burst delay (large turret mounted gun, default = 5.0)": 5.0, "Tank gun fire rate (default = 0.25)": 0.25, "Tank gun burst length (default = 4)": 4, "Tank gun aim cone (default = 2.0)": 2.0, "Tank gun projectile velocity (default = 100.0)": 100.0, "Tank gun range/search range (default = 50.0)": 50.0, "Top turret machine gun fire rate (swivelling top machine gun, default = 0.25)": 0.25, "Top turret machine gun aim cone (default = 3.0)": 3.0, "Gun Damage scale - TO PLAYER (1.0 = default, 2.0 = 2x, etc)": 1.0, "Main cannon damage scale - TO PLAYER (1.0 = default, 2.0 = 2x, etc)": 1.0, "Gun Damage scale - TO BUILDINGS (1.0 = default, 2.0 = 2x, etc)": 1.0, "Main cannon damage scale - TO BUILDINGS (1.0 = default, 2.0 = 2x, etc)": 1.0 }, "Bradley Scientist Options": { "Allow Bradley to Deploy Scientists When Under Attack": true, "Only Allow Event Owner/Team to Attack Deployed NPCs": false, "Deployed NPCs can be targeted by auto turrets (not player controlled)": true, "HP Threshold For First Scientist Deployment (Default = 0.8)": 0.8, "HP Threshold For Second Scientist Deployment (Default = 0.6)": 0.6, "HP Threshold For Final Scientist Deployment (Default = 0.4)": 0.4, "Use Custom Kits For Deployed Scientists": false, "Start Health of Deployed Scientists (Default = 150)": 150.0, "Damage Scale of Deployed Scientists (Default = 0.75)": 0.75, "Aim Cone Scale of Deployed Scientists (Less is More Accurate. Default = 2.0)": 2.0, "Scientist Kits": [ "Kit1", "Kit2", "Kit3" ], "Start Health For Deployed Heavy Scientists (Default = 300)": 300.0, "Damage Scale For Deployed Heavy Scientists (Default = 0.5)": 0.5, "Aim Cone Scale of Deployed Heavy Scientists (Less is More Accurate. Default = 2.0)": 2.0, "Heavy Scientist Kits": [ "Kit1", "Kit2", "Kit3" ] }, "CH47 Options": { "CH47 Can Take Damage": true, "Starting Health (Default = 3000)": 3000.0, "Can be Targeted by Homing Missiles": true, "Can Counter Homing Missiles With Flares": true, "Flare Active Duration (Seconds)": 10.0, "Flare Cooldown (Seconds)": 20.0, "Number of Locked Hackable Crates to Spawn When Destroyed": 0, "Hack Time for Locked Crate (Seconds)": 900.0, "Locked Crate Despawn Time (Seconds)": 7200.0, "Lock Looting Crates to Owner": false, "Unlock Looting Crates to Others After Time in Seconds (0 = Never)": 300.0, "Spawn Full CH47 Gun Crew to Attack Valid Targets at Drop Zone": true, "Distance From Landing Zone Before CH47 Scientists Will Engage": 100.0, "Only Allow Event Owner/Team to Attack CH47 NPCs": false, "NPCs can be targeted by auto turrets": true, "Use Custom Kits For CH47 Scientists": false, "Start Health of CH47 Scientists (Default = 150)": 150.0, "Damage Scale of CH47 Scientists (Default = 0.75)": 0.75, "Aim Cone Scale of CH47 Scientists (Less is More Accurate. Default = 2.0)": 2.0, "CH47 Scientist Kits": [ "Kit1", "Kit2", "Kit3" ], "CH47 Orbits the Drop Zone After Dropping & Scientists Engage Targets": true, "Orbit Duration (Seconds)": 120.0 }, "Gibs Options": { "Disable Bradley gibs": false, "Gibs too hot to harvest time (Seconds)": 600.0, "Health of gibs (more health = more resources)": 500.0, "Lock mining gibs to owner": false, "Unlock mining gibs to others after time in seconds (0 = Never)": 300.0 }, "Fireball Options": { "Disable Bradley fire": false, "Minimum duration (Rust default = 20.0)": 20.0, "Maximum duration (Rust default = 40.0)": 40.0, "Spread chance percent (1.0 = 100%, 0.5 = 50%, etc)": 0.5, "Spread at lifetime percent (1.0 = 100%, 0.5 = 50%, etc)": 0.5, "Damage per second (Default = 2.0)": 2.0, "Damage rate": 0.5, "Water required to extinguish": 200 }, "Reward Options": { "Reward points issued when destroyed (if enabled)": 1000.0, "XP issued when destroyed (if enabled)": 0.0, "Scrap amount issued when destroyed (if enabled)": 1000, "Custom reward amount issued when destroyed (if enabled)": 0, "Damage Threshold (Min damage player needs to contribute to get rewards)": 100.0 }, "BotReSpawn Options": { "BotReSpawn profile to spawn at Bradley kill site (leave blank for not using)": "" }, "Obstacle Damage Options": { "Barricade Options": { "Bradley destroys Barricades in it's path": true, "Barricade damage % per tick (0.1 = 10%, 0.2 = 20% etc)": 1.0 }, "Twig Building Options": { "Bradley destroys Twig building blocks in it's path": false, "Twig damage % per tick (0.1 = 10%, 0.2 = 20% etc)": 1.0 }, "Wood Building Options": { "Bradley destroys Wood building blocks in it's path": false, "Wood damage % per tick (0.1 = 10%, 0.2 = 20% etc)": 1.0 }, "Stone Building Options": { "Bradley destroys Stone building blocks in it's path": false, "Stone damage % per tick (0.1 = 10%, 0.2 = 20% etc)": 0.5 }, "Metal Building Options": { "Bradley destroys Metal building blocks in it's path": false, "Metal damage % per tick (0.1 = 10%, 0.2 = 20% etc)": 0.25 }, "Armored Building Options": { "Bradley destroys Armored building blocks in it's path": false, "Metal damage % per tick (0.1 = 10%, 0.2 = 20% etc)": 0.1 }, "Deployable Options": { "Bradley destroys Deployables in it's path": false, "Deployable damage % per tick (0.1 = 10%, 0.2 = 20% etc)": 1.0 }, "Damage tick rate in seconds (Rust default = 5.0)": 5.0 }, "Loot Options": { "Use custom loot table to override crate loot": false, "Minimum number loot items in crate (1 - 48)": 2, "Maximum number loot items in crate (1 - 48)": 6, "Allow duplication of loot items": false, "Maximum number of BPs in each crate": 2, "Custom loot table": [ { "ShortName": "example.shortname1", "Chance (0 - 100)": 50.0, "Min amount": 1, "Max Amount": 2, "SkinID": 1234567890, "Custom Display Name (leave blank unless creating custom items)": "Example Display Name 1", "Blueprint Chance Instead of Item, 0 = disabled. (0 - 100)": 0.0 }, { "ShortName": "example.shortname2", "Chance (0 - 100)": 50.0, "Min amount": 1, "Max Amount": 2, "SkinID": 1234567890, "Custom Display Name (leave blank unless creating custom items)": "Example Display Name 2", "Blueprint Chance Instead of Item, 0 = disabled. (0 - 100)": 0.0 } ] }, "Extra Loot Options": { "Use extra loot table (NOTE: Total loot + extra items should not exceed 48)": false, "Minimum number extra items to add to crate": 1, "Maximum number extra items to add to crate": 3, "Allow duplication of extra items": false, "Maximum number of BPs in each crate": 2, "Extra loot table": [ { "ShortName": "example.shortname1", "Chance (0 - 100)": 50.0, "Min amount": 1, "Max Amount": 2, "SkinID": 1234567890, "Custom Display Name (leave blank unless creating custom items)": "Example Display Name 1", "Blueprint Chance Instead of Item, 0 = disabled. (0 - 100)": 0.0 }, { "ShortName": "example.shortname2", "Chance (0 - 100)": 50.0, "Min amount": 1, "Max Amount": 2, "SkinID": 1234567890, "Custom Display Name (leave blank unless creating custom items)": "Example Display Name 2", "Blueprint Chance Instead of Item, 0 = disabled. (0 - 100)": 0.0 } ] }, "Locked Crate Loot Options": { "Use locked crate loot table (NOTE: Total should not exceed 48)": false, "Minimum number items to add to locked crate": 1, "Maximum number items to add to locked crate": 3, "Allow duplication of locked crate items": false, "Maximum number of BPs in crate": 2, "Locked crate loot table": [ { "ShortName": "example.shortname1", "Chance (0 - 100)": 50.0, "Min amount": 1, "Max Amount": 2, "SkinID": 1234567890, "Custom Display Name (leave blank unless creating custom items)": "Example Display Name 1", "Blueprint Chance Instead of Item, 0 = disabled. (0 - 100)": 0.0 }, { "ShortName": "example.shortname2", "Chance (0 - 100)": 50.0, "Min amount": 1, "Max Amount": 2, "SkinID": 1234567890, "Custom Display Name (leave blank unless creating custom items)": "Example Display Name 2", "Blueprint Chance Instead of Item, 0 = disabled. (0 - 100)": 0.0 } ] } }, "Bradley Drop (Medium)": { "Init & Setup Options": { "Bradley display name": "Bradley Drop (Medium)", "Skin ID of the custom Supply Signal": 2905355312, "Profile shortname (for use in permission and give command)": "medium", "Enable purchasing via the buy command": true, "Cost to purchase (using buy command)": 1000, "Starting health": 2000.0, "Number of patrol points": 4, "Patrol radius": 20.0, "Search range": 70.0, "Stuck detection time (seconds)": 3.0, "Stuck detection threshold (meters)": 1.0, "Prevent damage while falling": true, "Throttle response (1.0 = default)": 1.0, "Kill if APC goes in SafeZone": true, "Despawn timer": 1800.0 }, "Targeting & Damage": { "Attack owner": true, "Target sleeping players": false, "Target memory duration (default = 20.0)": 25.0, "Only owner can damage (and team if enabled) ": false, "Allow Bradley to target other players": true, "Block damage to calling players bases": false, "Block damage to other players bases": false, "Block damage to other players": false, "Block damage ALWAYS to entities in the protected prefab list": false }, "Crate Options": { "Number of crates to spawn": 6, "Bradley crate despawn time (seconds)": 900.0, "Disable fire on crates": false, "Crate fire duration (seconds)": 300.0, "Number of locked hackable crates to spawn": 0, "Hack time for locked crate (seconds)": 900.0, "Locked crate despawn time (seconds)": 7200.0, "Lock looting crates to owner": false, "Unlock looting crates to others after time in seconds (0 = Never)": 300.0 }, "Weapons Options": { "Counter players using rocket launchers & timed explosives with smoke grenades": true, "Smoke grenade cooldown (seconds)": 60.0, "Coax machine gun burst delay (turret mounted machine gun, default = 1.0)": 1.0, "Coax machine gun fire rate (default = 0.05)": 0.05, "Coax machine gun burst length (default = 15)": 15, "Coax machine gun aim cone (default = 3.0)": 3.0, "Coax machine gun target range (default = 40.0)": 40.0, "Tank gun burst delay (large turret mounted gun, default = 5.0)": 5.0, "Tank gun fire rate (default = 0.25)": 0.25, "Tank gun burst length (default = 4)": 4, "Tank gun aim cone (default = 2.0)": 2.0, "Tank gun projectile velocity (default = 100.0)": 100.0, "Tank gun range/search range (default = 50.0)": 50.0, "Top turret machine gun fire rate (swivelling top machine gun, default = 0.25)": 0.25, "Top turret machine gun aim cone (default = 3.0)": 3.0, "Gun Damage scale - TO PLAYER (1.0 = default, 2.0 = 2x, etc)": 1.0, "Main cannon damage scale - TO PLAYER (1.0 = default, 2.0 = 2x, etc)": 1.0, "Gun Damage scale - TO BUILDINGS (1.0 = default, 2.0 = 2x, etc)": 1.0, "Main cannon damage scale - TO BUILDINGS (1.0 = default, 2.0 = 2x, etc)": 1.0 }, "Bradley Scientist Options": { "Allow Bradley to Deploy Scientists When Under Attack": true, "Only Allow Event Owner/Team to Attack Deployed NPCs": false, "Deployed NPCs can be targeted by auto turrets (not player controlled)": true, "HP Threshold For First Scientist Deployment (Default = 0.8)": 0.8, "HP Threshold For Second Scientist Deployment (Default = 0.6)": 0.6, "HP Threshold For Final Scientist Deployment (Default = 0.4)": 0.4, "Use Custom Kits For Deployed Scientists": false, "Start Health of Deployed Scientists (Default = 150)": 150.0, "Damage Scale of Deployed Scientists (Default = 0.75)": 0.75, "Aim Cone Scale of Deployed Scientists (Less is More Accurate. Default = 2.0)": 2.0, "Scientist Kits": [ "Kit1", "Kit2", "Kit3" ], "Start Health For Deployed Heavy Scientists (Default = 300)": 300.0, "Damage Scale For Deployed Heavy Scientists (Default = 0.5)": 0.5, "Aim Cone Scale of Deployed Heavy Scientists (Less is More Accurate. Default = 2.0)": 2.0, "Heavy Scientist Kits": [ "Kit1", "Kit2", "Kit3" ] }, "CH47 Options": { "CH47 Can Take Damage": true, "Starting Health (Default = 3000)": 6000.0, "Can be Targeted by Homing Missiles": true, "Can Counter Homing Missiles With Flares": true, "Flare Active Duration (Seconds)": 10.0, "Flare Cooldown (Seconds)": 20.0, "Number of Locked Hackable Crates to Spawn When Destroyed": 0, "Hack Time for Locked Crate (Seconds)": 900.0, "Locked Crate Despawn Time (Seconds)": 7200.0, "Lock Looting Crates to Owner": false, "Unlock Looting Crates to Others After Time in Seconds (0 = Never)": 300.0, "Spawn Full CH47 Gun Crew to Attack Valid Targets at Drop Zone": true, "Distance From Landing Zone Before CH47 Scientists Will Engage": 100.0, "Only Allow Event Owner/Team to Attack CH47 NPCs": false, "NPCs can be targeted by auto turrets": true, "Use Custom Kits For CH47 Scientists": false, "Start Health of CH47 Scientists (Default = 150)": 150.0, "Damage Scale of CH47 Scientists (Default = 0.75)": 0.75, "Aim Cone Scale of CH47 Scientists (Less is More Accurate. Default = 2.0)": 2.0, "CH47 Scientist Kits": [ "Kit1", "Kit2", "Kit3" ], "CH47 Orbits the Drop Zone After Dropping & Scientists Engage Targets": true, "Orbit Duration (Seconds)": 120.0 }, "Gibs Options": { "Disable Bradley gibs": false, "Gibs too hot to harvest time (Seconds)": 600.0, "Health of gibs (more health = more resources)": 500.0, "Lock mining gibs to owner": false, "Unlock mining gibs to others after time in seconds (0 = Never)": 300.0 }, "Fireball Options": { "Disable Bradley fire": false, "Minimum duration (Rust default = 20.0)": 20.0, "Maximum duration (Rust default = 40.0)": 40.0, "Spread chance percent (1.0 = 100%, 0.5 = 50%, etc)": 0.5, "Spread at lifetime percent (1.0 = 100%, 0.5 = 50%, etc)": 0.5, "Damage per second (Default = 2.0)": 2.0, "Damage rate": 0.5, "Water required to extinguish": 200 }, "Reward Options": { "Reward points issued when destroyed (if enabled)": 2000.0, "XP issued when destroyed (if enabled)": 0.0, "Scrap amount issued when destroyed (if enabled)": 2000, "Custom reward amount issued when destroyed (if enabled)": 0, "Damage Threshold (Min damage player needs to contribute to get rewards)": 200.0 }, "BotReSpawn Options": { "BotReSpawn profile to spawn at Bradley kill site (leave blank for not using)": "" }, "Obstacle Damage Options": { "Barricade Options": { "Bradley destroys Barricades in it's path": true, "Barricade damage % per tick (0.1 = 10%, 0.2 = 20% etc)": 1.0 }, "Twig Building Options": { "Bradley destroys Twig building blocks in it's path": false, "Twig damage % per tick (0.1 = 10%, 0.2 = 20% etc)": 1.0 }, "Wood Building Options": { "Bradley destroys Wood building blocks in it's path": false, "Wood damage % per tick (0.1 = 10%, 0.2 = 20% etc)": 1.0 }, "Stone Building Options": { "Bradley destroys Stone building blocks in it's path": false, "Stone damage % per tick (0.1 = 10%, 0.2 = 20% etc)": 0.5 }, "Metal Building Options": { "Bradley destroys Metal building blocks in it's path": false, "Metal damage % per tick (0.1 = 10%, 0.2 = 20% etc)": 0.25 }, "Armored Building Options": { "Bradley destroys Armored building blocks in it's path": false, "Metal damage % per tick (0.1 = 10%, 0.2 = 20% etc)": 0.1 }, "Deployable Options": { "Bradley destroys Deployables in it's path": false, "Deployable damage % per tick (0.1 = 10%, 0.2 = 20% etc)": 1.0 }, "Damage tick rate in seconds (Rust default = 5.0)": 5.0 }, "Loot Options": { "Use custom loot table to override crate loot": false, "Minimum number loot items in crate (1 - 48)": 2, "Maximum number loot items in crate (1 - 48)": 6, "Allow duplication of loot items": false, "Maximum number of BPs in each crate": 2, "Custom loot table": [ { "ShortName": "example.shortname1", "Chance (0 - 100)": 50.0, "Min amount": 1, "Max Amount": 2, "SkinID": 1234567890, "Custom Display Name (leave blank unless creating custom items)": "Example Display Name 1", "Blueprint Chance Instead of Item, 0 = disabled. (0 - 100)": 0.0 }, { "ShortName": "example.shortname2", "Chance (0 - 100)": 50.0, "Min amount": 1, "Max Amount": 2, "SkinID": 1234567890, "Custom Display Name (leave blank unless creating custom items)": "Example Display Name 2", "Blueprint Chance Instead of Item, 0 = disabled. (0 - 100)": 0.0 } ] }, "Extra Loot Options": { "Use extra loot table (NOTE: Total loot + extra items should not exceed 48)": false, "Minimum number extra items to add to crate": 1, "Maximum number extra items to add to crate": 3, "Allow duplication of extra items": false, "Maximum number of BPs in each crate": 2, "Extra loot table": [ { "ShortName": "example.shortname1", "Chance (0 - 100)": 50.0, "Min amount": 1, "Max Amount": 2, "SkinID": 1234567890, "Custom Display Name (leave blank unless creating custom items)": "Example Display Name 1", "Blueprint Chance Instead of Item, 0 = disabled. (0 - 100)": 0.0 }, { "ShortName": "example.shortname2", "Chance (0 - 100)": 50.0, "Min amount": 1, "Max Amount": 2, "SkinID": 1234567890, "Custom Display Name (leave blank unless creating custom items)": "Example Display Name 2", "Blueprint Chance Instead of Item, 0 = disabled. (0 - 100)": 0.0 } ] }, "Locked Crate Loot Options": { "Use locked crate loot table (NOTE: Total should not exceed 48)": false, "Minimum number items to add to locked crate": 1, "Maximum number items to add to locked crate": 3, "Allow duplication of locked crate items": false, "Maximum number of BPs in crate": 2, "Locked crate loot table": [ { "ShortName": "example.shortname1", "Chance (0 - 100)": 50.0, "Min amount": 1, "Max Amount": 2, "SkinID": 1234567890, "Custom Display Name (leave blank unless creating custom items)": "Example Display Name 1", "Blueprint Chance Instead of Item, 0 = disabled. (0 - 100)": 0.0 }, { "ShortName": "example.shortname2", "Chance (0 - 100)": 50.0, "Min amount": 1, "Max Amount": 2, "SkinID": 1234567890, "Custom Display Name (leave blank unless creating custom items)": "Example Display Name 2", "Blueprint Chance Instead of Item, 0 = disabled. (0 - 100)": 0.0 } ] } }, "Bradley Drop (Hard)": { "Init & Setup Options": { "Bradley display name": "Bradley Drop (Hard)", "Skin ID of the custom Supply Signal": 2905355296, "Profile shortname (for use in permission and give command)": "hard", "Enable purchasing via the buy command": true, "Cost to purchase (using buy command)": 1500, "Starting health": 3000.0, "Number of patrol points": 4, "Patrol radius": 20.0, "Search range": 80.0, "Stuck detection time (seconds)": 3.0, "Stuck detection threshold (meters)": 1.0, "Prevent damage while falling": true, "Throttle response (1.0 = default)": 1.0, "Kill if APC goes in SafeZone": true, "Despawn timer": 1800.0 }, "Targeting & Damage": { "Attack owner": true, "Target sleeping players": false, "Target memory duration (default = 20.0)": 30.0, "Only owner can damage (and team if enabled) ": false, "Allow Bradley to target other players": true, "Block damage to calling players bases": false, "Block damage to other players bases": false, "Block damage to other players": false, "Block damage ALWAYS to entities in the protected prefab list": false }, "Crate Options": { "Number of crates to spawn": 9, "Bradley crate despawn time (seconds)": 900.0, "Disable fire on crates": false, "Crate fire duration (seconds)": 300.0, "Number of locked hackable crates to spawn": 0, "Hack time for locked crate (seconds)": 900.0, "Locked crate despawn time (seconds)": 7200.0, "Lock looting crates to owner": false, "Unlock looting crates to others after time in seconds (0 = Never)": 300.0 }, "Weapons Options": { "Counter players using rocket launchers & timed explosives with smoke grenades": true, "Smoke grenade cooldown (seconds)": 60.0, "Coax machine gun burst delay (turret mounted machine gun, default = 1.0)": 1.0, "Coax machine gun fire rate (default = 0.05)": 0.05, "Coax machine gun burst length (default = 15)": 15, "Coax machine gun aim cone (default = 3.0)": 3.0, "Coax machine gun target range (default = 40.0)": 40.0, "Tank gun burst delay (large turret mounted gun, default = 5.0)": 5.0, "Tank gun fire rate (default = 0.25)": 0.25, "Tank gun burst length (default = 4)": 4, "Tank gun aim cone (default = 2.0)": 2.0, "Tank gun projectile velocity (default = 100.0)": 100.0, "Tank gun range/search range (default = 50.0)": 50.0, "Top turret machine gun fire rate (swivelling top machine gun, default = 0.25)": 0.25, "Top turret machine gun aim cone (default = 3.0)": 3.0, "Gun Damage scale - TO PLAYER (1.0 = default, 2.0 = 2x, etc)": 1.0, "Main cannon damage scale - TO PLAYER (1.0 = default, 2.0 = 2x, etc)": 1.0, "Gun Damage scale - TO BUILDINGS (1.0 = default, 2.0 = 2x, etc)": 1.0, "Main cannon damage scale - TO BUILDINGS (1.0 = default, 2.0 = 2x, etc)": 1.0 }, "Bradley Scientist Options": { "Allow Bradley to Deploy Scientists When Under Attack": true, "Only Allow Event Owner/Team to Attack Deployed NPCs": false, "Deployed NPCs can be targeted by auto turrets (not player controlled)": true, "HP Threshold For First Scientist Deployment (Default = 0.8)": 0.8, "HP Threshold For Second Scientist Deployment (Default = 0.6)": 0.6, "HP Threshold For Final Scientist Deployment (Default = 0.4)": 0.4, "Use Custom Kits For Deployed Scientists": false, "Start Health of Deployed Scientists (Default = 150)": 150.0, "Damage Scale of Deployed Scientists (Default = 0.75)": 0.75, "Aim Cone Scale of Deployed Scientists (Less is More Accurate. Default = 2.0)": 2.0, "Scientist Kits": [ "Kit1", "Kit2", "Kit3" ], "Start Health For Deployed Heavy Scientists (Default = 300)": 300.0, "Damage Scale For Deployed Heavy Scientists (Default = 0.5)": 0.5, "Aim Cone Scale of Deployed Heavy Scientists (Less is More Accurate. Default = 2.0)": 2.0, "Heavy Scientist Kits": [ "Kit1", "Kit2", "Kit3" ] }, "CH47 Options": { "CH47 Can Take Damage": true, "Starting Health (Default = 3000)": 9000.0, "Can be Targeted by Homing Missiles": true, "Can Counter Homing Missiles With Flares": true, "Flare Active Duration (Seconds)": 10.0, "Flare Cooldown (Seconds)": 20.0, "Number of Locked Hackable Crates to Spawn When Destroyed": 0, "Hack Time for Locked Crate (Seconds)": 900.0, "Locked Crate Despawn Time (Seconds)": 7200.0, "Lock Looting Crates to Owner": false, "Unlock Looting Crates to Others After Time in Seconds (0 = Never)": 300.0, "Spawn Full CH47 Gun Crew to Attack Valid Targets at Drop Zone": true, "Distance From Landing Zone Before CH47 Scientists Will Engage": 100.0, "Only Allow Event Owner/Team to Attack CH47 NPCs": false, "NPCs can be targeted by auto turrets": true, "Use Custom Kits For CH47 Scientists": false, "Start Health of CH47 Scientists (Default = 150)": 150.0, "Damage Scale of CH47 Scientists (Default = 0.75)": 0.75, "Aim Cone Scale of CH47 Scientists (Less is More Accurate. Default = 2.0)": 2.0, "CH47 Scientist Kits": [ "Kit1", "Kit2", "Kit3" ], "CH47 Orbits the Drop Zone After Dropping & Scientists Engage Targets": true, "Orbit Duration (Seconds)": 120.0 }, "Gibs Options": { "Disable Bradley gibs": false, "Gibs too hot to harvest time (Seconds)": 600.0, "Health of gibs (more health = more resources)": 500.0, "Lock mining gibs to owner": false, "Unlock mining gibs to others after time in seconds (0 = Never)": 300.0 }, "Fireball Options": { "Disable Bradley fire": false, "Minimum duration (Rust default = 20.0)": 20.0, "Maximum duration (Rust default = 40.0)": 40.0, "Spread chance percent (1.0 = 100%, 0.5 = 50%, etc)": 0.5, "Spread at lifetime percent (1.0 = 100%, 0.5 = 50%, etc)": 0.5, "Damage per second (Default = 2.0)": 2.0, "Damage rate": 0.5, "Water required to extinguish": 200 }, "Reward Options": { "Reward points issued when destroyed (if enabled)": 3000.0, "XP issued when destroyed (if enabled)": 0.0, "Scrap amount issued when destroyed (if enabled)": 3000, "Custom reward amount issued when destroyed (if enabled)": 0, "Damage Threshold (Min damage player needs to contribute to get rewards)": 300.0 }, "BotReSpawn Options": { "BotReSpawn profile to spawn at Bradley kill site (leave blank for not using)": "" }, "Obstacle Damage Options": { "Barricade Options": { "Bradley destroys Barricades in it's path": true, "Barricade damage % per tick (0.1 = 10%, 0.2 = 20% etc)": 1.0 }, "Twig Building Options": { "Bradley destroys Twig building blocks in it's path": false, "Twig damage % per tick (0.1 = 10%, 0.2 = 20% etc)": 1.0 }, "Wood Building Options": { "Bradley destroys Wood building blocks in it's path": false, "Wood damage % per tick (0.1 = 10%, 0.2 = 20% etc)": 1.0 }, "Stone Building Options": { "Bradley destroys Stone building blocks in it's path": false, "Stone damage % per tick (0.1 = 10%, 0.2 = 20% etc)": 0.5 }, "Metal Building Options": { "Bradley destroys Metal building blocks in it's path": false, "Metal damage % per tick (0.1 = 10%, 0.2 = 20% etc)": 0.25 }, "Armored Building Options": { "Bradley destroys Armored building blocks in it's path": false, "Metal damage % per tick (0.1 = 10%, 0.2 = 20% etc)": 0.1 }, "Deployable Options": { "Bradley destroys Deployables in it's path": false, "Deployable damage % per tick (0.1 = 10%, 0.2 = 20% etc)": 1.0 }, "Damage tick rate in seconds (Rust default = 5.0)": 5.0 }, "Loot Options": { "Use custom loot table to override crate loot": false, "Minimum number loot items in crate (1 - 48)": 2, "Maximum number loot items in crate (1 - 48)": 6, "Allow duplication of loot items": false, "Maximum number of BPs in each crate": 2, "Custom loot table": [ { "ShortName": "example.shortname1", "Chance (0 - 100)": 50.0, "Min amount": 1, "Max Amount": 2, "SkinID": 1234567890, "Custom Display Name (leave blank unless creating custom items)": "Example Display Name 1", "Blueprint Chance Instead of Item, 0 = disabled. (0 - 100)": 0.0 }, { "ShortName": "example.shortname2", "Chance (0 - 100)": 50.0, "Min amount": 1, "Max Amount": 2, "SkinID": 1234567890, "Custom Display Name (leave blank unless creating custom items)": "Example Display Name 2", "Blueprint Chance Instead of Item, 0 = disabled. (0 - 100)": 0.0 } ] }, "Extra Loot Options": { "Use extra loot table (NOTE: Total loot + extra items should not exceed 48)": false, "Minimum number extra items to add to crate": 1, "Maximum number extra items to add to crate": 3, "Allow duplication of extra items": false, "Maximum number of BPs in each crate": 2, "Extra loot table": [ { "ShortName": "example.shortname1", "Chance (0 - 100)": 50.0, "Min amount": 1, "Max Amount": 2, "SkinID": 1234567890, "Custom Display Name (leave blank unless creating custom items)": "Example Display Name 1", "Blueprint Chance Instead of Item, 0 = disabled. (0 - 100)": 0.0 }, { "ShortName": "example.shortname2", "Chance (0 - 100)": 50.0, "Min amount": 1, "Max Amount": 2, "SkinID": 1234567890, "Custom Display Name (leave blank unless creating custom items)": "Example Display Name 2", "Blueprint Chance Instead of Item, 0 = disabled. (0 - 100)": 0.0 } ] }, "Locked Crate Loot Options": { "Use locked crate loot table (NOTE: Total should not exceed 48)": false, "Minimum number items to add to locked crate": 1, "Maximum number items to add to locked crate": 3, "Allow duplication of locked crate items": false, "Maximum number of BPs in crate": 2, "Locked crate loot table": [ { "ShortName": "example.shortname1", "Chance (0 - 100)": 50.0, "Min amount": 1, "Max Amount": 2, "SkinID": 1234567890, "Custom Display Name (leave blank unless creating custom items)": "Example Display Name 1", "Blueprint Chance Instead of Item, 0 = disabled. (0 - 100)": 0.0 }, { "ShortName": "example.shortname2", "Chance (0 - 100)": 50.0, "Min amount": 1, "Max Amount": 2, "SkinID": 1234567890, "Custom Display Name (leave blank unless creating custom items)": "Example Display Name 2", "Blueprint Chance Instead of Item, 0 = disabled. (0 - 100)": 0.0 } ] } }, "Bradley Drop (Expert)": { "Init & Setup Options": { "Bradley display name": "Bradley Drop (Expert)", "Skin ID of the custom Supply Signal": 3361673979, "Profile shortname (for use in permission and give command)": "expert", "Enable purchasing via the buy command": true, "Cost to purchase (using buy command)": 2000, "Starting health": 4000.0, "Number of patrol points": 4, "Patrol radius": 20.0, "Search range": 85.0, "Stuck detection time (seconds)": 3.0, "Stuck detection threshold (meters)": 1.0, "Prevent damage while falling": true, "Throttle response (1.0 = default)": 1.0, "Kill if APC goes in SafeZone": true, "Despawn timer": 1800.0 }, "Targeting & Damage": { "Attack owner": true, "Target sleeping players": false, "Target memory duration (default = 20.0)": 35.0, "Only owner can damage (and team if enabled) ": false, "Allow Bradley to target other players": true, "Block damage to calling players bases": false, "Block damage to other players bases": false, "Block damage to other players": false, "Block damage ALWAYS to entities in the protected prefab list": false }, "Crate Options": { "Number of crates to spawn": 12, "Bradley crate despawn time (seconds)": 900.0, "Disable fire on crates": false, "Crate fire duration (seconds)": 300.0, "Number of locked hackable crates to spawn": 0, "Hack time for locked crate (seconds)": 900.0, "Locked crate despawn time (seconds)": 7200.0, "Lock looting crates to owner": false, "Unlock looting crates to others after time in seconds (0 = Never)": 300.0 }, "Weapons Options": { "Counter players using rocket launchers & timed explosives with smoke grenades": true, "Smoke grenade cooldown (seconds)": 60.0, "Coax machine gun burst delay (turret mounted machine gun, default = 1.0)": 1.0, "Coax machine gun fire rate (default = 0.05)": 0.05, "Coax machine gun burst length (default = 15)": 15, "Coax machine gun aim cone (default = 3.0)": 3.0, "Coax machine gun target range (default = 40.0)": 40.0, "Tank gun burst delay (large turret mounted gun, default = 5.0)": 5.0, "Tank gun fire rate (default = 0.25)": 0.25, "Tank gun burst length (default = 4)": 4, "Tank gun aim cone (default = 2.0)": 2.0, "Tank gun projectile velocity (default = 100.0)": 100.0, "Tank gun range/search range (default = 50.0)": 50.0, "Top turret machine gun fire rate (swivelling top machine gun, default = 0.25)": 0.25, "Top turret machine gun aim cone (default = 3.0)": 3.0, "Gun Damage scale - TO PLAYER (1.0 = default, 2.0 = 2x, etc)": 1.0, "Main cannon damage scale - TO PLAYER (1.0 = default, 2.0 = 2x, etc)": 1.0, "Gun Damage scale - TO BUILDINGS (1.0 = default, 2.0 = 2x, etc)": 1.0, "Main cannon damage scale - TO BUILDINGS (1.0 = default, 2.0 = 2x, etc)": 1.0 }, "Bradley Scientist Options": { "Allow Bradley to Deploy Scientists When Under Attack": true, "Only Allow Event Owner/Team to Attack Deployed NPCs": false, "Deployed NPCs can be targeted by auto turrets (not player controlled)": true, "HP Threshold For First Scientist Deployment (Default = 0.8)": 0.8, "HP Threshold For Second Scientist Deployment (Default = 0.6)": 0.6, "HP Threshold For Final Scientist Deployment (Default = 0.4)": 0.4, "Use Custom Kits For Deployed Scientists": false, "Start Health of Deployed Scientists (Default = 150)": 150.0, "Damage Scale of Deployed Scientists (Default = 0.75)": 0.75, "Aim Cone Scale of Deployed Scientists (Less is More Accurate. Default = 2.0)": 2.0, "Scientist Kits": [ "Kit1", "Kit2", "Kit3" ], "Start Health For Deployed Heavy Scientists (Default = 300)": 300.0, "Damage Scale For Deployed Heavy Scientists (Default = 0.5)": 0.5, "Aim Cone Scale of Deployed Heavy Scientists (Less is More Accurate. Default = 2.0)": 2.0, "Heavy Scientist Kits": [ "Kit1", "Kit2", "Kit3" ] }, "CH47 Options": { "CH47 Can Take Damage": true, "Starting Health (Default = 3000)": 12000.0, "Can be Targeted by Homing Missiles": true, "Can Counter Homing Missiles With Flares": true, "Flare Active Duration (Seconds)": 10.0, "Flare Cooldown (Seconds)": 20.0, "Number of Locked Hackable Crates to Spawn When Destroyed": 0, "Hack Time for Locked Crate (Seconds)": 900.0, "Locked Crate Despawn Time (Seconds)": 7200.0, "Lock Looting Crates to Owner": false, "Unlock Looting Crates to Others After Time in Seconds (0 = Never)": 300.0, "Spawn Full CH47 Gun Crew to Attack Valid Targets at Drop Zone": true, "Distance From Landing Zone Before CH47 Scientists Will Engage": 100.0, "Only Allow Event Owner/Team to Attack CH47 NPCs": false, "NPCs can be targeted by auto turrets": true, "Use Custom Kits For CH47 Scientists": false, "Start Health of CH47 Scientists (Default = 150)": 150.0, "Damage Scale of CH47 Scientists (Default = 0.75)": 0.75, "Aim Cone Scale of CH47 Scientists (Less is More Accurate. Default = 2.0)": 2.0, "CH47 Scientist Kits": [ "Kit1", "Kit2", "Kit3" ], "CH47 Orbits the Drop Zone After Dropping & Scientists Engage Targets": true, "Orbit Duration (Seconds)": 120.0 }, "Gibs Options": { "Disable Bradley gibs": false, "Gibs too hot to harvest time (Seconds)": 600.0, "Health of gibs (more health = more resources)": 500.0, "Lock mining gibs to owner": false, "Unlock mining gibs to others after time in seconds (0 = Never)": 300.0 }, "Fireball Options": { "Disable Bradley fire": false, "Minimum duration (Rust default = 20.0)": 20.0, "Maximum duration (Rust default = 40.0)": 40.0, "Spread chance percent (1.0 = 100%, 0.5 = 50%, etc)": 0.5, "Spread at lifetime percent (1.0 = 100%, 0.5 = 50%, etc)": 0.5, "Damage per second (Default = 2.0)": 2.0, "Damage rate": 0.5, "Water required to extinguish": 200 }, "Reward Options": { "Reward points issued when destroyed (if enabled)": 4000.0, "XP issued when destroyed (if enabled)": 0.0, "Scrap amount issued when destroyed (if enabled)": 4000, "Custom reward amount issued when destroyed (if enabled)": 0, "Damage Threshold (Min damage player needs to contribute to get rewards)": 400.0 }, "BotReSpawn Options": { "BotReSpawn profile to spawn at Bradley kill site (leave blank for not using)": "" }, "Obstacle Damage Options": { "Barricade Options": { "Bradley destroys Barricades in it's path": true, "Barricade damage % per tick (0.1 = 10%, 0.2 = 20% etc)": 1.0 }, "Twig Building Options": { "Bradley destroys Twig building blocks in it's path": false, "Twig damage % per tick (0.1 = 10%, 0.2 = 20% etc)": 1.0 }, "Wood Building Options": { "Bradley destroys Wood building blocks in it's path": false, "Wood damage % per tick (0.1 = 10%, 0.2 = 20% etc)": 1.0 }, "Stone Building Options": { "Bradley destroys Stone building blocks in it's path": false, "Stone damage % per tick (0.1 = 10%, 0.2 = 20% etc)": 0.5 }, "Metal Building Options": { "Bradley destroys Metal building blocks in it's path": false, "Metal damage % per tick (0.1 = 10%, 0.2 = 20% etc)": 0.25 }, "Armored Building Options": { "Bradley destroys Armored building blocks in it's path": false, "Metal damage % per tick (0.1 = 10%, 0.2 = 20% etc)": 0.1 }, "Deployable Options": { "Bradley destroys Deployables in it's path": false, "Deployable damage % per tick (0.1 = 10%, 0.2 = 20% etc)": 1.0 }, "Damage tick rate in seconds (Rust default = 5.0)": 5.0 }, "Loot Options": { "Use custom loot table to override crate loot": false, "Minimum number loot items in crate (1 - 48)": 2, "Maximum number loot items in crate (1 - 48)": 6, "Allow duplication of loot items": false, "Maximum number of BPs in each crate": 2, "Custom loot table": [ { "ShortName": "example.shortname1", "Chance (0 - 100)": 50.0, "Min amount": 1, "Max Amount": 2, "SkinID": 1234567890, "Custom Display Name (leave blank unless creating custom items)": "Example Display Name 1", "Blueprint Chance Instead of Item, 0 = disabled. (0 - 100)": 0.0 }, { "ShortName": "example.shortname2", "Chance (0 - 100)": 50.0, "Min amount": 1, "Max Amount": 2, "SkinID": 1234567890, "Custom Display Name (leave blank unless creating custom items)": "Example Display Name 2", "Blueprint Chance Instead of Item, 0 = disabled. (0 - 100)": 0.0 } ] }, "Extra Loot Options": { "Use extra loot table (NOTE: Total loot + extra items should not exceed 48)": false, "Minimum number extra items to add to crate": 1, "Maximum number extra items to add to crate": 3, "Allow duplication of extra items": false, "Maximum number of BPs in each crate": 2, "Extra loot table": [ { "ShortName": "example.shortname1", "Chance (0 - 100)": 50.0, "Min amount": 1, "Max Amount": 2, "SkinID": 1234567890, "Custom Display Name (leave blank unless creating custom items)": "Example Display Name 1", "Blueprint Chance Instead of Item, 0 = disabled. (0 - 100)": 0.0 }, { "ShortName": "example.shortname2", "Chance (0 - 100)": 50.0, "Min amount": 1, "Max Amount": 2, "SkinID": 1234567890, "Custom Display Name (leave blank unless creating custom items)": "Example Display Name 2", "Blueprint Chance Instead of Item, 0 = disabled. (0 - 100)": 0.0 } ] }, "Locked Crate Loot Options": { "Use locked crate loot table (NOTE: Total should not exceed 48)": false, "Minimum number items to add to locked crate": 1, "Maximum number items to add to locked crate": 3, "Allow duplication of locked crate items": false, "Maximum number of BPs in crate": 2, "Locked crate loot table": [ { "ShortName": "example.shortname1", "Chance (0 - 100)": 50.0, "Min amount": 1, "Max Amount": 2, "SkinID": 1234567890, "Custom Display Name (leave blank unless creating custom items)": "Example Display Name 1", "Blueprint Chance Instead of Item, 0 = disabled. (0 - 100)": 0.0 }, { "ShortName": "example.shortname2", "Chance (0 - 100)": 50.0, "Min amount": 1, "Max Amount": 2, "SkinID": 1234567890, "Custom Display Name (leave blank unless creating custom items)": "Example Display Name 2", "Blueprint Chance Instead of Item, 0 = disabled. (0 - 100)": 0.0 } ] } }, "Bradley Drop (Nightmare)": { "Init & Setup Options": { "Bradley display name": "Bradley Drop (Nightmare)", "Skin ID of the custom Supply Signal": 3361674045, "Profile shortname (for use in permission and give command)": "nightmare", "Enable purchasing via the buy command": true, "Cost to purchase (using buy command)": 2500, "Starting health": 5000.0, "Number of patrol points": 4, "Patrol radius": 20.0, "Search range": 100.0, "Stuck detection time (seconds)": 3.0, "Stuck detection threshold (meters)": 1.0, "Prevent damage while falling": true, "Throttle response (1.0 = default)": 1.5, "Kill if APC goes in SafeZone": true, "Despawn timer": 1800.0 }, "Targeting & Damage": { "Attack owner": true, "Target sleeping players": false, "Target memory duration (default = 20.0)": 40.0, "Only owner can damage (and team if enabled) ": false, "Allow Bradley to target other players": true, "Block damage to calling players bases": false, "Block damage to other players bases": false, "Block damage to other players": false, "Block damage ALWAYS to entities in the protected prefab list": false }, "Crate Options": { "Number of crates to spawn": 15, "Bradley crate despawn time (seconds)": 900.0, "Disable fire on crates": false, "Crate fire duration (seconds)": 300.0, "Number of locked hackable crates to spawn": 0, "Hack time for locked crate (seconds)": 900.0, "Locked crate despawn time (seconds)": 7200.0, "Lock looting crates to owner": false, "Unlock looting crates to others after time in seconds (0 = Never)": 300.0 }, "Weapons Options": { "Counter players using rocket launchers & timed explosives with smoke grenades": true, "Smoke grenade cooldown (seconds)": 60.0, "Coax machine gun burst delay (turret mounted machine gun, default = 1.0)": 1.0, "Coax machine gun fire rate (default = 0.05)": 0.05, "Coax machine gun burst length (default = 15)": 15, "Coax machine gun aim cone (default = 3.0)": 3.0, "Coax machine gun target range (default = 40.0)": 40.0, "Tank gun burst delay (large turret mounted gun, default = 5.0)": 5.0, "Tank gun fire rate (default = 0.25)": 0.25, "Tank gun burst length (default = 4)": 4, "Tank gun aim cone (default = 2.0)": 2.0, "Tank gun projectile velocity (default = 100.0)": 100.0, "Tank gun range/search range (default = 50.0)": 50.0, "Top turret machine gun fire rate (swivelling top machine gun, default = 0.25)": 0.25, "Top turret machine gun aim cone (default = 3.0)": 3.0, "Gun Damage scale - TO PLAYER (1.0 = default, 2.0 = 2x, etc)": 1.0, "Main cannon damage scale - TO PLAYER (1.0 = default, 2.0 = 2x, etc)": 1.0, "Gun Damage scale - TO BUILDINGS (1.0 = default, 2.0 = 2x, etc)": 1.0, "Main cannon damage scale - TO BUILDINGS (1.0 = default, 2.0 = 2x, etc)": 1.0 }, "Bradley Scientist Options": { "Allow Bradley to Deploy Scientists When Under Attack": true, "Only Allow Event Owner/Team to Attack Deployed NPCs": false, "Deployed NPCs can be targeted by auto turrets (not player controlled)": true, "HP Threshold For First Scientist Deployment (Default = 0.8)": 0.8, "HP Threshold For Second Scientist Deployment (Default = 0.6)": 0.6, "HP Threshold For Final Scientist Deployment (Default = 0.4)": 0.4, "Use Custom Kits For Deployed Scientists": false, "Start Health of Deployed Scientists (Default = 150)": 150.0, "Damage Scale of Deployed Scientists (Default = 0.75)": 0.75, "Aim Cone Scale of Deployed Scientists (Less is More Accurate. Default = 2.0)": 2.0, "Scientist Kits": [ "Kit1", "Kit2", "Kit3" ], "Start Health For Deployed Heavy Scientists (Default = 300)": 300.0, "Damage Scale For Deployed Heavy Scientists (Default = 0.5)": 0.5, "Aim Cone Scale of Deployed Heavy Scientists (Less is More Accurate. Default = 2.0)": 2.0, "Heavy Scientist Kits": [ "Kit1", "Kit2", "Kit3" ] }, "CH47 Options": { "CH47 Can Take Damage": true, "Starting Health (Default = 3000)": 15000.0, "Can be Targeted by Homing Missiles": true, "Can Counter Homing Missiles With Flares": true, "Flare Active Duration (Seconds)": 10.0, "Flare Cooldown (Seconds)": 20.0, "Number of Locked Hackable Crates to Spawn When Destroyed": 0, "Hack Time for Locked Crate (Seconds)": 900.0, "Locked Crate Despawn Time (Seconds)": 7200.0, "Lock Looting Crates to Owner": false, "Unlock Looting Crates to Others After Time in Seconds (0 = Never)": 300.0, "Spawn Full CH47 Gun Crew to Attack Valid Targets at Drop Zone": true, "Distance From Landing Zone Before CH47 Scientists Will Engage": 100.0, "Only Allow Event Owner/Team to Attack CH47 NPCs": false, "NPCs can be targeted by auto turrets": true, "Use Custom Kits For CH47 Scientists": false, "Start Health of CH47 Scientists (Default = 150)": 150.0, "Damage Scale of CH47 Scientists (Default = 0.75)": 0.75, "Aim Cone Scale of CH47 Scientists (Less is More Accurate. Default = 2.0)": 2.0, "CH47 Scientist Kits": [ "Kit1", "Kit2", "Kit3" ], "CH47 Orbits the Drop Zone After Dropping & Scientists Engage Targets": true, "Orbit Duration (Seconds)": 120.0 }, "Gibs Options": { "Disable Bradley gibs": false, "Gibs too hot to harvest time (Seconds)": 600.0, "Health of gibs (more health = more resources)": 500.0, "Lock mining gibs to owner": false, "Unlock mining gibs to others after time in seconds (0 = Never)": 300.0 }, "Fireball Options": { "Disable Bradley fire": false, "Minimum duration (Rust default = 20.0)": 20.0, "Maximum duration (Rust default = 40.0)": 40.0, "Spread chance percent (1.0 = 100%, 0.5 = 50%, etc)": 0.5, "Spread at lifetime percent (1.0 = 100%, 0.5 = 50%, etc)": 0.5, "Damage per second (Default = 2.0)": 2.0, "Damage rate": 0.5, "Water required to extinguish": 200 }, "Reward Options": { "Reward points issued when destroyed (if enabled)": 5000.0, "XP issued when destroyed (if enabled)": 0.0, "Scrap amount issued when destroyed (if enabled)": 5000, "Custom reward amount issued when destroyed (if enabled)": 0, "Damage Threshold (Min damage player needs to contribute to get rewards)": 500.0 }, "BotReSpawn Options": { "BotReSpawn profile to spawn at Bradley kill site (leave blank for not using)": "" }, "Obstacle Damage Options": { "Barricade Options": { "Bradley destroys Barricades in it's path": true, "Barricade damage % per tick (0.1 = 10%, 0.2 = 20% etc)": 1.0 }, "Twig Building Options": { "Bradley destroys Twig building blocks in it's path": false, "Twig damage % per tick (0.1 = 10%, 0.2 = 20% etc)": 1.0 }, "Wood Building Options": { "Bradley destroys Wood building blocks in it's path": false, "Wood damage % per tick (0.1 = 10%, 0.2 = 20% etc)": 1.0 }, "Stone Building Options": { "Bradley destroys Stone building blocks in it's path": false, "Stone damage % per tick (0.1 = 10%, 0.2 = 20% etc)": 0.5 }, "Metal Building Options": { "Bradley destroys Metal building blocks in it's path": false, "Metal damage % per tick (0.1 = 10%, 0.2 = 20% etc)": 0.25 }, "Armored Building Options": { "Bradley destroys Armored building blocks in it's path": false, "Metal damage % per tick (0.1 = 10%, 0.2 = 20% etc)": 0.1 }, "Deployable Options": { "Bradley destroys Deployables in it's path": false, "Deployable damage % per tick (0.1 = 10%, 0.2 = 20% etc)": 1.0 }, "Damage tick rate in seconds (Rust default = 5.0)": 5.0 }, "Loot Options": { "Use custom loot table to override crate loot": false, "Minimum number loot items in crate (1 - 48)": 2, "Maximum number loot items in crate (1 - 48)": 6, "Allow duplication of loot items": false, "Maximum number of BPs in each crate": 2, "Custom loot table": [ { "ShortName": "example.shortname1", "Chance (0 - 100)": 50.0, "Min amount": 1, "Max Amount": 2, "SkinID": 1234567890, "Custom Display Name (leave blank unless creating custom items)": "Example Display Name 1", "Blueprint Chance Instead of Item, 0 = disabled. (0 - 100)": 0.0 }, { "ShortName": "example.shortname2", "Chance (0 - 100)": 50.0, "Min amount": 1, "Max Amount": 2, "SkinID": 1234567890, "Custom Display Name (leave blank unless creating custom items)": "Example Display Name 2", "Blueprint Chance Instead of Item, 0 = disabled. (0 - 100)": 0.0 } ] }, "Extra Loot Options": { "Use extra loot table (NOTE: Total loot + extra items should not exceed 48)": false, "Minimum number extra items to add to crate": 1, "Maximum number extra items to add to crate": 3, "Allow duplication of extra items": false, "Maximum number of BPs in each crate": 2, "Extra loot table": [ { "ShortName": "example.shortname1", "Chance (0 - 100)": 50.0, "Min amount": 1, "Max Amount": 2, "SkinID": 1234567890, "Custom Display Name (leave blank unless creating custom items)": "Example Display Name 1", "Blueprint Chance Instead of Item, 0 = disabled. (0 - 100)": 0.0 }, { "ShortName": "example.shortname2", "Chance (0 - 100)": 50.0, "Min amount": 1, "Max Amount": 2, "SkinID": 1234567890, "Custom Display Name (leave blank unless creating custom items)": "Example Display Name 2", "Blueprint Chance Instead of Item, 0 = disabled. (0 - 100)": 0.0 } ] }, "Locked Crate Loot Options": { "Use locked crate loot table (NOTE: Total should not exceed 48)": false, "Minimum number items to add to locked crate": 1, "Maximum number items to add to locked crate": 3, "Allow duplication of locked crate items": false, "Maximum number of BPs in crate": 2, "Locked crate loot table": [ { "ShortName": "example.shortname1", "Chance (0 - 100)": 50.0, "Min amount": 1, "Max Amount": 2, "SkinID": 1234567890, "Custom Display Name (leave blank unless creating custom items)": "Example Display Name 1", "Blueprint Chance Instead of Item, 0 = disabled. (0 - 100)": 0.0 }, { "ShortName": "example.shortname2", "Chance (0 - 100)": 50.0, "Min amount": 1, "Max Amount": 2, "SkinID": 1234567890, "Custom Display Name (leave blank unless creating custom items)": "Example Display Name 2", "Blueprint Chance Instead of Item, 0 = disabled. (0 - 100)": 0.0 } ] } } } }, "Version": { "Major": 1, "Minor": 3, "Patch": 0 } }
For Other Developers:
The following hook is available to use in your plugins to check custom Supply Signals, Cargo Planes and Supply Drops to avoid conflict with your plugins:
object IsBradleyDrop(ulong skinID)
This will return true if the item is a Bradley Drop item/entity, or null if not.
Call it directly without referencing the plugin:
if (Interface.CallHook("IsBradleyDrop", skinID) != null)
	return true; // IsBradleyDrop
Or reference my plugin and call like this:
[PluginReference]
Plugin BradleyDrops;

if (BradleyDrops.CallHook("IsBradleyDrop", skinID) != null)
	return true; // IsBradleyDrop