The Lone Dark's Wishlist
-

$7.99
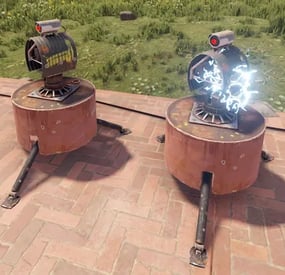
Sam Site Limiter
SamSiteLimiter allows you to change the SAM site turret limit for the individual player or for the entire CLAN/TEAM, based on the configurations and assigned roles. You can limit the number of SAM site turrets per TC (Tool Cupboard) or by range.
You can configure the plugin to disable all server and/or player SAM site turrets with the ability to bypass these limitations via roles and/or configurations. It also offers commands to view SAM site turret statistics and the ability to turn SAM site turrets on and off via commands.
Basically, 4 groups are configured: Default, VIP1, VIP2, VIP3, in this way you can decide the limit of the SAM site turrets based on the TC (Tool Cupboard) or the radius, based on the group assigned to the player or CLAN/TEAM.
Permissions:
samsitelimiter.admin - Allows you to execute some commands reserved for administrators samsitelimiter.bypass.force - Allows you to bypass limits forcibly, regardless of configuration samsitelimiter.default - Assign configurations: Default samsitelimiter.vip1 - Assign configurations: VIP1 samsitelimiter.vip2 - Assign configurations: VIP2 samsitelimiter.vip3 — Assign configurations: VIP3 COMMANDS
Commands can be typed in chat (by putting the / character in front of the command), or from console.
/ssl status or /ssl st — This command allows the player to see his SAM site turret statistics and limits /ssl status <steamID> or /ssl st <steamID> — This command allows the administrator to see another player's SAM site turret and limit statistics. To use this command you must have permission: samsitelimiter.admin /ssl start or /ssl stop — This command allows the player to turn all of your SAM site turrets ON or OFF. To use this command, you must enable the AllowCommandsToStartAndStop = true property in your configuration or have permission: samsitelimiter.admin /ssl start <steamID> or /ssl stop <steamID> — This command allows you to turn ON or OFF all SAM site turrets of a player based on its SteamID. To use this command you must have permission: samsitelimiter.admin NB: The commands start or stop turns all player SAM site turrets ON or OFF. If the player is part of a clan/team, all SAM site turrets of all members of the clan/team will be turned ON or OFF. Commands can be added or modified in the configuration file: /oxide/config/SamSiteLimiter.json Command output example (/ssl status or /ssl st)
CLAN/TEAM
If you are part of a clan/team and there are 1 more members who have the VIP/ROLE, then all members of the clan/team will benefit.
Example: a clan/team member has the VIP/ROLE to be able to place 5 SAM site turrets, in this case all clan/team members will be able to place 5 SAM site turrets, but this does not mean that the total number of turrets you can place are added, the limit in in this case there are still 5 SAM site turrets, but they can be positioned by all members of the clan/team, rather than just the player who has the VIP/ROLE (in this case we assumed that the VIP/ROLE limited to 5 SAM site turrets).
If there are multiple clan/team members who have different VIPs/ROLEs, the best VIP/ROLE will be taken, usually VIP3
Configuration
The settings and options can be configured in the SamSiteLimiter under the config directory. The use of an editor and validator is recommended to avoid formatting issues and syntax errors. { "DisableAllServerSamSite (Disables all server SAM Site turrets). Default False.)": false, "DisableAllPlayerSamSite (Disables all player SAM Site turrets). Default False.)": false, "AllowAdminBypass (Allows admin to bypass SAM Site turret limitations). Default False.)": false, "PlayerShowSamSiteCountInfoMessage (Show the player, when he places a SAM site, a message with the number of turrets that are placed in the TC range or Radius he is in. Default true.)": true, "AllowCommandsToStartAndStop (If set to TRUE, enables commands to allow the player or clan/team to turn their all SAM site ON or OFF. Default FALSE)": false, "EnableMessageInfo (If set to TRUE, it shows a message info to the player, when he takes hold of an electricity cable or SAM Site, of the commands that the plugin makes available to him)": true, "Chat Command": [ "ssl", "samsitelimiter" ], "RolePermission": { "default": { "Type of limitation, TC-based or Radius-based. Value [Tc | Radius] (Default RADIUS)": "Tc", "SAM Site limit for TC-based limitation": 2, "SAM Site limit for Radius-based limitation": 0, "Radius (meters) within which the system checks for other SAM Site (lower = more SAM sites in the same area) (Default 40)": 0 }, "vip1": { "Type of limitation, TC-based or Radius-based. Value [Tc | Radius] (Default RADIUS)": "Radius", "SAM Site limit for TC-based limitation": 0, "SAM Site limit for Radius-based limitation": 4, "Radius (meters) within which the system checks for other SAM Site (lower = more SAM sites in the same area) (Default 40)": 40 }, "vip2": { "Type of limitation, TC-based or Radius-based. Value [Tc | Radius] (Default RADIUS)": "Radius", "SAM Site limit for TC-based limitation": 0, "SAM Site limit for Radius-based limitation": 8, "Radius (meters) within which the system checks for other SAM Site (lower = more SAM sites in the same area) (Default 40)": 40 }, "vip3": { "Type of limitation, TC-based or Radius-based. Value [Tc | Radius] (Default RADIUS)": "Radius", "SAM Site limit for TC-based limitation": 0, "SAM Site limit for Radius-based limitation": 10, "Radius (meters) within which the system checks for other SAM Site (lower = more SAM sites in the same area) (Default 40)": 20 } }, "VersionNumber": { "Major": 1, "Minor": 0, "Patch": 0 } }
DisableAllServerSamSite (Disables all server SAM Site turrets). Default False.): Disables all server SAM site turrets but not player SAM turrets. Default: FALSE DisableAllPlayerSamSite (Disables all player SAM Site turrets). Default False.): Disables all player SAM site turrets. Default: FALSE AllowAdminBypass (Allows admin to bypass SAM Site turret limitations). Default False.): If enabled you can bypass the SAM site turret limit with the role: samsitelimiter.admin. However, if you have the samsitelimiter.bypass.force role, you can forcibly bypass the SAM site turret limit, regardless of this configuration. Default: FALSE PlayerShowSamSiteCountInfoMessage (Show the player, when he places a SAM site, a message with the number of turrets that are placed in the TC range or Radius he is in. Default true.): Show the player, when he places a SAM site turret, a message with the number of SAM site turrets that are placed. Default: TRUE. AllowCommandsToStartAndStop (If set to TRUE, enables commands to allow the player or clan/team to turn their all SAM site ON or OFF. Default FALSE): If set to TRUE, enables commands to allow the player or clan/team to turn their all SAM site turrets ON or OFF. Default FALSE. EnableMessageInfo (If set to TRUE, it shows a message info to the player, when he takes hold of an electricity cable or SAM Site, of the commands that the plugin makes available to him): If set to TRUE, it shows a message info to the player, when he takes hold of an electricity cable or SAM site turret, of the commands that the plugin makes available to him. Default: TRUE. Chat Command: Here you can add, edit or delete Commands can be typed in chat (by putting the / character in front of the command), or from console. RolePermission Type of limitation, TC-based or Radius-based. Value [Tc | Radius] (Default RADIUS): Specify the type of limitation: enable limitation based on TC (Tool Cupboard) or Radius. SAM Site limit for TC-based limitation: If TC (Tool Cupboard) limit is enabled, specifies how many SAM site turrets can be placed around that TC (the entire building covered by the TC). SAM Site limit for Radius-based limitation: If Radius Limiting is enabled, specifies how many SAM site turrets can be placed in that specific Radius. Radius (meters) within which the system checks for other SAM Site (lower = more SAM sites in the same area) (Default 40): Set the radius size in meters.
PlayerShowSamSiteCountInfoMessage EXAMPLE:
EnableMessageInfo EXAMPLE:
Localization
The plugin, therefore the automatic messages and statistics, are translated into the following languages:
English Italian Spanish French German Dutch Turkish Russian Ukrainian
Translation files are located in the /oxide/lang folder, here is an example of a /oxide/lang/en/SamSiteLimiter.json translation file. You can add translations for other languages by adding them to the folder: /oxide/lang
-
$7.99
Auto Turret Interference & Settings
Auto Turret Interference & Settings
Auto Turret Interference allows you or your CLAN/TEAM to change the limit of turrets allowed for different players, based on your configurations and assigned roles. You can also make sure that the server or event turrets do not have interference, for example Raidable Base.
In addition, it offers commands to see the statistics on the auto turrets, the possibility of turning the turrets ON and OFF via command, automatic switching ON and OFF of the auto turrets and much more.
It also allows you to modify some automatic turret configurations, for example:
Customize rotation angle, Viewing angle and target scanning, Infinite Ammo: In the next release Health, Range, Bullet Speed, Aim Cone, Damage Scale
Oxide/Carbon compatibility
Basically, 4 groups are configured: Default, VIP1, VIP2, VIP3, in this way you can decide the limit of turrets in a given radius based on the group assigned to the user or the group they belong to
Permissions:
autoturretinterference.admin – Allows you to execute some commands reserved for administrators autoturretinterference.show.allowed – Allows you to use the /ati show command, to display text above the auto turrets with the status they are in.
---------------------------------------- autoturretinterference.default - Assign configurations: Default autoturretinterference.vip1 - Assign configurations: VIP1 autoturretinterference.vip2 - Assign configurations: VIP2 autoturretinterference.vip3 — Assign configurations: VIP3
These are the groups that are created by default, but you can add and/or edit groups as you wish.
For example, if you change the group vip1 to vip_elite, the permission autoturretinterference.vip_elite will be created
If you create a new group, for example vipvanilla, the permission autoturretinterference.vipvanilla will be created.
COMMANDS
Commands can be typed in chat (by putting the / character in front of the command), or from console.
/ati status or /ati st — This command allows the player to see his auto turret statistics and limits /ati status <steamID> or /ati st <steamID> — This command allows the administrator to see another player’s auto turret and limit statistics. To use this command you must have permission: autoturretinterference.admin
/ati start or /ati stop — This command allows the player to turn on or off the single auto turret you are looking at. To use this command, you must enable the AllowCommandsToStartAndStop = true property in your configuration or have permission: autoturretinterference.admin NB: If you have autoturretinterference.admin permission, you can turn on or off the auto turret you are watching of any player.
/ati startall or /ati stopall — This command allows the player to turn all of your auto turrets ON or OFF. To use this command, you must enable the AllowCommandsToStartAndStop = true property in your configuration or have permission: autoturretinterference.admin NB: If the player is part of a clan/team, all turrets of all members of the clan/team will be turned ON or OFF. /ati startall <steamID> or /ati stopall <steamID> — This command allows you to turn ON or OFF all turrets of a player based on its SteamID. To use this command you must have permission: autoturretinterference.admin NB: If the player is part of a clan/team, all turrets of all members of the clan/team will be turned ON or OFF.
/ati show or /ati sh — Command to display text above the auto turret with the status they are in.
Useful for finding turrets that are having problems.
To use this command you must have permission: autoturretinterference.show.allowed
You can pass one of these parameters: /ati show 0: Show all player auto turrets in all states. /ati show 1: Show text on all player active auto turrets /ati show 2: Show text on all player turned off auto turrets /ati show 3: Display text on all player auto turrets not connected to power /ati show 4: Display text on all player auto turrets with interference /ati show 5: Display text on all player auto turrets with information on the name of the weapon and the ammunition present in the auto turrets /ati show 6: Display text on all player auto turrets without a weapon /ati show 7: Display text on all player auto turrets without ammunition
/ati show <numbr> <steamID> or /ati sh <numbr> <steamID> — Command to display text above the auto turret with the state it is in based on the player’s SteamID.
To use this command you must have permission: autoturretinterference.admin Commands can be added or modified in the configuration file: /oxide/config/AutoTurretInterference.json
Command output example (/ati status or /ati st) :
Command output example (/ati show or /ati sh) :
CLAN/TEAM
If you are part of a clan/team and there are 1 more members who have the VIP/ROLE, then all members of the clan/team will benefit.
Example: a clan/team member has the VIP/ROLE to be able to place 40 turrets, in this case all clan/team members will be able to place 40 turrets, but this does not mean that the total number of turrets you can place are added, the limit in in this case there are still 40 turrets, but they can be positioned by all members of the clan/team, rather than just the player who has the VIP/ROLE (in this case we assumed that the VIP/ROLE limited to 40 turrets).
If there are multiple clan/team members who have different VIPs/ROLES, the VIP/ROLE with the lowest priority, assigned in the configuration, will be chosen.
Configuration
The settings and options can be configured in the AutoTurretInterference under the config directory. The use of an editor and validator is recommended to avoid formatting issues and syntax errors.
{ "Remove interference for server auto turrets: default true (Useful for Raidable Bases or events)": true, "PlayerShowTurretCountInfoMessage (Show the player, when he places a turret, a message with the number of turrets that are placed in the radius he is in. Default true.)": true, "AllowCommandsToStartAndStop (If set to TRUE, enables commands to allow the player or clan/team to turn their all auto turrets ON or OFF. Default FALSE)": false, "EnableAutomaticsStartAndStop (If set to TRUE, the player's turrets will be turned OFF when they go offline and ON when they come back online. For the clan/team, the entire clan must be offline to turn OFF the turrets automatically, but if at least one member of the clan comes back online, all the auto turrets will turn ON. Default FALSE)": false, "EnableMessageInfo (If set to TRUE, it shows a message info to the player, when he takes hold of an auto turret, of the commands that the plugin makes available to him)": true, "Auto Turret Draw Time (seconds). Default 60s": 60, "Auto Turret Draw Font Size (px). Default 16 pixel": 16, "Chat Command": [ "ati", "autoturretinterference" ], "RolePermission": { "vip1": { "Priority. (lower = higher priority)": 1, "Force the maximum number of Auto Turrets for player or entire clan/team (-1 no limit). Default -1": -1, "Player Auto Turrets without interference limit": 40, "Radius within which the system checks for other turrets (lower = more turrets)": 40, "Rotate Auto Turrets 180° degrees instead 90°. Default false": false, "Rotate Auto Turrets 270° degrees instead 90°. Default false": false, "Rotate Auto Turrets 360° degrees instead 90°. Default false": false, "Auto Turret Viewing angle and target scanning. Default 180° Degrees": 180, "Enable Auto Turrets custom settings": false, "Health (Default 1000)": 1000.0, "Range (Default 30)": 30.0, "Bullet Speed (Default 200)": 200.0, "Aim Cone (Default 4)": 4.0, "Damage Scale (Default 1.0)": 1.0 }, "vip2": { "Priority. (lower = higher priority)": 2, "Force the maximum number of Auto Turrets for player or entire clan/team (-1 no limit). Default -1": -1, "Player Auto Turrets without interference limit": 30, "Radius within which the system checks for other turrets (lower = more turrets)": 40, "Rotate Auto Turrets 180° degrees instead 90°. Default false": false, "Rotate Auto Turrets 270° degrees instead 90°. Default false": false, "Rotate Auto Turrets 360° degrees instead 90°. Default false": false, "Auto Turret Viewing angle and target scanning. Default 180° Degrees": 180, "Enable Auto Turrets custom settings": false, "Health (Default 1000)": 1000.0, "Range (Default 30)": 30.0, "Bullet Speed (Default 200)": 200.0, "Aim Cone (Default 4)": 4.0, "Damage Scale (Default 1.0)": 1.0 }, "vip3": { "Priority. (lower = higher priority)": 3, "Force the maximum number of Auto Turrets for player or entire clan/team (-1 no limit). Default -1": -1, "Player Auto Turrets without interference limit": 20, "Radius within which the system checks for other turrets (lower = more turrets)": 40, "Rotate Auto Turrets 180° degrees instead 90°. Default false": false, "Rotate Auto Turrets 270° degrees instead 90°. Default false": false, "Rotate Auto Turrets 360° degrees instead 90°. Default false": false, "Auto Turret Viewing angle and target scanning. Default 180° Degrees": 180, "Enable Auto Turrets custom settings": false, "Health (Default 1000)": 1000.0, "Range (Default 30)": 30.0, "Bullet Speed (Default 200)": 200.0, "Aim Cone (Default 4)": 4.0, "Damage Scale (Default 1.0)": 1.0 }, "default": { "Priority. (lower = higher priority)": 100, "Force the maximum number of Auto Turrets for player or entire clan/team (-1 no limit). Default -1": -1, "Player Auto Turrets without interference limit": 12, "Radius within which the system checks for other turrets (lower = more turrets)": 40, "Rotate Auto Turrets 180° degrees instead 90°. Default false": false, "Rotate Auto Turrets 270° degrees instead 90°. Default false": false, "Rotate Auto Turrets 360° degrees instead 90°. Default false": false, "Auto Turret Viewing angle and target scanning. Default 180° Degrees": 180, "Enable Auto Turrets custom settings": false, "Health (Default 1000)": 1000.0, "Range (Default 30)": 30.0, "Bullet Speed (Default 200)": 200.0, "Aim Cone (Default 4)": 4.0, "Damage Scale (Default 1.0)": 1.0 } }, "VersionNumber": { "Major": 1, "Minor": 2, "Patch": 0 } }
Remove interference for server auto turrets: default true (Useful for Raidable Bases or events): Whether or not to enable interference for server auto turrets. By default it is true, in this way the server's automatic turrets will not have interference, useful for events for example: Raidable Base. PlayerShowTurretCountInfoMessage: Show the player, when he places a turret, a message with the number of turrets that are placed in the radius he is in. Default: TRUE. AllowCommandsToStartAndStop: If set to TRUE, enables commands to allow the player or clan/team to turn their all auto turrets ON or OFF. Default FALSE. EnableAutomaticsStartAndStop: If set to TRUE, the player's turrets will be turned OFF when they go offline and ON when they come back online. For the clan/team, the entire clan must be offline to turn OFF the turrets automatically, but if at least one member of the clan comes back online, all the auto turrets will turn ON. Default FALSE. EnableMessageInfo: If set to TRUE, it shows a message info to the player, when he takes hold of an auto turret, of the commands that the plugin makes available to him. Default: TRUE. Auto Turret Draw Time (seconds). Default 60s: Duration of display of text above the auto turret. Default 60 seconds. Auto Turret Draw Font Size (px). Default 16 pixel: Size of text above auto turret. Default 16 pixel Chat Command: Here you can add, edit or delete Commands can be typed in chat (by putting the / character in front of the command), or from console.
Priority. (lower = higher priority) -- Each group has its own property, the lower this number is, the more important the group is.
This is useful in the case where a player has more roles assigned. In this case, the group with the lowest priority will be assigned, the most important group.
Negative numbers are also allowed. Player Auto Turrets without interference limit: How many automatic turrets can a player place within the radius within which the system controls the other turrets, without them interfering. For example, basic rust allows 12 turrets in a radius of 40 meters, you can set for example 30 turrets instead of 12. Radius within which the system checks for other turrets (lower = more turrets) Force the maximum number of Auto Turrets for player or entire clan/team (-1 no limit).
Maximum total number of auto turrets that can be active for player or entire clan/team.
When Auto Turrets are placed, only a certain number in a certain radius, configured in the configuration file, can be active at a given time.
However, this does not prevent you from being able to place unlimited Auto Turrets.
For example, you have set a limit of 20 Auto Turrets in a 40 meter radius, this means that in a 40 meter radius there can be a maximum of 20 Auto Turrets. But if you place another 20 Auto Turrets more than 40 meters away from the first ones, then you can place another 20 active Auto Turrets, and so on.
With this option you can establish the maximum number of Auto Turrets that can be active regardless of the radius, in order to avoid unlimited Auto Turrets.
It is always recommended to use this configuration together with the others.
For example you can decide that the forced maximum Auto Turrets limit is 5 times the number of active Auto Turrets in a given radius, it's up to you to decide. Default -1.
Auto Turrets rotation angle: Allows you to change the rotation angle of the turret. Targets will be acquired as usual, if they are in front of the turret which however can move to a larger angle. Rotate Auto Turrets 180° degrees instead 90°: If set to TRUE, the auto turrets will rotate 180° instead of the default 90° (degrees). Default False Rotate Auto Turrets 270° degrees instead 90°: If set to TRUE, the auto turrets will rotate 270° instead of the default 90° (degrees). Default False Rotate Auto Turrets 360° degrees instead 90°: If set to TRUE, the auto turrets will rotate 360° instead of the default 90° (degrees). Default False
Auto Turret Viewing angle and target scanning: This is a very powerful setting, it allows the auto turrets to see and acquire targets instantly based on the set angle, regardless of whether the target is in front of the auto turrets or not.
For example if set to 200°, the auto turrets will acquire targets instantly within 200°.
Or if set to 360°, the auto turrets will acquire targets instantly in all directions. You can choose the angle you prefer by entering a number between 1° and 360° (degrees). Default 180° Degrees.
Enable Auto Turrets custom settings: If set to TRUE, it allows you to change some Auto turret settings. Default FALSE Health (Default 1000): Auto Turrets maximum health.
Range (Default 30): Distance from which the weapon can see.
Bullet Speed (Default 200): Speed of bullets fired.
Aim Cone (Default 4): The weapon's aiming cone.
Damage Scale (Default 1.0): allows you to increase the damage of Auto turrets. A higher value indicates greater damage.
PlayerShowTurretCountInfoMessage EXAMPLE:
EnableMessageInfo EXAMPLE:
Localization
The plugin, therefore the automatic messages and statistics, are translated into the following languages:
English Italian Spanish French German Dutch Turkish Russian Ukrainian Translation files are located in the /oxide/lang folder, here is an example of a /oxide/lang/en/AutoTurretInterference.json translation file.
You can add translations for other languages by adding them to the folder: /oxide/lang
- #auto turret interference
- #auto turret
- (and 22 more)
-

$9.99
Custom Backpacks
By Cobalt Studios in Plugins
Create custom backpacks with varying capacities and properties Save on Death - Allow players to keep backpacks on death Item blacklist - Blacklist items from being placed in the backpack Lootspawns - Add custom backpacks to any loot spawn
Admin Commands:
/cb.give 'Backpack-Name' 'Player-Name/ID' - With this command, administrators or players with the appropriate permission can give a specific backpack to another player.
Admin Commands:
cbackpacks.give - allows the use of the cb.give command
{ "RemoveDefaultBackpacks": true, "Backpacks": { "rucksack": { "Shortname": "largebackpack", "SaveContentsOnDeath": true, "Capacity": 8, "ItemBlackList": [ "rifle.ak", "sulfur.ore", "lmg.m249" ] } }, "Command Names": { "give": "cb.give" }, "LootSpawns": { "assets/bundled/prefabs/radtown/crate_basic.prefab": { "rucksack": 100.0 } } }
Credit to M&B Studios the original author of this plugin.
- #backpacks
- #backpack
- (and 3 more)
-
$4.99
Server FPS Plus
The FpsPlus plugin is designed to optimize the server's frame rate in the game Rust. It does this by adjusting the frame budgets of various in-game systems based on the server's average frames per second (FPS) in 1 minute. The plugin is designed to help maintain a target FPS, which can be configured in the config file. It also helps reducing negative spikes in server fps.
Features:
- FPS Monitoring: The plugin monitors the server's FPS and maintains a list of the most recent FPS values. This list is used to calculate the average FPS, which is then used to determine the necessary optimization level.
- Dynamic Optimization: The plugin adjusts the frame budgets of various in-game systems based on the server's current average FPS. There are 4 levels of optimization. Console warnings will be displayed when changing the optimization level.
- Discord webhook: Report all optimization changes to a discord channel via a webhook.
1. Installation: Place the FpsPlus.cs file in the Oxide/Plugins directory of your Rust server.
2. Configuration: You can edit the oxide/config file to change the lower and upper FPS limit from which the optimizations will start being applied, whether warnings are enabled and enter the url of your discord webhook.
3. Usage: The plugin automatically starts monitoring the server's FPS and adjusting the frame budgets when it is loaded.
In the example picture above, my config is:
LowerFpsLimit: 20.0
UpperFpsLimit: 38.0
My server max FPS are set to 40 (via convar or console command fps.limit 40).
Since this plugn uses 1 minute average values, it will not jump between optimization levels on FPS spikes.
Default config file:
{ "DiscordWebhookUrl": "Your_discord_webhook_here", "EnableConsoleWarnings": true, //Enable messages in console for changes in optimization levels. "LowerFpsLimit": 20.0, // At this level or below, maximum optimizations will be applied. "UpperFpsLimit": 40.0 //At this level or above no optimizations will be applied. }
-

$34.95$21.95Kits
Unique kit system with the highest possible functionality and beautiful design. This will please you (no need to sit in the config every time and try to fill in some incomprehensible values, etc.), and your players (convenient, clear and informative interface). You just start editing items directly in the game) and your players (comfortable, clear, informative interface)!
🌟 Features of Kits
Beautiful User Interface: Experience a visually appealing and user-friendly design. High Performance: Optimized for fast, reliable performance. Automatic Kit Conversion (uMod): Easily convert your existing kits. In-Game Kit and Item Setup: Configure kits directly in the game. Auto Kits & Wipes (Optional): Automate kit distribution and server wipes. Custom Items & Commands: Assign unique items and commands to kits. Advanced Item Settings: Fine-tune every aspect of your items. CopyPaste Integration: Seamlessly work with CopyPaste. Optional Features: Delays after wipes, set blocking in Building Block, logging, and item chances. Skills & ServerPanel Support: Enhance player experience with integrated support.
🎮 Commands
kit – open the kit interface kit help – get help with kits kit autokit – enable or disable automatic kit.
Requires the "kits.changeautokit" permission. You can set this permission up in the plugin configuration under "Permission to enable/disable autokit". kit list – display all available kits kit [name] – redeem a specific kit kits.resetkits – delete all kits kits.give [name/steamid] [kitname] – grant a kit to player kits.convert – convert from uMod Kits kits.wipe – clear players data kits.reset – resets the player data or kits in the kits system. kits.reset data [<targetID>/all] – resets the data of a player or all players.
Parameters:
<targetID>: The ID of the player whose data is to be reset. If you specify all, the data of all players will be reset. kits.reset kits – resets all kits in the data kits.template <interface_type> <interface_style> <template> [template_version] – allows the administrator to customize the appearance of the bundles interface by choosing between fullscreen and inmenu mode. Different styles and templates are available for each interface type. The old style (old) is only available for fullscreen mode, while the new Rust style (rust) is available for both interface types. When using the Rust style, you must specify a specific template such as normal, content, categories or content_categories. For inmenu rust templates, you can also specify the ServerPanel template version (1 or 2).
Parameters: <interface_type>: The type of interface template. Valid values: fullscreen: Fullscreen interface template. inmenu: Menu interface template. <interface_style>: The style of the interface. Valid values: old: The old interface style (fullscreen only). rust: New Rust interface style (for fullscreen and inmenu). <template>: The name of the target template. Valid values depend on the interface style: normal, content, categories, content_categories. [template_version]: (Optional, only for inmenu rust) ServerPanel template version. Valid values: 1 or 2. Specifies the template version to be used with the selected inmenu rust template. Examples: kits.template fullscreen old - Sets the fullscreen interface to the old style. kits.template fullscreen rust normal - Sets the fullscreen interface to the Rust style with the normal template. kits.template fullscreen rust content - Sets the fullscreen interface to the Rust style with the content template. kits.template fullscreen rust categories - Sets the fullscreen interface to the Rust style with the categories template. kits.template fullscreen rust content_categories - Sets the fullscreen interface to the Rust style with the content_categories template. kits.template inmenu rust normal 1 - Sets the menu interface to the Rust style with the normal template for ServerPanel version 1. kits.template inmenu rust content 2 - Sets the menu interface to the Rust style with the content template for ServerPanel version 2. kits.template inmenu rust categories 1 - Sets the menu interface to Rust style with the categories template for ServerPanel version 1. kits.template inmenu rust content_categories 1 - Sets the menu interface to the Rust style with the content_categories template for ServerPanel version 1.
🎥 Video
P.S. Video of the old version, video for the V2+ version is now in development
🖼️ Showcase
Full screen Templates
Template OLD STYLE
Template NEW RUST
Default:
Content:
Categories:
Content & Categories:
In-Menu Templates
Template V1 (V1.1)
Default:
Content:
Categories:
Content & Categories:
Template V2
Default:
Content:
Categories:
Content & Categories:
Editor
🧪 TEST SERVER
Join our test server to view and experience all our unique features yourself!
Copy the IP Address below to start playing!
connect 194.147.90.147:28015
📚 FAQ
Q: Where can I see an example of a config?
A: Config
Q: Where can I see an example of a data?
A: Data
Q: I have a question/problem. What should I do?
A: You can write to me in a PM on the site, create a ticket. Or write me in Discord: Mevent#4546
Q: Does the Kits plugin support other plugins?
A: Yes, this Kits plugin has an API similar to other popular kits plugins. If the plugin works with Kits - it works with this plugin too.
Q: How do I enable the sale of kits?
A: You need to configure the plugin economy (which plugin, its hooks, etc.), enable "Enable sale" in the Kits data (oxide/data/Kits/Kits.json or carbon/data/Kits/Kits.json) and set the price to "Selling price"
"Enable sale": true, "Selling price": 100, Q: How do I use Economics to pay for kits?
A: Example configuration settings:
"Economy": { "Type (Plugin/Item)": "Plugin", "Plugin name": "Economics", "Balance add hook": "Deposit", "Balance remove hook": "Withdraw", "Balance show hook": "Balance", "ShortName": "", "Display Name (empty - default)": "", "Skin": 0 }, Q: How do I use ServerRewards to pay for kits?
A: Example configuration settings:
"Economy": { "Type (Plugin/Item)": "Plugin", "Plugin name": "ServerRewards", "Balance add hook": "AddPoints", "Balance remove hook": "TakePoints", "Balance show hook": "CheckPoints", "ShortName": "", "Display Name (empty - default)": "", "Skin": 0 }, Q: How do I use scrap to pay for kits?
A: Example configuration settings:
"Economy": { "Type (Plugin/Item)": "Item", "Plugin name": "", "Balance add hook": "", "Balance remove hook": "", "Balance show hook": "", "ShortName": "scrap", "Display Name (empty - default)": "", "Skin": 0 }, Q: How do I resize the kit image?
A: You can do this in the config, here's an example of the image setup (-32 and 32 are width, and -75 and -11 are height😞
"Kit Image": { "AnchorMin": "0.5 1", "AnchorMax": "0.5 1", "OffsetMin": "-32 -75", "OffsetMax": "32 -11" }, Q: How can I remove the numbers on the kits ("#1", "#2", etc.)?
A: You need to turn off "Show Number?" in the config:
"Show Number?": false, Q: How do I make it so that others can see kits with different permissions without being able to claim them?
A: You need to turn off "Show All Kits?" in the config:
"Show All Kits?": true, Q: Where can I edit the names in the plugin or add my own language?
A: You can edit lang files that are located (for example) at "oxide/lang/en/Kits.json" or "carbon/lang/en/Kits.json".
🛠️ HOOKS
private string[] canRedeemKit(BasePlayer player) private void OnKitRedeemed(BasePlayer player, string kitName) private double OnKitCooldown(BasePlayer player, double cooldown)
🧩 API
private bool TryClaimKit(BasePlayer player, string name, bool usingUI) private string[] GetAllKits() private object GetKitInfo(string kitname) private string[] GetKitContents(string kitname) private double GetKitCooldown(string kitname) private double PlayerKitCooldown(ulong ID, string kitname) private int KitMax(string kitname) private double PlayerKitMax(ulong ID, string kitname) private string KitImage(string kitname) private bool IsKit(string kitname) private bool isKit(string kitname) private void GetKitNames(List<string> list) private double GetPlayerKitCooldown(ulong userId, string name) private double GetPlayerKitCooldown(string userId, string name) private void SetPlayerCooldown(ulong userId, string name, int amount) private int GetPlayerKitUses(ulong userId, string name) private int GetPlayerKitUses(string userId, string name) private void SetPlayerKitUses(ulong userId, string name, int amount) private JObject GetKitObject(string name) private int GetKitMaxUses(string name) private string GetKitDescription(string name) private string GetKitImage(string name) private bool GiveKit(BasePlayer player, string name, bool usingUI) private bool HasKitAccess(string userId, string name) private int GetPlayerKitAmount(string userId, string name)