NHGaming's Wishlist
-
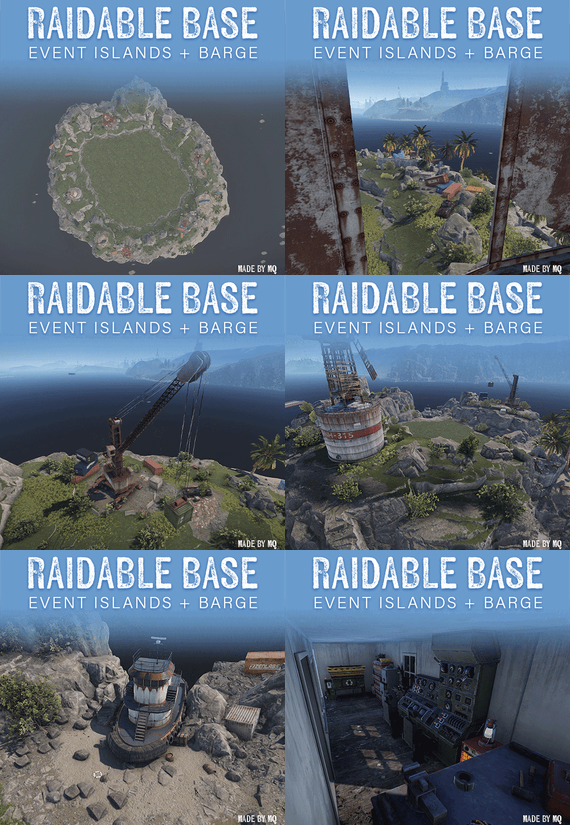
Raidable Base Event Islands + Barge
By monsterqueen in Prefabs
These islands were created to be event locations for your custom maps and were made with Raidable Bases in mind. These islands are approved by nivex for the use of Raidable Bases.
To use custom Spawn Points with Raidable Bases you must use the "Spawns Database” PlugIn by k1lly0u.
Included
1 Large Event Island 1 Small Event Island 1 "Landing Barge” The Landing Barge was created to be used as a teleporting point to the islands for players if you use those. Features
Recycler + Repair Bench at prefab T3 Workbench on Landing Barge Different vantage points around the islands for unique base raiding angles Installation
NOTE: Clear the ocean topology layer layer over the islands after placing.
These floating prefabs work best when placed at the specified height (Y Value):
MQ Large Event Island 1 - Y Height: 6.684 MQ Small Event Island 1 - Y Height: 2.075 MQ Landing Barge 1 - Y Height: 2.059 Helpful Links
Rustedit Training: HOW TO INSTALL RUSTEDIT
RustEdit - Working With Custom Prefabs Tutorial
Tutorial for Spawns Database
Feel free to reach out to me on Discord (Monster Queen#5124) for any questions or help needed.
-
Animal Farm
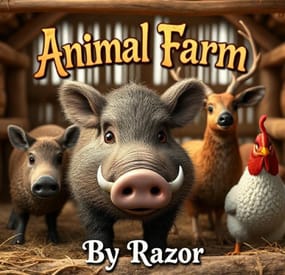
Allow your players to farm boars, bears, wolfs, panthers, tigers, alligators, and stags similarly to chickens. They need food and water to survive, and you can breed them to expand your farm.
You can set how much resources they get by there age. There age increase 1yrs every 60min.. You can bread the animals by petting them if you have 2 of the same animals.
Killing your own animal in the farm will not give you a baby item only animals in the wild will.
Check the config for all available options.
You can also find baby animals for your farm by slaughtering wild boars, bears, wolf, or stags.
Permission
"animalfarm.admin"; "animalfarm.gatherboar"; "animalfarm.gatherbear"; "animalfarm.gatherwolf"; "animalfarm.gatherstag"; "animalfarm.chickencoop"; "animalfarm.gatherpanther"; "animalfarm.gathertiger"; "animalfarm.gatheralligator"; /animalfarm <farm/boar/stag/bear/wolf> <amount>
animalfarm <userid> <farm/boar/stag/bear/wolf/panther,/tiger,/alligator> <amount>
WARNING: If your foundations are very low to the ground they will go threw the foundation a little to the ground.
The Config Information
In the config there is some default gather ages 1 to age 5, The age 5 is the default rust gather for the animal. Keep in mind if you have a gather manager for the animal its rates will still be applies. You can add as many ages as you like anything over the last age will use the max age you have in the config. The Gather settings can not and will not be able to add custom item to, You can use other plugins for that.
{ "Chicken Coop Settings": { "Total chickens animals allowed in the coop. Default UI will only show 4": 4, "Chickens hatch time minutes": 2, "Add storage adapter to coop": false, "Add water adapter to coop": false, "Allow auto hatching of eggs": false, "Player may have how many modifyed coops -1 = unlimited": -1, "Only use custom item to place coop": false, "Coop item skin": 3461239631, "Coop item name": "Industrial Chicken Coop" }, "Farm Settings": { "Farm item skinID": 3458119788, "Farm item name": "Animal Farm", "Total farm animals allowed in the farm": 10, "Add storage adapter to trough": true, "Add hopper to trough": true, "Require permissions for gatheringr": false, "Player may have how many farms -1 = unlimited": -1 }, "Boar Baby Settings": { "Chance to get baby boar from gathering": 10, "Baby Boar item skinID": 3458077515, "Baby Boar item name": "A Baby Boar", "Baby Boar groth minutes": 30, "Boar can breed.": true, "Boar breed chance.": 100, "Boar breed cooldown minutes.": 180, "Boar dung amount.": 2, "Boar gather age and items.": { "1": [ { "shortname": "meat.boar", "amount": 1.0, "isBP": false }, { "shortname": "bone.fragments", "amount": 10.0, "isBP": false }, { "shortname": "fat.animal", "amount": 5.0, "isBP": false }, { "shortname": "leather", "amount": 5.0, "isBP": false }, { "shortname": "cloth", "amount": 1.0, "isBP": false } ], "2": [ { "shortname": "meat.boar", "amount": 3.0, "isBP": false }, { "shortname": "bone.fragments", "amount": 15.0, "isBP": false }, { "shortname": "fat.animal", "amount": 10.0, "isBP": false }, { "shortname": "leather", "amount": 8.0, "isBP": false }, { "shortname": "cloth", "amount": 2.0, "isBP": false } ], "3": [ { "shortname": "meat.boar", "amount": 6.0, "isBP": false }, { "shortname": "bone.fragments", "amount": 50.0, "isBP": false }, { "shortname": "fat.animal", "amount": 15.0, "isBP": false }, { "shortname": "leather", "amount": 12.0, "isBP": false }, { "shortname": "cloth", "amount": 5.0, "isBP": false } ], "4": [ { "shortname": "meat.boar", "amount": 7.0, "isBP": false }, { "shortname": "bone.fragments", "amount": 25.0, "isBP": false }, { "shortname": "fat.animal", "amount": 20.0, "isBP": false }, { "shortname": "leather", "amount": 16.0, "isBP": false }, { "shortname": "cloth", "amount": 7.0, "isBP": false } ], "5": [ { "shortname": "meat.boar", "amount": 8.0, "isBP": false }, { "shortname": "bone.fragments", "amount": 50.0, "isBP": false }, { "shortname": "fat.animal", "amount": 40.0, "isBP": false }, { "shortname": "leather", "amount": 20.0, "isBP": false }, { "shortname": "cloth", "amount": 10.0, "isBP": false } ] } }, "Stag Baby Settings": { "Chance to get baby stag from gathering": 10, "Baby Stag item skinID": 3458079161, "Baby Stag item name": "A Baby Stag", "Baby Stag groth minutes": 30, "Stag can breed.": true, "Stag breed chance.": 100, "Stag breed cooldown minutes.": 180, "Stag dung amount.": 2, "Stag gather age and items.": { "1": [ { "shortname": "deermeat.raw", "amount": 1.0, "isBP": false }, { "shortname": "bone.fragments", "amount": 5.0, "isBP": false }, { "shortname": "fat.animal", "amount": 2.0, "isBP": false }, { "shortname": "leather", "amount": 10.0, "isBP": false }, { "shortname": "cloth", "amount": 5.0, "isBP": false } ], "2": [ { "shortname": "deermeat.raw", "amount": 1.0, "isBP": false }, { "shortname": "bone.fragments", "amount": 10.0, "isBP": false }, { "shortname": "fat.animal", "amount": 4.0, "isBP": false }, { "shortname": "leather", "amount": 15.0, "isBP": false }, { "shortname": "cloth", "amount": 10.0, "isBP": false } ], "3": [ { "shortname": "deermeat.raw", "amount": 2.0, "isBP": false }, { "shortname": "bone.fragments", "amount": 20.0, "isBP": false }, { "shortname": "fat.animal", "amount": 6.0, "isBP": false }, { "shortname": "leather", "amount": 20.0, "isBP": false }, { "shortname": "cloth", "amount": 15.0, "isBP": false } ], "4": [ { "shortname": "deermeat.raw", "amount": 3.0, "isBP": false }, { "shortname": "bone.fragments", "amount": 30.0, "isBP": false }, { "shortname": "fat.animal", "amount": 8.0, "isBP": false }, { "shortname": "leather", "amount": 30.0, "isBP": false }, { "shortname": "cloth", "amount": 20.0, "isBP": false } ], "5": [ { "shortname": "deermeat.raw", "amount": 4.0, "isBP": false }, { "shortname": "bone.fragments", "amount": 50.0, "isBP": false }, { "shortname": "fat.animal", "amount": 10.0, "isBP": false }, { "shortname": "leather", "amount": 50.0, "isBP": false }, { "shortname": "cloth", "amount": 25.0, "isBP": false } ] } }, "Bear Baby Settings": { "Chance to get baby bear from gathering": 10, "Baby Bear item skinID": 3458078401, "Baby Bear item name": "A Baby Bear", "Baby Bear groth minutes": 30, "Bear can breed.": true, "Bear breed chance.": 100, "Bear breed cooldown minutes.": 180, "Bear dung amount.": 2, "Bear gather age and items.": { "1": [ { "shortname": "bearmeat", "amount": 1.0, "isBP": false }, { "shortname": "bone.fragments", "amount": 25.0, "isBP": false }, { "shortname": "fat.animal", "amount": 20.0, "isBP": false }, { "shortname": "leather", "amount": 20.0, "isBP": false }, { "shortname": "cloth", "amount": 5.0, "isBP": false } ], "2": [ { "shortname": "bearmeat", "amount": 5.0, "isBP": false }, { "shortname": "bone.fragments", "amount": 50.0, "isBP": false }, { "shortname": "fat.animal", "amount": 40.0, "isBP": false }, { "shortname": "leather", "amount": 40.0, "isBP": false }, { "shortname": "cloth", "amount": 15.0, "isBP": false } ], "3": [ { "shortname": "bearmeat", "amount": 10.0, "isBP": false }, { "shortname": "bone.fragments", "amount": 75.0, "isBP": false }, { "shortname": "fat.animal", "amount": 60.0, "isBP": false }, { "shortname": "leather", "amount": 60.0, "isBP": false }, { "shortname": "cloth", "amount": 25.0, "isBP": false } ], "4": [ { "shortname": "bearmeat", "amount": 15.0, "isBP": false }, { "shortname": "bone.fragments", "amount": 100.0, "isBP": false }, { "shortname": "fat.animal", "amount": 80.0, "isBP": false }, { "shortname": "leather", "amount": 80.0, "isBP": false }, { "shortname": "cloth", "amount": 35.0, "isBP": false } ], "5": [ { "shortname": "bearmeat", "amount": 20.0, "isBP": false }, { "shortname": "bone.fragments", "amount": 150.0, "isBP": false }, { "shortname": "fat.animal", "amount": 100.0, "isBP": false }, { "shortname": "leather", "amount": 100.0, "isBP": false }, { "shortname": "cloth", "amount": 50.0, "isBP": false } ] } }, "Wolf Baby Settings": { "Chance to get baby wolf from gathering": 10, "Baby Wolf item skinID": 3458436442, "Baby Wolf item name": "A Baby Wolf", "Baby Wolf groth minutes": 30, "Wolf can breed.": true, "Wolf breed chance.": 100, "Wolf breed cooldown minutes.": 180, "Wolf dung amount.": 2, "Wolf gather age and items.": { "1": [ { "shortname": "skull.wolf", "amount": 1.0, "isBP": false }, { "shortname": "wolfmeat.raw", "amount": 1.0, "isBP": false }, { "shortname": "bone.fragments", "amount": 10.0, "isBP": false }, { "shortname": "fat.animal", "amount": 2.0, "isBP": false }, { "shortname": "leather", "amount": 10.0, "isBP": false }, { "shortname": "cloth", "amount": 5.0, "isBP": false } ], "2": [ { "shortname": "skull.wolf", "amount": 1.0, "isBP": false }, { "shortname": "wolfmeat.raw", "amount": 2.0, "isBP": false }, { "shortname": "bone.fragments", "amount": 20.0, "isBP": false }, { "shortname": "fat.animal", "amount": 4.0, "isBP": false }, { "shortname": "leather", "amount": 25.0, "isBP": false }, { "shortname": "cloth", "amount": 10.0, "isBP": false } ], "3": [ { "shortname": "skull.wolf", "amount": 1.0, "isBP": false }, { "shortname": "wolfmeat.raw", "amount": 3.0, "isBP": false }, { "shortname": "bone.fragments", "amount": 30.0, "isBP": false }, { "shortname": "fat.animal", "amount": 6.0, "isBP": false }, { "shortname": "leather", "amount": 45.0, "isBP": false }, { "shortname": "cloth", "amount": 20.0, "isBP": false } ], "4": [ { "shortname": "skull.wolf", "amount": 1.0, "isBP": false }, { "shortname": "wolfmeat.raw", "amount": 4.0, "isBP": false }, { "shortname": "bone.fragments", "amount": 35.0, "isBP": false }, { "shortname": "fat.animal", "amount": 8.0, "isBP": false }, { "shortname": "leather", "amount": 60.0, "isBP": false }, { "shortname": "cloth", "amount": 25.0, "isBP": false } ], "5": [ { "shortname": "skull.wolf", "amount": 1.0, "isBP": false }, { "shortname": "wolfmeat.raw", "amount": 5.0, "isBP": false }, { "shortname": "bone.fragments", "amount": 40.0, "isBP": false }, { "shortname": "fat.animal", "amount": 10.0, "isBP": false }, { "shortname": "leather", "amount": 75.0, "isBP": false }, { "shortname": "cloth", "amount": 35.0, "isBP": false } ] } }, "Tiger Baby Settings": { "Chance to get baby tiger from gathering": 10, "Baby Tiger item skinID": 3469950143, "Baby Tiger item name": "A Baby Tiger", "Baby Tiger groth minutes": 30, "Tiger can breed.": true, "Tiger breed chance.": 100, "Tiger breed cooldown minutes.": 180, "Tiger dung amount.": 2, "Tiger gather age and items.": { "1": [ { "shortname": "bigcatmeat", "amount": 1.0, "isBP": false }, { "shortname": "bone.fragments", "amount": 10.0, "isBP": false }, { "shortname": "fat.animal", "amount": 2.0, "isBP": false }, { "shortname": "leather", "amount": 10.0, "isBP": false }, { "shortname": "cloth", "amount": 5.0, "isBP": false } ], "2": [ { "shortname": "bigcatmeat", "amount": 2.0, "isBP": false }, { "shortname": "bone.fragments", "amount": 20.0, "isBP": false }, { "shortname": "fat.animal", "amount": 4.0, "isBP": false }, { "shortname": "leather", "amount": 25.0, "isBP": false }, { "shortname": "cloth", "amount": 10.0, "isBP": false } ], "3": [ { "shortname": "bigcatmeat", "amount": 3.0, "isBP": false }, { "shortname": "bone.fragments", "amount": 30.0, "isBP": false }, { "shortname": "fat.animal", "amount": 6.0, "isBP": false }, { "shortname": "leather", "amount": 45.0, "isBP": false }, { "shortname": "cloth", "amount": 20.0, "isBP": false } ], "4": [ { "shortname": "bigcatmeat", "amount": 4.0, "isBP": false }, { "shortname": "bone.fragments", "amount": 35.0, "isBP": false }, { "shortname": "fat.animal", "amount": 8.0, "isBP": false }, { "shortname": "leather", "amount": 60.0, "isBP": false }, { "shortname": "cloth", "amount": 25.0, "isBP": false } ], "5": [ { "shortname": "bigcatmeat", "amount": 5.0, "isBP": false }, { "shortname": "bone.fragments", "amount": 40.0, "isBP": false }, { "shortname": "fat.animal", "amount": 10.0, "isBP": false }, { "shortname": "leather", "amount": 75.0, "isBP": false }, { "shortname": "cloth", "amount": 35.0, "isBP": false } ] } }, "Panther Baby Settings": { "Chance to get baby Panther from gathering": 10, "Baby Panther item skinID": 3469941871, "Baby Panther item name": "A Baby Panther", "Baby Panther groth minutes": 30, "Panther can breed.": true, "Panther breed chance.": 100, "Pantherger breed cooldown minutes.": 180, "Panther dung amount.": 2, "Panther gather age and items.": { "1": [ { "shortname": "bigcatmeat", "amount": 1.0, "isBP": false }, { "shortname": "bone.fragments", "amount": 10.0, "isBP": false }, { "shortname": "fat.animal", "amount": 2.0, "isBP": false }, { "shortname": "leather", "amount": 10.0, "isBP": false }, { "shortname": "cloth", "amount": 5.0, "isBP": false } ], "2": [ { "shortname": "bigcatmeat", "amount": 2.0, "isBP": false }, { "shortname": "bone.fragments", "amount": 20.0, "isBP": false }, { "shortname": "fat.animal", "amount": 4.0, "isBP": false }, { "shortname": "leather", "amount": 25.0, "isBP": false }, { "shortname": "cloth", "amount": 10.0, "isBP": false } ], "3": [ { "shortname": "bigcatmeat", "amount": 3.0, "isBP": false }, { "shortname": "bone.fragments", "amount": 30.0, "isBP": false }, { "shortname": "fat.animal", "amount": 6.0, "isBP": false }, { "shortname": "leather", "amount": 45.0, "isBP": false }, { "shortname": "cloth", "amount": 20.0, "isBP": false } ], "4": [ { "shortname": "bigcatmeat", "amount": 4.0, "isBP": false }, { "shortname": "bone.fragments", "amount": 35.0, "isBP": false }, { "shortname": "fat.animal", "amount": 8.0, "isBP": false }, { "shortname": "leather", "amount": 60.0, "isBP": false }, { "shortname": "cloth", "amount": 25.0, "isBP": false } ], "5": [ { "shortname": "bigcatmeat", "amount": 5.0, "isBP": false }, { "shortname": "bone.fragments", "amount": 40.0, "isBP": false }, { "shortname": "fat.animal", "amount": 10.0, "isBP": false }, { "shortname": "leather", "amount": 75.0, "isBP": false }, { "shortname": "cloth", "amount": 35.0, "isBP": false } ] } }, "Crocodile Baby Settings": { "Chance to get baby Crocodile from gathering": 10, "Baby Crocodile item skinID": 3470285566, "Baby Crocodile item name": "A Baby Crocodile", "Baby Crocodile groth minutes": 30, "Crocodile can breed.": true, "Crocodile breed chance.": 100, "Crocodile breed cooldown minutes.": 180, "Crocodile dung amount.": 2, "Crocodile gather age and items.": { "1": [ { "shortname": "crocodilemeat", "amount": 1.0, "isBP": false }, { "shortname": "bone.fragments", "amount": 10.0, "isBP": false }, { "shortname": "fat.animal", "amount": 2.0, "isBP": false }, { "shortname": "leather", "amount": 10.0, "isBP": false }, { "shortname": "cloth", "amount": 5.0, "isBP": false } ], "2": [ { "shortname": "crocodilemeat", "amount": 2.0, "isBP": false }, { "shortname": "bone.fragments", "amount": 20.0, "isBP": false }, { "shortname": "fat.animal", "amount": 4.0, "isBP": false }, { "shortname": "leather", "amount": 25.0, "isBP": false }, { "shortname": "cloth", "amount": 10.0, "isBP": false } ], "3": [ { "shortname": "crocodilemeat", "amount": 3.0, "isBP": false }, { "shortname": "bone.fragments", "amount": 30.0, "isBP": false }, { "shortname": "fat.animal", "amount": 6.0, "isBP": false }, { "shortname": "leather", "amount": 45.0, "isBP": false }, { "shortname": "cloth", "amount": 20.0, "isBP": false } ], "4": [ { "shortname": "crocodilemeat", "amount": 4.0, "isBP": false }, { "shortname": "bone.fragments", "amount": 35.0, "isBP": false }, { "shortname": "fat.animal", "amount": 8.0, "isBP": false }, { "shortname": "leather", "amount": 60.0, "isBP": false }, { "shortname": "cloth", "amount": 25.0, "isBP": false } ], "5": [ { "shortname": "crocodilemeat", "amount": 5.0, "isBP": false }, { "shortname": "bone.fragments", "amount": 40.0, "isBP": false }, { "shortname": "fat.animal", "amount": 10.0, "isBP": false }, { "shortname": "leather", "amount": 75.0, "isBP": false }, { "shortname": "cloth", "amount": 35.0, "isBP": false } ] } }, "Version": { "Major": 1, "Minor": 3, "Patch": 0 } }
-
Dynamic Monuments
DynamicMonuments is a groundbreaking plugin for Rust servers that breathes new life into your maps!
Say goodbye to tedious manual map editing or relying on RustEdit.
With just a few clicks, your server will be transformed, featuring 18 unique monuments that blend seamlessly into any environment.
Key Features:
Dynamic Spawning:
- Monuments can spawn randomly during wipes or with each server restart (optional)
- Customize spawn frequency and zones through the plugin's configuration
- A variety of monument complexities, ranging from cozy hideouts to sprawling fortresses
18 Unique Monuments:
- Water Monuments
- Coastal Monuments
- River Monuments
- Roadside Monuments
- Modifications for Standard Monuments: (Metro entrances, power line towers, substations, quarries, and more).
Personalization:
- Give players personal monuments
Versatility:
- Compatible with both custom and procedural maps.
- Automatically adapts to terrain, water, and roads.
- No RustEdit required! Everything is managed through the plugin's configuration.
Giving a monument to a player
9 out of 18 monuments can be given to players for personal placement.
The dynamic monument is represented as a flare with a unique skin, which can be given to players in any way, such as through an in-game store.
To spawn the monument, the player must hold the flare and find a suitable location, receiving instructions in the chat and notifications.
Once placed, the monument is locked to the player, and only they can loot it.
Chat commands (admin only)
/killmonument - destroys the DynamicMonument you're looking at /replacecrate NewCratePresetName - replaces the crate you're looking at on the location with NewCratePresetName /spawnmonument PresetName - spawns a monument in a random position /spawnmonumentmypos PresetName - spawns the monument in your position /killallmonuments - destroys all DynamicMonuments on the server /respawnmonuments - forcibly launches automatic respawn of DynamicMonuments /givemonument PresetName - give the monument to yourself /addprefabspawnpoint PresetName — adds a crate or static NPC spawn point to a monument at your current position (only for Static Npc and crates) /removemonumententity command — removes entity spawn point you're looking at. (only for StaticNpc/crates/Entities for respawn) Console commands (RCON only)
spawnmonument PresetName - spawns a monument in a random position killallmonuments - destroys all DynamicMonuments on the server respawnmonuments - forcibly launches automatic respawn of DynamicMonuments givemonument PresetName userID - give the DynamicMonument to the player Plugin Config
en – example of plugin configuration in English ru – example of plugin configuration in Russian
Check out the rest of my work: Adem's Codefling Library
You can reach out to me in Discord: Adem's Discord Profile
Join the Mad Mappers Discord!
-
Social Links
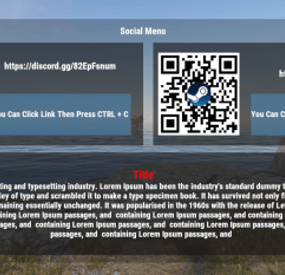
This plugin helps your players to easily reach discord and steam addresses. When players enter the game for the first time, a menu will appear and they can click on their discord and steam addresses and copy them. At the same time, players are given two papers with discord and steam arrows. In the content of these papers, you can send the steam and discord addresses together with the note you wrote to the user.
Plugin Settings
"Social Menu Enabled": true, if Social Menu Enabled is true player can see Social Menu Screen in first connect to server.
"Give Note For Every Resapwn (if false, just giving paper first connect server)": true if this settings is true player get papers for every respawn.
"Steam Oxide Group Name (Oxide Steam Auth Group Name": "auth", "Discord Oxide Group Name (Oxide Discord Auth Group Name": "authenticated", This settings can help players groups checking by plugin So if player in that group then player doesn't take note papers.
"Discord Note Enabled": true, "Social Menu Enabled": true, This settings can help to set papers settings active or not active. This settings can help to set papers settings active or not active. if they are true and player doesnt in group then plugin give papers to players
"Steam Icon Id": 3013596370, "Discord Icon Id": 2993752179, Note Paper icon id
All Plugin Settings
{ "Discord Note Enabled": true, "Plugin Icon Id": 0, "Discord Oxide Group Name (Oxide Discord Auth Group Name": "authenticated", "Discord Link": "https://discord.gg/82EpFsnumd", "Steam Link": "https://steamgroup...", "Discord Logo Link": "https://www.freepnglogos.com/uploads/discord-logo-png/discord-logo-logodownload-download-logotipos-1.png", "Steam Logo Link": "https://upload.wikimedia.org/wikipedia/commons/thumb/8/83/Steam_icon_logo.svg/2048px-Steam_icon_logo.svg.png", "Discord Icon Id": 2993752179, "Steam Note": true, "Social Menu Enabled": true, "Steam Oxide Group Name (Oxide Steam Auth Group Name": "auth", "Steam Icon Id": 3013596370, "Give Note For Every Resapwn (if false, just giving paper first connect server)": true }
Player Commands
/socialmenu -> showing menu /discord -> give discord note paper to player /steam -> give steam note paper to player
Language Settings:
You can modify the notification messages in different languages under the 'Language' folder.
{ "discordnote": "Dc :{0}\nYou can copy it by selecting the link above and then press ctrl + c.", "steamnote": "Steam: {0}\nYou can copy it by selecting the link above and then press ctrl + c.", "socialmenutitle": "Social Menu", "socialmenudescription": "<size=22><color=#FF0000>Title</color></size>\n Lorem dummy text of the printing and typesetting industry. Lorem Ipsum has been the industry's standard dummy text ever since the 1500s, when an unknown printer took a galley of type and scrambled it to make a type specimen book. It has survived not only five centuries, but also the leap into electronic typesetting, remaining essentially unchanged. It was popularised in the 1960s with the release of Letraset sheets containing Lorem Ipsum passages, and containing Lorem Ipsum passages, and containing Lorem Ipsum passages, and containing Lorem Ipsum passages, and containing Lorem Ipsum passages, and containing Lorem Ipsum passages, and containing Lorem Ipsum passages, and containing Lorem Ipsum passages, and containing Lorem Ipsum passages, and ", "socialmenucopybutton": "You Can Click Link Then Press CTRL + C", "discordgivepaper": "Discord Link Paper in Your Inventory", "steamgivepaper": "Steam Link Paper in Your Inventory", "plugin_pre_tag": "<color=#FF0000>[Social Links] :</color>" } Discord:
If you find any bugs, need assistance, or have suggestions related to the plugin, you can reach out on Discord. Discord pisagor0104
https://discord.gg/JnQftZeSXD
Youtube
- #social links
- #discord link
- (and 5 more)
-
Nade Plus
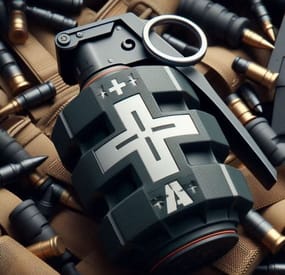
NadePlus adds a few custom Grenades to the world for more Tactical Gameplay
Fair warning ....All Players with IsAdmin tag are exempt from nade effects (but in fairness Admins should not play, Right?)
Custom Nades
Radiation Nade (spreads radiation and kills NPC's) ** Requires ZoneManager*** WaterBomb (Puts out fire's also works on Bradley and patrol and removes radiation effect to players in radius) Medical Nade (heals players within radius) DropNGo Nade (drops nearby players Hotbar items to give you a chance to run away) Sleeper Nade (Forces players to sleep for a set time) Gravity Nade (pulls players /animals and scientist to explosion position) Ping Nade (Pings players and Scientists in blast radius) F15 Nade (spawns a F15 Jets to taget npc or player in radius) Wall Nade (spawns Walls for defense) Boogie Nade (makes players dance for set time) DroppedLoot Nade (pings loot that was dropped from list) Turret Nade (Spawns 2 turrets armed and active. Team and self will be authed) Landmine Nade (spawns landmines in radius Yeet nade (Yeets Npc's outwards)
Console Commands
givenade <playername> <type> // 0 = Radiation 1=Waterbomb 2 = Medical 3 =DropNGo 4=Sleeper 5 = Gravity 6 = Ping 7 = F15 8 = Walls 9 = Boogie 10 = DroppedLoot // 11 = Turret //12 = Landmine //13 = yeet givenades <playername> // gives all nads to player
Admin Ingame Commands
/getname - Puts to console prefab name admin is looking at
Video examples
Config
{ "Use F1 grenades?": true, "Grenade SkinID's": { "RadiationNade": 810239244, "WaterNade": 1104350225, "HealNade": 830797289, "DropAndGoNade": 1806709625, "SleepNade": 1052763402, "GravityNade": 879489202, "PingNade": 3139713369, "F15Nade": 2425947331, "WallNade": 3263974252, "BoogieNade": 2206463709, "DroppedLootNade": 830792231, "TurretNade": 1262374789, "LandmineNade": 3282943077, "YeetNade": 817317634 }, "NPC names to Exclude": [ "conversationalis", "shopkeeper", "missionproviders" ], "Nade Config's": { "Radiation Nade": { "SpawnRadius": 20.0, "MaxRadiation": 60.0 }, "Water Nade": { "SpawnRadius": 20.0 }, "Medical Nade": { "SpawnRadius": 20.0, "Maxheal": 75.0 }, "DropNGo Nade": { "SpawnRadius": 20.0, "NPCDropChance": 30.0, "AffectTeammates": false, "TimeNPCShootDisabled": 15.0 }, "Sleeper Nade": { "SpawnRadius": 20.0, "TimeToKeepSleeping": 20.0 }, "Gravity Nade": { "SpawnRadius": 20.0, "PullScientists": true, "PullAnimals": false }, "Ping Nade": { "SpawnRadius": 40.0, "PingScientists": true, "PingTeam": false }, "F15 Nade": { "SpawnRadius": 40.0 }, "Wall Nade": { "WallAmount": 4, "TimetillKill": 10.0 }, "Boogie Nade": { "SpawnRadius": 20.0, "TimeToKeepBoogie": 10.0 }, "DroppedLoot Nade": { "SpawnRadius": 150.0, "Includeditems": [ "rifle.ak", "rifle.bolt", "rifle.l96", "rifle.lr300", "rifle.m39", "rifle.semiauto", "smg.2", "smg.mp5", "smg.thompson", "crossbow", "bow.hunting", "bow.compound", "shotgun.waterpipe", "shotgun.spas12", "shotgun.pump", "shotgun.double", "shotgun.m4", "pistol.revolver", "pistol.python", "pistol.eoka", "pistol.m92", "pistol.nailgun", "pistol.semiauto", "rocket.launcher", "lmg.m249", "multiplegrenadelauncher", "rifle.ak.ice", "hmlmg", "pistol.prototype17", "snowballgun", "minigun", "military flamethrower", "largebackpack", "smallbackpack", "rifle.sks", "t1_smg", "explosive.timed" ] }, "Turret Nade": { "TimetillKill": 30.0 }, "Landmine Nade": { "Landmineamount": 10, "SpawnRadius": 10.0, "TimetillKill": 120.0 }, "Yeet Nade": { "SpawnRadius": 20.0, "YeetScientist": true } }, "Enable Nade world spawns?": true, "Nade world spawns Options": { "RadiationNade": true, "SleeperNade": true, "GravityNade": true, "PingNade": true, "F15Nade": true, "WallNade": true, "DropNGoNade": true, "BoogieNade": true, "MedicalNade": true, "WaterBombNade": true, "DroppedLootNade": true, "TurretNade": true, "LandmineNade": true, "YeetNade": true }, "Drop Settings": [ { "Object Short prefab name": "crate_elite", "Minimum item to drop": 1, "Maximum item to drop": 1, "Item Drop Chance": 7.0 }, { "Object Short prefab name": "codelockedhackablecrate", "Minimum item to drop": 1, "Maximum item to drop": 1, "Item Drop Chance": 9.0 }, { "Object Short prefab name": "crate_ammunition", "Minimum item to drop": 1, "Maximum item to drop": 1, "Item Drop Chance": 20.0 } ] }
Known Conflict's
any plugin that modifies stacks
Future plans
Add more nades add more custom setting per nade in config more screenshots and videos

