
GangstaPichu's Wishlist
-
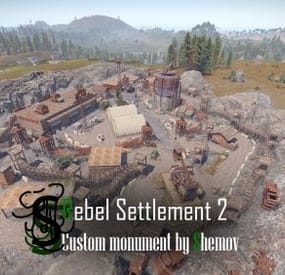
$8.30$6.22Rebel Settlement 2 | Custom Monument By Shemov
Second Rebel Settlement is ready to go on any map, you need a green card to unlock the full loot.
Features:
Great detail; Simple installing; There are quarries; Optimized FPS; There is radiation. General Info:
Prefabs count: ~3500; Type: for looting; Modifiers: Height&Splat&Topology. Loot:
Oil barrels: 5; Food box/crates: 5; Barrels: 30; Ordinary crates: 13; Military crates: 2; and 1 blue card. Other works:
You may like to take a look at a full finished maps by myself.
- #rust custom
- #custom monument
- (and 4 more)
-
$5.50
Place Anything
Having trouble fitting larger entities into your compound? By combining PlaceAnything with EntityScaleManager you can downsize big entities.
Vehicles can be directly added to the player's inventory, allowing them to deploy the vehicles whenever needed.
Vehicles can be picked up by players (optional).
Deployable trees and bushes, perfect for pve servers!
pre-configured data file with some trees and bushes
Entities.json
With the help of the CopyPaste plugin, you can sell pre-built bases for players to deploy.
• How can I pick up items?
Deployed structures can be picked up by hitting it with hammer. Items can be
picked up only by owner.
• How to upload custom icons?
Custom icons can be uploaded with Steam workshop uploader.
WorkshopUploader.zip original repository
• How to use CopyPaste plugin with PlaceAnyting?
In data file Entities.json, put 'copypaste/buildingName' instead of prefab path.
• Where I can find list of all prefabs?
Here is full updated list but not every prefab can be spawned from there and
some of them you might not be able to destroy, I do not recommend testing
this on live server.
Commands (admin only)
CHAT
/gimme
CONSOLE
placeanything <steamid> "<item display name>"
• Known issues and limitations
- some prefabs cannot be damaged thus can be used to grief players. (recycler, slotmachine, test generator...etc)
- hitting gambling wheel with hammer will make wheel disappear, game issue cant be fixed
Please note that PlaceAnything is a simple plugin that only spawns entities, similar to using the 'spawn' command in the console. It does not manage the behavior of entities after they are spawned. If you are unsure about the functionality of a specific entity, spawn it in-game as an admin and test it yourself before making purchase
Plugin comes with 19 pre-configured items. Use /gimme chat command in game to get those items for testing.
-
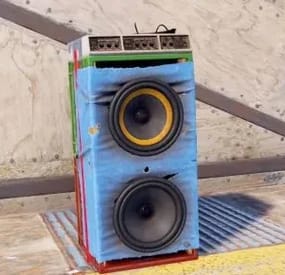
$15.00$13.50Monument Music
Adds music speakers to monuments you choose locations via chat commands and set there urls in the config.
Stand where you want the speaker to spawn and run one of the commands.
Hit twice with the tool hammer to remove any placed speaker.
Permission's
monumentmusic.admin
Chat Command's
/mmc monument - Adds speaker to monument.
/mmc mylocation - Adds speaker to your world location.
/mmc maponly - Adds speaker to monument for that map name only.
-
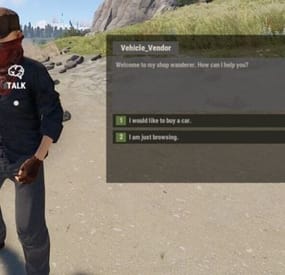
$25.00$22.50Talking Npc Vendors
With all cs files installed this will work with minimal configuration out of the box to spawn Copters/Boats/ModularCars/Snowmobiles/bikes.
Once all plugins are installed you can add the default vendors for modularcars/copters.
To do modularcars you will need https://umod.org/plugins/spawn-modular-car from umod.
Requires: https://www.myvector.xyz/index.php?resources/talkingnpcvehicles-addon-for-talkingnpc-plugin.115/
Works with: https://umod.org/plugins/custom-vending-setup
PERMS:
talkingnpc.admin - Needed for the chat commands.
<conversationFile> = default, modularcar, copter, boat, bike - conversationFile is the fileName in /oxide/data/TalkingNpc/Conversations/
<type> = boat, copter, modularcar, snowmobile
<true/false> = for placement at monument for respawn/map changes.
Guides By Customers: https://github.com/KaelKodes/Kaels-Documentations/tree/main/Talking_NPCs
Modular Cars Vendor:
1. Spawn the vendor modularcar can be replaced with the type <modularcar, copter, boat, bike>
/talking_npc vehicle modularcar <"Unique_Vendor_Name"> <false/true>
2. Create vehicle spawnpoints for modularcars
A message will popup explaining how to add the spawn points.
the /oxide/data/TalkingNpc/Addons/<"Unique_Vendor_Name">.json to set the car properties.
You can edit the UI messages in /oxide/data/TalkingNpc/Conversations/<"Unique_Vendor_Name">.json
****************************************************************
Copters Vendor:
1. Spawn the vendor
/talking_npc vehicle copter <"Unique_Vendor_Name"> <false/true>
2. Create vehicle spawnpoints for modularcars
A message will popup explaining how to add the spawn points.
the /oxide/data/TalkingNpc/Addons/<"Unique_Vendor_Name">.json to set the car properties.
You can edit the UI messages in /oxide/data/TalkingNpc/Conversations/<"Unique_Vendor_Name">.json
****************************************************************
About /talking_npc vehicle chat command:
<type> - "snowmobile", "copter", "modularcar", "boat", "bike"
Some info for custom Conversation Files:
$userID - Will insert players userID $displayName - Will insert players display name OpenVending <Vending Machine Configuration Files name> - Will open a vending machine Giveitem <item id> <amount> <skinID> <item name> - Give Item "Player Commands": [ "chat.say \"/TheCommand arangements\"" ],
-
$25.00
ZStickers
Forget about emoji, STICKERS are the next best thing to use in chat.
This plugin gives you and your players the ability to unlock stickers that can be used to express yourself in chat. Besides that, it adds a sticker market: Here stickers can be traded, which adds a great way for your players to make some good money on rare stickers.
Stickers are shown by using their :tag: in chat. By default, stickers are shown to every online player (players can turn them off individually by command). They popup on their screen and disappear in a few seconds. The possibilities are endless, and a lot of fun and interaction are guaranteed. You can add your own memes, cat pictures, word art or whatever image you can think of, tip: sneaky spiders give good results.
Sticker Editor
The main command for stickers is /sticker, but you will need some stickers first! Add any new stickers by using this command:
/sticker add :stickername: https://imgur.com/yoursticker.png After adding a sticker, you can find it in the sticker browser. Open the UI by using:
/sticker For admins (or people with the right permission) there is an in game sticker editor. From the browser, click the pencil icon on any sticker to start editing the sticker. The 3x3 grid sets your sticker’s start position, then you can align your sticker with the other values.
A group can be entered or chosen by clicking the … icon.
The 4 main tiers are only used for colors and not for real rarity, the only important tier here is the HIDE tier. Every sticker in this tier will not be available for players. Stickers are added in the hidden tier by default, so make sure to select another tier when you finish editing your sticker.
The TOTAL field is the maximum amount of copies of this sticker to be owned by players in total *. The right field shows the current number of owners.
* Stickers are limited!
Every sticker added to the plugin requires you to set up a maximum number of ‘owners’ for that sticker. The sticker can only be unlocked this many times.
Note that players can also have duplicate stickers. A sticker that has almost reached its max owners will be way harder to get when buying stickers. This rarity is useful in the sticker market and the recycler.
In the config file are settings for inactive players. After a certain amount of inactive days, X stickers will be taken from the player and become available again in the market.
Sticker Browser
Browse your stickers and click any sticker for details. The sticker browser has handy filters to quickly find the sticker you are looking for. Use the lock icons to toggle (un)locked stickers. Sorting is possible by age, a-z, rarity, collections (groups) and availability.
On the right side of the screen all sticker groups are shown.
These are basically collections of stickers that can be used like sticker packs. Collect them all!
Click any of the stickers to get more details, trade or recycle them. The eye icon on top of the sticker sends a chat message to show the sticker. Only visible for admins are the edit button (pencil) and lock/unlock button. The number on the top right shows the amount of this sticker you own. This sticker will be shown if a player who owns it uses :care: in global chat.
Buy Stickers
Players need sticker tokens to be able to unlock new random stickers.
Different packs with tokens can be set up in the config file. The (token) price of a sticker can also be configured. At the moment only random stickers are available.
You can unlock specific stickers for players by command. Tokens can also be given by (server) command, for example to be used as a vote or quest reward.
Sticker Market
In the sticker market, players can trade stickers they own. After setting a price, the sticker will be shown in the list of available trades. Other players can then buy the sticker and ownership will be transferred.
Sellers get paid in the same currency as the one setup for buying sticker tokens. In case you use items as a currency, the seller has to be online to make a trade.
Failed trades are being removed after a (configurable) amount of time.
Sticker Recycler
Besides trading your stickers, you can also decide to recycle them for sticker tokens.
The reward for recycling depends on the rarity of the sticker at that moment and the amount of the same sticker being recycled.
Recycling more of the same sticker results in higher rewards.
Permissions
zstickers.admin - needed for all sticker management zstickers.use - enables /sticker command zstickers.trade - allows to trade stickers zstickers.teamchat - allows players to use stickers in team chat (ninja mode)
Commands
/sticker - almost everything can be done inside the UI /sticker add :stickername: https://imgur.com/sticker.png - add stickers /sticker give <player name or id> <amount> - gives player x number of sticker tokens /sticker unlock <player name or id> :stickername: - unlocks a sticker for a player /sticker hide - hide all stickers /sticker show - show stickers again There are some debug commands in case something looks off (please report):
/sticker list - prints your unlocked stickers to chat /sticker clearallmystickers - clears all your stickers /sticker valid - validates all stickers and their owners /sticker update - refresh all sticker stats / find missing stickers /sticker cleanuptrades - manually cleans up sticker trades /sticker debug - logs what's happening to console /sticker stats - shows totals of stickers and their availability
Console commands
These commands can be used by admins and other plugins.
sticker givetokens <player name or id> <amount> - gives a player sticker tokens sticker unlock <player name or id> :stickername: - unlocks a sticker for a player sticker import <sticker pack name> - import sticker pack, see below for more info sticker import <sticker pack name> hidden - import a sticker pack but hide all stickers instead of using the sticker pack tiers
Config & Data
The config file is pretty straight forward. You can add or remove token packs. The currency is set by picking one of the numbers. If you want to use items as currency, make sure to setup the shortname of the item. Optionally you can add a skin ID too, so only items with a certain skin can be used to buy sticker tokens.
The plugin will create 3 files in /oxide/data/ZStickers/:
market_data.json - contains all trades, this data is automatically managed/wiped player_stickers.json - contains ownership data and token balance, you CAN wipe this, but this is not required: Players can keep their stickers forever, as long as they are active. stickers.json - contains all sticker data - don't wipe this if you want to keep your stickers. If you wipe this file, make sure to wipe the others too. New in version 1.1.0 is the ability to configure the buttons used to buy stickers. Check out the config below: The first item is the default buy-button (buy 1 sticker for 5 tokens). The 2nd item is a new custom buy button: Here you but 5 stickers at once for 22 tokens. Optionally you can also define what permission is needed to see the button and what collection (group) the sticker should be picked from.
Import Sticker Packs
Sticker packs are a way to easily add or share a bunch of stickers. They come with predefined settings, so it's basically plug and play. For sticker packs, a data folder called 'import' is created
/oxide/data/ZStickers/import/ Sticker packs can be added here to easy import a list of stickers. If the import folder is not there, you can create it yourself.
Add the sticker pack json file(s) to the folder and run the import command from your console. Results will be shown in your console. Stickers with the same :tag: can not be added this way. Make sure to remove other sticker first.
If you don't want the stickers to be visible for everyone right away, add the parameter 'hidden' to the import command. This will put all stickers in the hidden tier. Console command for example:
sticker import SuperCoolPack hidden
Dependencies & Plugin support
Required plugins: ImageLibrary
Optional currency plugins: ServerRewards, ZCoins
Economics plugin is added but untested, let me know if this works for you. This plugin will be fully supported.
Note: You can use any item with any skin if you're not using any of these plugins on your server.
Support / Contact me
If you encounter any problems or if you have any suggestions, feature requests or questions, please message me on Discord (josh.z) for the fastest response.
This plugin is made with love and I feel it's never really 'done'. I'd love to discuss your ideas for it on my Discord server here: https://discord.gg/KveEUQhGsZ
There's also a cool dude there (Nexus) who always sees your questions quicker than I do. If my response takes too long, find Nexus!