DeutscherRitterPlatz's Wishlist
-
Balloon Heist Event
The Balloon Bandits are trying to escape the island in hot air balloons after being spotted stealing treasure from the monuments. They’re heavily armed, so players need to plan carefully, taking out the ringleader first will make it harder, as the other bandits will scatter. When a bandit is killed or a balloon is destroyed, the electromagnet deactivates and releases the loot crate, causing it to fall to the ground. Once the main loot is secured, jets will be called in to eliminate the remaining bandits.
Key Features:
AutoLaunch: Set intervals for automatic event triggers.
Dynamic Balloon Formation: Outer balloons follow the central balloon and scatter when the leader is killed.
Dynamic Movement: Balloons adjust to changing wind speeds and directions, creating a realistic flight pattern.
Customizable Loot & NPCs: Adjust items, health, and NPC equipment.
High-Risk Airstrike Finale: Jets and rockets add a thrilling climax.
Admin Commands: Quick control for starting and stopping the event.
Compatible with Oxide & Carbon Servers
Permissions:
balloonheist.use — Grants admins permission to control event commands.
Commands:
Chat Command:
/startballoon — Admin only
Console Command:
startballoon — Admin only
{ "AutoLaunch": { "AutoLaunchEvent": 5400.0, "EnableAutoLaunch": true }, "ChristmasSettings": { "EnableXmasLights": true, "EnableXmasPresentDrop": true, "DropInterval": 300.0, "CustomLootEnabled": true, "EnableRandomizedLoot": true, "MinItems": 1, "MaxItems": 5, "LootTables": [ { "ShortName": "santabeard", "Amount": 1, "SkinID": 0 }, { "ShortName": "supply.signal", "Amount": 1, "SkinID": 0 }, { "ShortName": "easter.goldegg", "Amount": 1, "SkinID": 0 }, { "ShortName": "easter.silveregg", "Amount": 1, "SkinID": 0 }, { "ShortName": "easter.bronzeegg", "Amount": 1, "SkinID": 0 }, { "ShortName": "xmas.present.large", "Amount": 1, "SkinID": 0 }, { "ShortName": "xmas.present.medium", "Amount": 1, "SkinID": 0 }, { "ShortName": "xmas.present.small", "Amount": 1, "SkinID": 0 } ] }, "Wind": { "WindSpeed": 4.0, "WindChangeIntervalMin": 120.0, "WindChangeIntervalMax": 240.0 }, "Dynamics": { "EnableDynamicMovement": true, "VerticalMovementAmplitude": 10.0, "VerticalMovementFrequency": 1.0 }, "Flight": { "FixedHeight": 150.0, "FlightPathRadius": 2000.0 }, "Samsites": { "TargetBalloons": false }, "CenterBalloon": { "BalloonHealth": 3000.0, "hackableCrateHackingTime": 900.0, "TurnOffBalloonOnNpcDeath": true, "RequireNpcKillForLoot": true, "EnableFlares": true, "NpcHealthMultiplier": 1.0, "RemoveCratesOnEventEnd": false, "CustomLootEnabled": false, "EnableRandomizedLoot": false, "MinItems": 1, "MaxItems": 3, "LootTables": [ { "ShortName": "wood", "Amount": 1500, "SkinID": 0 }, { "ShortName": "supply.signal", "Amount": 1, "SkinID": 0 }, { "ShortName": "rifle.ak", "Amount": 1, "SkinID": 0 }, { "ShortName": "cloth", "Amount": 50, "SkinID": 0 } ] }, "OuterBalloons": { "BalloonHealth": 2000.0, "EnableBalloon": true, "FollowCenterBalloon": true, "BalloonCount": 6, "BalloonRadius": 100.0, "TurnOffBalloonOnNpcDeath": true, "RequireNpcKillForLoot": true, "EnableFlares": true, "NpcHealthMultiplier": 1.0, "RemoveCratesOnEventEnd": false, "CustomLootEnabled": false, "EnableRandomizedLoot": false, "MinItems": 1, "MaxItems": 3, "LootTables": [ { "ShortName": "metal.refined", "Amount": 75, "SkinID": 0 }, { "ShortName": "hazmatsuit", "Amount": 1, "SkinID": 0 }, { "ShortName": "lowgradefuel", "Amount": 10, "SkinID": 0 } ] }, "CenterBalloonNpcLoadout": { "NpcNames": [ "Cpt.Bandit Bill" ], "Attire": [ { "ItemShortName": "santahat", "SkinID": 0 }, { "ItemShortName": "santabeard", "SkinID": 0 }, { "ItemShortName": "metal.plate.torso", "SkinID": 3106983511 }, { "ItemShortName": "hoodie", "SkinID": 1587744366 }, { "ItemShortName": "pants", "SkinID": 1587846022 }, { "ItemShortName": "roadsign.gloves", "SkinID": 2867945048 }, { "ItemShortName": "shoes.boots", "SkinID": 2490448596 } ], "Weapon": "minigun", "Ammo": "minigunammopack", "WeaponSkinID": 0, "NpcCustomLoot": { "EnableCustomLoot": false, "EnableRandomizedLoot": false, "MinItems": 1, "MaxItems": 3, "CustomLoot": [ { "ShortName": "supply.signal", "Amount": 1, "SkinID": 0 }, { "ShortName": "rifle.ak", "Amount": 1, "SkinID": 0 }, { "ShortName": "ammo.rifle", "Amount": 30, "SkinID": 0 } ] } }, "OuterBalloonsNpcLoadout": { "NpcNames": [ "Scrappy Steve", "Stinky Pete", "Rusty Rick", "Breezy Bob", "Decay Dave", "Raider Ron" ], "Attire": [ { "ItemShortName": "attire.snowman.helmet", "SkinID": 0 }, { "ItemShortName": "metal.plate.torso", "SkinID": 2833391256 }, { "ItemShortName": "hoodie", "SkinID": 2899815283 }, { "ItemShortName": "pants", "SkinID": 2899814576 }, { "ItemShortName": "roadsign.gloves", "SkinID": 2867945048 }, { "ItemShortName": "shoes.boots", "SkinID": 2490448596 } ], "Weapon": "rifle.ak", "Ammo": "ammo.rifle", "WeaponSkinID": 0, "NpcCustomLoot": { "EnableCustomLoot": false, "EnableRandomizedLoot": false, "MinItems": 1, "MaxItems": 3, "CustomLoot": [ { "ShortName": "supply.signal", "Amount": 1, "SkinID": 0 }, { "ShortName": "pistol.eoka", "Amount": 1, "SkinID": 0 }, { "ShortName": "ammo.handmade.shell", "Amount": 10, "SkinID": 0 } ] } }, "EventMessages": { "StartMessage": "<color=red>Warning!</color> The Balloon Bandits have been spotted near grid <color=red>{grid}</color>. They were stealing treasures from the monuments! Stop them and reclaim the loot before they escape!", "NpcDeathMessage": "<color=red>{playerName}</color> has eliminated the bandit leader at grid <color=red>{grid}</color>. Stop the remaining bandits before they escape with the loot!", "LootCompleteMessage": "<color=red>{playerName}</color> has recovered the main treasure at grid <color=red>{grid}</color> and called in air support to take down the remaining balloons! You have 5 minutes to retrieve the remaining loot before it is lost forever!", "JetsInboundMessage": "<color=red>Jets incoming!</color> T-minus 30 seconds. Take cover!", "AllBalloonsDestroyedMessage": "The balloon bandits are down!", "EndEventMessage": "The balloon bandits escaped! The stolen goods remain unaccounted for.", "JetsEndMessage": "<color=red>Targets have been eliminated!</color>" }, "JetSettings": { "AirStrikeTimer": 300.0, "JetsInboundMessageDelay": 270.0 }, "EndEvent": { "AutoEndEvent": 3600.0 } }
- #event
- #balloon heist
-
(and 6 more)
Tagged with:
-
Nuke Event
Experience the terror of a nuclear explosion with stunning visual and audio effects. A nuclear missile is launched in to the sky, it will explode near each player, simulating a personal nuke event. This catastrophic blast is accompanied by bright flashes, fireballs, dynamic fog, and radiation. After the nuke explodes, the radioactive fallout will infect 90% of the population, triggering an apocalyptic scenario and unleashing a widespread zombie outbreak!
Christmas Update
How It Works:
Nuclear Missile Launch
A nuclear missile is launched and explodes near each player
Event Warnings:
Initial Warning: Players receive an early alert about an approaching nuclear missile via a UI or Chat message warning, providing a brief window to prepare for the imminent threat.
Second Warning: A final countdown and alert are issued just before the explosion, ensuring players are ready for the impact. These can be customized to show as a UI warning or a chat message.
Optional alarm sounds are used to enhance the urgency and realism.
Nuclear Blast and Audio Effects:
A bright flash simulates the explosion, followed by multiple explosion sound effects and fireballs representing the blast’s impact!
Fully customizable via the config file!
Radiation:
Players not equipped with a hazmat suit will suffer from radiation poisoning.
Hazmat suits and arctic suits offer protection against radiation.
Fully customizable via the config file!
Fog Effect:
Post-explosion, a fog effect is applied to simulate nuclear fallout. This fog gradually clears over time.
Zombie Spawning:
The explosion triggers the spawning of zombies around players, representing the fallout’s effect. Zombies appear randomly nearby and remain for a specified duration.
Post-Nuke Message:
After the explosion and initial chaos, players receive a message about the ongoing zombie threat.
Jet Care Package:
A care package will by dropped of by a jet plane at each players position. Medical supplies are set in as default. You can edit/add your own loot in the config file
Event Triggers:
Automatic Launch: The event can be set to trigger automatically at specified intervals.
Manual Command: Authorized players can start the event using the /nuke command.
Auto Cleanup System:
Automatic Cleanup: After the event concludes, the plugin automatically handles the removal of zombies, fog, and other temporary effects. This ensures a smooth transition back to the normal game state without manual intervention.
Key Features:
Warnings: Tailor messages and timing for initial and final alerts, with options for UI or chat notifications.
Nuke Effects: Customize visual effects, including flash intensity, fireball count, and fog density.
Radiation Protection: Configure protective clothing options and radiation settings
Zombies: Adjust spawn radius, quantity, and active duration for zombies.
Custom Care Package: Add your own loot to spawn in the care package
AutoLaunch: Set intervals for automatic event triggers.
Auto Cleanup: Automatically clears zombies, fog, radiation and other effects
Permissions: nukeevent.use (Admin Only)
Command: /nuke (Admin Only)
Console command: launchnuke (Admin Only)
https://www.youtube.com/watch?v=lsO5ngpW-KM
Update 1.0.4: Added Jet to drop off care package. Event has been sped up in the YouTube video for testing !
https://www.youtube.com/watch?v=4CtOPzB4Cwo&t=21s
{ "AutoLaunch": { "EnableAutoLaunch": true, "Interval": 7200.0 }, "Countdown": { "Interval": 1.0 }, "EventSettings": { "EnableAlarmSound": true, "EnableFireballs": true, "EnableUIWarnings": true, "EnableFlashEffect": true }, "NukeSettings": { "EnableNuclearMissile": true, "NukeEffect": { "BrightDuration": 3.0, "FadeDuration": 1.5, "FadeSteps": 10, "FireballCount": 5, "FireballRadius": 75.0, "FogDuration": 300.0,//Sync with end event duration for full effect "NukeSoundDelay": 0.0, "NukeSoundPaths": [ "assets/prefabs/tools/c4/effects/c4_explosion.prefab", "assets/prefabs/weapons/satchelcharge/effects/satchel-charge-explosion.prefab", "assets/prefabs/weapons/rocketlauncher/effects/rocket_explosion.prefab", "assets/bundled/prefabs/fx/weapons/landmine/landmine_explosion.prefab", "assets/prefabs/tools/c4/effects/c4_explosion.prefab" ] } }, "RadiationSettings": { "ContinuousRadiation": false, //When enabled radiation will continuously affect players without protective clothing until the event ends "EnableRadiation": true, "RadiationDamage": 1.0, "RadiationEffect": 200.0, "RadiationLevel": 200.0 }, "RadiationProtection": { "EnableProtectiveClothing": true, "PoisonSleepingPlayers": false, "ProtectiveClothing": [ "hazmatsuit", "hazmatsuit.arcticsuit" ] }, "CarePackageSettings": { "EnableCustomLoot": true, "EnableRandomizedLoot": false, "MinItems": 1, "MaxItems": 3, "SupplyDrop": { "CustomLoot": [ { "Amount": 1, "ShortName": "hazmatsuit", "SkinID": 0 }, { "Amount": 5, "ShortName": "antiradpills", "SkinID": 0 }, { "Amount": 10, "ShortName": "bandage", "SkinID": 0 }, { "Amount": 2, "ShortName": "largemedkit", "SkinID": 0 } ] } }, "ChristmasSettings": { "EnablePresentDrop": true, "PresentDropPerZombie": 3, "EnableSupplyDropPresents": true, "PresentDropPerSupplyDrop": 2, "ZombieNpcLoadout": { "EnableCustomLoadout": true, "Attire": [ { "ItemShortName": "attire.snowman.helmet", "SkinID": 0 }, { "ItemShortName": "metal.plate.torso", "SkinID": 2833391256 }, { "ItemShortName": "hoodie", "SkinID": 2899815283 }, { "ItemShortName": "pants", "SkinID": 2899814576 }, { "ItemShortName": "roadsign.gloves", "SkinID": 2867945048 }, { "ItemShortName": "shoes.boots", "SkinID": 2490448596 } ], "Weapon": "rifle.ak", "WeaponSkinID": 0, "Ammo": "ammo.rifle", "AmmoAmount": 10000 } }, "ZombieCustomLootSettings": { "EnableCustomLoot": false, "EnableRandomizedLoot": false, "MinItems": 1, "MaxItems": 3, "CustomLoot": [ { "Amount": 1, "ShortName": "hazmatsuit", "SkinID": 0 }, { "Amount": 1, "ShortName": "supply.signal", "SkinID": 0 }, { "Amount": 1, "ShortName": "rifle.ak", "SkinID": 0 }, { "Amount": 5, "ShortName": "bandage", "SkinID": 0 } ] }, "ZombieSpawnPerPlayerSettings": { "SpawnCount": 10, "SpawnRadius": 125.0 }, "ZombieGlobalSpawnSettings": { "SpawnGlobalZombies": false,//Zombies will spawn randomly across the map rather than near each player "GlobalZombieCount": 200 //Add more zombies at your own risk }, "WarningMessageSettings": { "Warnings": { "InitialWarningDuration": 6.0, "FirstWarningMessage": "Warning: A nuclear missile has been launched! It is rapidly approaching the island. Take Cover!" }, "SecondWarning": { "SecondWarningDuration": 10.0, "SecondWarningMessage": "Nuke incoming! Brace for impact!" }, "SecondWarningDelay": 10.0, "PostNuke": { "Message": "The nuclear blast has unleashed a chilling menace! 90% of the population has been infected, transforming into deadly Snowmen. Stay alert and fight for survival!", "MessageDuration": 5.0 }, "PostRemovalMessage": "The infection is now under control. All infected snowmen have melted away.\nA care package has been dropped at your position!", "PostRemovalMessageDuration": 5.0 }, "EndEventSettings": { "EventDuration": 300.0 } }
- #nuke
- #nuke event
-
(and 7 more)
Tagged with:
-
Loot Breaker
Overview:
This plugin adds an additional twist to PVP within monuments by giving items within player inventories a chance to perma break on death meaning the looter might not
get that shiny gun they were hoping to get. Each monument has a tier structure and the tiers break chance % can be modified to suit your playstyle , or if there are certain
items you dont want to be apart of the item table you can add them to the white list.
# Note - This will only affect items that have a condition/durability bar.
Newly Added: Configurable option to set the Loot Breaker to the entire map rather than just Monuments!
White listed:
- Option to set up a white list that disregards items placed into list that have a condition (shortnames).
Chat Command:
- "/breakitems" - Test the plugin by breaking every item in your inventory that has a condition.
Permissions:
- "lootbreaker.exempt" - Use this permission if you want exemption from the plugin.
Config Access:
- The break chance is by % , changing these numbers below will set a new % rate for that monument tier.
- Ability to set the monuments register size, currently set at 100m
- #loot
- #durability
-
(and 2 more)
Tagged with:
-
Tiers Mode
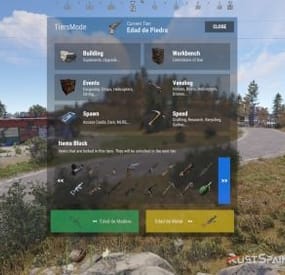
Integrate a complete tier/stage system into your mod server. Or just set up a new server with this game mode. By default the plugin will generate 4 Tiers, but you can create all the tiers you consider necessary and configure each tier to your liking. 1 Tier for each day? You can do it.
I know, the price of this plugin may seem expensive. But it’s several weeks of work on the development of the plugin + all the time I’ll have to spend maintaining it. Below I will show you all the features that are included.
Features
GUI
Screen Counter: It shows in the upper left part of the screen a counter with the current tier and time left for the tier to change.
Windows Info: Turns the use of the information display on or off. You can block it completely or simply block the information of the next tiers from being consulted.
Alert Modal: Enable or disable the plugin’s modal alerts that will notify players of blocked things.
Alert Modal Changue Tier: Enable or disable modal alerts when changing tiers.
Alert Modal Events: Enable or disable modal alerts when spawning or a server event occurs. Example when an airdrop comes out, the cargoship appears or the oil rig respawns.
Custom Alert Modal: Activate or deactivate custom modal alerts that you can perform from the /tieralert msg command.
MESSAGES
Chat: Notifies by chat of the warnings of the server alerts.
Welcome Message Chat: Welcome message in chat when a player connects explaining that they are on a server with Tiers Mode enabled.
Discord Messages: Notify on Discord, using the Discord Messages plugin when a Wipe is started or a Tier is changed.
OPTIMIZATION
Hooks: The plugin contains more than 14 oxide hooks for the operation of all features. That is why optimization has been taken care of in the use of each hook. Likewise, those features that are deactivated in each tier and their corresponding hooks are not necessary to work will be automatically deactivated.
LOCKED OBJECT EDITING INTERFACE
The plugin has an administrative command /tier edit to edit the objects that will be locked by each tier in an intuitive and easy way.
This way you won’t have to search for the name of the object and add it to the config.
Tiers Features
TIER CONFIG
Tier Name: Sets the name of the Tier to be displayed. Tier Icon URL: Set a URL with the image of the Tier. Tier Color: Set a color to customize the tier. Duration of the tier in Minutes: Sets the duration of the tier in minutes. If you want it to last an hour you will have to specify 60 minutes. If you want it to be 1 day, 24h = 1440. BUILDING
Cupboards: You can set a maximum of curpboards per player or leave it unlimited.
Cupboards Alerts: Destruction alert system. When a player breaks another player’s locker, the server can be notified. (As long as it is configured like this)
Maximum Upgrade Level: Sets the maximum upgrade level in each tier.
WORKBENCH
Research from Workbench: Allow or block research from the workbench depending on the tier.
Place All Workbench: Allow or block placement of all Workbenchs or just the Workbenches you specify.
EVENTS
You will be able to activate or deactivate the automatic events of the Server according to the tier.
For example: You will be able to disable the cargoship in the first tier.
The events that you can configure are:
Cargoship. Oil Rig. Chinook. Patrol Helicopter. Aidrop. Bradley APC.
SELLERS
You can activate or deactivate the different vendors on the map. As well as vending machines and the use of drones.
Helicopter Sale. Boat Sales. Horse Sales. Use of Drones. Use of Public Vending Machine (Rads). SPAWNS
Spawn Cards: Adjust the spawn of access cards. You can make only the green card appear in the first eras and as it progresses, the blue and red cards appear.
Spawn Vehicles (Cars): Configure if you want cars to spawn around the map. You can specify the number of modules that can appear. For example: Make that in the first tier no cars come out, but in the second only cars of 2 modules come out and in the third tier that they come out of 3 modules.
Use Vehicle MLRS: Allows or not, to use the MLRS vehicle.
Use Vehicle Workcart: Allows or not, to use the Workcart.
Use Vehicle Locomotive: Allows or not, to use the Locomotive.
SPEED
Crafting Rate: As the tiers progress, you can configure the crafting time to be faster, or always leave it vanilla.
Research Seconds: As the tiers progress, you can configure the research time to be faster or leave it vanilla. You can also make it last longer than vanilla.
Recycler Seconds: As the tiers progress, you can configure the recycling time to be faster or leave it vanilla. You can also make it last longer than vanilla.
Gather System:A complete Gather system is integrated so that depending on the tier you can configure it in a different way. In this way the first tier can be vanilla and as you advance from tier the farming ratio will go up. Of course, if you activate it, make sure that you do not use any other similar plugin for this. You can configure the following parameters:
Dispenser Gather. Dispenser Bonus. Collectible Pickup. Growable Gathered. Survey Gather. Quarry Gather. Excavator Gather. BLOCK
Items lock Craft: Blocks the ability to craft items that are locked in the current tier.
List of Blocked Items: You can easily edit the locked items in each tier with the /tier edit command.
Deployable lock without Building Permissions: Blocks the ability to place certain items if the player does not have locker permission. Ideal to prevent players from placing certain items anywhere on the map.
EXECUTION COMMANDS
You will be able to set your own commands that will be executed when the tier loads. Both in tier changes, and in server restarts. Ideal for disabling certain plugins up to a certain tier. Or to execute another plugin’s command to trigger an event. Or any other idea you can think of.
Permissions
tiersmode.admin With this permission you will be able to use the /tier edit command and the /tieralert command. Do not grant this permission to players. tiersmode.bypass.use_workcart and tiersmode.bypass.use_locomotive Permission to bypass Workcart and Locomotive usage lock. tiersmode.bypass.use_mlrs Permission to bypass the MLRS usage block. tiersmode.bypass.limit_cupboard Permission to evade the maximum limit of TC. tiersmode.bypass.block_items Permission to evade blocking of all items. tiersmode.bypass.block_place_no_building Permission to bypass the build lock of specific items without cabinets. tiersmode.bypass.upgrade Permission to bypass the building improvement limit. tiersmode.bypass.block_place_all_workbench Permission to bypass the placement lock of any workbench. tiersmode.bypass.block_research Permission to bypass the workbench research lock. tiersmode.bypass.block_vending_helis Permission to evade vendor blocking (Helis, Boats, Horses) tiersmode.bypass.block_vending_boat Permission to evade vendor blocking (Helis, Boats, Horses) tiersmode.bypass.block_vending_horses Permission to evade vendor blocking (Helis, Boats, Horses) tiersmode.instant_research Permission for instant research. tiersmode.alerts.block Permission to block alerts to that player. tiersmode.instant_recycler Permission for instant recycling.
Commands
/tier Opens the info screen if enabled in the config. /tier edit Opens the edit screen for locked items for tiers. Only with Admin. /tieralert textmsg Send a message in alert format to all online players on the server. You can only do this if you have admin permission. Configuration
DEFAULT CONFIGURATION WITH 4 TIERS
Language
Language support. By default it will be generated in English. If you are interested in the Spanish language, you just have to ask me privately.
Bonus
For any problem, doubt, suggestion or assistance do not hesitate to contact me by Discord ninco90#6219
If you need me to configure everything from scratch, according to your tastes, for your server I can also do it for an additional fee. Although you should be able to configure everything yourself.
-
DropBags
By Whispers88 in Plugins
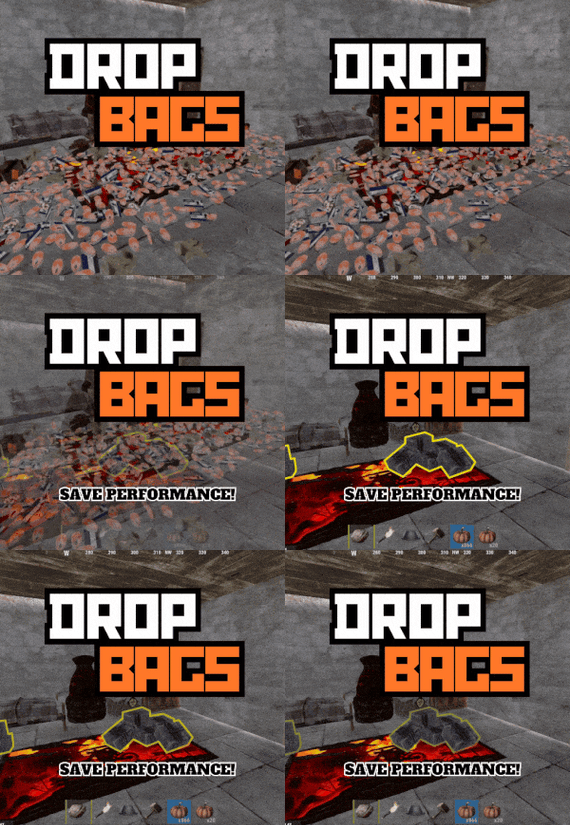
Drop Bags tracks items dropped into the rust world. When there are high-volume drops, they are combined into a single "drop bag.” This method enhances performance by streamlining the handling of item drops and reducing item physics.
Stop server stalls and freezing from item spam Works on craft spam, dropped item spam, gutted shark spam and horse dung! Light weight and easy to use Easy config
DropBags uses one light weight hook to track dropped items. Dependent on how many items are dropped in a given radius those items get placed into a drop bag. This stops mass item spam effecting your server performance.
{ "Area Size - How far away items can be moved into a container": 7, "Max drops before moving items to container": 36, "Time to wait before moving items": 5.0, "Vischeck - checks items are visable before moving to container": true, "Calculate despawntime from drop bag items": true, "Reset dropbag despawn time on loot": false, "Override drop bag despawn time (seconds), 0 = false": 0.0 }
- #dropbags
- #drop bags
- (and 26 more)


