
CoreSnap's Wishlist
-

$9.99
Weapon Mechanics
Easily adjust weapon statistics to fit your server’s gameplay. Customize a variety of attributes for any weapon, including custom names, damage, max range, effective distance, max ammo, and more. Tailor weapon performance to create unique gameplay balance and new challenges for players!
Discord
Join our community discord for fast support and future updates. We have several channels where you can get help, offer suggestions, see what's coming in future updates, and more. Our discord is the fastest way to get the help and info you need! http://discord.rustlevels.com/
Features:
Adjust attribute for every weapon Including:
Max ammo Distance Scale Damage Scale Effective Distance Close Range Addition Medium Range Addition Long Range Addition Make unbreakable In Game Admin Panel:
Setup and adjustments can be done live in-game without having to open or edit a config file. Custom user friendly UI with different themes Auto add option that can automatically add weapons and default attributes to the list Manually add weapons that you want Message display section to alert you of issues Debug mode that posts RCON messages with details on everything that's going on for easy troubleshooting
API - For Developers to use for compatibility:
// Looks for weapon shortname as string - returns true or false if weapon is listed in Weapon Mechanics public bool IsWeaponListed(string weapon) // Looks for weapon shortname as string - returns true or false if weapon is set to unbreakable public bool IsWeaponBreakable(string weapon) // Looks for weapon shortname and attribute name as string - returns new values as floats public float WMGetWeaponData(string weapon, string value) // Looks for weapon shortname as string - returns new max ammo as int public int WMGetMaxAmmo(string weapon)
Language:
{ "adminmenu_001": "Settings", "adminmenu_002": "Add Weapon", "adminmenu_003": "Close", "adminmenu_004": "Main", "adminmenu_005": "Save", "adminmenu_006": "Help", "adminmenu_007": "Theme", "adminmenu_008": "Reload", "adminmenu_009": "Menu:", "admin_001": "Name", "admin_002": "ShortName", "admin_003": "Max Ammo", "admin_004": "Distance Scale", "admin_005": "Damage Scale", "admin_006": "Effective Range", "admin_007": "Delete", "admin_008": "Edit", "admin_009": "Weapon", "admin_010": "(Set value to 0 to ignore)", "admin_011": "Enable Weapon Machanics", "admin_012": "Enable Debug Mode", "admin_013": "Weapon List", "admin_014": "(Type the item name, then hit enter)", "admin_015": "Load Default", "admin_016": "No item with found with {0}...", "admin_017": "Item already listed. {0}", "admin_018": "Search Weapon", "admin_019": "Search Results...", "admin_020": "+ Add", "admin_021": "... type here ...", "admin_022": "⇧ Prev", "admin_023": "Next ⇨", "admin_024": "Default data not found, Reload/Fire weapon to store defaults..", "admin_025": "Auto add weapons on reload (recommended)", "admin_026": "Main Icon", "admin_027": "No Weapons Listed Yet... \n Enable Auto Add or Click Add Weapon on the menu to start adding weapons.", "admin_028": "Close", "admin_029": "Close Range Addition", "admin_030": "Medium Range Addition", "admin_031": "Long Range Addition", "admin_032": "Admin Chat Command (requires save/reload)", "admin_033": "Select Theme", "admin_034": "Breakable", "adminmessage_001": "Weapon Mechanics Enabled", "adminmessage_002": "Debug Mode is ON", "adminmessage_003": "Auto Add Enabled", "adminmessage_004": "ImageLibrary Plugin Missing", "adminmessage_005": "XPerience Plugin Detected", "adminmessage_006": "XPerienceAddon Plugin Detected", "adminmessage_007": "Message Panel:", "adminmessage_008": "Weapon Mechanics Disabled", "admin_help_000": "Thank you for using our Weapon Mechanics plugin!\n\n These help pages will hopefully guide you in adjusting each weapon to best fit your needs. Be aware that these adjustments effect all weapons on a global scale and they will remain effected until your server restarts Weapon Mechanics plugin is removed or disabled!\n\n I recommend making minor adjustments in a private setting to find what best fits your needs. These adjustments are applied on each fire/reload if the weapon data doesn't match the Weapon Mechanics settings.\n\n Join our discord - discord.rustlevels.com - The fastest way to get the help and support you need from our great community!\n\n Continue to the next pages to view details on settings, their seffects, and what to do if something goes wrong.", "admin_help_001": "Settings: (Green = On/True - Red = Off/False)\n\n Enable Weapons Mechanics:\n By default Weapon Mechanics is disabled so that you can look around the admin panel before any changes are made. Turning this option on will allow the plugin to change all weapons listed on the main page. Turning this option off will stop any changes from being made to listed weapons however any weapon changed prior will still be effected.\n\n Auto add weapons on reload:\n This option allows the plugin to automatically add weapons to the main page with their default settings if they are not already listed. This is the easiest way to add weapons to the list. Weapons must still be reloaded at least 1 time to be automatically added to the Weapon Mechanics list.\n\n Enable Debug Mode:\n This is for helping find issues or see what is happening when Weapon Mechanics is enabled. Messages will be posted in your server console with information that can be useful when reporting bugs. Keep this disabled unless needed.\n\n When any of these options are enabled they will be listed on the menu display. This display will also alert you of any installed plugins that are directly supported or known to conflict.", "admin_help_002": "Weapon Adjustments:\n\n <color=yellow>Name:</color>\n You can edit the default name of any weapon. Customize your server with unique weapon names.\n\n <color=yellow>Max Ammo:</color>\n This is the new maximum amount of ammunition this weapon will hold. Players must still have the ammo needed to fill the weapon.\n\n <color=yellow>Distance Scale:</color>\n This changes the distance scale this weapon uses to determain how far the fired projectile will travel. The value works much like a percentage % based off a predetermained global distance scale. Increasing or decreasing this value will effect how far the weapons projects can travel.\n\n <color=yellow>Damage Scale:</color>\n This changes the damage scale this weapon uses to determain how much damage a fired projectile can cause. The value works much like a percentage % based off a predetermained global damage scale. Increasing or decreasing this value will effect how much damage the weapons projects can cause.\n\n <color=yellow>Effective Range:</color>\n This changes the effective range this weapon has and how much damage the fired projectile will lose over distance. The value is based off distance in meters and the fired projectile will drop damage potential increasingly after this distance. Increasing or decreasing this value will effect how far the fired project can travel before it begins to lose damage potential.", "admin_help_003": "Troubleshooting:\n\n <color=yellow>Weapons Not Effected?:</color>\n\n - Make sure Weapon Mechanics is enabled in the settings. By default Weapon Mechanics is disabled so that you can look around the admin panel before any changes are made.\n\n - Enable (Debug Mode) on the settings page and try reloading the weapon that isn't effected. In your server console you will see messages posted step by step when Weapon Mechanics tries to change the weapon as it reloads. Look for any messages that might explain what is happening and why the weapon is not being changed. If any errors appear report them to the developer.\n\n - If you are using any plugins that alter weapons, try unloading those plugins and see if Weapon Mechanics works. If so there could be a conflict bewteen plugins and this will have to be resolved between plugin developers. Report the conflict to both developers so they are aware and can look into possible solutions.\n\n <color=yellow>Images Not Showing?:</color>\n\n - This plugin requires the ImageLibrary plugin for images to show properly. Make sure you have the latest version of ImageLibrary installed.\n\n <color=yellow>Some Images Not Showing When Searching?:</color>\n\n - If the item has not been loaded before there can be a delay on ImageLibrary loading the image. The next search or load will usually fix this. All item images are hosted by rustedit.io and may be missing if those items have not been updated or added yet.\n\n <color=yellow>UI Images Not Showing?:</color>\n\n - The UI images such as the top left logo, menu background and other images are hosted by a public image service called imgur. This service sometimes limits the number of requests and can prevent the images from loading. These can be changed on the Them page using the custom option and enter the URL to any remote images you wish to use." }
-
$21.95$11.95Auto Recycler
Plugin Description
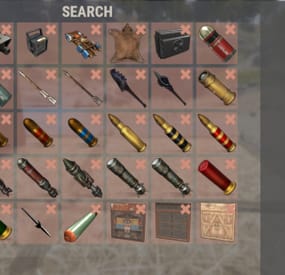
"Auto Recycler" is a Rust plugin that offers players advanced recycling features. It enables automatic item recycling, access to a virtual recycler, and special recycling crates. With admin permission, you can configure which items players are not allowed to automatically recycle.
Features
Automatic Recycling: Players can set specific items for automatic recycling. These items will be recycled automatically when they enter their inventory.
Virtual Recycler: Allows players to access a virtual recycler to recycle items directly from anywhere in the game.
Recycling Crate: A special item that functions as a portable recycler.
Customizable Configuration: The plugin configuration can be customized to exclude or allow specific items from recycling.
Permissions
autorecycler.admin: Grants access to all admin functions of the plugin.
autorecycler.autorec: Allows players to use automatic recycling.
autorecycler.recvirtual: Provides access to the virtual recycler.
autorecycler.characteristics: Allows modification of item characteristics related to recycling.
autorecycler.recboxbuy: Enables the purchase of the Recbox.
Chat Commands
/ar: Allows players to use the automatic recycler.
/vrec: Allows players to use a virtual recycler (configurable command).
/recbox: Displays information about the costs of purchasing a Recbox.
/recboxbuy: Allows players to buy a Recbox if they have the required resources.
NEW
/autorectoggle activate and deactivate the AutoRecycler
Additional Information
The plugin offers extensive UI integration to simplify interaction with its features. It stores player data to maintain automatic recycling settings between sessions. The configuration file allows admins to customize the plugin's behavior, including Recbox costs and adjustable recycling properties of items.
Note
Ensure that players have the appropriate permissions to fully utilize the plugin's features.
If you have any questions or problems, join my discord
https://discord.gg/D2zTWCEnrN
-
$25.00
KillFeed
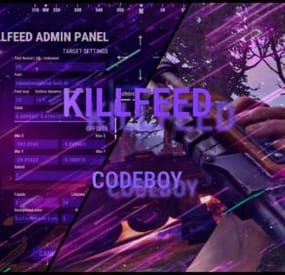
A kill feed your players actually notice.
Built in the game, not in a config.
Show who killed whom, with what, from how far, with both Steam avatars. Build the whole thing in a live in-game editor instead of opening a JSON file.
/kf.edit Open the full in-game editor with a preview that updates as you work. 01 - Built in the game, not in a config Edit against a live preview. No JSON, no reload cycle.
Move elements with steppers and an arrow pad, recolour them, reposition the feed and switch themes in the same editor. Every change updates while you type.
Position with intent Place the feed where it belongs using steppers and an arrow pad, then tune its direction and speed. Motion you can control New entries slide in. Expiring entries slide out and fade. Turn animation off entirely when you need a static feed. 02 - Steam avatars, zero dependencies Show the people behind the kill. Without another service to run.
KillFeed draws the killer's and victim's actual Steam avatars through the game UI. There is no ImageLibrary requirement, no Steam API key and nothing extra to install.
Icons for every encounter Bots, animals, Bradley and the patrol helicopter receive their own icons. Any entity can be mapped to a custom image. Private kills mode With one switch, each kill appears only to the killer and victim. Ideal for arenas, duels and private encounters. 03 - New: Discord live killfeed Bring the action to Discord. Without turning your channel into spam.
The optional companion bot plugin relays kills through the Discord Webhooks. Kills are grouped into one message on an interval you set from 1 to 60 seconds, which keeps the webhook inside Discord's rate limits on a busy server instead of being throttled into silence.
Embed or plain text Choose the output format, then set an embed title and colour. Configure it from the Discord section in the same in-game editor. Only the events you want Toggle PvP, NPC and animal kills, and deaths with no killer separately. Player names are escaped before sending. Line template placeholders {killer} {target} {weapon} {distance} {headshot} {killerid} {targetid} {reason} Use {reason} in the separate template for deaths with no killer. The companion plugin is optional, and the in-game feed works exactly as before without it.
04 - Three distinct themes Match your server's atmosphere. Keep the feed readable.
Start with Rust, Midnight or Neon. Each theme keeps the feed crisp while letting you configure colours and outlines to fit your server.
Rust Warm, grounded and familiar. Midnight Cool cyan for late-night servers. Neon Violet contrast with a sharper feel. 05 - Built for real servers Keep the feed where it belongs. Give players control.
Control which kills reach the feed, exclude sensitive areas and let players decide what they see or share.
Zones and monuments Use ZoneManager flags to hide kills involving players inside a chosen zone. Blacklist MonumentFinder monuments for arenas and event areas. Both filters are optional. Reliable and translatable One plugin file and bundled image pack. Use FileManager or ImageLibrary image loading, whichever you already run. Image references are validated on boot. English, Russian and German language files are included. 06 - Commands and permissions Simple to operate. Clear control for staff and players.
Use the editor to shape the feed, then expose only the controls each player needs.
Commands /kf.edit Open the in-game editor. Requires killfeed.admin. /killfeed Toggle your own feed on or off. Requires killfeed.use. Permissions killfeed.use See the feed and toggle it. killfeed.admin Open the in-game editor. killfeed.hidekillsfromfeed Hide this player's kills from everyone. killfeed.hidedeathsfromfeed Hide this player's deaths from everyone. -
$19.99
SimplePVE
By Iftebinjan in Plugins
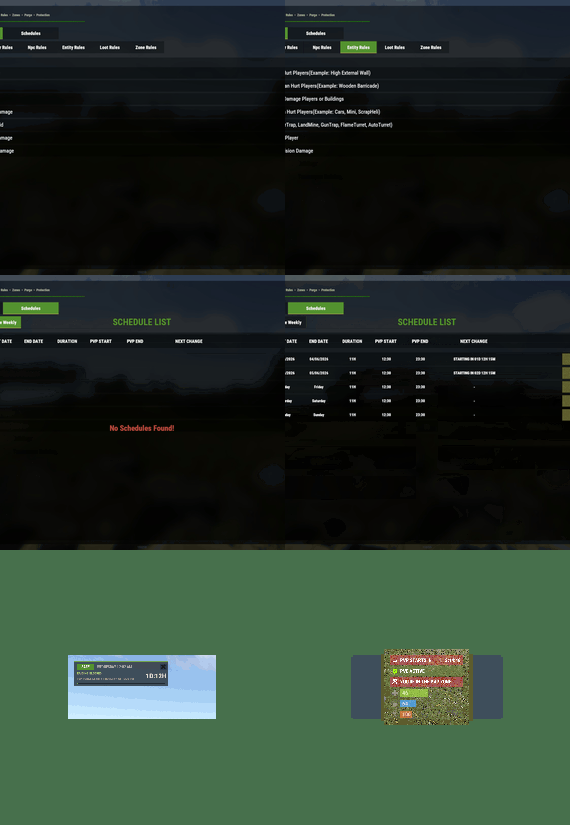
SimplePVE is exactly what the name suggests: a simple and easy-to-use PVE plugin for Rust servers. It allows server owners to control and customize PVE rules individually, either through the config or with a clean in-game CUI. You can also create, edit, and manage PVE/PVP schedules directly, making it easy to run full PVE servers, purge events, or hybrid PVE/PVP setups.
⭐ Key Features
Control PVE rules directly from in-game CUI or through the config Easy-to-understand rule system for managing damage, raiding, looting, and protection Enable or disable PVE/PVP manually with commands Create automatic PVP schedules for purge times Supports weekly schedules, such as Sunday to Friday or weekend-only PVP Supports date-specific schedules, such as January 1 to January 7, holiday events, wipe-weekend events, and custom purge periods Automatic PVE/PVP purge events based on your configured schedule Loot protection system to prevent unauthorized looting Zone Manager support for custom PVE/PVP zones Exclude specific zones from global PVE rules Supports many popular event plugins Works without using `server.pve true` In-game rule manager using `/sprules` Debug command to help check why damage is blocked or allowed Optional PVE/PVP status UI for players Customizable UI position, status text, icons, and colors Discord embed messages when PVP purge starts or ends Optional Discord warning messages before PVE/PVP schedule changes Run custom server commands when PVP purge starts or ends Admin bypass permissions for loot and damage control Supports PVP delay when leaving PVP zones Flexible config for server owners who want full control Designed for simple PVE servers, purge servers, hybrid PVE/PVP servers, and event-based servers NEW • CUSTOM STATUS NEW • PVE/PVP HUD FOR DISPLAYING PURGE EVENTS 📌 Commands
/simplepve - Use to enable or disable pve toggle (Chat & Console command) /simplepve on or off - Use to enable disable pve (Chat & Console command) /sprules - Use to Open a Cui to control PVE Rules & Creating Schedules (Chat command) /spdebug - Use this for debuging rules /sp_change - Use this to change the SimplePVE hud from ingame (Chat command) 📜 Permissions
simplepve.admin - Required to enable or disable SimplePVE simplepve.adminloot - Required to view Loots of other players simplepve.admindamage - Required for Admin damages to any entity
🎉 Game hosting perfected, that's Physgun
Join the thousands of server owners using Physgun to take their game server communities to the top.
🎬 Video Showcase
🚀 API & Hooks
void OnSPVEPurgeStarted() void OnSPVEPurgeEnded() TimeSpan GetPVPStartTimeRemaining() TimeSpan GetPVPEndTimeRemaining() ⚙️ Configurations
🗃️ Rules Data file in Oxide/data/SimplePVE
📜 FAQ
Question: Does SimplePVE require server.pve to be set to false?
Yes, it requires server.pve set to false. Question: Where can I change the rules for my PVE server?
You can use the `/sprules` command to open the in-game CUI rule manager. You must have the `simplepve.admin` permission assigned to use this command. Question: PVE/PVP schedules times are not working properly, why is that happening?
You may need to adjust the `UTC Time Difference` value in the config. Make sure the UTC offset matches your server’s intended timezone. For more details, please check the Info tab below. Question: How do I enable or disable PVE manually?
You can use `/simplepve on` to enable PVE and `/simplepve off` to disable it. You need the `simplepve.admin` permission to use these commands. Question: Can I create automatic PVP purge schedules?
Yes. SimplePVE supports scheduled PVP/PVE times, allowing you to automatically enable PVP during purge events and return to PVE when the schedule ends. Question: Can I do Weekly schedules like Sunday To Friday or specific date to another date?
Yes. SimplePVE supports both option and you can only use one of them at once. Question: Can admins damage players or entities while PVE is enabled?
Yes, but only if the admin damage settings and permissions allow it. The permission `simplepve.admindamage` is used for admin damage access. Question: Why is damage still happening during PVE mode?
This usually means one of your rules allows that damage type, or another plugin is modifying damage before or after SimplePVE. Use `/spdebug` to help debug which rule is being applied. Question: What does `/spdebug` do?
The `/spdebug` command helps you debug damage rules. It can be useful when you are trying to understand why damage is blocked or allowed. Question: How does loot protection work?
Loot protection prevents players from looting protected entities or containers, depending on your config settings. Admins can be allowed to bypass this using the `simplepve.adminloot` permission. Question: Can I exclude specific entities from loot protection?
Yes. You can add entity shortnames to the `Loot Protection Excluded Entitys` list in the config. Question: Does SimplePVE support zones?
Yes. SimplePVE supports Zone Manager, allowing you to create different PVE/PVP behavior inside specific zones. Question: Can I exclude specific zones from SimplePVE rules?
Yes. You can add zone IDs to the `Exclude Zone IDs From Rules` config option. Question: Can SimplePVE send Discord notifications?
Yes. SimplePVE can send Discord embed messages when PVP purge starts, ends, or when a scheduled event is approaching, depending on your Discord config settings. Question: Can I run server commands when PVP purge starts or ends?
Yes. You can add commands to the config options for commands that run when PVP purge starts or ends. ⚙️ Schedules Settings for your own timezone
🛠️ For Developers
💬 Support
Check Out My Other plugins as Well
-

$9.99
Loading Messages
By Whispers88 in Plugins
Loading Messages is a high-performance plugin that features customizable loading panel messages with adjustable display times and icons.
Custom Messages for Queued and Loading Players Language Support - Display messages in local languages Loading Messages on Respawn and Teleport Loading Screens Configurable Display Time per Message High Performance Plugin!
Loading Messages has three main message types:
Queued - When a player is in the server queue Joining - When a player is joining the server Loading - The loading screen displayed when a player is teleporting or in a pending gamemode state Each custom type allows for options including icon ID, next message display time & message content.
You can also use the placeholder {{PLAYERNAME}} in any message to display the player name inside a loading message.
New Lines - if you want to have text displayed over two lines the only way to achieve this is by using a lot of spaces to split a single line in two.
Loading Messages can use the following rich text tags - color, b, u, and i
To display local languages set: "Use Language Support": true in you configuration. Custom languages will only be displayed after the first time a user connects to the server.
Add multiple languages in the configuration listing:
"Lang Messages": { "es-ES": { "Queue Messages": [ { "iconID": "0", "NextMessageTime": 5.0, "Message": "Estás en la cola" }, { "iconID": "0", "NextMessageTime": 5.0, "Message": "Por favor espera" }, { "iconID": "0", "NextMessageTime": 5.0, "Message": "Reporta tramposos usando f7" } ] } }
You can see a list of most of the icons by going to https://fontawesome.com/icons.
- #loading messages
- #loading
- (and 15 more)