
ARobinhood's Wishlist
-
$40.00
BotReSpawn
By Steenamaroo in Plugins
Spawns set numbers of customised npcs at monuments,
various events, supply drops, biomes, custom locations, and 'toplayer'.
Plugin Description.
Highly customisable and intuitive npc plugin, setup exclusively via UI.
See images for an overview of the available options globally, and per npc profile.
Every option in the UI is clickable, showing a detailed description of its use.
Optional dependencies -
Kits (free at uMod.org) CustomLoot
Permissions.
botrespawn.allowed - Required for non-admin use
Chat commands.
/botrespawn - Opens UI. /botrespawn add *profilename* - Adds a custom profile then opens UI. (please don't use spaces or hyphens) /botrespawn remove *profilename* - Removes a custom profile. /botrespawn info - Tells you about the npc you're looking at. Console commands.
bot.count - Gives total number of spawned npcs. bots.count - Gives a breakdown of spawned npcs per profile. botrespawn toplayer NameOrId ProfileName amount(optional) botrespawn enable/disable "Profile name here" botrespawn tempspawn "Profile name here" - Spawns npcs from a profile at random points around that profile's location addspawn - Enabled via UI, in Edit Spawnpoints menu - for keybinding. botrespawn showspawns - Added for binding convenience. botrespawn checknav - Added for binding convenience. * Note = addspawn and showspawns commands require the user to select "Edit with console commands" first, from a profile's spawnpoints menu.
Default locations.
All major monuments are automatically included, plus profiles for the four biomes.
The following events also have default profiles
Airdrop (supply grenade optional) Locked Crate Spawn Locked Crate Hack Start APC Kill PatrolHeli Kill CH47 Kill
Configurable via json, per profile.
BotNames BotNamePrefix Announcement_Text Instant_Death_From_Headshot_Allowed_Weapons (accepts item shortnames) See note at end for weapon list formatting.
Everything else is configurable via UI - All options have a description in UI, accessible by clicking the name/label.
Kits.
Kits are managed, per profile, in UI.
As with BotSpawn, kit probability can be balanced by assigning a number to a kit.
When selecting multiple kits, increasing a kit's number increases its chances of being picked.
Only kits with weapons in the belt are shown in UI.
Most weapons are supported for npc use, including normal bullet and melee weapons,
rocket launchers, bows, crossbows, MGLs, nailguns, flamethrowers, etc.
Throwable explosives can be used but throwable melee (like spears) can be used but will not be thrown.
Spawnpoints.
Adding and managing spawnpoints is done, per profile, in UI,
or by enabling 'add by command' in spawnpoints menu, then using 'addspawn' console command.
You can bind this command for your convenience.
When opting to use the 'addspawn' command, a button will show in UI main page, allowing you to quickly return to the profile you were editing.
A new feature is that each spawn point can have overrides, forcing that specific npc to have different values to the rest of the profile's npcs.
At present you can override
Stationary Kits Health RoamRange
If you choose to use Parent_Monument, you can select it via UI, but do so before you add custom spawn points (if applicable).
Parent_Monument ensures that your profile and its spawn points will relocate after a map change,
so that they are in the same place, relative to that chosen monument.
If a profile uses custom spawn points, but does not have enough custom spawn points to cover the whole population,
it will spawn randomly placed npcs to make up the numbers, in accordance with the profile "Radius" setting.
EG :
Day_Time_Spawn_Amount 10
Number of custom spawn points 5
Result : 5 npcs on custom spawn points, and 5 randomly placed around the area, within the specified radius.
Murderer
Murderer true/false is no longer an option.
Instead, the AI will respond differently based on the weapons you give it.
If you want the AI to run directly at victims and attack, give it melee weapons only.
I believe you can still make murderer-style kits, although you also have Frankenstein clothing options built into the the UI options now.
Peacekeeper
Peacekeeper is now based on whether or not players are marked hostile.
An additional option 'Peacekeeper_Uses_Damage' restores the old behaviour,
where peacekeeper npcs will completely ignore players until attacked by them.
Configuration.
"DataPrefix": "default", (tells BotReSpawn which data files to load),
Allow_Parented_HackedCrates Allow_HackableCrates_With_OwnerID Allow_HackableCrates_From_CH47 Allow_HackableCrates_At_Oilrig Allow_All_Other_HackedCrates
Disable_WaterWells Disable_Substations Disable_UndergroundCaves Disable_UnderwaterLabs
"UseServerTime": Uses server IsNight check, instead of manual day/hour settings, "Show_Profiles_Seconds": 10, "DayStartHour": 8, "NightStartHour": 20, "SuicideBoom": true, (toggles explosion sound for suicide npcs), "Animal_Safe": true, "Supply_Enabled": false, (spawn 'airdrop' bots for user-called supplys), "Ignore_Skinned_Supply_Grenades": true, "Remove_BackPacks_Percent": 100 is always : 0 is never, "Remove_KeyCard": true, (any keycards in bot default loot will be destroyed), "Remove_Frankenstein_Parts": true, (any frankenstein parts in bot default loot will be destroyed), "Ignore_Sleepers": true/false, "Pve_Safe": true, (bots will not be injured by fire/barbs, etc.), "Max_Chute_Fall_Speed": 100, "Chute_Speed_Variation": 100, "Staggered_Despawn": false, "Disable_Non_Parented_Custom_Profiles_After_Wipe": false "Announce_Toplayer": false "RustRewards_Whole_Numbers": true "XPerience_Whole_Numbers: true "NPCs_Damage_Armour": true "Limit_ShortRange_Weapon_Use": false "Allow_Ai_Dormant": false "Prevent_Biome_Ai_Dormant": false "Scale_Meds_To_Health": false (increases npc heal amount relative to npc's max health. "Ignore_Factions": false - Makes all profiles fight all profiles if true. "Reduce_Damage_Over_Distance: false "Deaggro_Memory_Duration: 20 - Number of seconds it takes an npc to forget you outside deaggro range/line of sight. "Ignore_HackableCrates_With_OwnerID" - Makes hackable crate profiles only respond to crates with OwnerID 0 (server spawned) "NPCs_Assist_NPCs" - true/false. When a botrespawn npc is attacked, nearby botrespawn npcs will also respond and defend. "Enable_Targeting_Hook": false "Allow_AlphaLoot": true Can be used to prevent AlphaLoot from giving loot to BotReSpawn npcs. "Parachute_From_Height": 200 "Smooth_Damage_Scale": false "Allow_Oilrigs": false - NPCs here must be custom spawn point and stationary true. "Show_Spawns_Duration": 20, These values are adjustable and described in detail in in-game UI, with the exception of DataPrefix.
Profile values.
Each profile value and description is not listed here, but all (apart from text strings) are now configurable via UI,
and have sensible default values.
Every option has a full in-game description, accessible by clicking an option's name/label.
If any specific setting/value is unclear, please just ask in CF discord, my discord, or the support section here.
Notes :
Durations which used to be in seconds are now in minutes.
"Type" is an internal use variable - Users should not change this option.
Profile copy/paste does not include location, Parent_Monument, or custom spawnpoints.
BotNames, and Headshot weapons should be formatted as follows:
["name1"], for single or ["name1", "name2", "name3"], for many.
["rifle.lr300"], for single or [ "rifle.lr300", "pistol.m92" ], for many.
Faction and Subfaction of 0 means this profile will not fight any other, and will not be attacked by any other.
Faction and Subfaction settings greater than 1 are used for configuring which profiles should be allies / enemies.
API :
string[] AddGroupSpawn(Vector3 location, string profileName, string group, int quantity) string[] RemoveGroupSpawn(string group) string NPCProfile(NPCPlayer npc) (returns "No Name" for non BotReSpawn npcs) object OnBotReSpawnNPCTarget(ScientistNPC npc, BasePlayer player) void OnBotReSpawnNPCSpawned(ScientistNPC npc, string profilename, string group) void OnBotReSpawnNPCKilled(ScientistNPC npc, string profilename, string group, HitInfo info) bool IsBotReSpawn(NPCPlayer npc) bool IsBotReSpawn(ulong id)
For preventing BotReSpawn npc spawns for event profiles.
object OnBotReSpawnCrateDropped(HackableLockedCrate crate) object OnBotReSpawnCrateHackBegin(HackableLockedCrate crate) object OnBotReSpawnAPCKill(BradleyAPC apc) object OnBotReSpawnPatrolHeliKill(PatrolHelicopterAI heli) object OnBotReSpawnCH47Kill(CH47HelicopterAIController ch) object OnBotReSpawnAirdrop(SupplyDrop drop)
Example usage.
[PluginReference] private Plugin BotReSpawn; Vector3 location = new Vector3(0,0,0); string[] Spawn = BotReSpawn?.Call("AddGroupSpawn", location, "The Dome 0", "MadeUpNameHere", 5) as string[]; Puts($"{Spawn[0]}"); Puts($"{Spawn[1]}"); Passing 0 for quantity will spawn the appropriate amount of npcs for the time of day, according to the profile.
Method call OnBotReSpawnNPCSpawned(ScientistNPC npc, string profile, string group, notifies of spawned npcs.
Example.
void OnBotReSpawnNPCSpawned(ScientistNPC npc, string profile, string group) { if (String.IsNullOrEmpty(group)) Puts($"BotReSpawn spawned an npc from profile {profile}"); else Puts($"BotReSpawn spawned an npc from profile {profile} - API group name {group}"); }
FAQ.
Q: My npcs don't move and/or won't attack
A: If you have any PVE plugins or settings please try disabling those temporarily to test.
A: Make sure the server has the following settings.
nav_wait true nav_disable false ai.think true A: If you use Rust Admin, please ensure that the animal AI option is enabled.
A: If you have Vanish installed please try unloading it. If this worked, check you don't have the permission for permanent Vanish.
Q: There's a million options. Where do I start?
A: Open the UI with /botrespawn and set AutoSpawn to true for at least one monument, then click the button to reload that profile.
A: Everything else is preference/user customisation.
A: If the monument has a building/structure near the middle, like Dome, you may need to increase the spawn radius option to get going.
Q: My bots won't die / my bots take damage when attacking people.
A: Make sure Godmode permissions allow you to do damage.
A: Same for vanish ^.
A: Ensure you don't have a PVE plugin which is causing this damage behaviour.
Q: I take damage when attacking my bots.
A: This can also be caused by server, or plugin, PVE settings.
Q: Will X kill my bots?
A: Radiation, drowning, falling, and helicopters should not kill your bots.
A: Turrets targeting bots can be toggled. Bradleys targeting bots can be toggled.
A: Fire (campfires etc) will kill your bots. Damage from barbs, cacti etc will kill your bots, but can be prevented with the 'Pve_Safe' config option set to true.
Q: What weapons can my bots use?
A: As far as I know they should use all weapons except for throwable melee (eg. spears).
A: Flamethrowers, nail guns, rocket launchers, bows, grenade launchers, etc were added in a recent update.
A: Throwable explosives can be used as 'backup' weapons and are thrown when line-of-sight is temporarily broken.
A: All npcs, even those with throwables, must have at least one valid held weapon to use.
Q: Can I have custom profile locations?
A: Yes. Your custom locations are stored in data with a filename of *YourPrefix*-CustomProfiles.json.
Use chat command '/botrespawn add NewNameHere' to create a profile at your present location.
A: Doing so will open the UI, at the page for your new profile's settings.
Q: Can I spawn bots at events.
A: Yes. There are event profiles for aidrop, hackable crate spawn and hack start, and the destruction of CH47, Patrol Heli, and APC.
For the airdrop profile, spawn at user-supply call is an additional option, found in the global config.
Q: Can I have specific custom spawn points? (underground, etc)
A: Yes. Use the built in UI to create custom spawn points and set UseCustomSpawns to true, for some profile..
A: That BotReSpawn profile will now ignore radius settings and use the precise spawn points from your file.
A: Event profiles which can occur underground should work automatically now (crate spawn/crate hack).
A: Even if parachutes are enabled, these profiles should still work with underground-spawning npcs, if the event takes place under ground.
Q: My bot kits aren't working.
A: Kits which don't have a valid weapon in the belt will not be made available in the UI.
A: Please redeem the kit yourself to an empty inventory, to ensure that the expected items are definitely in it.
Q: How can I prove that bots have spawned? I can't find them.
A: Type bot.count into console for a total number, or bots.count for a per-profile breakdown.
A: Respawn timer is taken into account so if you spawn one and kill him, bot.count will show 0 until respawn.
Q: bot.count console command shows that there are 0 bots.
A: Double check that at least one monument is set "AutoSpawn": true in your config, and reload the plugin.
A: Also, don't forget their respawn timer. If they're all dead when you do bot.count, it will show 0.
-
$4.99
Admin Turret Blind Eye
By BlazingSteel in Plugins
A Rust plugin that prevent all entities from targeting Admins, even when they are not in vanish mode.
Permission:
TurretBlindEye.Use: Enables Admins to use Entity immunity
TurretBlindEye.Toggle: Allows Admins to toggle entity immunity on or off (Requires TurretBlindEye.Use)
Default Command:
/tt
Config:
{ "Enable UI?": true, "Log To Console?": true, "Enable for Admins by Default?": true }
Demonstration Video:
-
$20.00
Chippy Game Panel
🎮 Let’s level up the Chippy arcade machine!
Add some fresh UI games: Card Match, Deal or No Deal, and the classic Tic-Tac-Toe!
📺 Be sure to watch all the videos to see these games in action — your players are gonna love ’em!
✨ Heads up: Tic-Tac-Toe is a multiplayer game, so grab a buddy — it takes two to play!
-

$9.99
CryptoMenu
ENGLISH:
Tired of hoarding scrap in a chest?
It’s time to bring your server’s economy to life with Crypto Menu! 💰
With this innovative plugin, you can:
Invest your scrap in cryptocurrencies like BTC and ETH. Grow your wealth by buying and selling on a dynamic market. Compete with other players to become the top investor on the server. Track your portfolio, earnings, and personal stats with an intuitive and easy-to-use menu. Dynamic and Realistic values:
Crypto values fluctuate constantly, so invest wisely and profit like a true trader!
💎 Accessible for Everyone:
Open the menu with the /crypto command and start building your financial empire with ease.
🚀 Give your scrap a new purpose with Crypto Menu!
Why store your scrap when you can make it work for you? 🤑
Commands / Comandos
/crypto -> opens the cryptomenu!
/crypto -> abre el cryptomenu!
USE AN API TO RECEIVE REAL PRICES! / USA UNA API PARA RECIBIR LOS PRECIOS REALES!
https://api.coinlore.net/api/tickers/
To add cryptos to the json, you have to configure the APIKey, you have to look for it in the API page in the field ‘id’.
Para añadir cryptos al json, debes configurar sobretodo el APIKey, debes buscarlo en la pagina de la API en el campo "id"
If you have any questions please do not hesitate to contact me! / Si tienes cualquier duda no dudes en contactarme!
CONFIGURATION FILE / ARCHIVO DE CONFIGURACION
Here is a configuration file with additional cryptos
CryptoMenu.json
-
$9.99
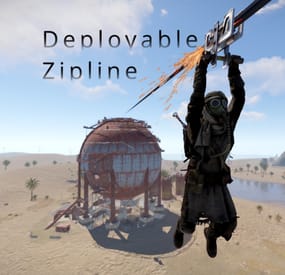
Deployable Zipline
By BlackLightning in Plugins
Features
Allows players to deploy ziplines from a distance using a crossbow Allows bidirectional ziplines Allows adjusting zipline movement speed, optionally based on incline Optionally requires cable to deploy ziplines Extensive configuration options to restrict zipline deployment Integrates with Economics and Server Rewards to allow buying the Zipline Tool Integrates with No Escape to prevent deploying ziplines while Raid blocked or Combat blocked Integrates with Remover Tool to provide an alternate way to pick up ziplines How it works
To deploy a zipline, a player must first obtain a Zipline Tool and some Zipline Cable. By default, the Zipline Tool is a crossbow with a custom skin, and Zipline Cable is rope with a custom skin. Once acquired, the player must shoot the crossbow where they want to start the zipline, then shoot again where they want to end the zipline (no arrows needed). Once the zipline has been deployed, players can ride it just like the vanilla ziplines, by looking up at the top of the start point and interacting with the "Use Zipline" prompt.
Since both the Zipline Tool and Zipline Cable are items, there are many ways you can provide them to players, including via kits, vending machines, and loot tables. The plugin also allows players to purchase them directly with chat commands.
Permissions
This plugin uses the permission system. To assign a permission, use oxide.grant <user or group> <name or steam id> <permission>. To remove a permission, use oxide.revoke <user or group> <name or steam id> <permission>.
Admin permissions
deployablezipline.protect -- Allows the player to run the zipline protect command to toggle protection for any ziplines they deploy. Protected ziplines do not decay, and can only be picked up by players with this permission. Purchase permissions
deployablezipline.buy.tool - Allows buying the Zipline Tool with the zipline buy command. deployablezipline.buy.cable - Allows buying Zipline Cable with the zipline buycable <amount> command. Tool usage permissions
Depending on how you have configured the plugin, there will be additional permissions like deployablezipline.profile.<suffix>, one for each profile. The plugin comes with the following profiles by default. Note: Players must have permission to a profile in order to use the Zipline Tool.
deployablezipline.profile.balanced 4 ziplines max 100m max zipline length 10 uses per Zipline Tool, but can be repaired Allows up to 45 ° decline and 15 ° incline Disallows monuments deployablezipline.profile.fun 6 ziplines max 200m max zipline length Unlimited uses per Zipline Tool Allows up to 45 ° decline and 45 ° incline Allows monuments deployablezipline.profile.unrestricted Unlimited ziplines 10000m max zipline length Unlimited uses per Zipline Tool No angle or location restrictions Speed permissions
The speed that players move along a deployed zipline can be configured according to the permissions of the player riding the zipline (not the player who deployed it). Each speed profile will have a permission like deployablezipline.speed.<suffix>. You can make as many speed profiles as you want in the configuration. The plugin comes with the following speed profiles by default.
deployablezipline.speed.slow 0.25x min uphill speed 0.5x max horizontal speed 0.75x max downhill speed deployablezipline.speed.balanced 0.5x min uphill speed 1x max horizontal speed 1.5x max downhill speed deployablezipline.speed.fast 0.75x min uphill speed 1.5x max horizontal speed 2.25x max downhill speed deployablezipline.speed.ridiculous 5x max speed deployablezipline.speed.ludicrous 10x max speed Commands
This plugin provides both chat and console commands using the same syntax. When using a command in chat, prefix it with a forward slash: /.
zipline buy -- Purchases a Zipline Tool. Requires the deployablezipline.buy.tool permission. By default, it costs 100 scrap. zipline buycable <amount> -- Purchases Zipline Cable. Requires the deployablezipline.buy.cable permission. By default, it costs 1 scrap. zipline toggle -- Enables or disables bidirectional mode for ziplines you deploy after running this command. Alternatively, you can press MMB (middle mouse button) while wielding a Zipline Tool. To use this command, you must have permission to a Zipline Tool profile that allows bidirectional ziplines. zipline protect -- Enables or disables protection of ziplines you deploy after running this command. Requires the deployablezipline.protect permission. A protected zipline does not decay, and can only be picked up by players who have the deployablezipline.protect permission. Configuration
The settings and options can be configured in the DeployableZipline file under the config directory. The use of an editor and validator is recommended to avoid formatting issues and syntax errors.
Zipline tool
Zipline Tool -- Determines which item is considered the Zipline Tool. This item can also be used to pick up ziplines when Pickup restrictions > Require hammer or zipline tool to pick up zipline is set to true. Players may purchase this tool with the zipline buy command if they have the deployablezipline.buy.tool permission. Item short name -- The short name of the Zipline Tool item. Must be an equippable item. Default: "crossbow". Item skin ID -- The skin ID of the Zipline Tool item. Default: 2793006815. Purchase info Cost -- Determines the cost to purchase the Zipline Tool. Item short name -- The short name of the currency item. Default: "scrap". Item skin ID -- The skin ID of the currency item. Set to 0 to require an unskinned currency item. Default: 0. Amount -- The amount of currency required to purchase the Zipline Tool. Default: 100. Use Economics (true or false) -- Set to true to require Economics currency instead of item currency. Default: false. Use Server Rewards (true or false) -- Set to true to require Server Rewards currency instead of item currency. Default: false. Attachment item short names -- Determines which attachments will be added to the Zipline Tool when purchased. Only applies to weapons that can have attachments. Default: ["weapon.mod.holosight", "weapon.mod.lasersight"]. Zipline cable
Zipline Cable -- Determines which item is considered Zipline Cable. Note: You can independently configure the condition loss of the Zipline Tool if you want to consume the tool itself. Item short name -- The short name of the item. Default: "rope". Item skin ID -- The skin ID of the cable item. Default: 2793158547. Cost -- Determines the cost to purchase Zipline Cable. Item short name -- The short name of the currency item. Default: "scrap". Item skin ID -- The skin ID of the currency item. Set to 0 to require an unskinned currency item. Default: 0. Amount -- The amount of currency required to purchase Zipline Cable. Default: 1. Use Economics (true or false) -- Set to true to require Economics currency instead of item currency. Default: false. Use Server Rewards (true or false) -- Set to true to require Server Rewards currency instead of item currency. Default: false. Pickup restrictions
Pickup restrictions -- Determines under which circumstances players may pick up ziplines. Require hammer or zipline tool to pick up zipline (true or false) -- Set to true to require the player to be holding a hammer or the Zipline Tool to pick up a zipline. This only applies to ends of the zipline that use the spear item, since the Tesla Coil end already requires a hammer to pick up. Default: true. Allow pickup while building blocked at other end (true or false) -- Set to true to allow players to pick up a zipline from one end, while they are building blocked at the other end of the zipline. Default: true. Note: Regardless of this option, players may not pick up a zipline from an end where they are building blocked. Effects
Effects -- Determines the effects that are played when using the Zipline Tool, or when trying to pick up a zipline. Tool impact (player only) -- Plays when the player hits a surface with the Zipline Tool. Only the Zipline Tool wielder will witness the effect. This provides feedback to the player so they can see where they hit. Tool failed (player only) -- Plays when the player tries to use the Zipline Tool but experiences an error. Only the Zipline Tool wielder will witness the effect. The wielder may experience an error for many reasons, such as being Building Blocked, or due to having insufficient Zipline Cable. Tool used -- Plays when the player successfully places either end of zipline using the Zipline Tool. Other players will witness the effect. Deploy succeeded -- Plays when the player successfully deploys a zipline using the Zipline Tool. Plays on both ends of the zipline. Other players will witness the effect. Pickup failed (player only) -- Plays when the player fails to pick up a zipline due to being Building Blocked. Only the Zipline Tool wielder will witness the effect. Zipline Tool permission profiles
Zipline Tool permission profiles - Zipline Tool profiles allow you to define complex rulesets depending on a user's Oxide permissions. You may define unlimited profiles, but at most one will be assigned to each player. Profiles toward the end of the list have highest priority. Permission suffix -- Determines the permission that you must grant to assign the profile to a player or group. For example, set this to "fun" to produce the permission deployablezipline.profile.fun. Allow tool while building blocked (true or false) -- Determines whether the player may use the Zipline Tool while they are standing in a location where they are Building Blocked. Allow bidirectional ziplines (true or false) -- Determines whether the player is allowed to place bidirectional ziplines. A bidirectional zipline can be mounted from either end. The player can press MMB (Mouse3) to enable/disable bidirectional mode. Zipline min length -- Determines the minimum zipline length that the player can deploy. Zipline max length -- Determines the maximum zipline length that the player can deploy. Zipline max decline angle -- Determines the maximum downward angle of ziplines that the player can deploy. Set to 90.0 to allow the player to deploy ziplines that go straight downward. Set to 0 to only allow ziplines to go across or upward. Zipline max incline angle -- Determines the maximum upward angle of ziplines that the player can deploy. Set to 90.0 to allow the player to deploy ziplines that go straight upward. Set to 0 to only allow ziplines to go across or downward. Zipline max elevation increase -- Determines the maximum delta between the zipline start position and end position. Set to 0 to only allow ziplines to go across or downward. Tool condition loss percent per zipline deployed -- Determines how much condition the Zipline Tool will lose when the player deploys a zipline. Set to 0 to allow unlimited uses. Set to 100 to allow only one use per Zipline Tool. The Zipline Tool will be destroyed when reaching 0 condition. Tool cooldown seconds -- Determines how long the player must wait after deploying a zipline with the Zipline Tool before they can deploy another one. Max ziplines at once -- Determines the maximum number of ziplines that the player may have in the map at once. Cable cost -- Determines how much Zipline Cable will be consumed when deploying a zipline. Cost per meter -- Determines how much Zipline Cable is required per meter. Set to 0 to not require any Zipline Cable. Set to a fraction such as 0.5 to allow each unit of Cable to cover multiple meters. Refund amount per meter on pickup -- Determines how much Zipline Cable is refunded when the player's ziplines are picked up. Set this to the same value as Cost per meter to allow players to recover all their Zipline Cable when picking up a zipline. Set to less than Cost per meter to effectively impose a penalty by refunding less than what was spent. Start point ruleset -- Determines the locations at which the player can place a zipline start point. Allow while building blocked (true or false) -- Determines whether the player can remotely place this end of the zipline at a location where they are Building Blocked, regardless of whether they are standing in a Building Blocked location. Min height above terrain -- Determines how close to terrain the player can deploy this end of the zipline. Set to 0 to allow placing a zipline at terrain level. Max deploy distance -- Determines the maximum distance away from the player that they can place this end of the zipline. Allowed layers -- (Advanced) Determines the Rust object layers to which the player can attach this end of the zipline. The player will not be able to attach a zipline to objects on other layers. Allowed values: Default, TransparentFX, Ignore_Raycast, Reserved1, Water, UI, Reserved2, Reserved3, Deployed, Ragdoll, Invisible, AI, Player_Movement, Vehicle_Detailed, Game_Trace, Vehicle_World, World, Player_Server, Trigger, Player_Model_Rendering, Physics_Projectile, Construction, Construction_Socket, Terrain, Transparent, Clutter, Debris, Vehicle_Large, Prevent_Movement, Prevent_Building, Tree, Unused2. Disallowed topology -- (Advanced) Determines the types of Terrain Topology to which the player cannot attach this end of the zipline. Set to [] to allow all types of Terrain Topology. Allowed values: Field, Cliff, Summit, Beachside, Beach, Forest, Forestside, Ocean, Oceanside, Decor, Monument, Road, Roadside, Swamp, River, Riverside, Lake, Lakeside, Offshore, Rail, Railside, Building, Cliffside, Mountain, Clutter, Alt, Tier0, Tier1, Tier2, Mainland, Hilltop. End point ruleset -- Determines the locations at which the player can place the zipline end point. Same options as Start point ruleset. Zipline decay settings -- Determines how quickly deployed ziplines decay while outside of Tool Cupboard range. Note: Only one end of the zipline must be within Tool Cupboard range to protect it from decay. Also, instead of taking damage, the zipline will simply disappear when the decay time has elapsed. Enabled (true or false) -- Determines whether decay is enabled. Default: true. Decay minutes -- Determines how long a zipline is protected from decay after being deployed, or after nearby Tool Cupboards are removed. Default: 60. No Escape integration -- Determines whether the player can use the Zipline Tool while Raid Blocked or Combat Blocked, as determined by the No Escape plugin. Allow tool while raid blocked (true or false) -- Set to false to prevent the player from using the Zipline Tool while they are Raid Blocked. Allow tool while combat blocked (true or false) -- Set to false to prevent the player from using the Zipline Tool while they are Combat Blocked. Speed permission profiles
Speed permission profiles -- Speed profiles allow you to configure how quickly players move along ziplines, depending on the Oxide permissions of the player riding it. You may define unlimited speed profiles, but at most one will be assigned to each player. Speed profiles toward the end of the list have highest priority. Permission suffix -- Determines the permission that you must grant to assign the speed profile to a player or group. For example, set this to "balanced" to produce the permission deployablezipline.speed.balanced. Move speed -- Determines the max speed that applies when the player is not holding the forward key. Bonus move speed -- Determines the additional max speed that applies when the player is holding the forward key. This value is added on top of Move speed to determine the total max speed. Acceleration time (seconds) -- Determines how many seconds it will take the player to reach max speed after mounting the zipline. Downhill speed bonus -- Determines how much to increase speed while going downhill. Percent increase per angle degree -- Example: While this is set to 1.0, going downhill at a 45 ° angle will increase max speed to 145%. Max speed percent -- Example: while Percent increase per angle degree is set to 1.0, and while this is set to 130.0, going downhill at a 45 ° angle would increase speed to only 130% instead of to 145%. Uphill speed penalty -- Determines how much to decrease speed while going uphill. Percent decrease per angle degree -- Example: While this is set to 1.0, going uphill at a 45 ° angle will decrease max speed to 55%. Min speed percent -- Example: While Percent decrease per angle degree is set to 1.0, and while this is set to 70.0, going uphill at a 45 ° angle would decrease speed to only 70% instead of 55%. Localization
The default messages are in the DeployableZipline file under the lang/en directory. To add support for another language, create a new language folder (e.g. de for German) if not already created, copy the default language file to the new folder and then customize the messages.