
.gif.6f3a363dfec70196781e00367ec6f978.gif)
flutes
-
Posts
84 -
Joined
-
Last visited
Content Type
Profiles
Warranty Claims
Downloads
Forums
Store
Services
Downloads Plus Support
DOWNLOADS EXTRA
Everything posted by flutes
-
Changed Status from Pending to Closed
-
Hello, I haven't found a solution yet to translate the page into English and therefore read the documentation (for the moment)
-
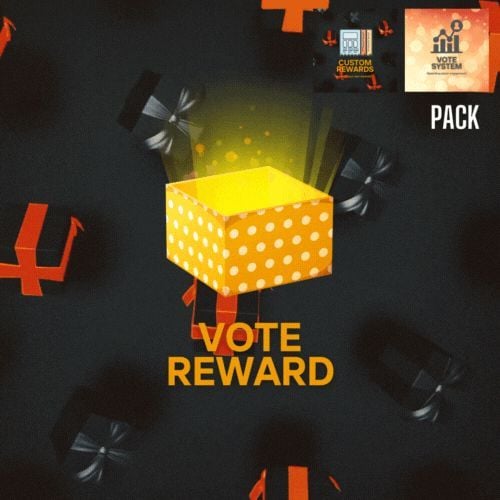 As I mentioned in one of our previous conversations, the original plugin (Vote Reward) has been split into two parts. Since this page was initially where I listed Vote-Reward for sale, it logically becomes a bundle now, given the plugin's division. This bundle also includes the original version of the plugin, meaning both plugins in one.
 -
Changed Status from Pending to No Response
-
Hey, pack of 2 plugins - Vote System - Plugins - Codefling - Custom Rewards - Plugins - Codefling
-
 his plugin does not replace Playtime Tracker; it only use it. This plugin is an extension to CustomRewards and will be useless on its own
 -

Version 1.0.5
146 downloads
Introduction CustomRewards is a turnkey solution to reward player engagement. This plugin allows you to give a player any type of reward based on conditions you'll be able to configure. Whether you're a server admin aiming to boost player engagement or a developer creating complex reward systems, CustomRewards is your go-to solution. Main Features: Diversity of Rewards: Set up a huge variety of rewards for your players, ranging from items to special permissions, including server command execution. Reward Templates: Create different reward models for various events or scenarios, providing maximum flexibility to meet your server's needs. Award Conditions: Ensure only eligible players receive certain rewards by setting conditions based on groups, permissions, and more. Integration with Other Plugins: CustomRewards isn't just a standalone, it can also be seamlessly integrated with other externals plugins such as VoteSystem or PlaytimeTracker : Vote System : By using Custom Reward with VoteSystem, your players will be able to obtain rewards by voting. PlayTime Reward (free) : By using CustomRewards with PlaytimeTracker, your players will be able to obtain rewards based on their playtime. Interface Customization Provide your players with an appealing visual experience with a fully customizable user interface, custom reward images, and colorful themes. Expandability for Developers For those looking to delve deeper, CustomRewards offers a robust API, allowing you to integrate your own point system or even other plugins ! Plugin's Future: We always listen to the community! If you have a specific plugin you'd like to see integrated with CustomRewards, please let us know. Our goal is to make CustomRewards as versatile and useful as possible for all users. Support : I am very often available and will respond as quickly as possible to all your questions, here or on my Discord: https://discord.gg/JJnxFgP27G. Full Documentation : Feel free to check out the complete documentation here. Commands (chat) : - /CustomRewards_Give <type> <player name or id> <quantity> : available only for administrators or with permission CustomRewards.Admin - The commands to show the UI need to be implemented in the configuration. Permissions : - CustomRewards.Admin : enable admin commands if not administrator - CustomRewards.<Type>.Use : Permission linked to the type (rewards template), users without the permission will not be able to use the command to display the UI. Therefore, it's important to add the permission to your groups once the template is created! How To use API : private void Give_API(string rewardType, ulong playerId, int quantity) // Add quantity points for player (for referenced rewardType) private int Get_API(string rewardType, ulong playerId) // Get quantity points for player (for referenced rewardType) CustomRewards Configuration Tutorial Step 1: Initial Setup : - Ensure the CustomRewards_rewards folder is present in Oxide/Data. If not, the plugin will attempt to create it automatically, but it's good to check. - Ensure - For each reward type you want to configure, create a .json file in the CustomRewards_rewards folder. For instance, for a reward type called "VIP", you might have a VIP.json file. Step 2: Basic Configuration In your .json file: - "Enabled": Set this value to true to activate this reward type. - "Commands for show UI": List of commands that will display the user interface for this reward type. For example: ["rewards_vip", "vip_rewards"]. Step 3: User Interface Configuration Under "UI Settings": - Configure the appearance and layout of the user interface with properties like "Max Reward By Page", "Window Rect", etc. - Set the theme colors under "Theme" using properties like "Colors". Each color is defined by an RGBA value. - Configure rarity colors under "Rarity Colors". - To modify the window title or description (above the rewards), go through the lang files (Oxide/Lang/<lang>/CustomRewards_<type>). Example Lang file : { "Messages": { "Title": "Rewards", "Description": "Every time you earn points, you can claim your rewards here." } } Step 4: Reward Configuration Under "Rewards Settings": - "Rewards List": Here, you'll define each individual reward for this type. - "Rarity (Common - Rare - Epic - Legendary)": Set the reward's rarity. - "Quantity": If the reward is an item, set the quantity here. - "Item Shortname (optional)": If the reward is an item, set its short name here. - "Custom image URL (optional)": For a custom image for the reward. - "Server command (optional)": Commands to execute when this reward is claimed. - "Grant Permissions ": Permissions to grant when this reward is claimed. - "Grant Groups": Groups to grant when this reward is claimed. - "Nedded Permissions": Permissions needed to claim this reward. - "Nedded Group ": Groups needed to claim this reward. Step 5: Plugin Extensions Under PluginExtensions, you can configure integration with other plugins: - For PlaytimeTracker, use properties under "PlayTimeTracker" like "Count Afk Time?", "Added points", and "Add point every (in seconds)". Step 6: Save and Reload After completing your configuration, save the .json file and reload the plugin on your server. Here's a sample configuration file to help you get started:$5.99 -
Hey, CustomRewards is in the process of being validated, but it is already available through this pack: (I've decided to split the plugin into several parts)
-
Version 1.0.0
566 downloads
/!\ THIS PLUGIN RECQUIRES CUSTOM REWARDS PLUGIN /!\ Playtime Reward is an extension of the CustomRewards plugin. This plugin allows your players to earn points at certain time intervals. The points earned can be used to claim rewards (see CustomRewards plugin). Configuration: CustomRewardsType: The type of rewards (the name that identifies the reward template, more information in the CustomRewards documentation) Count Afk Time: Count the time when the player is AFK Added points: Number of points to add Add point every (in seconds): Interval in seconds when points are added /!\ THIS PLUGIN RECQUIRES CUSTOM REWARDS PLUGIN /!\Free -
.thumb.gif.be4d7c48ffb8b6bd133b250f73404356.gif)
Version 1.0.6
44 downloads
What is Vote System ? Vote System is a sophisticated plugin designed to track player votes in real-time on various ranking sites. It offers two main functionalities: Integration with other plugins: Vote System can be paired with other plugins to enhance its features. See the list of compatible plugins. API for Developers: With a robust API, developers can create plugins that directly interact with the voting system, allowing for advanced customization. Supported Plugins Vote System is compatible with the following plugins: CustomReward: Allows players to receive rewards through a user interface after voting. Economics: Converts votes into virtual currency for players. Documentation : More informations on documentation Supported Ranking Sites Vote System currently supports the following ranking sites: rust-servers.net top-games.net top-serveurs.net$4.99 -
I'm really sorry, I didn't see the message. You can set the desired "raid protection" hours (in the configuration file) after a wipe. For a week, you can set it to 168 hours. If you have any questions, don't hesitate to send me another message PS : Also, don't hesitate to send me a message to confirm that you've successfully set up the configuration
-
Hey, For now, the only method is to edit the data files, which I admit can become tedious over time. You'll need to follow these steps: 1 - Unload the plugin. 2 - Modify the file named playervote_<player id or player name>.json and add the desired number of points. 3 - Next, edit the file user_<player id>.json: - Set your desired value for VotePoints. Ensure this matches the total points in the file you edited previously. - Update the "UnclaimedRewards" array: Add the rewards (by index) that are to be received. For instance, if you've added 3 extra points, you should include 3 new indexes, like so: "UnClaimedRewards": [0,1,2,3]. After completing these steps, you can reload the plugin. Alternatively, you might consider only adding the desired indexes to "UnClaimedRewards", though I'm not certain this will work. I recognize the need for a more straightforward command and understand this process might seem cumbersome. Rest assured, I'm working on an update that will incorporate this feature.
-
That seems possible too, I'll look into it next weekend!
-
For now, it's only possible to combine a maximum of one item + one command. But I can easily add a list of commands instead of limiting it to just one. I'll look into that for the next update. I can add more Json configuration examples, I'll add some more this week.
-
There seems to be an API available for both sites, so it seems possible to me. I will add these sites in the next update (by next weekend if there are no unforeseen issues ).
-
Version 1.0.6
139 downloads
We are excited to present our revamped plugins for Rust. Previously bundled as VoteReward, we've now separated the functionalities into two distinct plugins: VoteSystem and CustomRewards. This division offers users enhanced flexibility and customization options. Upon purchasing our product, you will receive both plugins, along with the original VoteReward, giving you the freedom to update at your own pace. VoteReward is a plugin for Rust, specifically designed to encourage players to vote for their server on various ranking sites. By offering in-game rewards for each vote, VoteReward turns voting into an interactive and rewarding experience, reminiscent of the battle pass systems found in many games. Documentation: More informations on VoteSystem and CustomRewards Documentations Command: To access the VoteReward user interface, players need to use the command /votes Compatibility with ranking sites: VoteReward currently supports the following ranking sites: rust-servers.net top-games.net top-serveurs.net If you wish to add more ranking sites, feel free to contact us. Features: VoteReward stores players' votes and allows them to claim their rewards at their own pace, even several days after voting. The user interface is fully customizable: colors, positions, sizes, and texts can all be modified via the Configuration and Lang files. You can set the number of points awarded per vote for each ranking site. Rewards can be in-game items or commands from other plugins, offering a wide variety of rewards. Each reward can be associated with a custom image. You can set the rarity of rewards, which changes the background color of the user interface. Configuration To configure the Vote System, navigate to Oxide/Config/VoteSystem.json. Below are the fields you can adjust: Vote Servers Settings: This represents the list of ranking sites. Please refrain from altering the key names. Enabled: Set this to true if you want votes from this site to be counted. API url: Do not modify this unless the URL changes. API token: Enter your unique token, which can be obtained from the respective ranking site. Points by vote: This determines the number of points awarded per vote (acts as a multiplier). Check Interval: Specifies the number of seconds between each API check. Ensure you save any changes made to the configuration file and reload the pluging for them to take effect. Reward Configuration: Customizing rewards is made easy with the configuration file. UI Settings: Max Reward By Page: Maximum number of rewards displayed per page. Window Rect: Position and size of the window. Top Rect: Position and size of the title bar. Close Rect: Position and size of the close button. Description Rect: Position and size of the description root. Rewards Rect: Position and size of the rewards root. Line Rect: Position and size of the progress line. Reward Margin: Margin between each reward. Show Description: Option to display or hide the description. Description font size: Font size of the description. Title font size: Font size of the title. Background Url: URL of the background image for a reward. New Icon Url: URL of the icon when the reward is new. Check Icon Url: URL of the icon when a reward has been claimed. Lock Icon Url: URL of the icon when a reward is locked. Prev Icon url: URL of the previous arrow. Next Icon url: URL of the next arrow. Theme: Color palette with available colors such as Surface, SurfaceDisabled, Background, TextPrimary, TextOnSecondary, Primary, Secondary, and Danger. Rewards Settings Rarity: Reward rarity (Common, Rare, Epic, Legendary). Quantity: Displayed quantity; for an item, the player will receive this quantity. Item Name: Item to be received (optional). Server Commands: List of commands to execute when the player claims the reward. Grant Permissions: List of permissions to grant (or remove) to the player when they claim the reward. Grant Groups: List of groups to grant (or remove) to the player when they claim the reward. Need Permissions: List of permissions required to unlock the reward. Need Groups: List of groups required to unlock the reward. If you're using a command rather than an item as a reward, leave the "Item Shortname (optional)" field blank. Optimization: VoteReward has been designed to have a minimal impact on server resources. Beta Phase: VoteReward is currently in the final beta phase. Although problems are rare, we advise you to exercise caution when configuring the plugin. Support: I am available to answer any questions or address any issues you may encounter when using VoteReward. Do not hesitate to contact me. With VoteReward, stimulate your players' engagement and enrich their gaming experience! More informations on VoteSystem and CustomRewards Documentations VoteReward.json$10.99 -
 Hello, no, there isn't a UI The plugin is designed to be as lightweight as possible, and the only way to get information about the raid hours is to enter the command.
 -
Version 1.0.4
78 downloads
Raid Time Protection is a Rust plugin designed to provide players with a layer of protection against raids. This plugin introduces a system where raiding is only possible during specific times, allowing players to build and enjoy the game without the constant threat of raids. Command: Players can use the command /raid_date to check the status of raid protection. Features: Raid Time Protection offers a time-based raid system, where raids are only possible during specific hours of the day. This system is customizable for each day of the week. The plugin provides a global protection configuration, allowing server administrators to enable or disable the plugin, show alerts on state changes, and more. Raid Time Protection is compatible with the ZoneManager plugin. Server administrators can specify zones where the protection is disabled. The plugin also allows server administrators to specify certain prefabs that are exempt from protection. Raid Time Protection includes a wipe protection feature, which provides a period of protection after a server wipe. Configuration: The configuration of Raid Time Protection is handled through a JSON file. Here, server administrators can set the hours of protection, the duration of protection, and more for each day of the week. The configuration also includes settings for global protection and wipe protection. Support: The developer of Raid Time Protection is available to answer any questions or address any issues you may encounter when using the plugin. Do not hesitate to reach out for support. You can also contact me via discord : https://discord.gg/JJnxFgP27G With Raid Time Protection, enjoy a more relaxed Rust experience, knowing that your base is safe from raids during protected hours! RaidTimeProtection.json$4.99 -

Version 1.0.1
3 downloads
Dialogs is an innovative plugin designed to introduce dynamic interactions within Rust. These interactions, in the form of dialogues, can guide players, provide information, trigger specific events, or even interact with other plugins. One of Dialogs' standout features is its ability to respond based on players' previous actions or choices, offering a rich and tailored user experience. While integrating with NPCs is an appealing feature, Dialogs can operate independently, providing server administrators with significant flexibility. Key Features: Dynamic Interactions: Craft step-by-step dialogues, with questions and answers that can guide players or initiate specific interactions. Responsiveness to Player Actions: Dialogs can tailor interactions based on players' previous actions or choices, making each dialogue unique and dynamic. NPC Independence: While integration with NPCs is possible, Dialogs can function without them, offering versatility in how interactions are presented to players. Powerful API: Dialogs' API allows developers to initiate dialogues programmatically, offering deeper integration with other plugins or custom gameplay scenarios. Advanced UI Customization: Dialogs provides comprehensive user interface customization, allowing users to create the exact appearance they desire. However, this customization, while powerful, may require careful attention to detail. Configuration & Customization: Dialogue Files: Dialogues are stored in individual files within the oxide/plugins/data/Dialogs directory. Each file represents a distinct dialogue. API for Developers: Utilize the provided API to programmatically trigger dialogues, offering flexibility in how dialogues are employed. UI Configuration: With the capability to customize every aspect of the user interface, users can craft dialogues that perfectly match their server's aesthetic. However, this customization can be intricate and requires some familiarity with UI configuration. Dialogs is an essential tool for enriching the gaming experience by introducing dynamic and responsive interactions. Its adaptability to player actions and advanced UI customization make it an ideal choice for server administrators looking to add an extra dimension to their gaming world. Example Configuration Examples are available on this page (in the attached files) or in the downloaded archive. Commands /dialog_show <dialog_id> : (For admin), show dialog with specified id Documentation Creating Dialogues : Defining Dialogues: - Dialogues are defined in individual files located in the oxide/plugins/data/Dialogs folder. - Each file represents a distinct dialogue and is named following the format DialogData_DialogueName.json. Dialogue Structure: - A dialogue consists of questions and answers. - Each dialogue starts with one or more initial questions/answers ("Start Question/Answers"). - It can then have a set of questions/answers ("All Question/Answers") that can be triggered based on the answers chosen by the player. Understanding the Fields : "Start Question/Answers" & "All Question/Answers": - These fields contain a list of questions and answers. - Each question has content ("Question content"), required event states ("Recquired Event States"), and possible answers ("Responses"). Answers ("Responses"): Each answer has content ("Response Content"). It can trigger another question/answer ("Trigger Question/Answer Id"). It can also end the dialogue ("Trigger Exit Dialog"). Event states might be required to display this answer ("Recquired Event States"). Event states can be updated when this answer is chosen ("Event States Updated"). Hooks from other plugins can be called ("Plugins Hooks"). Console commands can be executed ("Console Commands"). FAQ How do I create an NPC and link it to a dialogue using Human NPC? To create an NPC, use the command npc_add in the console. Once the NPC is spawned, it will have a unique ID displayed (if not, check the human npc json file). To link this NPC to a dialogue: - Note down the NPC's unique ID. - Navigate to the oxide/plugins/data/Dialogs directory. - Open the DialogsNpcsData.json file and add a new entry with the NPC's unique id as the key and the dialogue ID as the value. - Save the file and reload the plugin. - Now, when players interact with this NPC, the linked dialogue will be triggered. - For more advanced settings like changing the NPC's appearance, name, etc., refer to the Human NPC plugin's documentation on the mod page. Tutorial: Creating Interactive Dialogues with Two NPCs using the Dialogs Plugin Introduction: This tutorial will guide you through creating interconnected dialogues for two NPCs in Rust using the Dialogs plugin. By the end, the dialogue of one NPC will influence the dialogue of the other. Step 1: Preparation Ensure the Dialogs plugin is installed on your server. Navigate to the plugin's data directory, typically located at oxide/plugins/data/Dialogs. Step 2: Setting up Bob's Dialogue In the oxide/plugins/data/Dialogs directory, create a new file named DialogData_Bob.json. Open this file with a text or JSON editor. Define the root of the dialogue: { "Dialog": { "Start Question/Answers": { "Intro": { "Question content": "Have you seen Alice?", "Responses": { "1": { "Response Content": "yes I saw it !", "Trigger Question/Answer Id": "AliceLocation" }, "2": { "Response Content": "No, never seen!", "Trigger Exit Dialog": true } } } }, "All Question/Answers": { "AliceLocation": { "Question content": "Was she near the river or the mountain?", "Responses": { "1": { "Response Content": "I saw him by the river", "Event States Updated": { "AliceRiver": true } }, "2": { "Response Content": "I saw him at the bottom of the mountain", "Event States Updated": { "AliceMountain": true } } } } } } } Step 3: Setting up Alice's Dialogue Create a new file named DialogData_Alice.json. Open this file and set up Alice's dialogue: { "Dialog": { "Start Question/Answers": { "Intro": { "Question content": "Hello! How can I assist you today?", "Responses": { "1": { "Response Content": "I saw Bob and I told him you were at the river", "Recquired Event States": { "AliceRiver": true } }, "2": { "Response Content": "I saw Bob and I told him you were near the mountain.", "Recquired Event States": { "AliceMountain": true } }, "3": { "Response Content": "Just enjoying the view. Take care!", "Trigger Exit Dialog": true } } } } } } Step 4: Associating the Dialogue with the NPCs Open the file oxide/plugins/data/Dialogs/DialogsNpcsData.json. Add a new entry for each NPC: { "id_of_bob": { "Dialog Id": "Bob" }, "id_of_alice": { "Dialog Id": "Alice" } } Step 5: Testing Your Dialogues Launch your Rust server. or realod Dialogs plugin Approach Bob and initiate a conversation (or use /dialog_show <dialog_id>) Depending on your responses to Bob, approach Alice and see how her dialogue changes based on the event states set during your conversation with Bob. You've successfully set up interconnected dialogues for two NPCs in Rust! This dynamic interaction showcases the power of the Dialogs plugin. You can expand upon this foundation to create even more intricate and engaging dialogues for your players. Support : You can also contact me via discord : https://discord.gg/JJnxFgP27G DialogData_Alice.json DialogData_Bob.json$23.99 -

Version 1.0.0
287 downloads
The NpcOverlay plugin provides functionality to display overlays (text) above NPCs in the Rust game. This can be particularly useful for developers or server administrators who wish to provide additional context or information about an NPC, such as their name, role, or any other relevant details. Features Dynamic Overlays: Allows server administrators to set custom text overlays for NPCs. Event-Driven: The plugin responds to events when a player enters or exits the proximity of an NPC. Customizable Text: The text displayed can be customized for each NPC. Data Persistence: The plugin ensures that overlay settings for each NPC are saved and can be loaded across server restarts. Adding Overlays to NPCs 1. Installation Ensure the NpcOverlay plugin is installed on your server. 2. Setting Up Overlays: Navigate to the data file associated with the plugin, located in oxide/data/NpcOverlay.json. The structure of the JSON file is as follows: { "Overlays": { "MyNpcId": { "LangKey": "MyLangKey", "Color" : { "r":202, "g":49, "b":0, "a":1 }, "LocalOffset" : { "x":0, "y":1, "z":0 } } } } Replace MyNpcId with the NPC's ID and MyLangKey with the key you will use in the language file to represent the text you want to display. 3. Configuring Overlay Text Navigate to the language file, oxide/data/lang/yourlang/NpcOverlay.json. If it doesn't exist, create it. Add a new key-value pair where the key is the MyLangKey you used in the NpcOverlay.json file and the value is the text you want to display. Example: { "MyLangKey": "Hello, I'm Bob the Builder!" } 4. Spawning NPCs Use the appropriate command or method to spawn an NPC in your Rust server. Note down the NPC's ID. 5. Linking NPC to Overlay Add the NPC's ID and desired overlay text key to the NpcOverlay.json file. Save the file. 6. Testing Approach the NPC in-game. As you get close, you should see the overlay text appear above the NPC.Move away from the NPC, and the overlay should disappear. Usage Examples Quest Givers: Use overlays to identify NPCs that give out quests. E.g., "Quest Giver: Find the lost treasure!" Shopkeepers: Identify NPCs that sell items. E.g., "Shopkeeper: Buy rare items here!" Lore: Provide background information or lore about specific NPCs to enrich the game's story. Conclusion The NpcOverlay plugin is a simple yet powerful tool for server administrators and developers looking to enhance the player's experience in Rust.By providing contextual overlays above NPCs, players can have a clearer understanding of the role and significance of each NPC they encounter.Whether you're looking to guide players on their journey, provide lore, or simply add a touch of personality to your NPCs, NpcOverlay is a valuable addition to your server. Support : You can also contact me via discord : https://discord.gg/JJnxFgP27GFree -

Version 1.0.0
217 downloads
The PlayerEventStates plugin provides a system to manage and track event states for individual players and globally across the server. This system can be particularly useful for developers who wish to create conditional gameplay mechanics based on specific events or states. Features Player-Specific Event States: Allows tracking of individual player event states. Global Event States: Provides a mechanism to track global events that apply server-wide. API Access: Exposes several API methods for developers to interact with the system, making it versatile for integration with other plugins or custom scripts. Data Persistence: Ensures that both player-specific and global event states are saved and can be loaded across server restarts. API Methods (For Developers) GetEventStatePlayer_API(ulong playerId, string eventName); // Fetches the event state for a specific player. GetEventStateGlobal_API(string eventName); // Retrieves the global event state. SetEventStatePlayer_API(ulong playerId, string eventName, bool value); // Sets the event state for a specific player. SetEventStateGlobal_API(string eventName, bool value); // Modifies the global event state. PlayerHasRecquiredStates_API(ulong playerId, Dictionary<string,bool> states); //Checks if a player meets specific event state conditions. Usage Examples Quest Systems: If you're developing a quest system, you can use event states to track a player's progress. For instance, if a player completes a task, you can set an event state to true. This can then influence future interactions or dialogues with NPCs. Dynamic World Events: Global event states can be used to track server-wide events. For example, if a server-wide event like a festival is active, you can set a global event state. This could change interactions or available quests for all players. Conditional Dialogues: As mentioned, integration with the Dialogs plugin can lead to dynamic dialogues. An NPC might have different dialogues for players who have or haven't completed specific tasks. Setup & Configuration Ensure the PlayerEventStates plugin is installed on your server. The plugin will automatically create necessary data files in the oxide/data/PlayerEventStates directory. Developers can directly interact with the plugin using the provided API methods. Note for Developers: When developing with this plugin, pay special attention to the variables ending with _API. These are the methods you'll primarily interact with to get or set event states. Conclusion The PlayerEventStates plugin is a powerful tool for developers looking to add depth and dynamism to their Rust servers. By tracking both player-specific and global event states, it opens up a plethora of gameplay possibilities, especially when combined with plugins like Dialogs. Whether you're crafting a complex quest system or just want NPCs to recognize player achievements, PlayerEventStates is a valuable addition to your plugin arsenal. Support : You can also contact me via discord : https://discord.gg/JJnxFgP27GFree- 1 comment
-
- 2
-

-
- #development
- #developer api
- (and 5 more)


