
DeutscherRitterPlatz's Wishlist
-
$18.90
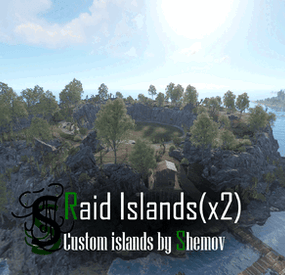
Raid Islands (2X PACK) | Custom Raid Islands by Shemov
There are 2 raid islands to spawn raid bases it is also possible to put them as a place to build a base
Features:
Simple installing; Great detail; Optimized FPS. General Info:
Prefabs count: ~500 per island; Type: for Raidable bases plugin or to build a base; Modifiers: Height&Splat&Topology. Other works:
- #rust custom
- #custom raid island
- (and 3 more)
-

$8.00
EASTER ICONS / PSD
By DesignCrew in Graphics
SPECIALLY FOR THE EASTER HOLIDAY WE DECIDED TO PREPARE AN ICON TEMPLATE
With this set of icons, you can decorate your store in honor of the holiday.
Also included is a template with which you can change the color of the effects and text
To work, you will need any new version of
ADOBE PHOTOSHOP.
-
$24.90
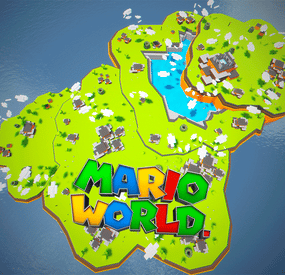
Mario World
Mario World is a world inspired by the legendary Mario Bross game. In Mario World you can build your house anywhere in this gigantic construction zone. Build on firm ground, build underwater, in mountains, build wherever you want. In Mario World you will find a fantastic and beautiful decoration in which you would think to be in another game. In addition to finding construction resources and food, you can visit the castle located at the top of the mountain. This castle is a safe area, it is equipped with everything you need for your needs, the castle is a hybrid between the Outpost and Bandit. Mario World is compatible with the Raideable Bases plugin.
INCLUDES
Character Mario Bross. Character Luigi. Donkey Kong character. Three different enemy characters. Underwater construction areas. Pipes to build inside. Construction resources. Food and Water. Helicopter vendor. Work tables. Bandit guards and turrets. Recycling machines. Shops. TIPS
This prefab contains a height layer, it is not necessary to apply the height layer, this option has been added to make the Raideable Bases plugin functional in Mario World. Climb the walls to reach the heights. Have fun 🙂 SUPPORT: https://discord.gg/ASxJynGndj
- #marioworld
- #mario world
- (and 45 more)
-
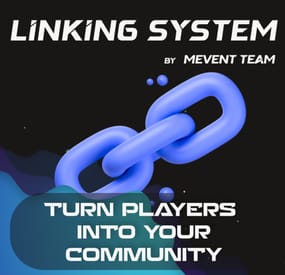
$25.95$21.95Linking System
Introducing Linking System, the ultimate Discord integration plugin for your Rust server! Seamlessly connect your players Rust accounts with their Discord profiles, automatically assign roles, and reward linked players with exclusive perks. With a beautiful UI, complete Discord bot solution, and powerful automation features, Linking System is the perfect tool to enhance your community engagement and keep your Discord server active.
⭐️ Features of Linking System
Complete Discord integration system with automatic role assignment for linked players, enhancing community engagement and server security. Beautiful, customizable UI with ServerPanel V1 and V2 template support for seamless integration with your existing server interface. Secure code generation system with configurable cooldown periods to prevent abuse while ensuring smooth linking process. Automatic permission group assignment for linked players with customizable UI elements displaying potential benefits and server perks. Complete Python Discord bot included with comprehensive installation guides for Windows, Linux, and Pterodactyl hosting platforms. Multi-server support allowing one Discord bot to manage linking across multiple Rust servers simultaneously. Automatic group management with configurable group assignment for linked players, perfect for permissions and role-based systems. Real-time synchronization between Discord and Rust server through RCON communication for instant updates and status changes. Data persistence with automatic saving and loading of linking data, ensuring no loss of player connections across server restarts. Plugin integration support with ImageLibrary, ServerPanel, and Notify plugins for enhanced functionality and user experience. Developer-friendly API for custom integrations, allowing other plugins to check linking status and trigger custom actions. Comprehensive notification system with support for multiple notification plugins to keep players informed about linking status. Flexible interface options with configurable UI settings - use "Use UI" set to false for command-only operation without graphical interface.
🤖 Complete Discord Bot Solution
LinkingSystem includes a complete Python Discord bot with everything you need for seamless integration. No complex setup required - just follow our step-by-step guides!
⚠️ Important: Python 3.12 is required! Python 3.13 is not compatible due to library issues.
🖥️ Windows Installation Complete guide for Windows servers with automatic startup configuration and service management. 🐧 Linux Installation Full Linux support with systemd service configuration for Ubuntu, Debian, CentOS, and RHEL systems. 🦕 Pterodactyl Support Optimized for Pterodactyl game panel with dedicated setup instructions and panel integration. 🔗 Multi-Server One bot can manage multiple Rust servers simultaneously with individual RCON configurations.
📬 Video Overview
🎮 Commands
/link - Opens the linking interface for players to connect their Discord account /link status - Shows your current linking status with Discord /link code - Generates a new linking code for Discord connection /link remove - Removes the existing link between Discord and Rust accounts
🛡️ Permissions
linkingsystem.use - Permission to access the linking system and connect Discord account
⚙️ How It Works
LinkingSystem provides a seamless three-step process for connecting Discord and Rust accounts, with both UI and command-only options:
Generate Code - Players use the /link command to open the UI interface, or /link code for direct command-only code generation with built-in cooldown protection. Discord Verification - Players share their code in the designated Discord channel where the bot automatically processes the connection. Instant Benefits - Once linked, players immediately receive their Discord role and start enjoying exclusive in-game perks and rewards. The system maintains real-time synchronization between Discord and your Rust server, ensuring that role changes and connections are processed instantly!
📚 FAQ
Q: Do I need to create my own Discord bot?
A: Yes, but we provide complete step-by-step instructions for creating and configuring your Discord bot, including all necessary permissions and settings.
Q: Can LinkingSystem work with multiple Rust servers?
A: Absolutely! The Discord bot supports multiple servers simultaneously. Simply add your server configurations to the bot's config file.
Q: How do I add LinkingSystem to the ServerPanel menu?
A: Follow these simple steps:
1. Open ServerPanel menu in-game and click "+ADD CATEGORY" button
2. Set these exact parameters:
Type: Plugin Plugin Name: LinkingSystem Plugin Hook: API_OpenPlugin 3. Click "SAVE" button to create the category
Q: How do linked players receive their rewards?
A: Rewards are granted automatically when a player successfully links their Discord account. The system automatically assigns the configured permission group to linked players.
Q: Are the rewards shown in the UI actually given to players?
A: The reward items displayed in the UI are visual representations only. The actual benefit is the automatic assignment to a permission group (default: "discord") which can be configured to provide various server perks through your permission system.
Q: Can I customize the rewards for linked players?
A: Yes! You can customize which permission group linked players receive and configure what benefits that group provides through your server's permission system. The visual reward elements in the UI are also fully customizable.
Q: What happens if a player leaves the Discord server?
A: The bot automatically detects when linked players leave the Discord server and can remove their in-game benefits accordingly.
Q: Is the linking data saved if the server restarts?
A: Yes, all linking data is automatically saved and persisted across server restarts, ensuring no loss of player connections.
Q: Can I use LinkingSystem without the UI interface?
A: Yes! Set "Use UI" to false in the configuration to enable command-only mode. Players can use /link code to generate linking codes, /link status to check their connection, and /link remove to unlink their accounts directly through chat commands.
🔄 Migrations
LinkingSystem includes migration tools to help you transition from other linking plugins. Currently supported:
DiscordLink Migration tools preserve all existing player links and Discord information, ensuring a smooth transition to LinkingSystem without data loss.
💻 Developer API
Linking System provides a developer-friendly API for integration with other plugins:
CuiElementContainer API_OpenPlugin(BasePlayer player) - Opens the linking interface for ServerPanel integration
🧪 TEST SERVER
Join our test server to experience Linking System and all our features yourself!
Copy the IP Address below to start playing!
connect 194.147.90.239:28015 -
$8.90
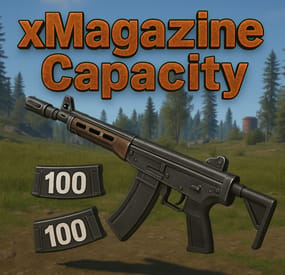
Custom Magazine Capacity
By xNullPointer95 in Plugins
xMagazineCapacity
- Set a custom magazine capacity for any weapon.
- Define a default capacity
- Define a permission or not for any custom magazine capacity
Default Config
{ "Weapons": [ { "weaponName": "rifle.ak", "capacity": 45, "defaultCapacity": 30, "permission": "" }, { "weaponName": "rocket.launcher", "capacity": 3, "defaultCapacity": 1, "permission": "xmagazinecapacity.rocketlauncher3" }, { "weaponName": "rocket.launcher", "capacity": 6, "defaultCapacity": 1, "permission": "xmagazinecapacity.rocketlauncher6" } ], "RevokePermissionsOnUnload": false, "RestoreRevokedPermissionsOnLoad": true, "AllowExtendedMagazineBonus": false } ℹ️ Keep "permission" empty to override magazine capacity for all players. When config is changed, reload the plugin.
➡️ Add as much weapons as you want.
➡️ Multiple permissions for same weapon
If you have identical weapon names with different permissions, the capacity will be taken from the one with the highest capacity.
Example: 3 times "rocket.launcher" with different permissions: xmagazinecapacity.rl3, xmagazinecapacity.rl6, xmagazinecapacity.rl9 - If a player has all 3 permissions, the capacity will be 9, since its the one with most capacity.
➡️ RevokePermissionsOnUnload/RestoreRevokedPermissionsOnLoad
"RevokePermissionsOnUnload": When the plugin unloads, it takes back any weapon permissions it granted while plugin was running.
"RestoreRevokedPermissionsOnLoad": If you turned the "RevokePermissionsOnUnload" on, this restore option puts revoked permissions back on the same players the next time the plugin loads. (It only affects xmagazinecapacity configured permissions)