
DeutscherRitterPlatz's Wishlist
-
$45.00$41.95Figma To Rust UI Exporter
Discover the Figma to Rust UI Export Plugin, a powerful tool designed to streamline the process of converting Figma interfaces into UI code compatible with Rust game plugins. This plugin enables designers and developers to seamlessly translate their Figma designs into functional UI elements for Rust-based games, enhancing workflow efficiency and maintaining design consistency.
📝 Guidelines
🖼️ Use Frames, Not Groups
Why: Groups with rectangles won’t export correctly. Frames with fills ensure proper Rust UI hierarchy. How: Always use Frames (Shift + A) for containers. Apply fills directly to the frame (not nested rectangles). Frame Example:
🖌️ Icons: Vector or PNG Only
Why: Nested icon frames cause export errors. How: Flatten icons into a single vector shape (Combine paths) or export as PNG. Right-click icon layers → Flatten Selection or export via Export Settings. 🏷️ Parent Naming Conventions
Why: Rust requires parent layers to be named Overlay or Hud (case-sensitive). How: Rename root frames in Figma to exactly Overlay or Hud in the Layers panel. 🎚️ Constraints Configuration
Why: Defines how elements scale/position in Rust’s UI system. Horizontal Constraints: Left/Right/Center: Anchors to screen edges. Scale: Full-width (AnchorMin="0 0" AnchorMax="1 1"). Vertical Constraints: Top/Bottom/Center: Anchors to top/bottom edges. Scale: Full-height (AnchorMin="0 0" AnchorMax="1 1"). Constraints Example:
⚡ Pro Tips
Test constraints in Figma’s Prototype mode to preview scaling behavior. Avoid mixed constraints (e.g., Left + Scale) unless intentional. Use Auto Layout for responsive elements (supports padding/spacing).
🚨 Troubleshooting
Export fails? Check for unnamed parents or nested groups. Icons missing? Ensure they’re flattened vectors or PNGs. UI misaligned in Rust? Re-validate constraints and parent names.- #ui exporter
- #figma plugin
- (and 4 more)
-
$9.99
Priority Queue
By Whispers88 in Plugins
Priority Queue redefines the vanilla queue skip with a brand new permission based system. Previously queue skips would allow players to bypass the max player limit of a server. Priority queue gives you full control of which players move to the front of the queue or can skip the queue. You can also offer players a new system of saving their spot when they disconnect from the queue or the server.
Priority Queue - Skip Players to the front of the queue Bypass Queue - Skip the entire queue Hold Queue Position - Holds your position in queue if you disconnect Bypass Queue on Disconnect - Allows you to bypass the queue if you just dc'ed Noob Bypass or Priority - Allows first time players to skip or priority queue
priorityqueue.bypass - permission for queue skip priorityqueue.priority - permission to skip all non-priority players in the current queue priorityqueue.bypassDC - permission to bypass the queue if you have recently disconnected priorityqueue.hold - permission to hold your position in the queue if recently disconnected
{ "Bypass Queue on Disconnect Timeout (minutes)": 5, "Hold Queue Position on Disconnect Timeout (minutes)": 5, "Disable native slot reservation": true, "Noob Queue Priority": false, "Noob Bypass Priority": false }
- #priorityqueue
- #priority queue
- (and 14 more)
-
$11.99
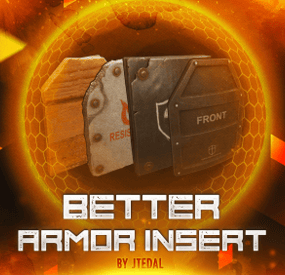
Better Armor Insert
This plugin allows you to add and customize custom Armor Inserts to clothing items. Each such insert has its own parameters that give an additional percentage of protection from different types of damage to the standard indicators of the plate, and can also be configured to fall out of different boxes with a given probability. The plugin is easily managed through the configuration file, where you can set the damage and chance of failure for each insert.
The main features of the plugin:
You can create an unlimited number of custom armor insert variations. For each custom item, you can set the percentage of protection for absolutely any damage (more on this below) You can customize the dropout of each custom item in the crates or add them to the preset of the custom interface for crafting items that cannot be done through the standard menu. How does it work?
The values specified in the configuration file DO NOT REPLACE the standard percentage of damage protection, but only add their own value to it. That is, if the armor insert indicates that it provides 2% protection against bullets, and in the config you have, for example, the entry "Bullet": 2.0, this means that this armor insert will have 4% protection. Everything is very easy, the standard percentage of protection + the one that you specify in the config
Plugin Config
config How to configure the plugin correctly
To set up a custom item correctly, you must specify the type of damage and the percentage of protection against it in the "Damage type and scale (0-100) for it". Keep in mind that you should not focus on the description that we see in the game, because you can see one line of the record, and in fact it means the percentage of protection for several types of damage at once. Therefore, I strongly recommend that you use the plaque that I will provide below with all the damage types that you could customize.
Types of damage and their description:
"Hunger" : "Hunger damage" "Thirst" : "Water shortage damage" "Cold" : "Cold damage" "Drowned" : "Suffocation damage" "Heat" : "Heat damage" "Bleeding" : "Bleeding damage" "Poison" : "Poison damage" "Bullet" : "Bullet damage" "Slash" : "Melee weapon damage" "Blunt" : "Melee weapon damage" "Fall" : "Fall damage" "Radiation" : "Radiation damage" "Bite" : "Animal bite damage" "Stab" : "Melee damage from NPCs" "Explosion" : "Explosion damage" "RadiationExposure" : "Radiation exposure damage" "ColdExposure" : "" "ElectricShock" : "Electric shock damage" "Arrow" : "Arrow damage" "AntiVehicle" : "Transport damage" "BeeSting" : "Bee damage" Console Command (RCON only)
giveinsert <StemID|Player name> (wooden|asbestos|lead|metal) <SkinID> <Amount> - gives the player a custom armor insert
For each custom item in the config, there is a table in the format [Damage type] = [Additional percentage of protection]
Check out more of my work here JTedal's library.
Come see our whole teams work Mad Mapper Library.
Come by the Mad Mapper Discord for support, feedback, or suggestions!
- #jtedal
- #mad mappers
- (and 11 more)
-

$24.00
IMPROVED ICONS / PNG
By DesignCrew in Graphics
Our studio has long noticed that icons in Rust are outdated. They look boring and inexpressive. Sometimes even of poor quality.
Have you ever looked closely at the blackberry icon?
We have prepared for you 196 3D icons for all categories of items in Rust.
Items:
ammo - 21 clothes - 22 components - 16 buildings and furniture - 37 explosives - 5 food - 17 modifiers - 11 resources - 14 tools - 8 weapons - 28 other - 8 boxes - 9
We have uploaded, created, and thought up icons manually. Each of them. We have processed them, added color correction. I hope many will be satisfied with these icons.
They can be used in the store or on the server.
If you have any questions or notice that we haven't made some of the icons, write to us - we'll add them
-
$7.00
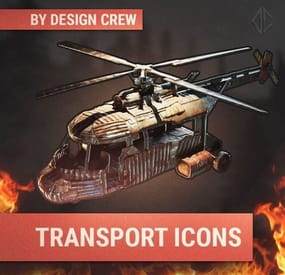
TRANSPORT ICONS / PNG
By DesignCrew in Graphics
We have prepared for you 18 icons in 3D design for all transport that is in Rust. It can be used in the store or on the server. Always choose quality!