Search the Community
Showing results for tags 'applications'.
-
Version 1.0.4
359 downloads
Bot Features ➤ Custom panel embed title and description - Customise the embeds for your server ➤ Reply commands - Use this to do functions like accepting a user or telling them some other information about there application all through the bot to there DM's ➤ Toggleable help command - Enable and disable the help command to be able to use other bots slash commands while running the same bot client/token ➤ Easy to use sendpanel command - Able to generate multiple application panels. ➤ Overview message to send/cancel - Option to send or cancel applicationn during and once completed. ➤ Application logging - Logging of general events Setup Fill out the config.json file and make sure your hosting is configured to run python, make sure your bot has all Discord intents enabled on the developers panel (Which is how you can create your Discord Bot). Use the OAuth Section and the URL Generator to create a link to invite your discord bot to your server, make sure that it has applications.commands and bot enabled, and that the permissions are set to Administrator. Take note that when configuring the emojis, you must use Discord Custom emojis which you can add by uploading them to your discord server. To get the <name:ID:> format needed for the bot you can type a backslash (\) followed directly by the emoji. Support Notice If you need support I more than welcome you to reach out to me on discord. My discord is: murderdev and I am open for any questions or inquiries! Thank you for reading this description and I hope that you enjoy! Note: I will always be constantly updating and developing this bot, if you find any bugs or have any feature requests ays be constantly updating and developing this bot, if you find any bugs or have any feature requests, feel free to DM me on discord (Murder#0845). - MurderFree- 1 review
-
- #discordbot
- #discord
-
(and 4 more)
Tagged with:
-
Version 1.0.0
14 downloads
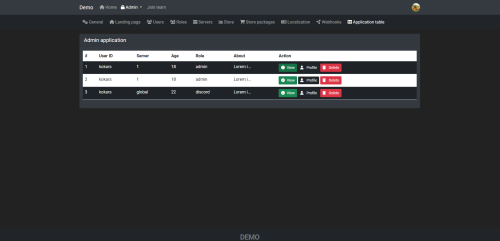
Ember - Admin Application Module Installation: Put zip files content (admin-application) folder inside `/modules` folder in Embers root directory Go to your embers site in browser and it will automatically show Updated page Click Update & Run Migrations Your are all set to accept new admin applications User form submission: Users fill out the application form. Form includes fields for role, server, age, gaming hours, server experience, location, languages, admin experience, and suitability for the role. Admin Review: Admins review submitted applications. Admins evaluate based on the user's provided information and qualifications. Feel free to message me if you want some customizations or have troubles to setup module. Discord: kokars Email: [email protected]$12.95- 1 review
-
- #ember
- #ember rust
-
(and 5 more)
Tagged with:
-
Version 1.0.1
53 downloads
Bot Features ➤ Accept and Deny Functions - Buttons to Accept or Deny a application depending on if it is enabled for that application type in the config. ➤ Custom Accept and Deny responses - Custom text to be sent to the user when they have been accepted or denied ➤ Able to give a role once user is accepted - The bot is able to give any role to the applicant if they have been accepted ➤ Stats gathering and command - Display some interesting stats easily by using /stats ➤ Custom panel embed title and description - Customise the embeds for your server ➤ Reply commands - Use this to do functions like accepting a user or telling them some other information about there application all through the bot to there DM's ➤ Toggleable help command - Enable and disable the help command to be able to use other bots slash commands while running the same bot client/token ➤ Easy to use sendpanel command - Able to generate multiple application panels. ➤ Overview message to send/cancel - Option to send or cancel applicationn during and once completed. ➤ Application logging - Logging of general events Setup Fill out the config.json file and make sure your hosting is configured to run python, make sure your bot has all Discord intents enabled on the developers panel (Which is how you can create your Discord Bot). Use the OAuth Section and the URL Generator to create a link to invite your discord bot to your server, make sure that it has applications.commands and bot enabled, and that the permissions are set to Administrator. Take note that when configuring the emojis, you must use Discord Custom emojis which you can add by uploading them to your discord server. To get the <name:ID:> format needed for the bot you can type a backslash (\) followed directly by the emoji. Support Notice If you need support I more than welcome you to reach out to me on discord: murderdev. Thank you for reading this description and I hope that you enjoy! Note: I will always be constantly updating and developing this bot, if you find any bugs or have any feature requests.$4.99-
- 2
-

-
- #discord
- #discordbot
-
(and 3 more)
Tagged with:


