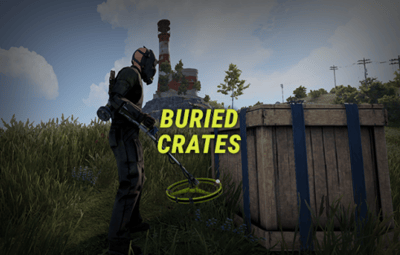
About Buried Crates
Buried Crates makes it possible to find crates while using a metal detector. This makes metal detectors worth using at any stage of the game.
FEATURES
- Custom Metal Detector: Can naturally spawn inside world crates (Tools Crate, Military, Normal, Labs, etc.) with customizable spawn chances.
- Map Pings: As player scanning gets closer they get a pinged exact location making the process less exhausting.
- Scarecrow Encounters: Digging up buried loot has a configurable chance to spawn a scarecrow.
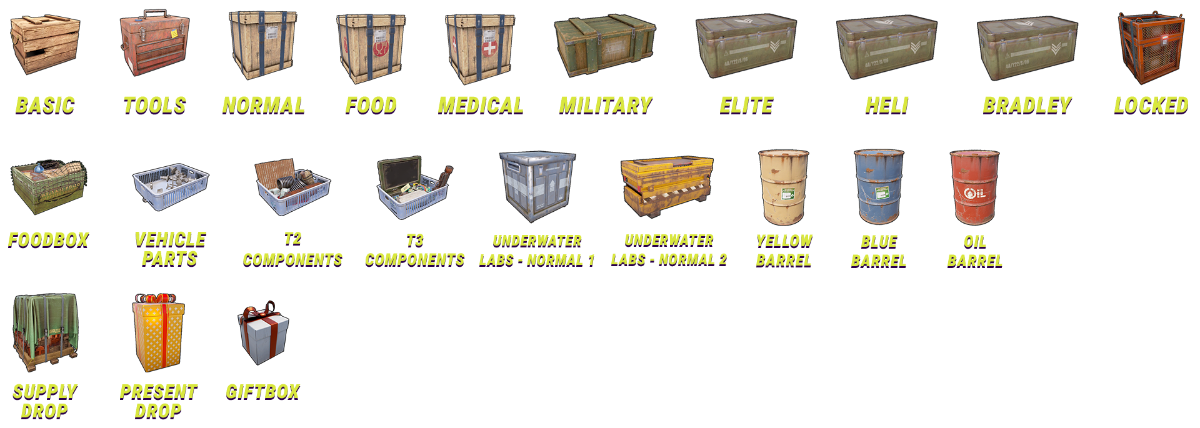
- Custom Crates & Weights: Define which crates and barrels can be dug up, complete with individual weighted probabilities.
- Hacking & Despawn Control: Configurable hack timers for locked crates and despawn timers for dug-up crates.
COMMANDS
/givedetector <player or steamid> (or in server console) - Gives the custom metal detector to the specified player. (Requires permission buriedcrates.admin)
SUPPORTED CRATES/BARRELS
PERMISSIONS & SPAWN PROBABILITY
In config you can define permissions and chance % of a crate spawning for each permission (if a crate doesn't spawn, vanilla loot items works like normal).
Crate types to be spawned uses a weight system, the higher the weight, the higher chance that crate type will be the one to spawn.
Default permissions: you can change or add to them in config
- buriedcrates.default - 25% chance of finding a crate
- buriedcrates.vip1 - 50% chance of finding a crate
- buriedcrates.vip2 - 80% chance of finding a crate
CONFIG
{
  "General settings": {
    "Metal detector pings": {
      "Enabled": true,
      "Ping trigger distance": 3.0,
      "Ping duration in seconds": 15.0
    },
    "Locked crate hack seconds": 60,
    "Dug up crate despawn in seconds": 900,
    "Scarecrow spawn chance (%)": 20.0,
    "Scarecrow despawn in seconds (0 = never)": 300,
    "Log dug up crates in console": false
  },
  "Custom metal detector": {
    "Skin ID": 3801704557,
    "Custom item name": "Buried Crates Detector",
    "Require for crate spawning": true,
    "Require for map pings": true,
    "Spawn in loot crates": {
      "Enabled": true,
      "Crates spawn chances (%)": {
        "Basic Crate": 2.0,
        "Tools Crate": 10.0,
        "Normal Crate": 3.5,
        "Military Crate": 4.0,
        "Underwater Labs Normal Crate 1": 3.5,
        "Underwater Labs Normal Crate 2": 3.5
      }
    }
  },
  "Permissions": {
    "default": {
      "Crate spawn chance (%)": 100.0,
      "Crates weights": {
        "Basic Crate": 5,
        "Foodbox": 5,
        "Vehicle Parts Crate": 5,
        "Tier 2 Components Crate": 5,
        "Tier 3 Components Crate": 5,
        "Normal Crate": 15,
        "Normal Crate - Food": 5,
        "Normal Crate - Medical": 5,
        "Tools Crate": 15,
        "Underwater Labs Normal Crate 1": 5,
        "Underwater Labs Normal Crate 2": 5,
        "Military Crate": 3,
        "Elite Crate": 3,
        "Elite Crate - Bradley": 2,
        "Elite Crate - Heli": 2,
        "Locked Crate": 0,
        "Supply Drop": 1,
        "Yellow Loot Barrel": 5,
        "Blue Loot Barrel": 5,
        "Oil Barrel": 5,
        "Giftbox": 5,
        "Present Drop": 0
      }
    },
    "vip1": {
      "Crate spawn chance (%)": 100.0,
      "Crates weights": {
        "Basic Crate": 0,
        "Foodbox": 5,
        "Vehicle Parts Crate": 5,
        "Tier 2 Components Crate": 5,
        "Tier 3 Components Crate": 5,
        "Normal Crate": 15,
        "Normal Crate - Food": 5,
        "Normal Crate - Medical": 5,
        "Tools Crate": 15,
        "Underwater Labs Normal Crate 1": 5,
        "Underwater Labs Normal Crate 2": 5,
        "Military Crate": 3,
        "Elite Crate": 3,
        "Elite Crate - Bradley": 2,
        "Elite Crate - Heli": 2,
        "Locked Crate": 1,
        "Supply Drop": 1,
        "Yellow Loot Barrel": 5,
        "Blue Loot Barrel": 5,
        "Oil Barrel": 5,
        "Giftbox": 5,
        "Present Drop": 1
      }
    },
    "vip2": {
      "Crate spawn chance (%)": 100.0,
      "Crates weights": {
        "Basic Crate": 0,
        "Foodbox": 0,
        "Vehicle Parts Crate": 0,
        "Tier 2 Components Crate": 0,
        "Tier 3 Components Crate": 5,
        "Normal Crate": 10,
        "Normal Crate - Food": 0,
        "Normal Crate - Medical": 0,
        "Tools Crate": 10,
        "Underwater Labs Normal Crate 1": 5,
        "Underwater Labs Normal Crate 2": 5,
        "Military Crate": 5,
        "Elite Crate": 5,
        "Elite Crate - Bradley": 3,
        "Elite Crate - Heli": 3,
        "Locked Crate": 1,
        "Supply Drop": 1,
        "Yellow Loot Barrel": 5,
        "Blue Loot Barrel": 5,
        "Oil Barrel": 5,
        "Giftbox": 5,
        "Present Drop": 1
      }
    }
  },
  "Version": {
    "Major": 1,
    "Minor": 1,
    "Patch": 0
  }
}