
steampunkvalley's Wishlist
-
$21.95$15.95Battlepass
Creates quests/missions for users to complete in order to get rewards (currency, items, etc.). Players can spend the currency they receive to open cases. This can become a major plugin for your server. Your players will not get bored! And a nice and user-friendly interface will surprise them even more
Features:
Beautiful user interface Logging purchases / replenishment of the balance (both to the console and to a file) Versatility (can work with various economy plugins) Performance (plugin is faster than existing competitors) Interesting idea The ability to customize absolutely any inscription
Preview
Commands
addfirstcurrency {userid} {amount} (give the player the first currency) addsecondcurrency {userid} {amount} (give the player a second currency) battlepass.wipedata (clear player progress) pass (open interface) battlepass.migrate (migrate to PlayerDatabase) battlepass.convert.128 (convert from 1.28.0)
Item Types
Item Command Plugin
Mission Types
Gather Kill Craft Look Build Upgrade Fishing LootCrate Swipe RaidableBases RecycleItem HackCrate PurchaseFromNpc ArcticBaseEvent GasStationEvent SputnikEvent ShipwreckEvent HarborEvent JunkyardEvent SatDishEvent WaterEvent AirEvent PowerPlantEvent ArmoredTrainEvent ConvoyEvent SurvivalArena KillBoss
FAQ
How to use multiple NPCs in one mission Loot Hackable Crates (config example) Default Config -
$22.00
Zombie Horde Event
The event is started automatically or by console command. A chinook crate spawns in a random position on a road on the map and is guarded by Zombies. The event is made difficult by the fact that you can only damaged Zombies from a distance set in the config file.
In the config file, you can set the Horde to always spawn to the same custo spawn position.
Console command:
- hordestart
- hordestop
Hook:
void OnZombieHordeEventStart()
void OnZombieHordeEventStop()
Contact:
Discord: https://discord.gg/C5CehdJMdK
Test Rust server: 213.181.206.21:27194
Video:
Config:
{ "Version": { "Major": 1, "Minor": 0, "Patch": 0 }, "Automatic event start": true, "Minimum time for event start": 3600.0, "Maximum time for event start": 7200.0, "Duration of the event": 2800.0, "Warning messages before event start": 300.0, "Warning messages before event end": 300.0, "Spawn the event at a custom spawn point?": false, "Custom spawn position:": "(0, 0, 0)", "Chat icon": 0, "Number of zombies in the horde": 20, "The distance of the Zombies' damage": 50.0, "Zombies setting": { "Name": "Zombie", "Health": 150.0, "Wear items": [ { "ShortName": "frankensteins.monster.01.head", "SkinID (0 - default)": 0 }, { "ShortName": "frankensteins.monster.01.legs", "SkinID (0 - default)": 0 }, { "ShortName": "frankensteins.monster.01.torso", "SkinID (0 - default)": 0 } ], "Use custom loot?": false, "CustomLoot": { "Minimum items": 1, "Maximum items": 1, "Use minimum - maxium?": false, "List of items": [ { "ShortName": "halloween.lootbag.small", "Minimum": 3, "Maximum": 6, "Chance": 100.0, "Give blueprint?": false, "SkinID": 0, "Displayname": "" } ] } }, "Locked crate hack time": 120.0, "Use only custom loot?": false, "The loot in the locked crate": { "Minimum items": 1, "Maximum items": 1, "Use minimum - maxium?": false, "List of items": [ { "ShortName": "xmas.present.small", "Minimum": 3, "Maximum": 6, "Chance": 100.0, "Give blueprint?": false, "SkinID": 0, "Displayname": "" } ] }, "Messages setting": { "Message before the event starts.": "<color=#ff0000>Zombie Horde</color> will spawn soon", "Message before the event stop.": "<color=#ff0000>Zombie Horde</color> will end soon!!", "Start message": "<color=#ff0000>Zombie Horde</color> spawn on:", "Stop message": "<color=#ff0000>Zombie Horde</color> Event stop!!", "Map marker name": "Zombie Horde", "Map marker radius": 0.6, "Distance warning": "Zombies are too far away, get closer", "Color": { "r": 1.0, "g": 0.0, "b": 0.0 } } }
-
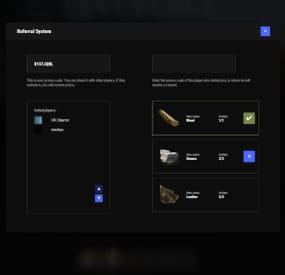
$19.95$11.95Referrals
Adds a referral system to the game. Players can invite other players and receive rewards for this.
Commands
referal - open interface promo [promocode] - activate promo code
Permissions
You can set permission in config, for example:
"Permission (example: referrals.use)": "referrals.use",
Hooks
private void OnPromoCodeActivated(BasePlayer player, string promocode)
API
private string GetPromoCode(BasePlayer member) private string GetPromoCode(string member) private string GetPromoCode(ulong member)
Config
{ "Commands": [ "ref", "referal" ], "Commands to activate the promo code": [ "promo", "code" ], "Permission (example: referrals.use)": "", "Work with Notify?": true, "Use auto-wipe?": false, "Promo Code Chars": "ABCDEFGHIJKLMNOPQRSTUVWXYZ0123456789", "Promo Code Length": 8, "Awards": [ { "Invites Amount": 1, "Type": "Item", "ID": 1, "Image": "", "Title": "", "Command (%steamid%)": "", "Plugin": { "Hook": null, "Plugin name": null, "Amount": 0 }, "Display Name (empty - default)": "", "ShortName": "wood", "Skin": 0, "Amount": 20000, "Chance": 70.0 }, { "Invites Amount": 2, "Type": "Item", "ID": 2, "Image": "", "Title": "", "Command (%steamid%)": "", "Plugin": { "Hook": null, "Plugin name": null, "Amount": 0 }, "Display Name (empty - default)": "", "ShortName": "stones", "Skin": 0, "Amount": 15000, "Chance": 70.0 }, { "Invites Amount": 5, "Type": "Item", "ID": 3, "Image": "", "Title": "", "Command (%steamid%)": "", "Plugin": { "Hook": null, "Plugin name": null, "Amount": 0 }, "Display Name (empty - default)": "", "ShortName": "leather", "Skin": 0, "Amount": 2400, "Chance": 55.0 }, { "Invites Amount": 7, "Type": "Item", "ID": 4, "Image": "", "Title": "", "Command (%steamid%)": "", "Plugin": { "Hook": null, "Plugin name": null, "Amount": 0 }, "Display Name (empty - default)": "", "ShortName": "cloth", "Skin": 0, "Amount": 2300, "Chance": 55.0 }, { "Invites Amount": 10, "Type": "Item", "ID": 5, "Image": "", "Title": "", "Command (%steamid%)": "", "Plugin": { "Hook": null, "Plugin name": null, "Amount": 0 }, "Display Name (empty - default)": "", "ShortName": "lowgradefuel", "Skin": 0, "Amount": 1500, "Chance": 50.0 } ] }
FAQ
Item as kit -
$19.99
Survival Arena
By imthenewguy in Plugins
Survival Arena is a plugin that spawns a Battle-royal style game, where players must scavenge for equipment and fight to the death, all while staying inside of a shrinking, non-radiated zone.
The plugin spawns a large play area high in the sky and inherits the biome type from the ground below. This means that if the area is suspended above an arctic biome, all of the rocks, trees, logs and bushes will be spawned mirroring that biome type.
Players are teleported into the center building when they join, and once the game begins, they must loot containers to gear up to survive. Players are returned to their original locations when they leave the event or respawn after dying at the event.
Server owners can change or add loot profiles via the config. The plugin will select a random profile when the arena begins and fill the loot containers based on your specifications.
It comes with 2 default loot profiles:
Primitive - spears, melee weapons, bows, crossbows, burlap equipment, revolvers etc GunLoot - more modern weapons.
The plugin uses EventHelper to run automatically, handle joining and leaving, and will allow players to vote to start the game.
Admins can also add additional trees, bushes, logs and loot spawns to the arena via command.
Type: Chat Command: survivalarena Function: Sends the user the UI to start up the game. Loot profiles, spawn height and lobby time can be adjusted here before starting the game. Type: Chat/Console Command: startarena <heightMod> <lobbytime> <arenaName> <lootProfile> Function: Spawns and starts the game using the specified heightmod and lobbytime parameters. You can simply use the command with no parameters to start it using the default settings and a random arena/lootprofile. Type: Chat/Console Command: endarena Function: Ends any active games and despawns the arena. Type: Chat Command: spawnarena <name> Function: Spawns the arena, but does not start the game. Useful for debugging and development. Type: Chat Command: setcentrepoint Function: Sets the arena's new center point at the players location. Useful if you want to move the spawn so it has more biome variety. Be sure not to make it too high or too close to the ground. Type: Chat Command: survival Function: Used to join the game when the lobby is active. Type: Chat Command: saremove Function: Removes the tree, loot container, log or bush that the player is looking at. This will no longer spawn in future games. Type: Chat Command: addtree Function: adds a tree spawn at the players position. Type: Chat Command: addbush Function: adds a bush spawn at the players position. Type: Chat Command: addlog Function: adds a log spawn at the players position. Type: Chat Command: addloot Function: adds a loot spawn at the players position. Type: Chat Command: saleave Function: Leaves the event Type: Console/Chat Command: wipeoldarena Function: Wipes any entities that are at the same height or higher than the arena.
survivalarena.admin
survivalarena.autojoin
If you wish to create your own arena, you may follow this tutorial here: https://youtu.be/BxmcjHjIJDU
Please note that the map file name needs to contain survivalarena or it will not allow the getarena command to work. Also I will not be offering support for this, so use at your own risk.
API
Hook Calls
void OnSurvivalArenaStart() - Called when the lobby starts. void OnSurvivalArenaEnd() - Called when the game is ending. void OnSurvivalArenaWin(BasePlayer player) - Called when a player wins the game. void OnEventLeave(BasePlayer player, string pluginName) - Called when a player leaves the event. object OnEventJoin(BasePlayer player, string pluginName) - Called when a player is attempting to join the event. Returning a string will prevent the player from joining and will print the string to them. void OnEventJoined(BasePlayer player, string pluginName) - Called when a player has successfully joined the arena. void OnPlayerItemsRestored(BasePlayer player) - called when a players items have been restored.
Hook Methods
bool IsEventPlayer(BasePlayer player) - returns true or null if the player is an EventPlayer.
-
.thumb.gif.1c2ddf2a4e9e762c1e90635e4db12435.gif)
$29.99
Zombie Hunter Reanimated
Unlock another (Frightening) lane of economic gameplay with Zombie Hunter.
Celebrating 2 years since drop we are here with Version 2.0.0 of Zombie Hunter.
This is a complete rewrite for features, spawn flex, QOL and Much more.
Get licensed, hunt Zombies, sell brains and profit.
Zombies spawn automatically & Randomly at FP Monuments.
You can also save your own custom spawn points via command.
Set a License fee so players have to "Legally" cash out Zombie Brains. The license is optional and the command name is configurable for shop integration.
Build as many Zombie tiers as you want. Each tier has its own settings for Aura - Stats - Combat Settings - Weapon (Melee Only) - Outfit - Marker. You can easily make a High Tier Target stand out from a Low Tier.
Per tier Aura effects let zombies deal radiation, heat, cold, electric or poison effects on nearby players.
An aura can also emit and players are notified when in range.
Top Zombie Hunters leaderboard broadcasts at your interval or players can see it via command.
Players cash out at the Zombie Hunter Cashout Npc. The Npc now features a UI that tries to match the native feel.
Within config you can set the sell amounts via the steps.
Use Economics, Server Rewards, or pay out items to your players.
Discord webhook can track all sales.
View Config below for more info.
ZombieHunter.Admin ZombieHunter.LifetimeLicense
Admin Commands /spawnzombiehunter requires Admin permission and spawns a Zombie Hunter NPC at your current position. /removezombiehunter requires Admin permission and removes the Zombie Hunter NPC you are currently looking at. /az saves a custom spawn point in the data file for zombies to spawn at. Player Commands /buyzl lets a player purchase a Zombie Hunter License if they have sufficient funds. The license requirement can be disabled or bypassed in the config. The command name is configurable. Console / Shop buyzl can also be used as a console command targeting a specific player's Steam ID, which makes it usable for shop plugins to sell licenses to your players. Usage: buyzl id
OnZombieActive() - Called when the field changes from no zombies to atleast one. OnZombieInactive() - Called when no zombies are on the field. OnZombieHunterKill(BasePlayer player) - Called when a player kills a ZH Zombie. OnZombieHunterTrade(BasePlayer player) - Called when a player trades with the Npc. HasZombieLicense(ulong playerID) - Checks if the player has a valid license. GetZombieStats() Returns a Dictionary<ulong, int> - Determines player stats.
{ "Spawn Zombies On Plugin Reload?": false, "Amount to Spawn On Plugin Reload? (Must be less than Max Active Zombies)": 1, "Announce Top Zombie Hunters To Chat Every x Seconds (0 To Disable)": 600, "Enable Spawn Time Restriction?": false, "What time to allow Zombies to Spawn?": 18, "What time should we be over for the Zombies to stop Spawning?": 5, "Clear Kill Counters on Wipe?": false, "Discord Webhook URL": "INSERT_WEBHOOK_URL", "Enable Skill Tree Xp Gain?": false, "Require License for Xp Gain?": true, "Enable Monument Spawns?": true, "Monument Exclusion List - ShortPrefab": [ "tunnel-entrance", "substations" ], "Enable Custom Spawns?": false, "Clear Custom Spawns File On Wipe?": false, "Chat Icon": 0, "Maximum Active Zombies": 3, "Drop Zombie Brains In Pouch?": true, "Base Item for the Zombie Brains?": "blood", "Brains Marketable to the Zombie NPC?": true, "Console Command to Purchase a Zombie License? (For GUI Shops)": "buyzl", "Chat Command to Purchase a Zombie License?": "buyzl", "Require a Zombie License To Cash In Drops to the Zombie Hunter NPC?": true, "Price to Purchase a Zombie Hunter License?": 10000, "Lose Zombie Hunter License on Death?": true, "Clear Licenses on Wipe?": false, "Dynamic Spawn at this Monument": "assets/bundled/prefabs/autospawn/monument/medium/bandit_town.prefab", "Dynamic Spawn Points (Relative to Monument)": [ { "x": 6.74, "y": 1.4, "z": -40.78 }, { "x": -25.3, "y": 2.02, "z": -3.45 } ], "Dynamic Spawn Rotation Correction": 45.0, "Dynamic Spawn Of The Zombie Hunter NPC Enabled?": true, "Economy Plugin - 1 Economics - 2 Server Rewards - 3 Items": 1, "Item Economy Shortname (If Economy Plugin = 3)": "scrap", "Item Economy Skin (If Economy Plugin = 3)": 0, "Item Economy Custom Display Name": "", "Quick Sell Quantity Buttons (max 3 visible)": [ 1, 5, 25 ], "NPC Interaction Cooldown In Seconds": 3.0, "NPC Kit Enabled?": false, "NPC Kit Name?": "", "Amount of Time In Seconds Between Zombie Spawns": 750, "Amount of Time In Seconds for a Zombie to Despawn": 1240, "Enable Spawn SFX?": true, "Enable Despawn SFX?": true, "Announce to Chat When Zombie is Active?": true, "Announce to Chat When Zombie is Claimed?": true, "Enable Bonus Damage In Blight Zones?": false, "Blight Zone Damage Multiplier": 2.0, "Enable Bonus Loot On Death In Blight Zones?": false, "Blight Zone Loot Multiplier": 2.0, "Enable Bonus Health For Zombies Spawned In Blight Zones?": false, "Blight Zone Health Multiplier": 2.0, "Enable Bonus Skill Tree XP For Kills In Blight Zones?": false, "Blight Zone XP Multiplier": 2.0, "Enable Marker Manager from UMOD, To Mark Zombies?": true, "Enable Marker Manager from UMOD, To Mark NPC Location?": true, "Zombie Tiers": [ { "Zombie Name": "Low Tier Zombie", "Skill Tree Xp Value": 100.0, "Zombie Clothing Options": [ { "Shortname": "gloweyes", "Skin": 0 }, { "Shortname": "hat.boonie", "Skin": 818908416 }, { "Shortname": "attire.hide.skirt", "Skin": 807540775 }, { "Shortname": "tshirt", "Skin": 876665516 }, { "Shortname": "burlap.gloves", "Skin": 827694932 }, { "Shortname": "wood.armor.pants", "Skin": 0 } ], "Zombie Total Health": 150, "Zombie Damage Scaling": 1.0, "Seconds Between Attacks": 2.0, "Sense Range": 20.0, "Weapon to Equip?": "longsword", "Weapon Skin ID": 924880337, "Equip Beancans?": true, "Amount of Beancans to Equip?": 5, "Zombie Drop Name": "Low Tier Zombie Brain", "Zombie Drop Skin": 3254396871, "Is the Drop Marketable to the Zombie Hunter NPC?": true, "Sale Price?": 1000.0, "Min Item Drop": 1, "Max Item Drop": 3, "Min Brains Per Kill": 1, "Max Brains Per Kill": 1, "Marker Style": { "Radius": 0.3, "Color": "4E7334", "Outline": "606060", "Alpha": 0.75 }, "Zombie Optional Drops": [ { "Shortname": "humanmeat.spoiled", "Skin": 0, "Custom Name": "", "Amount Min": 3, "Amount Max": 10, "Chance to Drop": 20.0 }, { "Shortname": "ammo.shotgun.slug", "Skin": 0, "Custom Name": "", "Amount Min": 5, "Amount Max": 30, "Chance to Drop": 30.0 }, { "Shortname": "radiationremovetea.advanced", "Skin": 0, "Custom Name": "", "Amount Min": 1, "Amount Max": 2, "Chance to Drop": 40.0 } ], "Aura Effects": [ { "Effect Type (None, Radiation, Heat, Cold, Electric, Poison)": "Radiation", "Enable Proximity Aura?": false, "Enable On Attack Effect?": false, "Aura Radius": 5.0, "Proximity Damage Per Tick": 2.0, "Proximity Duration (seconds)": 8.0, "Proximity Tick Rate (seconds)": 1.0, "Proximity Check Interval (seconds)": 3.0, "On Attack Damage": 5.0, "Enable Aura Sphere?": false, "Aura Sphere Color (Blue, Green, Red, Purple)": "Green" } ] }, { "Zombie Name": "Mid Tier Zombie Target", "Skill Tree Xp Value": 200.0, "Zombie Clothing Options": [ { "Shortname": "hat.gas.mask", "Skin": 0 }, { "Shortname": "tshirt", "Skin": 965885061 }, { "Shortname": "attire.hide.pants", "Skin": 2960205521 }, { "Shortname": "burlap.gloves.new", "Skin": 0 }, { "Shortname": "jacket", "Skin": 834233801 }, { "Shortname": "gloweyes", "Skin": 0 } ], "Zombie Total Health": 225, "Zombie Damage Scaling": 1.5, "Seconds Between Attacks": 1.5, "Sense Range": 30.0, "Weapon to Equip?": "longsword", "Weapon Skin ID": 924880337, "Equip Beancans?": true, "Amount of Beancans to Equip?": 5, "Zombie Drop Name": "Mid Tier Zombie Brain", "Zombie Drop Skin": 3254397311, "Is the Drop Marketable to the Zombie Hunter NPC?": true, "Sale Price?": 2000.0, "Min Item Drop": 1, "Max Item Drop": 3, "Min Brains Per Kill": 1, "Max Brains Per Kill": 1, "Marker Style": { "Radius": 0.4, "Color": "a64242", "Outline": "606060", "Alpha": 0.8 }, "Zombie Optional Drops": [ { "Shortname": "humanmeat.spoiled", "Skin": 0, "Custom Name": "", "Amount Min": 3, "Amount Max": 10, "Chance to Drop": 30.0 }, { "Shortname": "scrap", "Skin": 0, "Custom Name": "", "Amount Min": 120, "Amount Max": 230, "Chance to Drop": 30.0 }, { "Shortname": "maxhealthtea.advanced", "Skin": 0, "Custom Name": "", "Amount Min": 10, "Amount Max": 15, "Chance to Drop": 40.0 } ], "Aura Effects": [ { "Effect Type (None, Radiation, Heat, Cold, Electric, Poison)": "Radiation", "Enable Proximity Aura?": false, "Enable On Attack Effect?": false, "Aura Radius": 7.0, "Proximity Damage Per Tick": 3.0, "Proximity Duration (seconds)": 10.0, "Proximity Tick Rate (seconds)": 1.0, "Proximity Check Interval (seconds)": 3.0, "On Attack Damage": 8.0, "Enable Aura Sphere?": false, "Aura Sphere Color (Blue, Green, Red, Purple)": "Green" } ] }, { "Zombie Name": "High Tier Zombie Target", "Skill Tree Xp Value": 300.0, "Zombie Clothing Options": [ { "Shortname": "gloweyes", "Skin": 0 }, { "Shortname": "pants", "Skin": 2228727332 }, { "Shortname": "attire.hide.vest", "Skin": 0 }, { "Shortname": "mask.bandana", "Skin": 2839354901 }, { "Shortname": "attire.hide.poncho", "Skin": 2949395842 }, { "Shortname": "hat.boonie", "Skin": 2963365014 }, { "Shortname": "shoes.boots", "Skin": 1669982744 } ], "Zombie Total Health": 325, "Zombie Damage Scaling": 2.0, "Seconds Between Attacks": 1.0, "Sense Range": 40.0, "Weapon to Equip?": "longsword", "Weapon Skin ID": 924880337, "Equip Beancans?": true, "Amount of Beancans to Equip?": 5, "Zombie Drop Name": "High Tier Zombie Brain", "Zombie Drop Skin": 3254397772, "Is the Drop Marketable to the Zombie Hunter NPC?": true, "Sale Price?": 3200.0, "Min Item Drop": 1, "Max Item Drop": 3, "Min Brains Per Kill": 1, "Max Brains Per Kill": 1, "Marker Style": { "Radius": 0.6, "Color": "39FF14", "Outline": "000000", "Alpha": 0.9 }, "Zombie Optional Drops": [ { "Shortname": "metal.refined", "Skin": 0, "Custom Name": "", "Amount Min": 200, "Amount Max": 500, "Chance to Drop": 30.0 }, { "Shortname": "scrap", "Skin": 0, "Custom Name": "", "Amount Min": 440, "Amount Max": 600, "Chance to Drop": 30.0 }, { "Shortname": "supertea", "Skin": 0, "Custom Name": "", "Amount Min": 1, "Amount Max": 1, "Chance to Drop": 40.0 } ], "Aura Effects": [ { "Effect Type (None, Radiation, Heat, Cold, Electric, Poison)": "Radiation", "Enable Proximity Aura?": false, "Enable On Attack Effect?": false, "Aura Radius": 10.0, "Proximity Damage Per Tick": 5.0, "Proximity Duration (seconds)": 12.0, "Proximity Tick Rate (seconds)": 1.0, "Proximity Check Interval (seconds)": 3.0, "On Attack Damage": 12.0, "Enable Aura Sphere?": false, "Aura Sphere Color (Blue, Green, Red, Purple)": "Green" } ] } ], "NPC Weapon": "rifle.ak", "NPC Weapon Skin": 3047277939, "Marker Settings": { "Zombie Hunter NPC Marker Style": { "Radius": 0.3, "Color": "038C7F", "Outline": "606060", "Alpha": 0.75 }, "Zombie Hunter NPC Marker Display Name": "Zombie Hunter Cashout" }, "NPC Clothing Options": [ { "Shortname": "pants", "Skin": 2630171764 }, { "Shortname": "hoodie", "Skin": 2630170972 }, { "Shortname": "shoes.boots", "Skin": 547978997 }, { "Shortname": "coffeecan.helmet", "Skin": 1894381558 }, { "Shortname": "roadsign.jacket", "Skin": 1894379005 }, { "Shortname": "roadsign.kilt", "Skin": 1894376712 } ] }
{ "NoPerms": "[<color=#4E7334>Zombie Hunter</color>] You do not have permission to run this <color=#312E8C>Command</color>!", "NoBrains": "You have no <color=#4E7334>Zombie Brains</color> on you that I can pay you for. \nBe safe out there, please come back soon!", "Cooldown": "[<color=#4E7334>Zombie Hunter</color>] :angry: Wait <color=#a642b5>{0}</color> second(s)!, I think I heard a <color=#4E7334>Zombie</color>...", "SellSuccess": "[<color=#4E7334>Zombie Hunter</color>] :eyes: \n\n I can afford to give you {0} for your <color=#038C7F>{1}x</color> <color=#a642b5>{2}</color>(s).", "SellAllSuccess": "[<color=#4E7334>Zombie Hunter</color>] :eyes: \n\n Sold everything marketable: <color=#038C7F>{1}</color> brain(s) for {0}.", "SaleDisabled": "[<color=#4E7334>Zombie Hunter</color>] <color=#038C7F>Sales</color> are Disabled in the Config, Enable and Try again.", "NoLicense": "[<color=#4E7334>Zombie Hunter</color>] :eyebrow: Are you out there Hunting Zombies without a <color=#038C7F>License</color>? \nUse <color=#038C7F>/{0}</color> to purchase one.", "AlreadyLicensed": "[<color=#4E7334>Zombie Hunter</color>] You already have a <color=#312E8C>Zombie Hunter License</color>.", "BuySuccess": "[<color=#4E7334>Zombie Hunter</color>] <color=#312E8C>Zombie Hunter License</color> Obtained. \nYou were charged {0}, Stay Safe, <color=#312E8C>{1}</color>!", "InsufficientFunds": "[<color=#4E7334>Zombie Hunter</color>] You don't have enough funds to purchase a <color=#4E7334>Zombie Hunter License</color>. \nIt costs {0}.", "Despawn": "[<color=#4E7334>Zombie Hunter</color>] The <color=#038C7F>{0}</color> has <color=#312E8C>escaped</color> our hunting parties.", "ZombieSpotted": "[<color=#4E7334>Zombie Hunter</color>]\n\n A <color=#038C7F>{0}</color> has been seen attacking a local near <color=#038C7F>{1}</color>.", "ZombieEliminated": "[<color=#4E7334>Zombie Hunter</color>] The <color=#038C7F>{0}</color> was <color=#4E7334>Eliminated</color> by <color=#312E8C>{1}</color>!", "ZombieDrop": "[<color=#4E7334>Zombie Hunter</color>] The <color=#038C7F>{0}</color> dropped a pouch! Open it and deliver the <color=#038C7F>Zombie Brain</color> to the Zombie Hunter for your Reward!", "Revoked": "[<color=#4E7334>Zombie Hunter</color>] Your <color=#038C7F>Zombie License</color> has been <color=#038C7F>Revoked</color> be wary of Death next time!", "AuraWarning": "[<color=#4E7334>Zombie Hunter</color>] You are caught in <color=#ff7c35>{0}</color>'s aura! <color=#ff4535>Get out before it's too late!</color>", "BlightedZombieEliminated": "[<color=#4E7334>Zombie Hunter</color>] The <color=#39FF14>blighted</color> <color=#ff4444>{0}</color> was <color=#c0c0c0>purged</color> by <color=#ffd700>{1}</color>!" }