
Magnumk's Wishlist
-
$14.99
Raid Time Manager
Raid Time Manager · Rust · Oxide · Carbon Your best players get raided at 4am and never log in again You set the hours raiding is open. Outside them the damage, the ladder stacks, the ceiling drops and the turret placements all stop — and everyone can see the schedule on screen. A full week is configured out of the box, and every hour of it is editable from a calendar in game. The HUD Six layouts, one of them fits your screen Switched live from the settings screen — every player's HUD is redrawn on the spot. How it goes From install to the night before wipe MINUTE ONE It works before you open the config Raid time is set to 18:00–22:00 Monday to Friday, 10:00–22:00 Saturday, 08:00–22:00 Sunday. Every hour outside that is safe time, and the restrictions are already on. Your timezone, by offset or by name, daylight saving included Several raid windows in one day, or none at all for a full safe day Nothing to fill in first — edit the week later, or never EVERY DAY Nobody has to ask when raid time is A HUD shows today's windows as a bar, a marker for where the clock sits inside them, and a green or red dot for whether raiding is open right now. Six positions, switched live. Players can hide it, and it hides itself on cameras and drones Every player reads it in their own language, on a 12- or 24-hour clock An alert on screen the moment raid time opens, and again when it closes An optional Discord webhook warns your players a set time before it opens WHEN THEY TRY Blocking damage alone does not stop a raid Someone who cannot blow a wall will stack ladders, drop a ceiling inside your compound, or park a turret on your door instead. Thirteen switches, so you block what matters on your server and leave the rest alone. Damage. Other people's buildings, your own, twig, boats, tugboats, fire Raids with no player behind them. Patrol helicopter, MLRS, SAM sites and auto turrets, each its own toggle Building tricks. Ladders and ceilings inside someone else's privilege, cupboards and turrets placed next to one They are told why. A blocked shot or placement puts the reason on the player's screen Your own exceptions. A prefab list that stays damageable whatever the clock says, and a separate switch for other people's sleeping bags WIPE DAY The exceptions are where a schedule earns its keep A fixed week is fine until wipe day, a holiday, or the first complaint about being raided ten minutes after joining. All four of those are settings. Set hours for one specific date from the calendar — it beats the weekly rule Safe days after a wipe, written into the schedule for you New players protected for a few hours, if you want them to be Or block offline raids only, with a shorter grace period for your donators Alongside the rest It fits what you already run All optional, all off until you point at them. ✓ TruePVE — its ruleset is switched with the schedule, so the two never disagree ✓ ZoneManager — confine the whole thing to listed zones, or apply it everywhere except them ✓ Raidable Bases — event bases stay raidable around the clock, safe time never locks players out ✓ Your own commands — run any server command the moment raid time opens, and again when it closes Reference One command, and it is yours to rename Everything else is a screen you click through in game. Chat /rtm Open the raid calendar. Admins also get a settings button on it. Chat /rtm hud Hide the HUD, or bring it back Perm rtm.vip Shorter offline grace period. Rename it or add more groups. Straight answers Asked before every purchase Do I need TruePVE? No, it blocks the damage itself. TruePVE is optional and only makes the two systems agree if you already run it. Can I still raid people who are online? Turn on offline-only mode and safe time protects a base only while the owner and their whole team are away. Do I have to edit config files? Not for the schedule. The calendar and settings screens change the hours, the toggles and the HUD position from in game. Is it English only? No. Days, months, AM/PM and every message are language file entries, so you translate once and each player sees their own. What about NPCs and scripted raids? One switch lets non-player raiders through at any hour, and the prefab list covers anything that must always stay damageable. Will the HUD annoy my players? Six positions including a compact one, they can dismiss it themselves, and you can switch it off server-wide. 13 actions you can block 6 HUD layouts 3 integrations — TruePVE, ZoneManager, Raidable Bases 1 dependency — ImageLibrary- #raid
- #raid time
- (and 19 more)
-
$13.99$10.35RaidBlock
Multifunctional and advanced RaidBlock plugin
It includes all the necessary functions for this plugin and an extended configuration that will allow you to fully customize the plugin to the requirements of your server.
Introduce your players to a truly functional plugin with a beautiful and modern UI interface, optimization, and new features that your players will appreciate.
List of features:
(The description briefly outlines the functionality and includes screenshots.)
Visual Dome System:
This is a new feature for RaidBlock's plugins, the visual dome system, offering a choice of two possible domes - standard and BattleRoyale.
The dome can be disabled or configured in the configuration file.
Sphere
BattleRoyale The ability to set colors for the Battle Royale dome:
List of supported colors
Blue
Green
Purple
Red
Modern and optimized UI design of the plugin:
We offer a choice of 3 UI design options, which can be fully customized and changed using settings in the configuration.
It blends well with the game design and looks compact on the players' screens.
0 option
1 option
2 option
Map Markers:
A wide selection of markers for displaying raid blocks on the map.
Fully customizable markers.
Type 0
Type 1
Type 2
Type 3
Conveniences for Administrators:
Implemented a black and white list system for raid block triggers, we have added for convenience 2 items that will help easily configure these lists directly from the game.
To obtain these items, use the commands described in the "Commands" tab. Don't forget to grant yourself the necessary permissions.
Black List
White List
Permissions:
raidblock.ignore - with this permission, the player will have immunity to raid blocking. raidblock.toolgun - with this permission, the player can obtain a "Toolgun" for configuring the blacklist and whitelist of items. Command:
Chat commands: /rbtest - allows testing raid block (simulates a raid at your position) (available only to administrators). /rb.white - obtain the Toolgun to add items to the whitelist. /rb.black - obtain the Toolgun to add items to the blacklist. Api:
API: // Returns whether the player is raid blocked bool IsBlocked(BasePlayer player) bool IsRaidBlocked(string playerId) bool IsRaidBlocked(ulong playerId) bool IsRaidBlocked(BasePlayer player) bool IsRaidBlock(ulong userId) // Returns the remaining time of raid block for a player int ApiGetTime(ulong userId) Hooks: CanRaidBlock(BasePlayer player, Vector3 position) OnRaidBlock(Vector3 position) OnRaidBlockStopped(BasePlayer player) OnRaidBlockStopped(Vector3 position) OnCreatedRaidZone(Vector3 position, BasePlayer initiator) OnEnterRaidZone(BasePlayer player) OnExitRaidZone(BasePlayer player) Configuration:
An excellent addition to this plugin:
- #no escape
- #no escape rust
- (and 6 more)
-
$11.99
NPC Health Bar
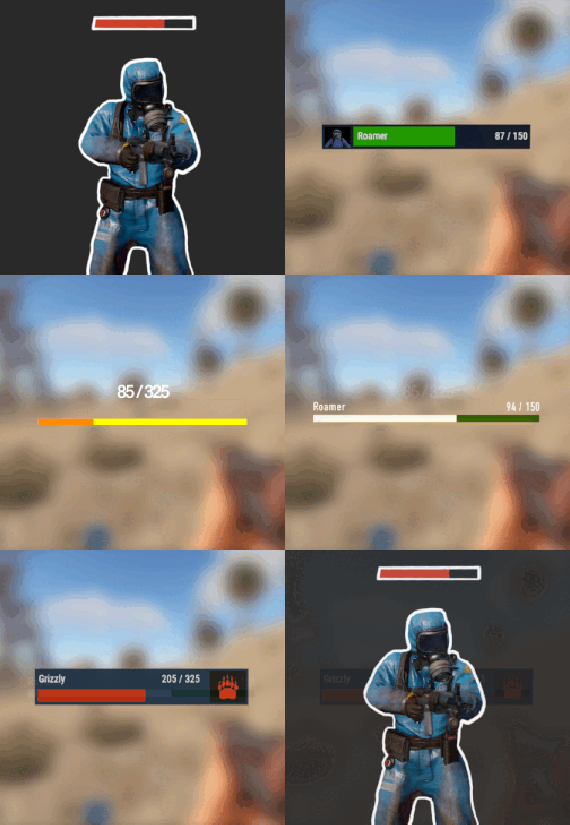
NPC Health Bar is plugin compatible with all NPCs in Rust game, to provide its Health status info.
This also comes with few, already custom made, layouts that can be used straight away upon provided configuration file have been copied and pasted.
Nonetheless, these layouts and its parameters are customizable.
USE
/npcbar - opens up a menu to set up Your health bar
Features
health info text in-game EDIT MODE for players to resize, move and choose their own layout in some layout cases, also NPC name text Images , that are being made custom for some layout options or Images of your own customizable names of entities customizable position of the bar itself
Setup
- Copy and paste file into the .../oxide/plugins directory , configuration file will be created after first load of plugin, but main changes can be made through in-game Options menu or Edit mode menu.
-
$32.99
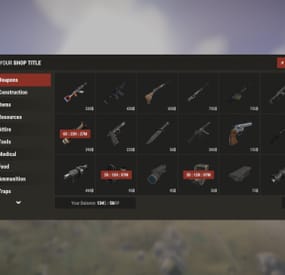
Shop UI
Well rounded shop, with various features. It's standalone plugin which is compatible with WelcomePanel, HumanNpc.
This plugin also supports selling commands, wipe block, no escape, sales, permission access.
Multi-currency support
Use different currencies for different items. Economics and ServerRewards (RP) is supported as well as scrap or any other ingame item.
Restrictions
Combat, raid, spawn and building block supported alongside with basic cooldowns and wipe block. NoEscape is required for combat and raid block.
Appearance
Simple and clean design to ensure smooth user experience for your players. Additionally Shop can be inserted into WelcomePanel to achieve "all in" server panel.
Customization
Widely customizable and feature rich Shop which will fit all needs of your community.
Field Tested
Plugin made by experienced developer, tested by hundreds of server owners and used by some big organizations.
Discord
Customer support available on discord,
Installation
- unzip downloaded package and place Shop.cs file into your plugin folder.
- after succesfuly loading the plugin, data folder oxide/data/Shop will be generated
- take data files provided in plugin package and drop them into your Shop data folder
After finishing these steps your shop is ready to used.
Server Currency
If you don't wish to use ingame items as currency make sure you use either Economics or ServerRewards as you currency management as only those two plugins are compatible with Shop. Default currency setting is Economics ("eco"), if you wish to change it navigate to "oxide/data/Shop/Items.json", open this file in some text editor (VSC recommended) and simply select "eco" and mass replace for desired value. (video here)
"eco" for Economics
"rp" for ServerRewards
"scrap" or any other ingame item
Shop Categories
To remove, change or add new categories open "oxide/data/Shop/Categories.json" file. There you will find all categories alongside with items lists. If you wish to remove certain items from category, just head over to item list and delete from there.
Items
Changing prices
In "oxide/data/Shop/Items.json" you will find every item with their properties, to quick search for specific items press "CTRL + F". By leaving BuyPrice or SellPrice at 0 you will disable selling or buying of said item. Due to multi-currency support prices can be set only in whole numbers, no decimals. To offset for this, you can set minimal amount requirement. For example instead of selling one piece of wood for 0.01$ you can set minimal amount of 100x wood for 1$.
Removing items
If you wish to remove some items from Shop, you can do that directly in "data/Shop/Categories.json" file. Removing items from "Items.json" is not needed as they have no effect unless they are listed in some category.
Adding new items
To add new item you must first head over to "Items.json" data file and create new entry by copy pasting some of the existing ones. Once done with that you can add the item into category. To add multiple versions of same item can be created by simply adding unique tag behind shortname, for example "rifle.ak{1}", "rifle.ak{2}", etc...
Commands
Adding new commands
Commands can be create at "data/Shop/Commands.json". Plugin can only run server side console commands and then parse steam id or player name with tags {steamid} and {playername}. There are two examples shown in default data file. Server side console commands are common thing and almost all plugins utilize them.
Listing commands in categories
Simply type in one of your command names into category item list like this "cmd/yourCommandName". Slash cmd in front of command name is there to make difference between ingame item and command.
Cooldowns
These are very basic, cooldown is triggered when buy/sell action is triggered. By using minimal amount requirement for items you can manage how much player buy and how often. Cooldowns are managed in "data/Shop/Cooldowns.json". Default data file contains two example of cooldowns but it's simply shortname and amount of seconds.
Restrictions
Raid and Combat Block
Managed by NoEscape plugin, option to enable these two block can be found in config file.
Building Block
Prevents players from using shop while they are building block, option can be found in config file.
Spawn Block
Prevents players from using shop after they respawn, amount of seconds can be set in config file, 0 = disabled.
Wipe Block
Prevents players from buying specific items after wipe. Settings are located in "data/Shop/ItemsWipeBlock.json", similar as cooldowns.
Sales
By Permission (config file)
Discount on every item in the shop assigned by permission, multiple permission can be created with their own discount values.
By Category (categories data file)
Discount for every item within specified category.
By Item
Discount for specific item in the shop. If item is already in discounted category, higher discount will be applied.
WelcomePanel integration
To integrate this plugin into WelcomePanel simply use one of the four configs included in download package. These config were premade for each WelcomePanel template (goes from 1 to 4). In case you have own highly customized layout for WelcomePanel you will have to adjust "Layout Container" in Shop config file by yourself.
-
$50.00$45.00Raidable Bases (Tier 3 Package) - Plugin sold separately. Bundle available.
Complete tier 3 package for the Raidable Bases plugin. Core plugin sold separately.
PLUGIN SOLD SEPARATELY
This package includes everything you need to avoid the hassle of having to setup the plugin from scratch.
Time is money, and not having to spend hours or days setting everything up is a game changer.
All bases can be viewed in the gallery at the top of this page.
This is the perfect package with a massive 50 base collection surely to wow your players!
Included:
10 bases (copypaste files) for every difficulty which are now unique to tier 1 and tier 2 difficulty loot tables for each difficulty base loot tables for every profile profiles for each difficulty the configuration file all bases are unique to tier 1 and 2 easy to understand instructions Free version note:
The free version can use this tier package, but it only supports one difficulty (Normal) and one Base Loot file. Remove all Base Loot files except the one you want all bases to use. You must also bypass the protection that prevents paid files from loading with the free version, which exists to stop paid users from accidentally erasing paid-only options by installing the free version over them. To bypass it intentionally, edit the config and rename the "Buyable Events" section on line 283 to "blah" or anything else. After that, the package will load with the free version. The paid version does not have these limitations and supports Easy, Medium, Hard, Expert, Nightmare, and custom difficulties. The tier package is still useful with the free version as it includes preconfigured files, copypaste files and works well for servers that manually enable and disable profiles to rotate through harder bases as the wipe progresses.
Paid plugin sold separately.
Instructions (available in zip file)