0g.Ghost.7373's Wishlist
-

$20.99
Offer System
The Offer System plugin is a versatile tool designed to enhance player engagement by allowing players to exchange in-game currency for special permissions or group memberships. Whether it's granting VIP status or enabling specific abilities, this plugin provides a seamless and interactive way for server administrators to monetize and reward their community. With built-in support for the Economics plugin, as well as physical currencies like scrap or custom Rust Cash, players can make offerings at designated ATM machines and receive their rewards after a timed countdown.
Key Features:
Multi-Currency Support: Accepts multiple forms of currency, including Economics balance, scrap, and custom Rust Cash with skin ID support. Customizable Offer Commands: Configure multiple offer commands with specific costs, durations, and rewards, allowing for tailored player experiences. Countdown Timer: Initiate a timed offering process where players must stay near an ATM machine to complete their transaction, adding a strategic element to offerings. Player Death Mechanics: If a player is killed during the offering countdown, the offered amount is transferred to the killer, creating high-stakes PvP opportunities. Discord Integration: Automatically broadcasts successful offers to a Discord channel via webhook, keeping your community informed of in-game activities. Visual and Audio Effects: Enhances the offering experience with lightning effects and sound cues, making each successful transaction feel rewarding and immersive.
Benefits:
Engage Players with Interactive Offerings: The Offer System plugin adds depth to your server by allowing players to actively participate in earning special permissions or group memberships through a fun and engaging process. Monetize Your Server: By offering exclusive in-game perks in exchange for currency, server administrators can create additional revenue streams while enhancing the player experience. Promote Player Interaction: The countdown and player death mechanics introduce opportunities for players to engage with each other, whether through strategic protection or high-stakes PvP encounters. Customizable and Flexible: The plugin is highly customizable, allowing you to tailor the offer commands and currency settings to fit your server's specific needs.
Unique Features:
High-Stakes PvP Integration: Unique to the Offer System plugin is the feature where a player's offering can be stolen by their killer if they are killed during the countdown. This mechanic encourages players to strategically protect their offerings or take risks for potential rewards. Multi-Currency Versatility: The plugin’s ability to handle various types of in-game currency, including custom items like Rust Cash, gives server administrators flexibility in how they reward their players. Real-Time Discord Notifications: Keep your community engaged with real-time updates on successful offers through integrated Discord notifications, enhancing both player recognition and community interaction.
Currency:
Economics: If set as main currency, the player needs to be close to ATM Machine or Vending Machine (if no skin applied) to start the offering via bank transfer. If the player dies during the process of offering and during countdown, his balance of economics will automatically transferred to the killer. Scrap: If set as main currency, the player needs to be close to ATM MAchine of Vending Machine to offer the scrap equal to the amount of you set per offers. Once the player dies during the offer process, the scrap can be looted and can be used by the killer. Rust Cash: (economics and paper item) combined with skin to make Cash Item. The player needs to be close to ATM MAchine of Vending Machine to offer the Rust Cash equal to the amount of you set per offers. Once the player dies during the offer process, the Rust Cash can be looted and can be used by the killer.r
Proximity:
Configurable proximity between player and ATM Machine or Vending Machine. You can also configure the range before they can start the offer.
Example:
Config set to 3m. Player can use the offer command with 3meter distance to the machine. Proximity Config set to 15m. During the offer process, player can run, hide, and roam within 15meters range while the system is on countdown to finish the offering. This is the range where he can defend and protect himself from griefers. Once the player goes beyond the set proximity, then the offer process will be cancelled and he needs to start over again. By default, there is 5 minutes countdown until offer is finish. Can be configured in the settings.
Sample Config
{ "Commands": { "vip": { "Cost": 1200000.0, "Duration": "3d", "Type": "Group", "Permission": "vip" }, "lootprotection": { "Cost": 300000.0, "Duration": "3d", "Type": "Permission", "Permission": "adminlootprotection.use" }, "raidprotection2": { "Cost": 300000.0, "Duration": "1d", "Type": "Permission", "Permission": "raidprotection.level.2" }, "personalslave": { "Cost": 500000.0, "Duration": "3d", "Type": "Permission", "Permission": "personalnpc.slave" }, "slavebuilder2": { "Cost": 500000.0, "Duration": "1d", "Type": "Permission", "Permission": "personalbuilder.slave2" }, "slavebuilder7": { "Cost": 1000000.0, "Duration": "1d", "Type": "Permission", "Permission": "personalbuilder.slave7" }, "slavebuilder9": { "Cost": 2000000.0, "Duration": "1d", "Type": "Permission", "Permission": "personalbuilder.slave9" }, "slavebuilder1": { "Cost": 800000.0, "Duration": "1d", "Type": "Permission", "Permission": "personalbuilder.slave1" } }, "CurrencySettings": { "Economics": { "IsEnabled": false, "Shortname": null, "SkinID": null }, "Scrap": { "IsEnabled": false, "Shortname": "scrap", "SkinID": null }, "PaperCash": { "IsEnabled": true, "Shortname": "paper", "SkinID": 2570661100 //Skin of Cash, you may use different skins } }, "VendingMachineSettings": { "VendingMachineSkinID": 3042408530 //Default ATM Machine skin, set to 0 if you want a normal vending machine, or set to other skin ID }, "CountdownSettings": { "CountdownDuration": 300, //5 minutes countdown until offer is finish (5 minutes griefing and raiding in the area) "ATMDistance": 3.0, //Distance between player and the machine to use /offer command "PlayerMaxDistanceToCancel": 15.0 //Distance between player and machine to roam and allow countdown, beyong this value will cancel the offering process }, "DiscordSettings": { "BroadcastToDiscord": true, "DiscordWebhook": "webhook url" } }
Enhance your Rust server with the Offer System plugin—bringing strategic offerings, high-stakes PvP, and customizable rewards to your players.
- #rustplugin
- #offersystem
- (and 5 more)
-

$5.99
Explosive Drones
Allows you to place explosives inside the drone, this makes it a kamikaze drone. Just put a regular drone on the ground, you will see a small stash attached to it. Put explosives inside the small stash. Control it like a regular drone using a computer station and attack your enemies. Almost all types of explosives are supported, the plugin is ready to work right away. The plugin is also easy to configure.
Config:
{ "Explosive list(short names of explosive items that can be placed in a drone)": [ "ammo.grenadelauncher.he", "ammo.grenadelauncher.smoke", "supply.signal", "ammo.rocket.mlrs", "explosive.timed", "ammo.rocket.basic", "ammo.rocket.hv", "ammo.rocket.fire", "grenade.smoke", "grenade.beancan", "explosive.satchel", "grenade.f1", "grenade.flashbang", "grenade.molotov", "surveycharge", "ammo.rocket.sam" ], "Sensitivity(if the drone is damaged by this amount, detonation will occur)": 5, "Prohibitory message": "You can't put this item here" }
- #oxide
- #oxiderust
- (and 15 more)
-
$22.00
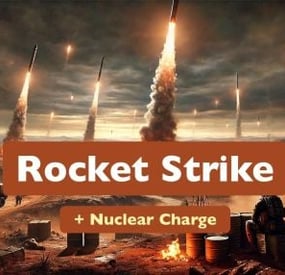
Rocket Strike
Rocket Strike - the ultimate event that allows you to create missile strikes anywhere on the map, in any quantity, any radius and with all possible settings. A unique feature is the creation of nuclear charges that create radiation zones after the explosion.
The following types of rockets are supported: regular, fire, high-speed, MLRS.
The configuration file allows you to manage all aspects of the event:
- projectile type for a missile strike
- random projectiles
- explosion radius
- number of missiles in launch
- nuclear charge
- nuclear charge strength
- radius and duration of the radiation zone
- event frequency
- markers on map
- marker on map after explosion (different color)
- sound siren
- notifications in chat (for all or for nearby players)
- damage multipliers
- loot after explosion
Permissions
Requires: rocketstrike.rs
Chat commands
/rs call (/rs - alias) - takes your position as the center point for launching rockets and using the "Default" preset
/rs onme takes your position as the center point for launching rockets and using the "OnMe" preset
/rs start - event start (the rocket strike will not start immediately, it will be scheduled according to the configuration settings)
/rs stop - stops the event if it was started and scheduled
Configuration
Event settings
"EventSettings": { "autoStart": false, // automatically schedule an event to run after the plugin is installed "startAtRandomTime": true, "randomTimeRangeFrom": 120, // minutes "randomTimeRangeUpTo": 180, // minutes "repeatTimeInterval": 45, // minutes "rocketsLaunchPreset": "Default", // selected launch preset "randomRocketsLaunchPresets": false }
Presets
1 preset in the example below:
"LaunchPresets": { "Default": { "soundAlarm": true, // play sound alarm on launch start "soundAlarmDuration": 11, // seconds "chatNotifications": true, // notify players "chatNotificationsForNeardbyPlayersOnly": false, // notify only nearby players "showMapMarker": true, // show markers on the map (both: red and orange) "mapMarkerLootingStageDuration": 10, // duration in minutes for the orange marker "noDamage": false, // turns damage off "dropLoot": true, // allows to control loot drop "dropLootMultiplier": 1.0, // multiplier for the loot amount dropped by each projectile "maxRadius": 350, // rocket launch zone max radius "minRadius": 250, // rocket launch zone min radius "maxRocketsAmount": 12, // max 12 rockets in one launch "minRocketsAmount": 7, // min 7 rockets in one launch "maxDuration": 120, // seconds "minDuration": 60, // seconds "damageMultiplier": 1.0, // global damage multiplier that affects each projectile "projectiles": [ "NuclearMLRSRocket" // projectile type ] } }
Projectiles configuration
1 projectile in the example below:
"Projectiles": { "NuclearMLRSRocket": { // name used in a launch presset "damageMultiplier": 3.0, // projectile damage multiplier for each damage type "explosionRadius": 45, // meters "minExplosionRadius": 25, // meters, minimum radius "gravityModifier": 0, // affects projectile velocity "velocity": 35, // projectile velocity "nuclearCharge": true, // if “true” a nuclear charge will be added to the projectile "nuclearZoneRadius": 50, // meters, radiation zone radius after the explosion "nuclearZoneRadiationAmount": 55, // radiation damage in the zone per second "nuclearZoneDuration": 5, // minutes "prefab": "ammo.rocket.mlrs", // game object used for this projectile "additionalDamageTypes": [ // additional damage type { "type": "Radiation", // types list is available in the plugin file "damage": 1000 } ], "itemOnLootDropSpot": "assets/content/structures/excavator/prefabs/diesel_collectable.prefab", // spawns this item on each explosion spot "dropLootList": [ // list of loot to spawn { "item": "metal.fragments", "min": 500, "max": 1000 }, { "item": "sulfur", "min": 300, "max": 1000 }, { "item": "lowgradefuel", "min": 250, "max": 500 }, { "item": "charcoal", "min": 500, "max": 1000 }, { "item": "explosives", "min": 3, "max": 12 } ] }}
-

$19.99
PlaceryExtended
Experience TRUE "Creative Mode" With Placery
-WIP - Getting Mountable Items Or Deployables to correctly be indentified to players can mount chairs on walls
-WIP - Futher improvements + Correction to any deployables/items that was looked over
-WIP - Allowment Of Placement of deployables on Terrain
-WIP - WallPaper Compability
Preview Video To Show Some Of The Possibilites With The Plugin - Video is from before most recent update so things not working or been incorrect here have been fixed with the new version 1.0.7 of PlaceryExtended
Placery Extended is a powerful Rust plugin designed to enhance your building experience by allowing players to place any deployable item directly onto walls, roofs, and other surfaces, both inside and outside your base. Whether you're fortifying your base or adding aesthetic touches, this plugin grants you precise control over where and how deployables are placed. The plugin includes advanced correction and snapping features to ensure deployables like auto turrets, mines, barricades, and even seeds are placed seamlessly, even upside down on roofs.
Key Features:
Extended Placement Options: Place any deployable, with support for walls, roofs, and various surfaces. Customize your base to your liking by placing items in unconventional ways, such as flameturrets on walls or metal barricades upside down on roofs. Even seeds can be placed on walls or roofs, allowing you to grow plants without the need for a planter or ground placement. User Permissions: Manage who can utilize these placement features with a simple permission system. Fine-tune access with permissions like placeryextended.use, or grant admin-level access for bypassing restrictions. Bypass Cooldown Permission: Admins or players with the bypass permission can skip the deployable placement cooldown. However, be aware that this could potentially allow players to write messages using seeds on walls, which may cause server lag if many players do this simultaneously. Admin Placement on Player Bases: Admins with the appropriate permissions can place deployables on players' bases, bypassing standard building privileges, allowing for greater flexibility in administrative tasks. Configurable Blacklist: Customize which items can be placed on certain surfaces using an intuitive blacklist feature to prevent overpowered or unintended gameplay mechanics. Advanced Snap-to-Surface Placement: Deployables automatically align and snap to supported surfaces, ensuring they don’t float or misalign. The plugin uses custom alignment logic for different types of entities, ensuring items like beds, signs, frames, and towers are placed correctly based on the environment. Skins Support for Deployables: Deployables placed with skins will retain the selected skin when deployed, enhancing customization and allowing players to further personalize their base aesthetics. NoEscape Compatibility: Support for NoEscape plugins includes options to block deployable placement during combat, raids, or escape attempts, ensuring balanced and fair gameplay. Language File Customization: All in-game messages sent to players are stored in a language file, making it easy for server administrators to customize or translate messages. Optimized for Performance: Placery Extended is lightweight and optimized, performing real-time checks on player actions without straining server resources. Placement Toggle Command: Players with permission can toggle the plugin on and off for their personal use via the /toggleplacery command, allowing for more control over when they use the extended placement features.
Admin Commands:
/addblacklist <item> – Add an item to the blacklist, preventing it from being placed on certain surfaces. /removeblacklist <item> – Remove an item from the blacklist, allowing it to be placed again. /getblacklist – View the current blacklist of restricted items. /clearblacklist – Clear all items from the blacklist. /reloadplacery – Reload the plugin configuration without restarting the server, applying any changes made to the config file immediately.
Player Commands:
/placeryhelp – Display a list of available commands for both regular users and admins. /toggleplacery – Enable or disable the placement functionality for individual players based on permissions.
How It Works:
Placery Extended introduces a special right-click placement process, allowing players to place deployables in areas that are normally restricted, such as walls, roofs, and other unconventional surfaces. To place items using Placery Extended, players must right-click or hold right-click during the placement process. This ensures the plugin’s enhanced features are only used when needed. For players who prefer the traditional Rust placement logic, left-click can still be used as usual, allowing them to place items in the default Rust-approved areas. This dual system ensures that Placery Extended does not interfere with Rust’s default mechanics, giving players the flexibility to choose when to use the extended placement options and when to stick to the standard behavior.
New Updates:
Skins Support for Deployables: Deployables placed with skins will display the selected skin when deployed, allowing players to personalize the appearance of deployable items. Seed Placement: Seeds can be placed on walls or roofs, allowing players to grow plants without needing a planter or ground placement inside their compound. NoEscape Integration: With the NoEscape support, admins can block placement during specific events, such as combat, raid, or escape scenarios, providing better control over gameplay. Language File Support: All in-game messages are stored in an easily editable language file, allowing for seamless customization or translation to match server preferences. Admin Placement on Player Bases: Admins can now place deployables on player-owned structures, bypassing standard building privilege checks, allowing for more control and flexibility. Dynamic Deployable Blacklist: Blacklisted items can be dynamically added or removed by players with admin permission, streamlining configuration management without server restarts.
Configuration:
The plugin includes a user-friendly configuration file where you can:
Blacklist specific items from being placed on walls, roofs, or other surfaces to maintain balance. Define eligible surfaces for deployables (e.g., "wall," "roof," "foundation," "shelf," "stair"). Control placement cooldowns and specify the radius around players for placement. Configure NoEscape settings to block placement during combat, raids, or escape attempts.
Example Configuration:
{ "Blacklist": [ "wall.external", "wall.frame", "wall.window", "ladder.wooden.wall", "chineselantern", "chineselanternwhite", "xmas.lightstring", "xmas.lightstring.advanced", "ceilinglight", "gunrack_stand", "xylophone", "piano", "pinata", "discoball", "microphonestand", "sled", "sled.xmas", "cupboard.tool", "cupboard.tool.shockbyte", "cupboard.tool.retro", "elevator", "generator.wind.scrap", "lock.code", "lock.key", "door.closer" ], "Placement": [ "floor", "wall", "foundation", "ceiling", "stair", "shelve", "roof" ], "PlacementCooldown": 2.0, "PlacementRadius": 4.0, "IsCombatBlocked": false, "IsEscapeBlocked": false, "IsRaidBlocked": false }
Blacklist: Items listed here (e.g., "wall.external") cannot be placed on specified surfaces. Placement: Specify the surfaces where deployables can be placed (e.g., "floor," "roof," "wall"). Cooldown & Radius: Set the cooldown and radius around the player for deployable placement. NoEscape: Define whether placement is blocked during combat, escape, or raids.
Perfect For:
Creative Base Building: Offer your players greater creative freedom with more versatile placement options, perfect for elaborate base designs. Roleplay Servers: Create immersive, dynamic environments with unrestricted deployable placements. Competitive Servers: Maintain balance with customizable restrictions and NoEscape integration to ensure item placements remain fair.
Installation:
Drag and drop the plugin into your Rust server’s plugin directory, adjust the configuration to your needs, and you’re all set!
Compatibility:
Placery Extended is compatible with most Rust mods, including NoEscape, and requires Oxide/uMod for installation. Note: UberTool may cause conflicts with this plugin, so it is recommended to disable UberTool for better functionality.
Get Started: Transform your server’s building mechanics with Placery Extended! Purchase now and unlock new possibilities for your Rust community.
Plugins By Duff
https://discord.gg/2KBPH7hXb7
- #placement
- #options
- (and 4 more)
-
$10.99
DropEvent
DropEvent
DropEvent is a plugin that I have been using on my server for several years now.
It's a very popular event because it encourages PVP.
It's not even about the loot anymore, but about the fun, as the whole server gathers at one point.
I have completely reworked this plugin so that there is a config and all the necessary things so that you can use it easily.
Pictures speak louder than words, so I've picked out an old video for you.
Functions
It is important that you have MonumentFinder.
DropEvent is dependent on the API!
Thanks to, WhiteThunder!
MonumentFinder -> MonumentFinder
You can start the DropEvent command:
/flashdropevent
You can start the DropEvent console:
flashdropevent
To use the command, you need the authorization:
dropevent.admin
Config
{ "Settings": { "SupplySignalCount": 3 } }
load, run, enjoy 💝
Support Discord