-
Content Count
236 -
Joined
-
Last visited
Content Type
Downloads
Forums
Store
Support
module__dplus_manager
Files posted by MikeHawke
-
StartingPoint
StartingPoint is a simple method of setting a single spawn point.
Features
Teleports new players to Start Point on spawn.
Simple command to set spawn point.
Automatic Zone creation when enabled.
Automatic data clear on map change.
Provision to give a certain kit on player spawn.
Ability to set it as global spawn for all players new or old.
Provision to force players to skip DeathScreen.
Optional Dependencies
Zone Manager << Required to use Zone Functions.
Kits << Required For Kits Functions
Permission
StartingPoint.Admin << Required to set spawn point.
Commands
/EnableStart << Toggles the StartPoint Enabled Variable in config (to be used after Start Point is set
/SetStart << In game sets the spawn point (Start Point) and updates config.
WipeStart << In Console clears the data file which resets the initial spawns.
Configuration
The settings and options for this plugin can be configured in the startingpoint.json file under the oxide/config directory. The use of a JSON editor or validation site such as jsonlint.com is recommended to avoid formatting issues and syntax errors.
{ "StartPoint Enabled true/false": false, "StartPoint Location": { "x": 28.01832, "y": 1.85290134, "z": 968.511536 }, "AutoRespawn true/false": false, "Only Spawn at SpawnPoint true/false": false, "Give Kit On Spawn true/false": false, "KitName": "AutoKit", "Zone On StartPoint true/false": false, "Zone Radius": 5, "Zone Flags": "pvpgod, noplayerloot", "Use Messages true/false": true, "Enter Message": "This is a <color=#ff0000>NO</color> PVP Spawn!", "Exit Message": "Flying the nest, Good Luck", "Spawn Building Load Timer(Increase if building around Spawn isnt spawning in time)": 4.0 } Zone Manager is required to use Zone Functions.
Use Messages needs to be true to use the Enter and Exit Message function
color tags are usable in the Enter and Exit Messages but must be in hex format.
If "Only Spawn at SpawnPoint true/false" Is set to true please ensure you clear the DataFiles for Starting Point with WipeStart in console as players that have already died will continue to spawn as normal.
- 2,003
- 63
- 4
Updated
-
RustyBangers
Rusty Bangers is a UI for Vehicle Licence.
Check out updates below
Dependency
Vehicle Licence
Permissions
Rusty Bangers now requires vehiclelicence.use permission to be opened
AND NOW
Players can now only see options for vehicles that they have been granted permissions to spawn.
Command
/rusty << opens the UI
Configuration
{ "Page1PermSettings": { "MiniCopter Permission": "vehiclelicence.minicopter", "Scrap Transport Heli Permission": "vehiclelicence.transportcopter", "Hot Air Balloon Permission": "vehiclelicence.hotairballoon", "Chinook Permission": "vehiclelicence.chinook", "Rhib Permission": "vehiclelicence.rhib", "RowBoat Permission": "vehiclelicence.rowboat", "Sedan Permission": "vehiclelicence.sedan", "Horse Permission": "vehiclelicence.ridablehorse" }, "Page2PermSettings": { "Small Chassis Permission": "vehiclelicence.smallchassis", "Medium Chassis Permission": "vehiclelicence.mediumchassis", "Large Chassis Permission": "vehiclelicence.largechassis", "Small Mod Car Permission": "vehiclelicence.smallmodularcar", "Medium Mod Car Permission": "vehiclelicence.mediummodularcar", "Large Mod Car Permission": "vehiclelicence.largemodularcar" }, "PageSettings": { "Second Page active": true }, "ButtonSettings": { "Buy Button Color": "1 0 0 1", "Deliver Button Color": "0 1 0 1", "Recall Button Color": "0 0 1 1", "Kill Button Color": "0.5 0.5 0.5 1" } } Set your config Variables to the same details displayed in your Vehicle Licence Config
Button Color Configuration is done in the RGBA format with values between 0 and 1. Examples at bottom.
Vehicle licence config
Here is a pastebin link for the config I use.. if your missing cars and chassis this contains them as you have to manually create them now. (Set prices and cool downs to your requirements mine maybe weird because it's for testing)
https://pastebin.com/VBH8HjZz
Video
Color Examples
blackSolid black. RGBA is (0 0 0 1).
blueSolid blue. RGBA is (0 0 1 1).
clearCompletely transparent. RGBA is (0 0 0 0).
cyanCyan. RGBA is (0 1 1 1).
grayGray. RGBA is (0.5 0.5 0.5 1).
greenSolid green. RGBA is (0 1 0 1).
greyEnglish spelling for grey. RGBA is the same (0.5 0.5 0.5 1).
magentaMagenta. RGBA is (1 0 1 1).
redSolid red. RGBA is (1 0 0 1).
whiteSolid white. RGBA is (1 1 1 1).
The Last digit dictates Alpha channel... so for an opaque appearance select a value below 1 E.g. 0.7
UPDATE
V1.0.4 Global configuration section removed thanks to Arainrr exposing fields in VehicleLicence for the RustyBangers project.
- vehicle licence
- ui
- (and 7 more)
- 4,351
- 453
- 22
Updated
-
DropBox Extension
The Dropbox Extension creates a backup of your Rust files and uploads them to your Dropbox account.
Video Below Explaining Usage and setup
Requires a Dropbox developer app to be made at http://dropbox.com/developer
to get an OAuth2 Token
and a directory in your Dropbox folder.
File is contained in a zip. unzip the folder to find Oxide.Ext.DropBox.dll
Power off your server, place the .dll in your RustDedicated_data/managed folder
Please note some providers do not grant access to this folder you may need to open a support ticket with your host
Powering on the server will create a file in the oxide/config folder.
Configuration
{ "OAuth2Token": "Token here", "DropBoxDir": "DropBox_Directory", "BackupInterval": 3600, "BackupOxideConfig": true, "BackupOxideData": true, "BackupOxideLang": true, "BackupOxideLogs": true, "BackupOxidePlugins": true, "BackUpServer": true, "FileList": [] } V1.0.1 > BackUpServer value will save any files in your rust instance/server folder (maps, saves, etc)
By default the extension will back up all of the oxide folder.. however if you only wish to backup specific files in the directory or say HurtWorld files set the values in FileList.
E.g.
"FileList": ["autosave_DiemensLand.plr", "autosave_DiemensLand.wld"] Once you have changed the settings a reboot will be required.
Video
- 720
- 99
- 0
Updated
-
RustyBanLite
RustyBan is a simple no hassle Community Ban system.
NEW CENTRALIZED BANNING API AT BOTTOM
RustyBanLite will search our database whenever a player connects, If they have been banned off one of our partnered servers it will prevent entry to the player.
No configuration needed, No messing about, Just drop the plugin in and start your protection today.
Our database of cheaters and troublemakers is growing daily... Don't get caught with your pants down!
RustyBan From V1.0.3 will create a datafile of each warning.. this will wipe on map change automatically. This is so that RustyBan will only send warnings of known players once per wipe.
Configuration
We have a configuration if you want to change the default setup.
None of these setting are required to start your protection however if you want to use discord web hooks or allow banned players to join.. this is where you do it..
use of discord requires Discord Messages from uMod
Bypass List If you have a player you can vouch for you can add their Steam ID to the bypass list and they will bypass RustyBan checks when connecting.
This is a list format so needs to be written like ["steamid"] for one or ["steamid","steamid","steamid","etc"] for more.
{ "Allow Players But Warn Admin": false, "Warn To Discord": false, "Discord webhook": "Discord Webhook", "Bypass List": [] } For more information on the Project and to learn about becoming a Partnered server come see us at http://www.RustyBan.com
***NEW From RustyBan***
RustyBans now has a Centralized Banning API, Works the same as the RustyBanLite.
You can use the database on vanilla servers.
Just set the convar
server.bansServerEndpoint http://api.rustyban.com/centralcheck.php?steamId= You can look up more on the Centralized Banning system here https://wiki.facepunch.com/rust/centralized-banning
- admin tool
- ban
- (and 2 more)
- 1,924
- 169
- 0
Updated
-
STFU
STFU is a simple player voice muting system (that doesn't interfere with game chat or running commands like some others do)
STFU handles times as Seconds, Minutes, Hours, Days, or perm mutes.
Optional output to discord via webhook (Requires DiscordMessages by Slut on uMod)
Permissions
STFU.user << required to use in-game commands
In-Game Commands
To mute:
/STFU <target> <duration> "reason" Reasons for multiple words must be contained in quotations
E.g.
/STFU Death 2d "Shouting reeee continuously."
for perm mutes, just use the word "perm."
E.g
/STFU Death Perm "Reee'd again."
To Unmute:
/UnShut <target> E.g
/UnShut Death
Console Commands
same as above but without the slash
To Mute:
STFU <Target> <Duration> "reason" To Unmute:
UnShut <Target> Console all so has the command.
STFULookUp Which will print all current bans to console
Configuration
The configuration is only needed if you wish to output to discord via DiscordMessages
{ "Report to Discord": false, "Discord Webhook": "DiscordWebhook URL" }
- admin tool
- mute
- (and 8 more)
- 1,134
- 64
- 2
Updated
-
PhoneCore
PhoneCore is a Grand Theft Auto Style GUI that is easy to setup and customise.
UPDATE? Go To Bottom
PhoneCore is a zip file with 4 variations to the code, images and psd/afphoto allowing you all the options you could think of.
Code included is a 2x3 Phone, 3x4 phone and now 2x3 with 4 pages and 3x4 with 4 pages!
Fire off any command that would usually be used with a "/" via this tasty little ui (e.g. /kits /backpack /dis)
Configuration
Configuration is simple, Drop in the urls for the image you want (list in image folder of default URLS) and add a command,Save, Reload and enjoy.
Both the configs follow the same setup, just one is longer than the other.
The use of a JSON editor or validation site such as jsonlint.com is recommended to avoid formatting issues and syntax errors.
{ "Use Permission phonecore2x4.show": false, "Background Image Url": "https://i.imgur.com/GY90fRP.png", "Image Url in place One": "https://i.imgur.com/bQGcmWL.png", "Command For Place One": "", "Image Url in place Two": "https://i.imgur.com/WAY6j4A.png", "Command For Place Two": "", "Image Url in place Three": "https://i.imgur.com/rOLnNiY.png", "Command For Place Three": "", "Image Url in place Four": "https://i.imgur.com/EbBRqT5.png", "Command For Place Four": "", "Image Url in place Five": "https://i.imgur.com/3mLH0mP.png", "Command For Place Five": "", "Image Url in place Six": "https://i.imgur.com/6RjWdNd.png", "Command For Place Six": "" } Command
/Phone << opens the phone GUI
Permission
Each of the codes has an option to use permissions in the config.. the permission is pluginname.show and is required to open the PhoneUI is the config value is set to true
e.g. PhoneCore3x4.show
Update
Version 1.0.1... Added 2 Extra codes to the zip, These "multi" versions have 4 pages.. Watch the video Below.
Version 1.0.1... Code 2x3 had an error that prevented compiling.. this has been rectified.
Version 1.0.2... Added Rules so that blank unused buttons are no longer clickable.
Version 1.0.3... Added option in config to require a permission to open the UI
Images
These are images that are included & random things I've added to hosting that you can use on with PhoneCore
Icons:
https://i.imgur.com/6RjWdNd.png Blank
https://i.imgur.com/EbBRqT5.png Backpack
https://i.imgur.com/0o3q7BC.png Close
https://i.imgur.com/3mLH0mP.png Discord
https://i.imgur.com/Vz4vVaw.png Hammer
https://i.imgur.com/rOLnNiY.png Info
https://i.imgur.com/bQGcmWL.png Facemask/Kits
https://i.imgur.com/mnBkYwB.png Message
https://i.imgur.com/WAY6j4A.png Minicopter
https://i.imgur.com/cMjS34N.png WorkBench
https://i.imgur.com/eRN5lCU.png Door
https://i.imgur.com/uKCyxev.png House/Teleport
https://i.imgur.com/cclUBi3.png Kit/Present
https://i.imgur.com/62Tu4HV.png Lift/Elevator
https://i.imgur.com/ldwvf7L.png Wolf/Pet
https://i.imgur.com/IqvuMKd.png Stats
https://i.imgur.com/1Of9ltc.png Skin/Hoodie
https://i.imgur.com/8DJoUQT.png Rocket Turret
https://i.imgur.com/9Yom8S9.png Brush
https://i.imgur.com/rUlh3Qk.png Portal
Backgrounds:
https://i.imgur.com/GY90fRP.png Default/Phone GUI
https://i.imgur.com/MCjSq33.png Tower
https://i.imgur.com/rYwQO6C.png Furnace
https://i.imgur.com/J4rvbCJ.png Wolf
https://i.imgur.com/d7b2LmJ.png SatAirDrop
https://i.imgur.com/1NZyPXl.png Night
https://i.imgur.com/UqdQAWL.png RustPoster
https://i.imgur.com/m48YGmJ.png Waving
https://i.imgur.com/WJ5Qr6w.png Face
https://i.imgur.com/XHLySft.png Hemp
https://i.imgur.com/AweYNbi.png MikeHawke
https://i.imgur.com/vVye6Wu.png Cobalt Rewards
https://i.imgur.com/htVCYhH.png Cobalt Regen
- 6,887
- 251
- 36
Updated
-
PVETurrets
PVETurrets Disables Turrets and GunTraps aiming and/or shooting players when enabled.
This will allow players to place turrets for decoration / targeting NPC's etc
Can be used in conjunction with raidable bases (see bottom)
Permission
PVETurrets.admin < Required to use the in game toggle commands
Commands
/PVETurret tur << toggles Turret PVE on or off
/PVETurret trap << toggles Gun Trap PVE on or off
Configuration
These values can be changed in game with the above commands.
The values are either true or false.
{ "PVE Turret Active": false, "PVE GunTraps Active": false }
Raidable bases
If you wish to use this plugin to have the turrets/gun traps on Raidable Bases target players whilst blocking player placed turrets/gun traps from targeting other players.
1. Set both PVETurrets config values to true
2. Open the config for CopyPaste and set the value for EntityOwner to false:
"EntityOwner (true/false)": false 3. Reload CopyPaste (o.reload CopyPaste)
After reloading CopyPaste the Turrets and Gun Traps in your raidable base will target players but player placed turrets and Gun Traps will not.
- 1,040
- 122
- 6
Updated
-
EasyVote
Easy Vote is a player reward system for server votes on Rust-servers.net, rust-servers.info and BestServers.com.
This is a fork of EasyVote by Exel80 EasyVote by Exel80 on Github and thus licensed under his MIT licence.
Changes are listed below.
Required DiscordMessages on Umod to send webhook
Features
Closest reward feature.
Players receive a reward every time they vote successfully. You can edit the available rewards in the configuration file.
You can make more reward variables by adding new line in Commands json. Commands are just console commands, so this way EasyVote support every plugin which have console commands.
Add custom reward based how many time player has voted. You can add many as you like custom rewards, there is no limits.
Supports Rust-Servers.net, Rust-Servers.info and BestServers.com but you can add other voting API sites by editing config file.
Global Announcement - Alert to every player in server. Who and how many time player has voted.
Discord Announcement - Alert to every player in server. Who and how many time player has voted.
And much more!
Reward Variables
These are called "Commands" in config file!!!
Also note that these are just CONSOLE COMMANDS, so you can make more by just add new line! Rename variable name and use it in Rewards.
Note: If you make new "Commands", you have to add same named line in lang/EasyVote.json lang file. You can see existing commands there as well.
item.name: <amount> -- You get item list from Oxide itemlist addgroup: <group>-<time> -- Add a player to a group for a specific time (Request: Timed Permissions) grantperm: <permission>-<time> -- Give a player a permission for a specific time (Request: Timed Permissions) money: <amount> -- How much gave money per vote (Request: Economics) oxidegrantgroup: <group name> -- Add player to group oxidegrantperm: <permission name> -- Grant permission to player oxiderevokegroup: <permission name> -- Remove player from group oxiderevokeperm: <group name> -- Revoke permission to player rp: <amount> -- Add points to players profile (Request: ServerRewards) zlvl-wc: <amount> -- How much add Woodcutting level per vote (Request: ZLevels) zlvl-m: <amount> -- How much add Mining level per vote (Request: ZLevels) zlvl-s: <amount> -- How much add Skinning level per vote (Request: ZLevels) zlvl-c: <amount> -- How much add Crafting level per vote (Request: ZLevels) zlvl-*: <amount> -- How much add ALL level per vote (Request: ZLevels) Variables
Use the below replacement variables when you make own commands.
{playername} -- player's display name {playerid} -- player's Steam ID {value} -- the reward list {value2}** the reward list split with - character; example:addgroup: GroupName-30d` Permissions
This plugin uses Oxide's permission system. To assign a permission, use oxide.grant <user or group> <name or steam id> <permission>. To remove a permission, use oxide.revoke <user or group> <name or steam id> <permission>.
easyvote.use -- Allows player to use the available chat commands
Chat Commands
/vote -- Show vote link(s) /claim -- Claim vote reward(s) /rewardlist -- Display what reward(s) can get Configuration
The settings and options for this plugin can be configured in the EasyVote.json file under the oxide/config directory. The use of a JSON editor or validation site such as jsonlint.com is recommended to avoid formatting issues and syntax errors.
{ "Commands": { "money": "deposit {playerid} {value}", "oxidegrantgroup": "oxide.usergroup add {playerid} {value}", "oxidegrantperm": "oxide.grant user {playerid} {value}", "oxiderevokegroup": "oxide.usergroup remove {playerid} {value}", "oxiderevokeperm": "oxide.revoke user {playerid} {value}", "rp": "sr add {playerid} {value}", "tempaddgroup": "addgroup {playerid} {value} {value2}", "tempgrantperm": "grantperm {playerid} {value} {value2}", "zlvl-*": "zl.lvl {playerid} * {value}", "zlvl-c": "zl.lvl {playerid} C {value}", "zlvl-m": "zl.lvl {playerid} M {value}", "zlvl-s": "zl.lvl {playerid} S {value}", "zlvl-wc": "zl.lvl {playerid} WC {value}" }, "Discord": { "Discord webhook (URL)": "", "DiscordMessage Enabled (true / false)": "false", "Enable @here alert (true / false)": "false", "Title": "Vote" }, "Rewards": { "@": [ "supply.signal: 1", "zlvl-*: 1" ], "first": [ "oxidegrantperm: kits.starterkit" ], "vote10": [ "money: 1000", "rp: 50", "tempgrantperm: fauxadmin.allowed-5m" ], "vote3": [ "oxidegrantgroup: member" ], "vote6": [ "money: 500", "tempaddgroup: vip-1d1h1m" ] }, "Servers": { "ServerName1": { "Rust-Servers.net": "ID:KEY" }, "ServerName2": { "Rust-Servers.info": "ID:KEY" }, "ServerName3":{ "BestServers.com" :"ID:KEY" }, }, "Settings": { "Enable logging => oxide/logs/EasyVote (true / false)": "true", "Globally announcment in chat when player voted (true / false)": "true", "Prefix": "<color=#00ffff>[EasyVote]</color>", "Send thank you message to player who voted (true / false)": "true", "Vote rewards cumulative (true / false)": "false" }, "VoteSitesAPI": { "Rust-Servers.info": { "API Claim Reward (GET URL)": "https://api.rust-servers.info/votesclime/?key={0}&steamid={1}", "API Vote status (GET URL)": "https://api.rust-servers.info/votescheckclime/?key={0}&steamid={1}", "Vote link (URL)": "http://rust-servers.info/server/id-{0}.html" }, "Rust-Servers.net": { "API Claim Reward (GET URL)": "http://rust-servers.net/api/?action=custom&object=plugin&element=reward&key={0}&steamid={1}", "API Vote status (GET URL)": "http://rust-servers.net/api/?object=votes&element=claim&key={0}&steamid={1}", "Vote link (URL)": "http://rust-servers.net/server/{0}" }, "BestServers.com": { "API Claim Reward (GET URL)": "https://bestservers.com/api/vote.php?action=claim&key={0}&steamid={1}", "API Vote status (GET URL)": "https://bestservers.com/api/vote.php?action=status&key={0}&steamid={1}", "Vote link (URL)": "https://bestservers.com/server/{0}" } } }
Changes
Color tags updated to Hex Code.
Removal of Beancan API as servers are no longer approved.
Inclusion of Pavel Neelers API for rust-servers.info
Updated to api requirements for DiscordMessages
ORIGINAL CREDITS
Calytic, for adding beancan.io support helping with the config reading
MJSU, for their custom Easy Vote plugin and all the effort done so far
Luke Spragg, for helping hotfix plugin
FURTHER CREDIT
TheExel80 for bringing this plugin together and supporting it until recently
FAQ
Get Your API Keys:
Add your server to Rust-Server.net, Rust-Server.info, or BestServers.com, or all.
You can find the id from the last part of the voting site's URL for your server.
in Rust-Server.info id is right here https://rust-servers.info/server/id-123.html <- in this case, is 123
In Rust-Servers.net, id is right here http://rust-servers.net/server/123 <- in this case, is 123
In BestServers.com, id is right here http://BestServers.com/server/123 <- in this case, is 123
Key is secret key what you should not share any one. Key is hided in vote site dashboard. Login your account and navigate to modify your server, somewhere there should be your apikey, key, secret token, etc.
Rust-servers.info displays your API at the top of the My Server section
Note that you can add all your servers in this config and let player vote all your server. It also let players claim reward in any server. Here is example how it could look after you finished to found your ID and KEY.
"Servers": { "My Server x10": { "Rust-Servers.info": "12345:gsvdwsdsdsfddfgsfdg21342uJTRA9oOPIASCNDJK12343b", "Rust-Servers.net": "12345:gsvdwsdsdsfddfgsfdg21342uJTRA9oOPIASCNDJK12343b", "BestServers.com" : "12345:gsvdwsdsdsfddfgsfdg21342uJTRA9oOPIASCNDJK12343b" }, "My Second server x10000": { "Rust-Servers.info": "12345:gsvdwsdsdsfddfgsfdg21342uJTRA9oOPIASCNDJK12343b", "Rust-Servers.net": "12345:gsvdwsdsdsfddfgsfdg21342uJTRA9oOPIASCNDJK12343b", "BestServers.com" : "12345:gsvdwsdsdsfddfgsfdg21342uJTRA9oOPIASCNDJK12343b" } }, After that trouble, feel free test that everything is working. Run reload command in server console: oxide.reload EasyVote.
If you found out that you do not get any reward after voting server or /vote chat command not showing any server what you just added. Then open logs (oxide/logs/EasyVote) and there you can see what cause the error.
If everything works just fine then start modifying rewards settings.
What is Closest reward feature?
Here is an example configuration:
"Rewards": { "first": [ "oxidegrantperm: kits.starterkit" ], "@": [ "supply.signal: 1" ], "vote1": [ "money: 10" ], "vote5": [ "money: 50" ] }, Plugin will always give the last/closest reward based on their votes.
"@" means all the time reward, "first" means once time reward.
[Voted 1th] -> Vote1 reward first & @ reward [Voted 2th] -> Vote1 reward @ reward [Voted 3th] -> Vote1 reward @ reward [Voted 4th] -> Vote1 reward @ reward [Voted 5th] -> Vote5 reward @ reward [Voted 6th] -> Vote5 reward @ reward If "Vote rewards cumulative" is enabled from config. Player will got all past reward(s), like so..
[Voted 1th] -> Vote1 reward first & @ reward [Voted 2th] -> Vote1 reward @ reward [Voted 3th] -> Vote1 reward @ reward [Voted 4th] -> Vote1 reward @ reward [Voted 5th] -> Vote1 & Vote5 reward @ reward [Voted 6th] -> Vote1 & Vote5 reward @ reward
How can I make a new command for my rewards?
All "Commands" are just console commands. Make new line under last line in "Commands". Also remember add a comma character in above line example
"zlvl-wc": "10", << Dont forget that comma "hello": "say {value}" << new command Now you can add "hello" in rewards, like this:
"Rewards": { "@": [ "supply.signal: 1", "hello: Potato", << New command will say Potato in chat "zlvl-*: 1" ] } Save all and oxide.reload EasyVote
- 3,315
- 411
- 6
Updated
-
The Button
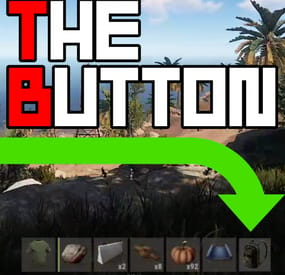
Customizable 7th Button.
Easy to setup, Default is a backpack image and command
Use any command that would usually require a slash e.g. "/Backpack" becomes "Backpack" in the config
Permissions
TheButton.use << Required to use The Button
Command
/button << toggles button on or off.
Configuration
{ "GlobalSettings": { "Image Url for The Button": "https://i.imgur.com/7L1uDrs.png", "Command For The Button": "backpack", "Background color of Button RGBA format": "0.3 0.3 0.3 0.8", "Open By Default true/false": true }, "AlignmentSettings": { "AnchorMin": "0.645 0.023", "AnchorMax": "0.688 0.095" } }
AnchorMin And Max are set roughly to the position right of the hot-bar but can appear slightly different depending on the players resolution.
The default value in the Config is for 16:10....
theres 16:9: AnchorMin": "0.645 0.029", AnchorMax": "0.691 0.104"
theres also to the left 16:9: AnchorMin": "0.295 0.029", AnchorMax": "0.341 0.104",
Color Examples
blackSolid black. RGBA is (0 0 0 1).
blueSolid blue. RGBA is (0 0 1 1).
clearCompletely transparent. RGBA is (0 0 0 0).
cyanCyan. RGBA is (0 1 1 1).
grayGray. RGBA is (0.5 0.5 0.5 1).
greenSolid green. RGBA is (0 1 0 1).
greyEnglish spelling for grey. RGBA is the same (0.5 0.5 0.5 1).
magentaMagenta. RGBA is (1 0 1 1).
redSolid red. RGBA is (1 0 0 1).
whiteSolid white. RGBA is (1 1 1 1).
The Last digit dictates Alpha channel... so for an opaque appearance select a value below 1 E.g. 0.7
Updates
1.0.2 Added background color to config, added open or close by default to config, fixed errors on server load, added hook to hide button if using furnace splitter.
1.0.3 Removed Debug message and fixed force load on default being true
1.0.4 error on server load fixed.... for real this time
1.0.5 Loosing the will to live.... Changed red text stuff again, changed methods that call the ui, simplified code, expanded brackets, drank coffee.. if its still broken after this i'm removing the plug and stating again!
1.0.6 Not given up on life yet.. another possible fix for red text spamage.
1.0.7 I just broke everything
1.0.8 Set the permission to the GUI... if the player doesnt have the perm they dont see the button
- 8,858
- 761
- 36
Updated
-
JuanTime
JuanTime gives players a kit one time per wipe.
JuanTime will wipe its data of who has had the kit on map change/Server wipe.
Give one Kit, or a random kit from list
Dependency
Umod Rust Kits
Configuration
Easy one line config.. place name of kit in config, save and reload. (Case Sensitive)
Default:
{ "KitName": [] } One Kit:
{ "KitName": ["autokit"] } Multiple (picks one at random):
{ "KitName": ["autokit","poop","bum"] }
Command
JuanWipe << will wipe the list of people who have had the kit awarded to them (which is saved in Data)
Video
(ignore config part.. its changed.. look above)
- 1,413
- 85
- 0
Updated
-
Back To The Carpet
Take Your Protocol Back To The Carpet!
Change the default Protocol mismatch error message to something players can understand.
{ "ServerUpdateRequired": { "Server Update Required Message": "The Server Need Updating, Please Try Again Later" }, "ClientUpdateRequired": { "Client Update Required Message": "Your Client Needs Updating, Close Client And Reload" } }
- 1,233
- 88
- 0
Updated
-
NameCheck
NameCheck checks a players name to see if it contains part of the config list and then kicks the player with a custom message.
Prevent players advertising on your server with their display name.
Configuration
Default config looks like this
{ "Names": [], "Kick Message": "Change your name to enter this server" }
For a single entry input it in quotations like this
{ "Names": [".com"], "Kick Message": "Change your name to enter this server" }
For multiple entries enter them separated with a comma
{ "Names": [".com",".gg","skins"], "Kick Message": "Change your name to enter this server" } Just enter values, reload and forget about it.
- admin tools
- admin
- (and 4 more)
- 1,000
- 85
- 0
Updated
-
GetToDaChoppa
Nice and Simple.. Clears the fuel tank on Minicopter and Scrap Transport Heli spawns at the Bandit Camp and replaces it with the amount set in the config.
No need to change your stack size to counteract the new air wolf fuel give away.
Load this, set the amount and be happy
Configuration
{ "Amount of fuel to spawn with MiniCopters": 100, "Amount of fuel to spawn with Scrap Helicopters": 100 } No Perms
No Commands
Just Load, Set, Reload!
- rust
- helicopter
- (and 8 more)
- 2,529
- 285
- 5
Updated
-
Into The Boat
Combat fuel giveaway at the new boat houses.
Spawn Boats with a specified quantity of fuel.
If your new fishing village is polluting the seas with free lowgrade slap this bad boy onto your server and choke that leak!
Simple Setup, Same as Get To Da Choppa.. Load plugin, edit config with values, reload and enjoy.
Configuration
{ "Amount of fuel to spawn with RowBoats": 100, "Amount of fuel to spawn with Rhibs": 100 } Set amount and reload plugin.
Plugin will only effect RowBoats and RHIBS inside safe zones which will prevent player fuel loss on reboots.
- 1,161
- 139
- 1
Updated
-
ComTimer
ComTimer is a plugin that runs console commands after an amount of time.
Good for automating events quickly and easily
Set the commands you want to run into the config list.
Set a timer upper limit and a timer lower limit and the plugin will pick a number between and countdown... on completion it will run a command from the list and start the whole process over again.
any command that you can run in rcon you can run with this.
Configuration
Default configuration is as follows:
{ "Command List": [], "Upper Time In Seconds": 500.0, "Lower Time In Seconds": 200.0 } Setting a single command:
{ "Command List": ["say Welcome to the server"], "Upper Time In Seconds": 500.0, "Lower Time In Seconds": 200.0 } Setting more then one command:
{ "Command List": ["say Welcome to the server","callheli","giveall scrap 1"], "Upper Time In Seconds": 500.0, "Lower Time In Seconds": 200.0 }
Works well with plugins like CustomHeliTiers if the plugin doesn't have its own spawn timer:
{ "Command List": ["callheli 1","callheli 2","callheli 3","callheli 4","callheli 5","callheli 6"], "Upper Time In Seconds": 500.0, "Lower Time In Seconds": 200.0 }
- admin
- admin tools
- (and 6 more)
- 1,242
- 124
- 3
Submitted
-
Rules GUI
RulesGUI displays a screen overlay on connect or command that a player must agree to, to continue playing on your server.
This is a fork of the original work done by Pain Under his MIT Licence.
V2 Full Rewrite, Backup and delete your config content.
Features
Customiseable overlay that the player HAS to accept to continue playing on your server.
Chat command so that players can remind them selfs on the server rules at any time
Admin command to force player to re-read the rules
Variables
Version 2.0.0 has a very easy to understand config.
Background Image: True/False < Color or image as background
Background Color RGBA: "0 0 0 1" < BG Color if ^ is set to false (RGBA examples at bottom)
Background Image URL : << URL Of Background image if ^ is true
Font Size << Size of font... duh
Message Text: The message that will be displayed.
Display on every connection: True/False << Display the message on first connection only or every connection.
Disagree Kick Reason << If you disagree to the rules you get kicked from the server and the this will be displayed as the reason why
Formatting
As I have updated the code there is now more space to add text.. and as the text is no longer in a list format there is some formatting that needs to be applied.
For new line us \n (not /).
To make it look closer to the original use two \n\n
Color tags etc all still work.
Permissions
rulesgui.usecmd Required to use /rulesto command
Chat Commands
/rules Will display rules on screen
/rulesto "NameOrID" Will display rules on players screen.
Console Command
sendrules "PlayerName/ID" Will display the rules to selected player
Configuration
The settings and options for this plugin can be configured in the RulesGUI.json file under the oxide/config directory. The use of a JSON editor or validation site such as jsonlint.com is recommended to avoid formatting issues and syntax errors.
{ "Background Image true/false": true, "Background Color RGBA": "0.1 0.1 0.1 0.7", "Background Image URL": "https://i.ytimg.com/vi/yaqe1qesQ8c/maxresdefault.jpg", "Text Font Size": 22, "Message text": "<color=#00FFFF>Welcome!</color> <color=#ff0000>The following in-game activities are prohibited in the Game:</color>\n\n<color=#FFFF00>1.</color> Use of bots, use of third-party software, bugs.\n\n<color=#FFFF00>2.</color> Pretending to be a member of Administration.\n\n<color=#FFFF00>3.</color> Fraud, other dishonest actions.\n\n<color=#FFFF00>4.</color> Flooding, flaming, spam, printing in capital letters (CAPS LOCK).\n\n<color=#FFFF00>5.</color> Creating obstructions for other users, Greifing and bullying\n\n<color=#FFFF00>6.</color> Advertisement, political propaganda.\n\n<color=#ff0000>7. Racism! </color>\n\n<color=#0000FF>8. Failure to comply will land you in prison, continuing to break rules will land you a Ban!</color>", "Display on every connection true/false": true, "Disagree Kick Reason": "You disagreed with the rules!" }
Color Examples
blackSolid black. RGBA is (0 0 0 1). blueSolid blue. RGBA is (0 0 1 1). clearCompletely transparent. RGBA is (0 0 0 0). cyanCyan. RGBA is (0 1 1 1). grayGray. RGBA is (0.5 0.5 0.5 1). greenSolid green. RGBA is (0 1 0 1). greyEnglish spelling for gray. RGBA is the same (0.5 0.5 0.5 1). magentaMagenta. RGBA is (1 0 1 1). redSolid red. RGBA is (1 0 0 1). whiteSolid white. RGBA is (1 1 1 1). The Last digit dictates Alpha channel... so for an opaque appearance select a value below 1 E.g. 0.7
- gui
- information
- (and 4 more)
- 5,859
- 860
- 8
Updated
-
BanScreen
BanScreen displays a screen overlay to lock out a player and force them to acknowledge that they are being banned or warned.
Updating it 1.5.1 Back up Your Config
Features
Customiseable overlay that the player is greeted with when banning
Chat and console command so that a player can be banned from in game or rcon
Variables
Background
Color "255 0 0 1" << If Background image is false then you can select the color and transparency of the GUI in RGBA format (Examples at bottom) Enabled True/False << Sets a background or color screen ImageURL URL << Set Background Image Messages
"BAN_MESSAGE": "Failed to follow rules" << Message that will be displayed after player is banned and when they attempt to join the server FontSize "22" << Size of text on overlay "BAN_MESSAGES" ["line one","line two","line three"] << Text that will be displayed on Ban Screen "LC_MESSAGES" ["line one","line two","line three"] << Text that will be displayed of Last Chance Ban Acknowledge Button
Enabled True/False << Display button on Ban Screen Seconds till close if button is false: 10 << Amount of seconds the Ban screen is displayed before banning player if button is set to false Warn Acknowledge Button
Enabled True/False << Display button on Warning Screen Seconds till close if button is false: 10 << Amount of seconds the Warning screen is displayed before closing if button is set to false Permissions
BanScreen.usecmd Required to use /BanScreen & /LastChance command
Chat Commands
/BanScreen "Player/ID" Will display Ban Screen to player
/LastChance "Player/ID" Will display Last Chance Screen to player
Console Command
BanScreen "PlayerName/ID" Will display Ban Screen to player
LastChance "Player/ID" Will display Last Chance Screen to player
Configuration
The settings and options for this plugin can be configured in the BanScreen.json file under the oxide/config directory. The use of a JSON editor or validation site such as jsonlint.com is recommended to avoid formatting issues and syntax errors.
{ "Background": { "Color": "255 0 0 1", "Enabled": false, "ImageURL": "https://i.ytimg.com/vi/yaqe1qesQ8c/maxresdefault.jpg" }, "Ban Acknowledge Button": { "Enabled": true, "Seconds till close if button is false": 10 }, "Messages": { "BAN_MESSAGE": "Failed to follow rules", "BAN_MESSAGES": [ "<color=#000000>STOP!</color> <color=#FFFF00>You have not followed the rules of this server:</color>", "As a result,", "It is the opinion of the staff that you are issued with", "A SERVER BAN", "If you feel the ban is unfair, you may appeal the ban via the following methods", "Discord", "Website", "<color=#0000FF>Note that appeals are at the discretion of the server owner</color>", "<color=#0000FF>And may take up to 48 hours to complete </color>" ], "FontSize": "22" }, "Warn Acknowledge Button": { "Enabled": true, "Seconds till close if button is false": 10 }, "WarningMsgs": { "FontSize": "22", "LC_MESSAGES": [ "<color=#000000>STOP!</color>", "This is a warning.", "Continue to not follow the rules and we will issue you", "A SERVER BAN", "Your actions are in violation of the server rules", "If you need to be remided of the rules", "Use /Rules ", "<color=#0000FF>If you continue in this manner you will be removed from the server</color>", "<color=#0000FF>This is your final warning </color>" ] } }
Color Examples
blackSolid black. RGBA is (0 0 0 1). blueSolid blue. RGBA is (0 0 1 1). clearCompletely transparent. RGBA is (0 0 0 0). cyanCyan. RGBA is (0 1 1 1). grayGray. RGBA is (0.5 0.5 0.5 1). greenSolid green. RGBA is (0 1 0 1). greyEnglish spelling for gray. RGBA is the same (0.5 0.5 0.5 1). magentaMagenta. RGBA is (1 0 1 1). redSolid red. RGBA is (1 0 0 1). whiteSolid white. RGBA is (1 1 1 1). The Last digit dictates Alpha channel... so for an opaque appearance select a value below 1 E.g. 0.7
Thanks to my moderator and friend MrBytedk for being banned about a hundred times while testing functionality
- information
- informational
- (and 5 more)
- 2,474
- 226
- 2
Updated
-
Terminator
Terminator stops unwanted rust world spawns and kills rust events and entities via command.
Features
Ability to toggle config settings via console.
One time Kill or continual kill.
Item count.
Sets server convars where available to lighten load.
Commands
There are 3 main console commands..
DoIt/DoItNow/Comeon.
and 12 variables.
Bradley/Plane/Heli/CH47/Mini/Scrap/Horse/Hab/Boats/Ores/Cols/Animals
Bradley is the tank found usually at launch site
Plane is the Cargo plane that drops air drops
Heli is the attack helicopter
Ch47 is the chinook (this will break oil rig events if true)
Mini is MiniCopters
Scrap is Scrap Transport Helicopters
Horse is both wild horse and ridable horse
Hab is Hot Air Balloon
Boats is Row and RHIB Boats
Ores are all mineable Ore
Cols are Collectable entities (Pumpkins, Hemp, Corn, Stone, Metal, Sulfur, Wood, Halloween Cross, Easter Eggs...etc
Wood are Driftwood
Animals is all Animals (Bear, Bore, Stag, Wolf etc)
ModCars is the new modular cars.
DoIt followed by a variable will toggle the config property
E.g. DoIt Mini [Terminator] Terminating Minicopters is set to True DoIt Mini [Terminator] Terminating Minicopters is set to False
DoItNow followed by a variable will destroy all active entities of that type. (Also has the extra variable ALL)
E.g. DoItNow Mini [Terminator] Terminating MiniCopters [Terminator] None Out ComeOn Will count active items on the map from all of the variable options.
E.g. ComeOn [Terminator] There are 16 Minicopters Alive [Terminator] There are 7 Scrap Helis Alive [Terminator] There are 9 Horses Alive [Terminator] There are 9 HotAirBalloons Alive [Terminator] There are 900 Ores Alive [Terminator] There are 2152 Collectable Entites Alive [Terminator] There are 45 Boat Entites Alive [Terminator] There are 143 Animals Entites Alive
Configuration
The settings and options for this plugin can be configured in the Terminator.json file under the oxide/config directory. The use of a JSON editor or validation site such as jsonlint.com is recommended to avoid formatting issues and syntax errors.
{ "Kill BradleyAPC true/false": false, "Kill CargoPlane true/false": false, "Kill CargoShip true/false": false, "Kill Attack Heli true/false": false, "Kill Ch47 true/false": false, "Kill MiniCopters true/false": false, "Kill Scrap Helis true/false": false, "Kill Horses true/false": false, "Kill HotAirBalloons true/false": false, "Kill Ores true/false": false, "Kill Collectable Entites true/false": false, "Kill Boat Entites true/false": false, "Kill Animals true/false": false, "Kill Modular Cars true/false": false "Default Population Value For Scrap Transport Helis": 0, "Default Population Value For Minicopters": 0, "Default Population Value For Wild Horses": 1, "Default Population Value For Rideable Horses": 4, "Default Population Value For Hot Air Ballons": 1, "Default Population Value For Row Boats": 4, "Default Population Value For Rhibs": 1, "Default Population Value For Bears": 2, "Default Population Value For Chickens": 3, "Default Population Value For Stags": 3, "Default Population Value For Wolves": 2, "Default Population Value For Boars": 5, "Default Population Value For Modular Cars": 3 } Kill options are toggleable via the DoIt Command.
Default Population Values are what the server expects as a default number when NOT terminating the item in question...
This has been added as some servers (after the Vehicle update) have chosen to still have MiniCopters and Scrapcopters spawn in the wild...
E.g. "Default Population Value For Minicopters": 1 << would be the default value before the update. (now 0)
When the plugin is loaded it will set the server convars to the value in the config and when terminating is disabled.
Example Setup
In this example we want to remove Ores only...
Dropping in the plugin will update Server Convars as per the rules set out in the config.
[Terminator] Update Server Values scraptransporthelicopter.population: "1" minicopter.population: "1" horse.population: "1" ridablehorse.population: "4" hotairballoon.population: "1" cargoship.event_enabled: "True" [Terminator] Bradley Not Being Terminated [Terminator] Plane Not Being Terminated [Terminator] Heli Not Being Terminated [Terminator] Chinook Not Being Terminated [Terminator] Ores Not Being Terminated [Terminator] Collectables Not Being Terminated motorrowboat.population: "4" rhib.rhibpopulation: "1" bear.population: "2" chicken.population: "3" stag.population: "3" wolf.population: "2" boar.population: "5" By default the Config value for Terminating Ores is false.. so lets set it to true
doit ores [Terminator] Terminating Ores is set to True And then lets kill any ores that have spawned on the map before the rule was set
doitnow ores [Terminator] Terminating Ores [Terminator] Terminating Ores [Terminator] Terminating Ores [Terminator] Terminating Ores [Terminator] Terminating Ores [Terminator] None Out Now to confirm, if we run ComeOn we can see there are no longer any Ores on the map
comeon [Terminator] There are 18 Minicopters Alive [Terminator] There are 9 Scrap Helis Alive [Terminator] There are 36 Horses Alive [Terminator] There are 9 HotAirBalloons Alive [Terminator] There are 3498 Collectable Entites Alive [Terminator] There are 45 Boat Entites Alive [Terminator] There are 143 Animals Entites Alive Lather, Rinse, Repeat for the Variables you want.
Video
FAQ.
Horse
When I Kill horses it says
[Terminator] Terminating Horse Part1
but no part two...
Part 1 is Rideable horses
Part 2 is Wild horses.
Its fine to see one without the other.
Spam
When I run a doitnow command there is a log of network spam.
This is intentional to show that the plugin is working per variable.
The doitnow all command does not do this.
nothing out/ not out
After running a doitnow command it says terminating and then nothing out or not out.
Correct.. it validates that it has killed them all and reports that they are gone.
- 1,691
- 25
- 0
Updated
-
Scopes
Scopes is an on screen crosshair solution for all your rusty shooting needs.
Features
Selection of 6 Scopes that are customisable via the config.
Permissions
Scopes.Toggle << Required to use Scopes.
Commands
/Scope << Tells players to use the following:
/Scope 1 << Scope1 (Default is 「」
/Scope 2 <<Scope2 (Default is +
/Scope 3 <<Scope3 (Default is ◎
/Scope 4 <<Scope4 (Default is ◬
/Scope 5 <<Scope5 (Default is ・
/Scope 6 <<Scope6 (Default is Ⓧ
/NoScope <<Disables the Scope.
Configuration
The settings and options for this plugin can be configured in the Scopes.json file under the oxide/config directory. The use of a JSON editor or validation site such as jsonlint.com is recommended to avoid formatting issues and syntax errors.
{ "symbols": [ "「」", "+", "◎", "◬", "・", "Ⓧ" ], "Colour": "1 0 0 1" } SPECIAL CAUTION NEEDS TO BE TAKEN WHEN EDITING THE CONFIG. USE NOTEPAD++ OR VSC. SOME PLAIN TEXT EDITORS (Like the one built into WinSCP) CANNOT LOAD THE SYMBOLS AND REPLACES THEM WITH GARBAGE!
Variables
As you can see to change a symbol you just type in your favourite character Within Rusts abilities (Some symbols are not supported as they are not included in Rusts Language packs... can be a little bit trial and error)
Symbol Color is in the RGBA format Examples below..
Color Examples
blackSolid black. RGBA is (0 0 0 1).
blueSolid blue. RGBA is (0 0 1 1).
clearCompletely transparent. RGBA is (0 0 0 0).
cyanCyan. RGBA is (0 1 1 1).
grayGray. RGBA is (0.5 0.5 0.5 1).
greenSolid green. RGBA is (0 1 0 1).
greyEnglish spelling for grey. RGBA is the same (0.5 0.5 0.5 1).
magentaMagenta. RGBA is (1 0 1 1).
redSolid red. RGBA is (1 0 0 1).
whiteSolid white. RGBA is (1 1 1 1).
The Last digit dictates Alpha channel... so for an opaque appearance select a value below 1 E.g. 0.7
- 2,064
- 257
- 0
Updated
-
Finder
Finder is a small plugin for admins to search for various things quickly and easily
Features
Find all players with partial names
Find all sleeping bags owned by a specific player
Find all Tool Cupboards with partial names
Find all buildings with partial names
Find items
Find Teleport locations
Permissions
finder.find << Required to use chat commands
Players with Auth level 1 or 2 should not require special permissions.
Chat Commands
/find player PLAYERNAME/STEAMID
/find cupboard PLAYERNAME/STEAMID
/find bag PLAYERNAME/STEAMID
/find building PLAYERNAME/STEAMID
/find item ITEMNAME MINAMOUNT
/find tp FINDID
Item names may need to be enclosed in quotations eg
/find item "Timed Explosive Charge" 1 =>
Special thanks to Steenamaroo the code whisperer for helping me keep what little sanity I had left!
- admin tools
- admin
- (and 1 more)
- 2,791
- 335
- 0
Updated