Search the Community
Showing results for tags 'christmas sale'.
-

Version 0.1.2
253 downloads
At the moment, the plugin does not work with the new recoil! Installing the plugin removes the recoil from rapid-fire weapons! It is also possible to increase the number of cartridges in the clip. Works on all weapons that are listed in config!! If you take away permissions from the user. Then his weapons will become normal! It is possible to increase the magazine of cartridges but no more than 1000 You can also adjust the percentage of return, thereby changing it. Also, improved weapons can be given a prefix There is a lang file Everything can be configured in the config file Сommands: Chat /nrg ShortName – Give yourself improved weapons! Permission needed (NoRecoil.admin) /nr – When you enter this command, the modification is disabled for your weapon that is in your hands. If you enter it again, you can turn it back on Permission needed (NoRecoil.admin or NoRecoil.ShortName (NoRecoil.rifle.ak)) Console /nrg Steam64ID/Nick ShortName – The team issues improved weapons to the player on the server Permission needed (User must have permission to use – NoRecoil.ShortName (NoRecoil.rifle.ak)) Configuration: Video review -$20.00 -
Version 1.1.4
217 downloads
This is a tool I made as I found CUI to be very difficult when beginning to make Rust Plugins. This tool allows you to make any type of UI in unity, and export it to Rust Format, using this tool allows you to go back and make any minor adjustments needed as everything is saved in the project file. Never leave your self guessing on how far you can go with UI, this tool will allow you to make super sleek looking UI in just minutes! Features Create Panels, Images, Labels, Buttons, and Input Fields Pick one of the four fonts and get a preview live Use any sprite from rust, and directory auto set by exporter UI Materials, be able to test UI with materials live Auto Custom Image Uploader, exporter will upload your image to imgur and the exporter will put the link in the proper section Export UI from Unity to Rust Automatic Offset/Anchor Support, no longer need to fight with numbers in your head Automatic conversion for Font Size, Text Alignment, etc Installation Download Unity 2021.1.5f1 Extract the zip file to a spot you would like to keep the tool Find the ImgurToken.txt in the same folder as the UI scene, follow instructions in the file. Open the project file in the folder that you extracted, and navigate to the top find Rust -> Download Sprites and follow the instructions After that you are all done, now its time to get creative and make some killer UI Notes for those who purchase: - When using custom images, please put them in a custom folder in the assets folder. - Make sure you set your game tab to 1920x1080 otherwise your scene view will look all wonky - Make sure that you are on the right unity version, and if you are showing unity errors google them before contacting me. - Rust CUI Input Fields do not have a background or placeholder text, to add a background use a panel. View an example, and if that's not enough check out the video below! Advanced UI made in minutes$45.00 -
Version 1.4.15
371 downloads
I present to your attention – IQSphereEvent This is a new look at the plugins for RUST servers, a storyline, a dynamic story, and events depending on the story The dull, old, and familiar sphere will gain new colors with this plugin, your players will definitely like it! This plugin is suitable both for PVE servers to gather teams and attack the sphere, capturing valuable loot from scientists and for PVP servers, creating battles between players for holding the sphere and passing the story! P.s If you have any questions about the plugin or you want to help me with the translation, please contact me at Discord - @mercury.official Chat & Console Commands : – iqsp start – standard start of the event in normal mode – iqsp quick.start – quick start of the event – iqsp stop – standard shutdown of the event – iqsp quick.stop – quick shutdown of the event API : public Boolean IsEventStart() //Returns the event status With this plugin, you can : Create a unique event on your beautiful server Entertain the players and surprise them with the introduction of this event A unique story with a pleasant accompaniment Large and convenient plugin configuration Multilingual support in the plugin story Absolutely configure the plugin in detail :Detailed configuration for NPCs of each level of the sphere separately: You will be able to customize the items of clothing on the NPC You will be able to customize the elements of weapons from NPCs and adding different variations You will be able to customize the drop-down loot with an NPC Setting up the chance of falling out for loot with NPC Support for custom loot in NPC Setting the number of HP for an NPC Configuring the NPC Display Name Setting the number of NPC spawn Full control over the event : You can configure the interval for the automatic start of the event You will be able to control the end of the event Setting up your own loot on the sphere : Support for custom items Support for the chance of dropping items You can configure the event’s coverage area : You will be able to block the teams you need in the event area Support for placemarks on the G map : You can customize the marker color You can adjust the transparency of the marker Additional settings : You will be able to enable notifications for players who are in the area of the event to inform them Pager support : You can enable and disable pager support You can adjust the frequency of the pager The pager will turn on and vibrate from the start of the event to its end Full customization of the sphere’s appearance and configuration of its events:Air defense support : You can enable and disable air defense support You can adjust the radius of detection of flying objects You can adjust the number of rounds in each air defense Support for sound effects : You can enable and disable support for sound effects You can create your own unique sound effect or take a ready-made one from YouTube, absolutely any sound is suitable, at your discretion You will be able to control the volume level of the sound effect Radiation support : You can turn on additional radiation on the sphere during the storyline Setting the initial radiation value Setting up the radiation multiplier Setting the radiation update time Maximum radiation value Support for light signals : You can enable and disable support for light signals The light signals include : Red warning lights Yellow warning lights Lighting support: You can turn on and off the lighting on the sphere The lighting includes : Bright lamps Laser support You can enable and disable support for lasers on the sphere The lasers include : Laser installations that respond to sound Support for additional plugins :There is support for IQChat : You can enable and disable IQChat support Configuring the icon in the message Configuring the prefix in messages Story Settings : (All the settings listed above also affect the story )You will be able to customize each element of the story : Setting up icons for each person’s story interface Setting up the names of each person’s story interface Setting up effects in the story: You can enable and disable the effects support in the plugin The story has a nice running line that is comfortable to read When you turn on the running line with the story , a different sound of the NPC is played You will be able to customize the playback sound yourself when you turn on the story (Sounds specifically from the game) Setting up a helicopter : You can enable and disable helicopter support on the sphere Adjust the number of circles that the helicopter will make around the sphere Adjust the maximum speed of the helicopter Adjust the speed indicator of the helicopter (The helicopter has its own speed during each maneuver, so this indicator differs from the maximum speed indicator) Plot development with a helicopter : (All events will be accompanied by a story)When a helicopter is shot down : You can set up your own loot from a helicopter Burning boxes fall out of it, already in flight and fly to the ground, have their own gravity, thereby making this element unusual, because the boxes can fly to different places The number of boxes is always different, you can specify it yourself Enable and disable loot support At the end of the flying circles by helicopter : The helicopter will start to fly away and disappear only at the end of the map, where it will not be seen by the players Setting up a Chinook : You can disable and enable Chinook support on the sphere Chinook has several behaviors and each behavior has its own events :Behavior : Crash With this behavior, during the flight to the sphere, the Chinook will suffer an explosion of the fuel tank and begin to explode in flight, after that it will try to make an emergency landing, which will be unsuccessful and it will fall exactly into the center of the sphere (All this will be accompanied by a plot) When a Chinook crashes, there are several events :A normal crash : The Chinook just falls, accompanied by the plot, on the sphere Behavior with the loss of cargo :A Chinook can drop one or more boxes with a timer of 15 minutes during falls You will be able to set up your own loot list for each hackeblelocket crate Behavior : Combat Support With this behavior, the Chinook will fly up to the sphere and maneuver over it while the scientists in it will shoot everyone around and after that it will fly away (All this is also accompanied by a plot) Behavior : Ammunition support With this behavior, the Chinook will fly up to the sphere and maneuver over it while the scientists in it will shoot everyone around, then it will drop the box and after that it will fly away (All this is also accompanied by a plot) Configuring hackeblelocket crate drops in each behavior :In each behavior of the chinook, you can configure the hackeblelocket crate drop: You can set up a static chance of dropping the hackeblelocket crate You can set up a dynamic chance of dropping the hackeblelocket crate You can disable or enable hackeblelocket crate drops support Each behavior supports its own loot setting$24.99 -

Version 1.5.15
28 downloads
IQHeadReward - with this plugin, you can bring a new gameplay to your server by adding notes of the wild west to it. Make players fight with each other, it can also be applied on single servers, group and clan! Video - Videos Plugin Features : Automatic announcement of a reward for the head : A smart system of automatic announcements of rewards on the head of players! You can : Disable or enable this feature Specify the interval at which a random player will be selected Specify a list of awards that will be issued as a reward for killing Specify the number of awards that will be generated for the list of awards List of possible awards :Items Supported Shotname Supported SkinID It supports specifying a random number of items from the minimum to the maximum Your own name for the item is supported Commands The commands will be executed on behalf of the server, you can also substitute a parameter that will insert the player ID into the command IQEconomic An additional feature with the IQEconomic plugin installed, you will be able to give players a balance for the execution of an ad The ability to specify the minimum and maximum amount of balance Set up notifications that will come to the chat with information that a reward has been assigned to the player Manual announcement of the reward for the head : Thoughtful and easy-to-use manual announcement of the reward for the head by your players The interface is made in the "Step-by-step task creation" mode , which will allow you to see the stages of creating a task by a player and will not allow you to send an ad without finishing it Players can : Choose independently any player on whom they want to declare a reward Specify any number of rewards in the form of items Set limits on the number of items as a reward Set the time to create a reward Supported NoEscape Supported IQRankSystem The ability to allow the creation of an ad having a certain rank IQRankSystem Items Supported Shotname Supported SkinID It supports specifying a random number of items from the minimum to the maximum Your own name for the item is supported With the IQEconomic plugin, players will be able to specify the lifetime of the task, both for free and for currency (the standard time is specified in the configuration) When the reward lifetime expires, players will have the opportunity to return their delivered items and take them back Reward system : Quite an interesting reward system, I decided not to use the standard issue of items from "nowhere" Now if a player has completed a task, his reward will be scattered around the map in boxes, depending on the number of reward elements, one box holds 6 items, if there are more rewards, there will be more boxes in different places on the map The boxes will be buried underground (smallstash) and closed from above with a barricade, which will need to be broken to get to the box (it breaks easily enough) This will add interest to your server and more goals in order to run around the map, and as we know-running around the map, you meet adventures along the way! I hope you will like this system System display on the G map : The display on the G map is present in 2 methods of the plugin Display of the player who has a reward assigned to him - if a reward was assigned to a player for his head, he will be displayed on the G map for all players on your server Displaying rewards for killing a player by ad - if a player has completed an ad, his reward will be scattered around the map and highlighted on the G map for him personally, no one except this player will see his reward on the G map Ability to customize the display of the placemark on the map Marker size Time update Marker color Outline color Description when hovering over the marker Enable or disable it Protection against abuse of team players : There are team players who may want an "easy loot" and will want to abuse the rewards for the head, leaving the team and killing their teammate for whom the reward is assigned. I have provided for this problem, now even if a player leaves the team, re-enters , disbands it, whatever, and kills his former teammate - the reward will not be given to him, of course it will not last forever, this lock will be hung on players if they were in the team before the award was assigned to his teammate and removed from them for some time, so that there is no effect of "abuse in a friendly way" Additional points : The remaining settings are available in the configuration and language file, you can view them in the "Configurations" tab or "Language file" on the resource page Supported Plugins : IQChat IQEconomic Duel Battles Clans Friends XDQuest IQRankSystem Permissions : iqheadreward.invise - adds immunity to the automatic announcement of a bounty on the head ChatCommand : /ih - open menu /ir - returns your delivered items if the player reward expires API : void KilledTask(BasePlayer Killer, BasePlayer Wanted) /// - called when a player is killed by an ad (Killer - the one who killed, Wanted - the one who was killed) void CreatedTask(BasePlayer player, Uint64 WantedID) /// - called when creating an ad for a player (player - the one who created it, WantedID-Steam64ID of the one for whom the task was created) void UpdateTask(BasePlayer player, Uint64 WantedID) /// - called when re-creating an ad for a player/updating / adding items or time (player - the one who created, WantedID-Steam64ID of the one for whom the task was created)$18.00 -
Version 1.1.6
131 downloads
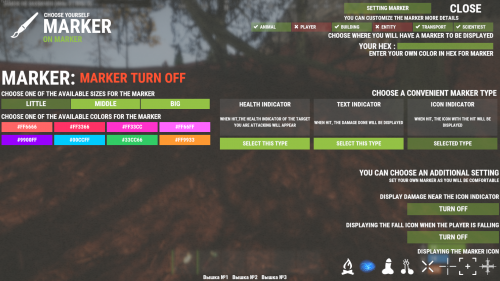
IQMarker is a new look at the already outdated and boring markers when hit! Now your players themselves customize what they want to see when they hit, so you can sell each customization item separately or give it out just like that! Absolutely every marker in the player is configured separately, when you change the marker type, the settings of the previous marker are saved, which gives more comfort to your players in choosing and configuring the marker for themselves! The player will be able to: - Choose the appropriate marker color - Choose when he wants to see the marker, for example when hitting a player or an animal, or a building, or a car! Anything at all! - The player can choose a separate type of marker (of which there are 3) - Marker icon, health bar or text with damage! - By selecting an icon or health bar-the player can also choose an additional setting for it with the display of damage or fall of the player! Watch the video review to clearly see how the plugin works! Permissions : iqmarker.use - give access to the marker iqmarker.usecolorlist - give access to the list of colors iqmarker.usecustomcolor - give access to a choice of custom colors iqmarker.usesize - give access to the ability to resize the marker And also all other rights to add-ons to the marker, for each color or icon, you set in the configuration file! Example - o.grant group default iqmarker.use Chat command: /hit - open the settings menu CONFIGURATION : { "Configuring the plugin": { "true-enable marker setting/false - disable setting": true, "Setting the available colors for the marker": [ { "Access rights for this color": "iqmarker.red", "HEX color": "#FF6666" }, { "Access rights for this color": "iqmarker.default", "HEX color": "#FF3366" }, { "Access rights for this color": "iqmarker.default", "HEX color": "#FF33CC" }, { "Access rights for this color": "iqmarker.purple", "HEX color": "#FF66FF" }, { "Access rights for this color": "iqmarker.purple", "HEX color": "#9900FF" }, { "Access rights for this color": "iqmarker.aqua", "HEX color": "#00CCFF" }, { "Access rights for this color": "iqmarker.green", "HEX color": "#33CC66" }, { "Access rights for this color": "iqmarker.default", "HEX color": "#FF9933" } ] }, "Configuring the plugin interface": { "Configuring the main panel": { "HEX background": "#444440A6", "Background Material": "assets/content/ui/uibackgroundblur-ingamemenu.mat", "Sprite logo": "assets/icons/workshop.png" }, "Setting up a panel with a marker setting": { "HEX buttons settings": "#93C34680", "HEX input fields for setting marker color": "#93C34680", "HEX of the selected marker display element": "#93C34680", "HEX of not selected marker display element": "#C3454580", "Sprite of a non-selected marker display elementt": "assets/icons/vote_up.png", "Sprite of the selected marker display element": "assets/icons/vote_down.png", "HEX panels with marker typee": "#FFFFFF29", "HEX buttons with available marker type": "#93C344FF", "HEX buttons with unavailable marker type": "#C3454580", "HEX buttons with the selected marker type": "#93C34480" }, "HEX text colors": "#FFFFFFFF" }, "Setting up markers": { "Setting up the HealthBar marker": { "General setting": { "Display name": "<size=16><b>HEALTH INDICATOR</b></size>", "Description": "<size=11>WHEN HIT,THE HEALTH INDICATOR OF THE TARGET YOU ARE ATTACKING WILL APPEAR</size>", "Random position settings for the position of the icon/text/strip when shots are fired": { "Use a random position of the icon/text/stripe position? (true - yes/false - no)": false, "Position spread level": 60.0 } }, "Permission to access the HealthBar token type": "iqmarker.healthbar", "Permission to access the HealthBar extension, displaying damage next to the indicator": "iqmarker.damagetext", "Permission to access the HealthBar add-on, displaying the player drop icon": "iqmarker.healthbarwound" }, "Setting the DamageText marker": { "General setting": { "Display name": "<size=16><b>TEXT INDICATOR</b></size>", "Description": "<size=11>WHEN HIT, THE DAMAGE DONE WILL BE DISPLAYED</size>", "Random position settings for the position of the icon/text/strip when shots are fired": { "Use a random position of the icon/text/stripe position? (true - yes/false - no)": false, "Position spread level": 60.0 } }, "Permission to access the DamageText token type": "iqmarker.damagetext", "Permission to access the DamageText extension, displaying the icon with the player falling": "iqmarker.damagetextwound" }, "Setting up the Icon marker": { "General setting": { "Display name": "<size=16><b>ICON INDICATOR</b></size>", "Description": "<size=11>WHEN HIT, THE ICON WITH THE HIT WILL BE DISPLAYED</size>", "Random position settings for the position of the icon/text/strip when shots are fired": { "Use a random position of the icon/text/stripe position? (true - yes/false - no)": false, "Position spread level": 60.0 } }, "Permission to access the Icon token type": "iqmarker.icon", "Permission to access the Icon extension, displaying damage next to the indicator": "iqmarker.icondamagetext", "Permission to access the HealthBar add-on, displaying the player drop icon": "iqmarker.iconwound", "Icon list(Name-link to the 64x64 icon)": [ { "Permissions": "", "PNG": "https://i.imgur.com/mIbPpj3.png" }, { "Permissions": "", "PNG": "https://i.imgur.com/XCSkVNk.png" }, { "Permissions": "", "PNG": "https://i.imgur.com/RACMuqg.png" }, { "Permissions": "", "PNG": "https://i.imgur.com/tqtF73m.png" }, { "Permissions": "", "PNG": "https://i.imgur.com/uIHaR7Q.png" }, { "Permissions": "", "PNG": "https://i.imgur.com/Dbxnsm1.png" }, { "Permissions": "", "PNG": "https://i.imgur.com/bzsU7kE.png" }, { "Permissions": "", "PNG": "https://i.imgur.com/2Wke9lp.png" } ] } }, "Setting for new users(Be careful, these settings are given by default regardless of rights,if the player turns them off and he does not have rights, he will need them to re-enable)": { "Is the token enabled for new players?(true-yes/false-no)": true, "Standard marker color for new players(HEX)": "#05bec5", "Standard marker type for new games (0 - Text with damage | 1-HP bar | 2-Icon)": 2, "Standard marker size for new games (0 - Small | 1 - Medium | 2 - Large).)": 1, "Additional HP band settings for new tracks": { "Enable text display with damag(true-yes/false-no)": false, "Enable display of drop icon(true-yes/false-no)": false }, "Additional text settings with damage for new tracks": { "Enable text display with damag(true-yes /false-no)": false }, "Advanced icon settings for new icons": { "Enable text display with damag(true-yes / false-no)": true, "Enable display of drop icon(true-yes/false-no)": true } } }$20.00 -

Version 1.11.10
234 downloads
IQWipeBlock - multifunctional temporary lock of items after a wipe Has the ability to : - An interface that generates line positions with blocking progress by itself - You can configure the lock completely in detail - Variations of additional item locks for the main item ( ammo or modules ), you can enable the unlock of additional items during the unlock of the main item or after it is unlocked - Support for blocking custom items with SkinID from plugins ( for example, the UraniumTools plugin) - Full item blocking - Blocking of separate modules to the item (body kits) - Blocking of separate cartridges to the object (can be combined with the blocking of modules (body kits) and vice versa) - Ability to highlight a locked item in your inventory - The selection of a blocked item in the inventory can be made in 3 different types (grid, lightning, flame, see the video review) - Detailed interface configuration : - You can customize the location of all the blocks, change their places - Two views of the unlock progress display ( configurable in the configuration) - Customize all colors - You can enable the quick menu for users - Allow users to hide and reveal the quick menu - Enable or disable the informative block with the display of colors ( informs about colors in the process of unlocking ) ( configurable in the configuration) - Supports multilanguage - Plugin support: - Duel - Battles - Duelist - ImageLibrary CONFIGURATION : { "Setting up Locks": { "Configuring weapon and Tool Locks": { "rifle.ak": { "Time to lock this item(in seconds)": 500, "SkinID for the item(if not required, leave the value 0)": 0, "Additional list related to this subject! (Items that can be applied to the main item, example Weapons - > Ammo)": { "weapon.mod.8x.scope": 100 } }, "wood": { "Time to lock this item(in seconds)": 500, "SkinID for the item(if not required, leave the value 0)": 0, "Additional list related to this subject! (Items that can be applied to the main item, example Weapons - > Ammo)": {} }, "stones": { "Time to lock this item(in seconds)": 600, "SkinID for the item(if not required, leave the value 0)": 0, "Additional list related to this subject! (Items that can be applied to the main item, example Weapons - > Ammo)": {} }, "sulfur.ore": { "Time to lock this item(in seconds)": 700, "SkinID for the item(if not required, leave the value 0)": 0, "Additional list related to this subject! (Items that can be applied to the main item, example Weapons - > Ammo)": {} } }, "Configuring Gear locks": { "shoes.boots": { "Time to lock this item(in seconds)": 600, "SkinID for the item(if not required, leave the value 0)": 0, "Additional list related to this subject! (Items that can be applied to the main item, example Weapons - > Ammo)": {} } }, "Setting up explosive locks": { "explosive.timed": { "Time to lock this item(in seconds)": 7770, "SkinID for the item(if not required, leave the value 0)": 0, "Additional list related to this subject! (Items that can be applied to the main item, example Weapons - > Ammo)": {} } }, "Unlock additional items after unlocking the main one (true) or jointly (false)": true }, "Configuring the interface": { "In which part of the screen will the interface with the lock of weapons and tools be located(0-Left, 1-Center, 2-Right)": 0, "In which part of the screen will the interface with the equipment lock be located (0-Left, 1-Center, 2-Right)": 1, "In which part of the screen will the interface with blocking explosives and ammunition be located(0-On the Left, 1-In the Center, 2-on the Right)": 2, "Display the progress of opening an item by filling in the background": false, "Display information-instructions, which block is responsible for what": true, "Link to your background (If not required, leave the field blank)": "", "HEX background color": "#3B3A2EC3", "HEX background color blurr": "#00000044", "HEX background color blurr of additional items": "#00000076", "HEX text color": "#efedee", "HEX line color": "#5E5E5EC8", "HEX line color when unblocking": "#7D904EFF", "HEX background color of the blocked image": "#16161647", "HEX color of the background color of the blocked background": "#16161624", "HEX background color of the next item to unlock": "#161616FF", "HEX background color of the unlocked item": "#667345", "HEX background color of an unlocked item with additional locks": "#C67036", "HEX color of the subject lines with additional locks": "#D08654FF", "Sprite of the blocked element": "assets/icons/bp-lock.png", "Sprite in the quick access menu": "assets/icons/warning_2.png", "Should I hide the interface opening button after unlocking all items": false, "Use the time format (Full - D + H + M(/S) - true / Abbreviated - D/H/M/S - false)": false }, "Configuring the plugin": { "Use the label in the player's inventory if the item is locked(the label will be right on the item being locked)": true, "Enable menu to open wipeblock": false, "Enable the ability to hide the menu to users": true, "Select the label type : 0 - Grid, 1-Flame, 2-Lightning": 0, "Display time on all blocked items, regardless of progress": false, "Settings for collaboration with other plugins": { "IQChat : Chat Settings": { "IQChat : Custom prefix in chat": "[IQWipeBlock]", "IQChat : Custom avatar in the chat (If required)": "", "IQChat : Use UI notifications": false } }, "Notify players that all items have been fully unlocked (true - yes/false - no). The message is configured in lang": true, "Notify players every time they log on to the server that all items are unlocked (true - yes/false - no). The message is configured in lang": false } }$12.99- 19 comments
-
- 1
-

-
- #wipeblock
- #rust
- (and 7 more)
-
Version 1.4.21
234 downloads
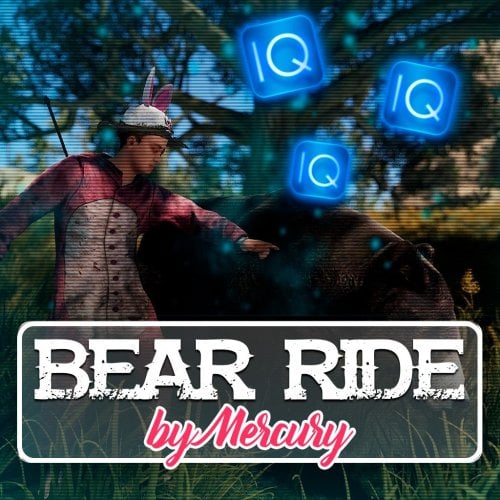
Conquer the world of RUST on a riding bear! The bear has a portable inventory, increased characteristics such as speed, health and other indicators! The plugin has an intuitive and pleasant interface for interacting with the bear, as well as an additional interface with instructions for managing it! Your players will be able to fight on bears, kill other players or animals with the help of a bear! Break trees and smash barrels! Permissions : Rights to use a bear by players - iqbearride.usedbear Rights to give a bear to a player - iqbearride.givebear Rights to give a teddy bear to a player - iqbearride.giveteddy Detailed configuration in the configuration : You will be able to change various indicators, such as : Movement speed Running speed Speed of turns Bear Growth Time Damage done Number of inventory cells Full interface configuration Full customization of the bear cub item Full customization of the bear item There is a language file and localization! The plugin has support for many other plugins : 1. IQChat – configured in the plugin configuration 2. IQRates – the bear will mine the same amount as the player. He is affected by the same X production indicators as the player 3. Working with a variety of plugins to multiply mining ratings 4. AnimalLoot – bear prey will be affected by the settings from this plugin 5. IQCraftSystem – you can add the creation of an adult bear to the crafting system Console Commands : Permission for this command – iqbearride.givebear iqbr.bear <SteamID:Name:IP> – Issuance of an adult bear Permission for this command – iqbearride.giveteddy iqbr.teddy<SteamID:Name:IP> – Issuing a bear cub CONFIGURATION { “Chance of a bear cub falling out”: 20, “Make a bear immortal (true – yes/false – no)”: false, “The number of hp of the bear”: 1200, “How long does a bear grow in seconds”: 100, “Walking speed”: 5.0, “Leash speed”: 7.5, “Running speed”: 7.5, “Running speed with shift”: 10.0, “Turning speed”: 150.0, “Step size up (If you don’t know what it is, don’t touch this function)”: 1.0, “Step size down (If you don’t know what it is, don’t touch this function)”: 1.0, “Board size length (If you don’t know what it is, don’t touch this function)”: 1.5, “Board size width (If you don’t know what it is, don’t touch this function)”: 0.2, “The maximum height that can climb”: 50.0, “The radius of checking for objects (If you don’t know what it is, don’t touch this function)”: 0.6, “The radius of the rotation balls check (If you do not know what it is, do not touch this function)”: 0.35, “Maximum depth”: 150.0, “Inventory Size”: 24, “The damage inflicted is individual”: { “default”: 50.0, “player”: 20.0 }, “How much health to give when eating”: 50.0, “IQ Chat : Custom prefix in the chat”: “[IQBearRide]”, “IQChat : Custom avatar in the chat (If required)”: “0”, “IQChat : Use UI notifications”: false, “Setting up the Bear Item”: { “DisplayName”: “Медведь | Bear”, “ShortName”: “stash.small”, “SkinId”: 2445048695 }, “Setting up the Bear Cub item”: { “DisplayName”: “Медвеженок | Teddy bear”, “ShortName”: “stash.small”, “SkinId”: 2445033042 }, “Picture To Follow”: “https://i.imgur.com/0sGNhqD.png”, “Picture to ride”: “https://i.imgur.com/xar8gWn.png”, “Picture Raise”: “https://i.imgur.com/973xdCt.png”, “Picture Inventory”: “https://i.imgur.com/OpjOCgL.png”, “Picture Instructions”: “https://i.imgur.com/32JQy4R.png” }$15.00 -
.thumb.jpg.11381cd0b3f57375a21b5282755e901c.jpg)
Version 1.2.5
21 downloads
Referral system - simple and beautiful! Including: Lang file is present Very simple config to configure Nice and stylish UI Avatars in UI at the best quality Doesn't load your server You can customize whatever your heart desires Commands: /ref - Open UI /ref invite <name> - Invite a player /ref accept - Accept invitations How it works ? The player must invite the player using the command /ref invite <name> Next, the player who was invited must accept the request using the command /ref accept After that, the Player and Jobs will appear in the UI (/ref). When completing these jobs, both players will receive the rewards you specified in the configuration. Gratitude: Azmodean - Thanks to this person, the lang file is very well translated. You can fix it anyway! Additional Information: This plugin was originally owned by another developer. It was given to me with his conscent. It has been heavily modified from the original version. Config: { "Maximum number of invited players": 5, "List of gift performers for the inviter (if more than one - random is taken)": [ { "Items obtained from this set": [ { "Item Display Name": null, "Short name of the subject": "rifle.ak", "Item Quantity": 1, "Item SkinID": 1, "Called command": null }, { "Item Display Name": null, "Short name of the subject": null, "Item Quantity": 0, "Item SkinID": 0, "Called command": "say %STEAMID% is god" } ] } ], "List of possible gifts for the invitee (if more than one - random is taken)": [ { "Items obtained from this set": [ { "Item Display Name": null, "Short name of the subject": "rifle.ak", "Item Quantity": 1, "Item SkinID": 1, "Called command": null }, { "Item Display Name": null, "Short name of the subject": null, "Item Quantity": 0, "Item SkinID": 0, "Called command": "say %STEAMID% is god" } ] } ], "Quest Accelerator to get a reward": { "ReferalSystem.default": 1.0, "ReferalSystem.vip": 2.0 }, "Prize conditions settings": { "Time spent on the server": 60.0, "The number of collected resources": 5000, "Number of destroyed objects": 5 } }$15.00 -
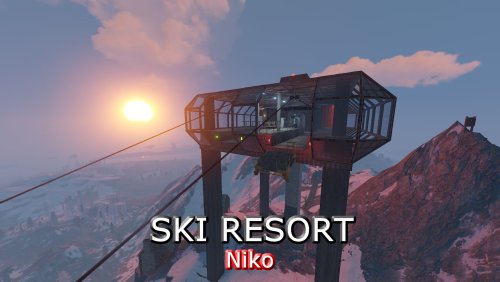
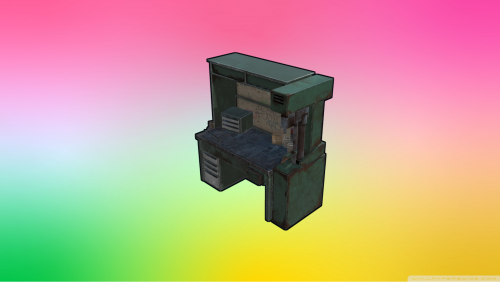
Version 66 050523
55 downloads
These set of prefabs will allow you to place a Ski Resort high up on the mountains of Rust. It features a working Ski Lift, within the realms of Rust and a plugin to support this that you will need to configure. Instructions included in the ReadMe file Included in the Zip Ski Station Ski Station inc Stairwell Ski Lift Pylon Ski Lodge V1 & V2 Ski Ramp If you have any problems you can contact me via Discord https://discord.gg/r84Cg84 Finally, please make yourself aware of the TOS-Restrictions for use. Thanks Niko$14.95 -
Version 1.0.1
90 downloads
Rust Snippets is a tool for developers to enable them to speed up programming and avoid them to have to visit forums or repeat repetitive tasks. Rust Snippets currently has all hooks built in to your visual studio so you never have to go look at the docs again, code on the fly with comments per hook. There is some other secrets and ideas I have for this, so expect updates Shortcuts: Setup - Sets up default oxide plugin setup Harmony - Sets up default Harmony oxide plugin Config - Sets up basic config file Language - Sets up base language file Rest are hooks, so typing "On" or "Can" will bring up all the hooks Tutorial is included in download, its very easy and well guided. Feel free to message me with any questions. Credits: JMarkson - Getting me the uMod link with hooks and giving me the idea$5.00- 10 comments
- 3 reviews
-
- 2
-

-
-
- #christmas sale
- #coding
- (and 7 more)
-
Version 2.5.7
362 downloads
A very interesting auto event for your server. Down with the boring old radioactive house. Features: Construction - You can make any building - The building position is level, the house will not hang in the air or spawn in the same place Bots - Bots turn on lights and laser sights at night, and cut them out in the morning - It is possible to dress the NPC as you want it, as well as give them all random weapons - You can also adjust the loot and health level of the NPC Radiation - It is possible to turn on radiation in the event area Map - It is possible to display the event on maps Other possibilities - There is sending notifications to the discord - You can change any message in the lang file - You can multiply the loot by the day of the wipe, the loot will get higher every day the wipe - Detailed setting of everything. - UI notifications The plugin was tested for a month and a half, many problems were fixed. But if something is found, I will fix it! I am also ready to accept your suggestions, Any! Sorry, but the video is in Russian Commands: /cl start /stop - Start / stop the event ahead of schedule (For administrators) /cl.items add - add loot to the box with prizes, then be sure to adjust the odds in the config (From your inventory) /cl.items reset Replace all old loot in the box with a new one (From your inventory) /cl.botitems add "NAME" - add the loot that will be in the bot, then you must definitely adjust the odds in the config (From your inventory) /cl.botitems reset "NAME" - completely change the old loot in the bot to the new one Config: { "Setting up and stopping an event": { "The minimum number of players to start an event": 0, "Time before the start of the event (Minimum in seconds)": 3000, "Time before the start of the event (Maximum in seconds)": 7200, "Time until the event is deleted if no one opens the box (Seconds)": 900, "The time until the event is deleted after the box is unlocked": 300, "Create a PVP zone within the radius of the event? (Requires TruePVE)": false, "Do you use a dome ?": false, "Transparency of the dome (the smaller the number, the more transparent it is. The values should be no more than 5)": 3 }, "Configuring notifications": { "Discord WebHook (If you do not need discord notifications, leave the field blank)": "", "Enable UI Notifications?": true, "Auto hide UI notifications?": true, "How long after the show will it hide? (sec)": 15.0, "UI window background color": "0.8 0.28 0.2 0.8", "UI Close Button Color": "0.6784314 0.254902 0.1843137 0.8" }, "Setting up radiation in the event area": { "Turn on radiation?": true, "Number of radiation particles": 20, "Radius of the affected area (No more than the radius of detection of players)": 20 }, "Event display on maps": { "Mark the event on the G card (Requires FREE https://umod.org/plugins/marker-manager)": true, "Text for map G": "Cobalt lab", "Marker color (without #)": "f3ecad", "Outline color (without #)": "ff3535" }, "Setting up buildings for the event (Copypaste) and NPCs": { "Spawn buildings. (If more than 1 then random is selected)": [ { "Setting the height of the building (Required in the setting if you want to place your building)": 0, "The names of the file in the folder `/oxide/data/copypaste` with your building": "HouseCobalt", "Copter spawn chance (if present in a building)": 50, "NPCs setting": [ { "Minimum": 3, "Maximum": 7, "Will they spawn as help after hacking locked crate?": true, "Number of NPCs (Help)": 3, "NPCs setting": { "Name": "Cobalt Defense", "Health": 230.0, "Roam Range": 35.0, "Chase Range": 10.0, "Attack Range Multiplier": 3.0, "Sense Range": 50.0, "Target Memory Duration [sec.]": 40.0, "Scale damage": 2.0, "Aim Cone Scale": 1.0, "Detect the target only in the NPC's viewing vision cone? [true/false]": false, "Vision Cone": 135.0, "Speed": 8.0, "Disable radio effects? [true/false]": false, "Is this a stationary NPC? [true/false]": false, "Remove a corpse after death? (it is recommended to use the true value to improve performance) [true/false]": false, "Wear items": [ { "ShortName": "roadsign.kilt", "SkinID (0 - default)": 1121447954 }, { "ShortName": "burlap.shirt", "SkinID (0 - default)": 2076298726 }, { "ShortName": "shoes.boots", "SkinID (0 - default)": 0 }, { "ShortName": "roadsign.gloves", "SkinID (0 - default)": 0 }, { "ShortName": "burlap.trousers", "SkinID (0 - default)": 2076292007 }, { "ShortName": "metal.facemask", "SkinID (0 - default)": 835028125 } ], "Belt items": [ { "ShortName": "rifle.lr300", "Amount": 1, "SkinID (0 - default)": 1837473292, "Mods": [ "weapon.mod.flashlight" ] }, { "ShortName": "pistol.semiauto", "Amount": 1, "SkinID (0 - default)": 1557105240, "Mods": [] }, { "ShortName": "syringe.medical", "Amount": 10, "SkinID (0 - default)": 0, "Mods": [] }, { "ShortName": "grenade.smoke", "Amount": 3, "SkinID (0 - default)": 0, "Mods": [] } ], "Kit": "" }, "Which loot table should the plugin use? (0 - default; 1 - own; 2 - AlphaLoot;": 1, "Own loot table (if the loot table type is 1)": { "Minimum numbers of items": 1, "Maximum numbers of items": 1, "Use minimum and maximum values? [true/false]": true, "List of items": [ { "ShortName": "scrap", "Minimum": 5, "Maximum": 10, "Chance [0.0-100.0]": 50.0, "Is this a blueprint? [true/false]": false, "SkinID (0 - default)": 0, "Name (empty - default)": "", "Multiply the amount of the item by the number of days since the beginning of the wipe (on the 3rd day, the loot will be 3 times more)": false }, { "ShortName": "supply.signal", "Minimum": 1, "Maximum": 1, "Chance [0.0-100.0]": 20.0, "Is this a blueprint? [true/false]": false, "SkinID (0 - default)": 0, "Name (empty - default)": "", "Multiply the amount of the item by the number of days since the beginning of the wipe (on the 3rd day, the loot will be 3 times more)": false }, { "ShortName": "syringe.medical", "Minimum": 1, "Maximum": 2, "Chance [0.0-100.0]": 70.0, "Is this a blueprint? [true/false]": false, "SkinID (0 - default)": 0, "Name (empty - default)": "", "Multiply the amount of the item by the number of days since the beginning of the wipe (on the 3rd day, the loot will be 3 times more)": false } ] } }, { "Minimum": 1, "Maximum": 3, "Will they spawn as help after hacking locked crate?": false, "Number of NPCs (Help)": 0, "NPCs setting": { "Name": "Cobalt Guard", "Health": 150.0, "Roam Range": 30.0, "Chase Range": 90.0, "Attack Range Multiplier": 2.0, "Sense Range": 50.0, "Target Memory Duration [sec.]": 30.0, "Scale damage": 1.0, "Aim Cone Scale": 1.0, "Detect the target only in the NPC's viewing vision cone? [true/false]": false, "Vision Cone": 135.0, "Speed": 7.0, "Disable radio effects? [true/false]": true, "Is this a stationary NPC? [true/false]": false, "Remove a corpse after death? (it is recommended to use the true value to improve performance) [true/false]": false, "Wear items": [ { "ShortName": "roadsign.kilt", "SkinID (0 - default)": 1121447954 }, { "ShortName": "burlap.shirt", "SkinID (0 - default)": 2076298726 }, { "ShortName": "shoes.boots", "SkinID (0 - default)": 0 }, { "ShortName": "roadsign.gloves", "SkinID (0 - default)": 0 }, { "ShortName": "burlap.trousers", "SkinID (0 - default)": 2076292007 }, { "ShortName": "metal.facemask", "SkinID (0 - default)": 835028125 } ], "Belt items": [ { "ShortName": "rifle.lr300", "Amount": 1, "SkinID (0 - default)": 1837473292, "Mods": [ "weapon.mod.flashlight" ] }, { "ShortName": "pistol.semiauto", "Amount": 1, "SkinID (0 - default)": 1557105240, "Mods": [] }, { "ShortName": "syringe.medical", "Amount": 10, "SkinID (0 - default)": 0, "Mods": [] }, { "ShortName": "grenade.f1", "Amount": 3, "SkinID (0 - default)": 0, "Mods": [] } ], "Kit": "" }, "Which loot table should the plugin use? (0 - default; 1 - own; 2 - AlphaLoot;": 1, "Own loot table (if the loot table type is 1)": { "Minimum numbers of items": 1, "Maximum numbers of items": 1, "Use minimum and maximum values? [true/false]": true, "List of items": [ { "ShortName": "scrap", "Minimum": 5, "Maximum": 10, "Chance [0.0-100.0]": 50.0, "Is this a blueprint? [true/false]": false, "SkinID (0 - default)": 0, "Name (empty - default)": "", "Multiply the amount of the item by the number of days since the beginning of the wipe (on the 3rd day, the loot will be 3 times more)": false }, { "ShortName": "supply.signal", "Minimum": 1, "Maximum": 1, "Chance [0.0-100.0]": 20.0, "Is this a blueprint? [true/false]": false, "SkinID (0 - default)": 0, "Name (empty - default)": "", "Multiply the amount of the item by the number of days since the beginning of the wipe (on the 3rd day, the loot will be 3 times more)": false }, { "ShortName": "syringe.medical", "Minimum": 1, "Maximum": 2, "Chance [0.0-100.0]": 70.0, "Is this a blueprint? [true/false]": false, "SkinID (0 - default)": 0, "Name (empty - default)": "", "Multiply the amount of the item by the number of days since the beginning of the wipe (on the 3rd day, the loot will be 3 times more)": false } ] } } ] } ] }, "Customizing the box": { "Time to unlock the Crates [sec.]": 900.0, "Which loot table should the plugin use? (0 - default; 1 - own; 2 - AlphaLoot; 3 - EcoLootUI;": 0, "Own loot table (if the loot table type is 1)": { "Minimum numbers of items": 0, "Maximum numbers of items": 0, "Use minimum and maximum values? [true/false]": false, "List of items": [ { "ShortName": "pistol.python", "Minimum": 1, "Maximum": 1, "Chance [0.0-100.0]": 60.0, "Is this a blueprint? [true/false]": false, "SkinID (0 - default)": 0, "Name (empty - default)": "", "Multiply the amount of the item by the number of days since the beginning of the wipe (on the 3rd day, the loot will be 3 times more)": false }, { "ShortName": "multiplegrenadelauncher", "Minimum": 1, "Maximum": 1, "Chance [0.0-100.0]": 15.0, "Is this a blueprint? [true/false]": false, "SkinID (0 - default)": 0, "Name (empty - default)": "", "Multiply the amount of the item by the number of days since the beginning of the wipe (on the 3rd day, the loot will be 3 times more)": false }, { "ShortName": "sulfur", "Minimum": 500, "Maximum": 800, "Chance [0.0-100.0]": 40.0, "Is this a blueprint? [true/false]": false, "SkinID (0 - default)": 0, "Name (empty - default)": "", "Multiply the amount of the item by the number of days since the beginning of the wipe (on the 3rd day, the loot will be 3 times more)": false }, { "ShortName": "wall.external.high.ice", "Minimum": 1, "Maximum": 5, "Chance [0.0-100.0]": 75.0, "Is this a blueprint? [true/false]": false, "SkinID (0 - default)": 0, "Name (empty - default)": "", "Multiply the amount of the item by the number of days since the beginning of the wipe (on the 3rd day, the loot will be 3 times more)": false } ] }, "Turn on the alarm when breaking into a locked box ?": true }, "Reward in the form of a team to the player who 1 opened the cargo": { "List of commands that are executed in the console (%STEAMID% - the player who looted the box)": [], "Messages that the player will receive (Here you can write about what the player received)": "" }, "Setting up the selection of positions for spawn (For experienced users)": { "Allow spawn on the roads ?": true, "Allow spawn on rivers ?": true, "Radius of monument detection": 40.0, "Detection radius of the tool cupboard (Building Block)": 90.0 } }$25.00- 50 comments
- 2 reviews
-
- 3
-
-
- #radhouse
- #radiation
- (and 10 more)
-

Version 1.1.8
398 downloads
Store Robbery plugin is a plugin that was made from my memory of Arma 3 Life Gas Station robbery's, currently this plugin allows you to place Robbable Store Clerk's around the map for players to attract PvP too. Only the best will be able to survive a store robbery and walk away with the reward! Permission storerobbery.manage - Allow creating and deleting of Store Clerks Commands /createclerk - Creates a clerk at your current location /removeclerk - Removes a clerk that you are looking at. /getclerkid - Ability to get the id of the clerk in the data file, so you can edit rotation or position if needed. Features Spawn guards at robbery start or robbery end Live progress bar showing robbery progress Toggable Markers and Chat Anouncment Auto fill clerks at all gas stations and supermarkets Configurable robbery times and cooldowns Support for Server Rewards and Economics plugin Configurable Item List with item counts, and probability. Config { "Announce Robberies In Chat": true, "Use Clerk Marker": true, "Use Robbery Area Marker": true, "Allow Shoot To Rob": false, "Robbery Distance (m)": 5.0, "Robbery Time (Secs)": 20, "NPC Cooldown/Reset Time (Secs)": 10, "Use Player Cooldown?": true, "Player Robbery Cooldown Time (Secs)": 10, "Whitelisted Robbery Weapons": [ "rifle.ak", "rifle.bolt", "smg.2", "rifle.l96", "lmg.m249", "rifle.lr300", "rifle.m39", "pistol.m92", "smg.mp5", "pistol.python", "pistol.revolver", "rocket.launcher", "rifle.semiauto", "pistol.semiauto", "shotgun.spas12", "smg.thompson" ], "Clear NPCs On New Save": true, "Clerk Name": "Store Clerk", "Fill Clerks at Supermarkets": true, "Supermarket Clerk Position": { "x": 8.8, "y": 0.0, "z": 3.5 }, "Supermarket Clerk Rotation": { "x": 8.8, "y": 0.0, "z": 2.0 }, "Fill Clerks at Gas Stations": true, "Gas Station Clerk Position": { "x": -8.7, "y": 0.0, "z": 21.5 }, "Gas Station Clerk Rotation": { "x": -8.2, "y": 0.0, "z": 21.5 }, "Guard Settings": { "Play Alarm Sound": true, "Spawn Guards at Robbery Start": false, "Spawn Guards at Robbery End": false, "Chance of Guard Spawn (0-100%)": 75, "Amount of Guard at Robbery Start": 0, "Amount of Guard at Robbery End": 5, "Store Guard": "Store Guard", "Gaurds HP": 400.0 }, "NPC Clothing": { "Clothing": [ "hat.cap", "shirt.collared", "pants.shorts", "shoes.boots" ], "Skins": [ 1125552993, 1145623671, 883719992, 2592902166 ] }, "Robbery Rewards": { "Use Economics Plugin": false, "Minimum Amount Of Credits": 3000, "Maximum Amount Of Credits": 6000, "Use Server Rewards Plugin": false, "Minimum Amount Of RP": 300, "Maximum Amount Of RP": 600, "Use Item Box Rewards": true, "Minimum Amount Of Items From List": 3, "Maximum Amount Of Items From List": 6, "Possible Item List": [ { "shortname": "rifle.ak", "customname": "Red Zircon AK47", "skin": 2589524856, "minamount": 1, "maxamount": 1, "probability": 90 }, { "shortname": "rifle.bolt", "customname": "", "skin": 0, "minamount": 1, "maxamount": 1, "probability": 5 }, { "shortname": "ammo.pistol", "customname": "", "skin": 0, "minamount": 10, "maxamount": 50, "probability": 70 }, { "shortname": "ammo.shotgun", "customname": "", "skin": 0, "minamount": 10, "maxamount": 30, "probability": 70 }, { "shortname": "syringe.medical", "customname": "", "skin": 0, "minamount": 1, "maxamount": 3, "probability": 40 }, { "shortname": "keycard_blue", "customname": "", "skin": 0, "minamount": 1, "maxamount": 1, "probability": 35 }, { "shortname": "cctv.camera", "customname": "", "skin": 0, "minamount": 1, "maxamount": 2, "probability": 50 }, { "shortname": "shotgun.double", "customname": "", "skin": 0, "minamount": 1, "maxamount": 1, "probability": 70 }, { "shortname": "bow.hunting", "customname": "", "skin": 0, "minamount": 1, "maxamount": 1, "probability": 90 }, { "shortname": "pistol.revolver", "customname": "", "skin": 0, "minamount": 1, "maxamount": 1, "probability": 80 }, { "shortname": "arrow.wooden", "customname": "", "skin": 0, "minamount": 10, "maxamount": 40, "probability": 85 }, { "shortname": "arrow.fire", "customname": "", "skin": 0, "minamount": 5, "maxamount": 20, "probability": 70 }, { "shortname": "rope", "customname": "", "skin": 0, "minamount": 3, "maxamount": 6, "probability": 75 }, { "shortname": "propanetank", "customname": "", "skin": 0, "minamount": 3, "maxamount": 6, "probability": 75 }, { "shortname": "metalpipe", "customname": "", "skin": 0, "minamount": 2, "maxamount": 4, "probability": 75 } ] } }$20.00 -
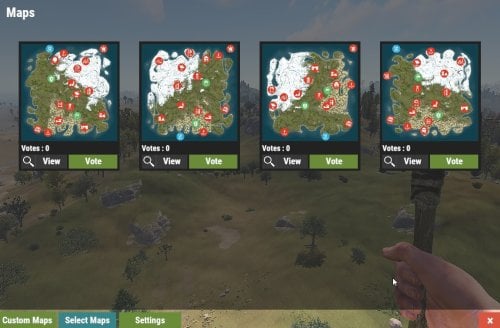
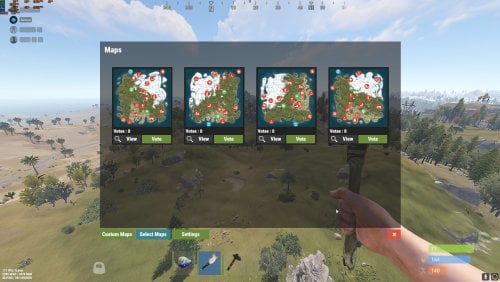
Version 1.4.70
534 downloads
This plugin makes the admin’s life easier by automatically generating maps, initiating a vote that lets users choose which map they would like to play in during the next wipe and auto wiping the server. Depends on: Image Library Wipe Info API (If your server in country that have forced wipe at Friday please use WipeInfoApi file in MapVoter/WipeInfoApi/WipeInfoApi .cs) Discord extension UnZip for Windows Update 1.4.67: Added: Single Discord message now supports up to 4 maps. Wipe countdown in Embed. Fixed: Magnify icon not showing. New config options: You must set the Embed URL if you want to use the Single Discord embed message. "Embed Url": "https://codefling.com" "Single Embed?": false Note: The single message will only display 4 maps, but you can add more. Update 1.4.64: Server administrators can list data files to be deleted after the wipe "Plugins Data wipe": { "Enable plugins data wipe on forced wipe day": true, "Enable plugins data wipe on map wipe day": true, "File names to be deleted on forced wipe day": [ "wipeinfo", "WipeInfoApi" ], "File names to be deleted on map wipe day": [ "wipeinfo", "WipeInfoApi" ] } If you utilize a game hosting service, please ensure that your host permits the modification of the startup command. Update 1.3.26 : Auto wipe now works for non Dedicated (game server or host) servers but you'll have to disable sandbox and you won't be able to auto update the server. Requirements Rust Server(s) setup in a standard way on a Windows ,Pterodactyl Panel , Open Game Panel, Ubuntu dedicated server or game/host server (Doesn't work on LinuxGSM). Administrator privileges on said dedicated server. All of your server settings in \server\my_server_identity\cfg \server.cfg except rcon.port ,rcon.web rcon.password which will be added to batch script later. Auto Wipe will launch the server without start.bat. Features: Automatically restart and update the server every first Thursday of the month. Automatically generate or select random maps from rustmaps.com filter maps on wipe day or x days before wipe using https://rustmaps.com/ & wipe-info-api and start the vote. Allows players to vote on maps through an in-game UI or Discord (if you use any plugin that links a player and a Discord user, enable “only authenticated users can vote” in the config file to avoid duplicate votes). Automatically checks if it’s wipe day using wipe-info-api and the plugin’s config. Automatically update Oxide and the server and wipes it on forced wipe. Configure the plugin through a GUI (not all settings are available on the GUI). Select maps from rustmaps.com through a GUI via a RustMaps share code. Added Custom maps via GUI (to delete map you have to delete it from data file in MapVoter/Custommapdata.json). The vote will start automatically on custom maps in data folder if custom maps usage is enabled in config. Fun kit. Automatically generates custom maps every wipe, utilizing RustMaps.com. Please note that to use this feature, a subscription to RustMaps.com is required. Update 1.4.61 In this update you can generate a custom maps every time map vote starts with same config you provided. Update 1.3.40 New UI Update 1.3.35 1- Added Fun kit. Fun kit is kit that will be enabeled before every wipe, players can redeem it using /kit <kit name> or when respawning. Players wont be able to learn BPs and unloack workbench tree nodes. How to add fun kit? 1 - create kit using kits plugin with permission example : 2 - In map voter config file edit : "Fun Kit": { "Fun kit enabled": false, "Enable Fun kit x minutes before wipe": 0, "Kit name": null, "Permission": null }, 3 - save and reload MapVoter. 2 - Map Voter will print future wipes in console when loaded How to add Custom maps : Video Permissions: MapVoter.use only allows an admin to generate maps and start a vote. MapVoter.Manager allows an admin to use all the features. MapVoter.Vote allows player to vote(you can enable or disable this in configuration). Commands /mvote : Opens the plugin’s main GUI. /startvote After selecting which maps will appear on the vote, starts the vote. MapVoter.generate <Number of maps to generate> <seed> <voting duration in minutes>. voteresult : Shows which map had won the vote. Mapvoter.reload reload the plugin. MapVoter.mapwipe <delay in seconds> <Map size > will generate a map and change startup parameters in server.cfg. MapVoter.mapwipe <delay in seconds> <Custom map url > will wipe the server with a given custom map url and change startup parameters in server.cfg MapVoter.bpwipe <delay in seconds> <Map size > will generate map and delete *.db, *.db-journal and *.sav files and changes startup parameters in server.cfg MapVoter.bpwipe <delay in seconds> <Custom map url > will delete *.db, *.db-journal and *.sav files and change startup parameters MapVoter.cancelwipe : cancels ongoing wipe. MapVoter.stopvoting : stops ongoing voting. MapVoter.update <Delay in seconds> initiates restart and updates the server & oxide. Mapvoter.CancelUpdate : Cancels restart and update. Discord commands !vote !generate <Number of maps to generate> <seed> <voting duration in minutes>. !mapwipe <delay in seconds> <Map size > !bpwipe <delay in seconds> <Map size > bpwipe <delay in seconds> <Custom map url > !cancelwipe !stopvoting !update <Delay in seconds> !cancelupdate Configuration { "Commands": { "Open MapVoter UI": "mvote", "Generate Mpas": "MapVoter.generate", "vote result": "voteresult" }, "Options": { "Map size": 3500, "Select random maps from rustmaps filter id instead of generating random maps on wipe day (true/false)": false, "How many pages the plugin looks up per search request(every page has 30 maps": 10, "Enable Discord bot (true/false)": true, "Only players with permission MapVoter.Vote can vote (true/false)": false, "Log to Discord (true/false)": true, "Discord Logs Channel Id": "", "Disable UI": false, "RustMaps API key": "https://rustmaps.com/user/profile", "staging": false, "barren": false, "Stop voting after (minutes)": 60, "avatar url": "", "Discord footer": "", "filter Id": "Visit https://rustmaps.com/ and adjust your map requirements. In the red box above the settings hit the Share button,the string at the end of the URL is the filterId.Example URL: https://rustmaps.com/?share=gEU5W6BUuUG5FpPlyv2nhQ the string at the end in this case {gEU5W6BUuUG5FpPlyv2nhQ} is the filterId." }, "Discord Settings": { "Vote Channel id": "", "Discord Apikey": "BotToken", "Discord Command Prefix": "!", "Discord Channels": [ { "Discord Channel ID": "", "Commands": [ "generate", "vote", "mapwipe", "bpwipe", "cancelwipe", "stopvoting", "update", "cancelupdate" ] } ], "Discord Command Role Assignment (Empty = All roles can use command.)": { "generate": [ "DiscordRoleName", "DiscordRoleName2" ], "vote": [ "DiscordRoleName", "DiscordRoleName2" ], "mapwipe": [ "DiscordRoleName", "DiscordRoleName2" ], "bpwipe": [ "DiscordRoleName", "DiscordRoleName2" ], "cancelwipe": [ "DiscordRoleName", "DiscordRoleName2" ], "stopvoting": [ "DiscordRoleName", "DiscordRoleName2" ], "update": [ "DiscordRoleName", "DiscordRoleName2" ], "cancelupdate": [ "DiscordRoleName", "DiscordRoleName2" ] } }, "Auto Vote": { "Auto start vote": true, "Only Authenticated users can vote through discord": true, "Start voting x days before wipe": 0, "Start voting at (HH:mm) 24-hour clock": "17:00", "Number of maps to generate": 4 }, "Auto Wipe": { "Custom Map": { "Custom map": false, "Map URL": "" }, "Map Wipe schedule": [ 7, 14, 21, 28 ], "BP Wipe schedule": [ 0 ], "Enable Auto wipe": true, "Wipe BPs at forced wipe day": true, "Forced Wipe time (HH:mm) 24-hour clock": "19:00", "Wipe time (HH:mm) 24-hour clock": "19:00" } } Files Batch & Powershell script which turns on/off your server, updates it and deletes your selected map/bp files. AutoWipeconfig.txt MapVoter.cs, which will handle wipe schedule and automatically generate maps, start voting and restart the server. How to Install Non Dedicated servers : 1 - Upload Non Dedicated servers/oxide.disable-sandbox to /RustDedicated_Data/Managed/. 2 - Upload Mapvoter.cs. 3 - all your server configuration must be in /server/my_server_identity/cfg/server.cfg or you can change the path in config if your host use different path (/server/{folder name}). Windows: 1-Download & load https://umod.org/plugins/wipe-info-api and edit WipeInfoApi configuration to fit with your wipe schedule. 2- Load MapVoter and edit MapVoter configuration. 3- Shutdown the server. 4- Copy AutoWipe.bat, TryParse.ps1 , AutoWipeconfig.txt and DiscordSendWebhook.exe to your server folder. 5- download & install Unzip for Windows http://gnuwin32.sourceforge.net/packages/unzip.htm 6- open AutoWipe.bat in NotePad++. 7- Find RustDedicated.exe -batchmode and change rcon.port ,rcon.web rcon.password if you use rcon. 8- Open AutoWipeconfig.txt in NotePad++. 9- Replace the example server config path with your own server.cfg location. 10- Replace the example SteamCmd path with your own SteamCmd.exe location. 11-Replace unzip path with your own unzip.exe location if you install it to a different path and replace https://support.discordapp.com/hc/en-us/articles/228383668-Intro-to-Webhooks to your discord channel webhook. 11- Script will delete all maps *.sav* on map wipe and all *.db *.db-journal on full wipe. 12-Run AutoWipe.bat. Pterodactyl / Open game Panel / Linux / TC-admin: 1- Upload Discord extension to /RustDedicated_Data/Managed. 2- Upload AutoWipeInfo and MapVoter. 3- change the startup command if possible to ./RustDedicated -batchmode +server.identity "rust" +rcon.port {{RCON_PORT}} +rcon.web true +rcon.password \"{{RCON_PASS}}\" or leave all the map seed, size and level URL empty. 4-create server.cfg file in (default path of pterodactyl) server/rust/cfg/ example : server.port 28000 server.seed server.worldsize //server.levelurl server.maxplayers 100 server.gamemode vanilla server.hostname " Vanilla" server.tags vanilla,weekly server.level "Procedural Map" server.radiation true server.saveinterval 600 server.tickrate 30 server.headerImage "" server.url "" server.secure 1 server.salt 50 Below steps are debricated 1- Change the Docker Images in settings -> Nests -> rust -> rust to ghcr.io/kaysharp42/pterodactyl-rust-image:main 2- Go to Servers click on server name you want to install the script -> startup replace the Startup Command with ./AutoWipe.sh +rcon.port {{RCON_PORT}} +rcon.web true +rcon.password \"{{RCON_PASS}}\" Note : your going to use RCON password and port in Pterodactyl variables (startup). 3- Upload AutoWipe.sh, AutoWipeConfig.txt and discord.sh to File Manager. 4- Connect to your server Terminal using SSH or any other method. 5- Go to your Server folder Command #1 : cd /var/lib/pterodactyl/volumes Command #2: ls Command #3: cd "your server folder name" Command #4: chmod +x AutoWipe.sh Command #5: chmod +x discord.sh 6- Go back to File manager click on server folder and create folder named my_server_identity if you don't have one 7- In my_server_identity create another folder cfg and in the new folder create file server.cfg with all your server configuration exept recon password and port. 8- Change https://support.discordapp.com/hc/en-us/articles/228383668-Intro-to-Webhooks to your discord channel webhook. 9- Now go to server settings and click on reinstall server (Some files may be deleted or modified during this process, please back up your data before continuing.) Open game Panel : 1- Open AutoWipe.sh in Text Editor find ./RustDedicated and change rcon password and port. 2- Upload AutoWipe.sh and AutoWipeConfig.txt to File Manager. Go to your server folder and run this command chmod +x AutoWipe.sh then chmod +x discord.sh Example : cd /home/ogp_agent/OGP_User_Files/rustDev chmod +x AutoWipe.sh chmod +x discord.sh 3- install steamcmd if its not installed and then copy steamcmd folder to server folder cp -R {steamcmd path} {your server folder} Example : cp -R /root/.steam/steamcmd /home/ogp_agent/OGP_User_Files/rustDev 4- You must put all server variables in server/my_server_identity/cfg/server.cfg 5- Replace rust_linux64.xml in /var/www/html/modules/config_games/server_configs with rust_linux64.xml in Mapvoter-V*.*.*/OpenGamePanel you downloaded 6- open AutoWipeConfig.txt and replace https://support.discordapp.com/hc/en-us/articles/228383668-Intro-to-Webhooks with your discord channel webhook link. 6- start your server. Linux: 1-Download & load https://umod.org/plugins/wipe-info-api and edit WipeInfoApi configuration to fit with your wipe schedule. 2-Load MapVoter and edit MapVoter configuration. 3- Shutdown the server. 4- Copy AutoWipe.sh and AutoWipeconfig.txt to your server folder 5- download & install Unzip sudo apt-get install unzip 6- download & install jq JSON sudo apt-get install jq 7- open AutoWipe.sh in NotePad++. 8- Find RustDedicated.exe -batchmode and change rcon.port ,rcon.web rcon.password if you use rcon. 9- Open AutoWipeconfig.txt in Text Editor. 10- Replace the example server config path with your own server.cfg location. 11- Replace the example SteamCmd path with your own SteamCmd.sh location and replace https://support.discordapp.com/hc/en-us/articles/228383668-Intro-to-Webhooks to your discord channel webhook. 12- Script will delete all maps *.sav* on map wipe and all *.db *.db-journal on full wipe. 13- open terminal and do chmod +x AutoWipe.sh then chmod +x discord.sh. 14- Run AutoWipe.sh ./AutoWipe.sh. Perform a Dry-Run Run the AutoWipe.bat to ensure that it is working as expected. Whilst your server is online with no players, test some commands like Mapvote.bpwipe, check AutoWipeLogs.log as well as server.cfg, and make sure that server.seed and server.worldsize has changed and all your selected files have been deleted. Contact kaysharp#2008$45.00- 50 comments
- 8 reviews
-
- 4
-
-
-
- #admin tools
- #admintool
- (and 9 more)
-

Version 1.3.3
41 downloads
For growing various plants (hemp, pumpkin, corn, etc.), players receive special points that they can spend in a farm barn in an NPC town. In the city of the NPC, a small building called "Farm Barn" will spawn, in which there will be 8 boxes - they will differ by category (resources, tools, constructions, clothing, weapons, components, equipment, items). In the configuration, you can set up the items sold, change their price, set a marker to display the farm barn on the map, set up the issuance of the initial balance to the players, set up the issuance of points, change the pictures on the sign. You can separately disable any boxes by deleting products from it in the config. In this case, when you open the box, it will be empty and the purchase interface will not appear. P.S: The plugin allows you to sell custom items. The MarkerManager plugin is required to display the farm barn on the map! Video: Config: { "How many points to give out for the planted plants?": 200, "Initial balance for the player": 0, "Reset player balance after wipe?": true, "Disable chat notification when you receive points?": false, "Products": { "Resource box": [ { "Item name (if needed)": "", "Item shortname": "wood", "Item icon url (if custom item)": "", "Skin ID": 0, "Amount": 1000, "Price": 100 }, { "Item name (if needed)": "", "Item shortname": "stones", "Item icon url (if custom item)": "", "Skin ID": 0, "Amount": 10000, "Price": 500 }, { "Item name (if needed)": "", "Item shortname": "metal.fragments", "Item icon url (if custom item)": "", "Skin ID": 0, "Amount": 1000, "Price": 100 } ], "Tool box": [ { "Item name (if needed)": "", "Item shortname": "hatchet", "Item icon url (if custom item)": "", "Skin ID": 0, "Amount": 1, "Price": 100 }, { "Item name (if needed)": "", "Item shortname": "pickaxe", "Item icon url (if custom item)": "", "Skin ID": 0, "Amount": 1, "Price": 100 }, { "Item name (if needed)": "", "Item shortname": "axe.salvaged", "Item icon url (if custom item)": "", "Skin ID": 0, "Amount": 1, "Price": 100 } ], "Constructions box": [ { "Item name (if needed)": "", "Item shortname": "door.hinged.toptier", "Item icon url (if custom item)": "", "Skin ID": 0, "Amount": 1, "Price": 1000 }, { "Item name (if needed)": "", "Item shortname": "door.double.hinged.toptier", "Item icon url (if custom item)": "", "Skin ID": 0, "Amount": 1, "Price": 1000 }, { "Item name (if needed)": "", "Item shortname": "door.hinged.metal", "Item icon url (if custom item)": "", "Skin ID": 0, "Amount": 1, "Price": 100 } ], "Clothes box": [ { "Item name (if needed)": "", "Item shortname": "hoodie", "Item icon url (if custom item)": "", "Skin ID": 0, "Amount": 1, "Price": 100 }, { "Item name (if needed)": "", "Item shortname": "shoes.boots", "Item icon url (if custom item)": "", "Skin ID": 0, "Amount": 1, "Price": 50 }, { "Item name (if needed)": "", "Item shortname": "metal.facemask", "Item icon url (if custom item)": "", "Skin ID": 0, "Amount": 1, "Price": 200 } ], "Weapons box": [ { "Item name (if needed)": "", "Item shortname": "rifle.bolt", "Item icon url (if custom item)": "", "Skin ID": 0, "Amount": 1, "Price": 200 }, { "Item name (if needed)": "", "Item shortname": "rifle.ak", "Item icon url (if custom item)": "", "Skin ID": 0, "Amount": 1, "Price": 300 }, { "Item name (if needed)": "", "Item shortname": "rifle.m39", "Item icon url (if custom item)": "", "Skin ID": 0, "Amount": 1, "Price": 200 }, { "Item name (if needed)": "", "Item shortname": "pistol.m92", "Item icon url (if custom item)": "", "Skin ID": 0, "Amount": 1, "Price": 200 } ], "Components box": [ { "Item name (if needed)": "", "Item shortname": "scrap", "Item icon url (if custom item)": "", "Skin ID": 0, "Amount": 1000, "Price": 800 }, { "Item name (if needed)": "", "Item shortname": "gears", "Item icon url (if custom item)": "", "Skin ID": 0, "Amount": 10, "Price": 100 }, { "Item name (if needed)": "", "Item shortname": "propanetank", "Item icon url (if custom item)": "", "Skin ID": 0, "Amount": 10, "Price": 50 }, { "Item name (if needed)": "", "Item shortname": "metalpipe", "Item icon url (if custom item)": "", "Skin ID": 0, "Amount": 10, "Price": 100 } ], "Equipment box": [ { "Item name (if needed)": "", "Item shortname": "largemedkit", "Item icon url (if custom item)": "", "Skin ID": 0, "Amount": 1, "Price": 100 }, { "Item name (if needed)": "", "Item shortname": "syringe.medical", "Item icon url (if custom item)": "", "Skin ID": 0, "Amount": 10, "Price": 100 }, { "Item name (if needed)": "", "Item shortname": "ammo.shotgun", "Item icon url (if custom item)": "", "Skin ID": 0, "Amount": 10, "Price": 50 }, { "Item name (if needed)": "", "Item shortname": "ammo.rifle", "Item icon url (if custom item)": "", "Skin ID": 0, "Amount": 10, "Price": 100 }, { "Item name (if needed)": "", "Item shortname": "ammo.pistol", "Item icon url (if custom item)": "", "Skin ID": 0, "Amount": 100, "Price": 100 }, { "Item name (if needed)": "", "Item shortname": "explosive.timed", "Item icon url (if custom item)": "", "Skin ID": 0, "Amount": 1, "Price": 1000 }, { "Item name (if needed)": "", "Item shortname": "explosive.satchel", "Item icon url (if custom item)": "", "Skin ID": 0, "Amount": 1, "Price": 250 } ], "Items box": [ { "Item name (if needed)": "", "Item shortname": "furnace", "Item icon url (if custom item)": "", "Skin ID": 0, "Amount": 1, "Price": 100 }, { "Item name (if needed)": "", "Item shortname": "furnace.large", "Item icon url (if custom item)": "", "Skin ID": 0, "Amount": 1, "Price": 200 }, { "Item name (if needed)": "", "Item shortname": "sofa", "Item icon url (if custom item)": "", "Skin ID": 0, "Amount": 1, "Price": 50 }, { "Item name (if needed)": "", "Item shortname": "bbq", "Item icon url (if custom item)": "", "Skin ID": 0, "Amount": 1, "Price": 25 } ] }, "Ambar local position": { "x": 0.0, "y": 0.0, "z": 0.0 }, "Ambar local rotation": { "x": 0.0, "y": 0.0, "z": 0.0 }, "Marker on the map": { "Enable display of the farm barn on the map?": true, "Display name": "Farm Barn", "Marker radius": 0.32, "Marker fill color": "c0392b", "Marker outline color": "e74c3c" }, "GoldenFish plugin support": { "Enable GoldenFish plugin support?": false, "How many points to give out for a caught goldfish?": 4 }, "Oysters plugin support": { "Enable Oysters plugin support?": false, "How many points to give out for a caught oyster?": 4 }, "Pictures": { "GUI Image": "https://www.rustyplugin.ru/FarmBarn/eng/gui.png", "Banner Image": "https://www.rustyplugin.ru/FarmBarn/eng/logo.png", "Picture for sign 'Components'": "https://www.rustyplugin.ru/FarmBarn/eng/components.png", "Picture for sign 'Constructions'": "https://www.rustyplugin.ru/FarmBarn/eng/constructions.png", "Picture for sign 'Equipment'": "https://www.rustyplugin.ru/FarmBarn/eng/equipment.png", "Picture for sign 'Items'": "https://www.rustyplugin.ru/FarmBarn/eng/items.png", "Picture for sign 'Resources'": "https://www.rustyplugin.ru/FarmBarn/eng/resources.png", "Picture for sign 'Tools'": "https://www.rustyplugin.ru/FarmBarn/eng/tools.png", "Picture for sign 'Weapons'": "https://www.rustyplugin.ru/FarmBarn/eng/weapons.png", "Picture for sign 'Clothes'": "https://www.rustyplugin.ru/FarmBarn/eng/clothes.png" } } Commands: /farmbarn balance - shows the player his current balance in the farm barn fb [STEAM ID] [AMOUNT] - gives the player a certain number of points (works only from the server console)$20.00 -
Version 1.3.3
256 downloads
Better No Workbench - Rust Plugin A plugin for Rust that gives workbench level 3 access to players with permission. Unlike the free version you can refill items and it also displays the workbench UI in the bottom right. Permission: Give players so they get workbench access: BetterNoWorkbench.on$2.99- 11 comments
-
- 4
-
-

-
- #christmas sale
- #workbench
- (and 1 more)
-
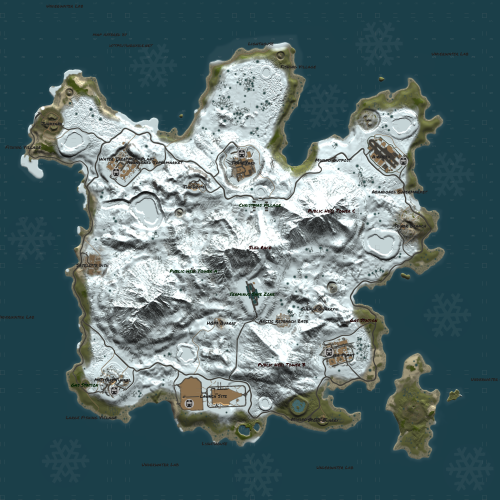
Version 1.4.1
17 downloads
Winter Wonderland is a christmas/winter themed map with dominant biome arctic and minority of the rest. Map contains 4 unique custom made cabins for players to explore and build in + a large ice valley that can be an unique location for a town or just player bases. Custom Safezone including all vendors from both Outpost + Bandit Camp , including Airwolf Vendor. 3 unique Heli Towers placed on top of mountains and 3 unique Gas Stations made by !David#1337 On top of mountains you will have the Sled Shop Cabin which allows players to race towards the Christmas Modern Village and Terminus Safe Zone , Sled Shop will sell sleds (Loot Profile included in zip file in case you want to do edits). The pack of wolves down next to Modern Christmas Village are dormant and will not move/attack or be hurt by any player interactions or AI. Snowflakes that you see on map picture are underwater terrain modifications. The map features custom and procedural monuments ~Procedural Monuments : Water Treatment Plant Train Yard Airfield Power Plant Launch Site Military Tunnels Satellite Dish Junkyard Sewer Branch The Dome Arctic Research Base HQM & Sulfur & Stone Quarries 2 Mining Outpost 2 Abandoned Supermarket Large & Small Oil Rigs 6 Underwater Labs ~Custom Monuments : 3 Public Heli Towers with Tier 1 - 2 - 3 Workbenches / Repair and Research Bench / Recycler and Vending Machines / Recreation area 4 Custom Winter Cabins featuring a deep hidden cave under the cabin and attic 2 Gas Stations made by !David#1337 Terminus Safezone - Including all Vendors from both Outpost & Bandit Camp with Airworlf Vendor and extras Modern Christmas Village featuring 4 Modern Villas in unique location and slightly modified Roadside bus stations with cover and fire source to warm your players Santa's Atelier with Reindeers (Pack of Wolves on budget) Sledge track towards Safezone and Village Sledge Shop on top of mountain between the Sledge tracks Frozen Valley ~ Entity Count : 29770 ~ Map Size : 4000 Password Comes with the map.$25.00- 8 comments
-
- 3
-
-
- #christmas
- #rust
- (and 9 more)
-
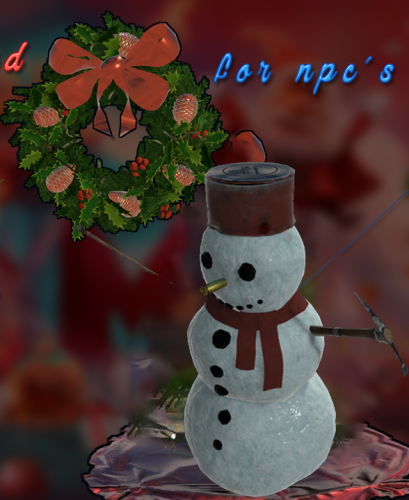
Version 1.0.6
6 downloads
ChristmasDead Features Are you also a big Christmas fan and want a little more Christmas feeling in the game? With this plugin you can turn the bodies of NPCs and players into a snowman. Animals get a Christmassy wreath. I have set it so that the items spawn offset next to the corpse so that it does not interfere with looting or mining! You can adjust the duration in the config until it despawns. Config: { "Spawn Snowman for Players": true, "Spawn Snowman for NPCs": true, "Spawn Christmas Door Wreath for Animals": true, "Show Duration (Seconds)": 15 } load, run, enjoy$1.99 -
Version 1.1.19
152 downloads
This plugin makes the admin’s life easier by automatically generating maps, initiating a vote that lets users choose which map they would like to play in during the next wipe. Depends on: Image Library Wipe Info API Discord extension UnZip for Windows NEW GUI: Features: Automatically generate maps and start the vote ,every first Thursday of the month. Automatically generate maps on wipe day using https://rustmaps.com/ & wipe-info-api and start the vote. Allows players to vote on maps through an in-game UI or Discord (if you use any plugin that links a player and a Discord user, enable “only authenticated users can vote” in the config file to avoid duplicate votes). Automatically checks if it’s wipe day using wipe-info-api and the plugin’s config. Configure the plugin through a GUI (not all settings are available on the GUI). Select maps from rustmaps.com through a GUI via a RustMaps share code. Note : This plugin does not include auto wipe script. if you wish to automatically restart and update the server and wipes it on forced wipe or on schedule check the other version of Map voter. Video How to add Custom maps : Permissions: MapVoter.use only allows an admin to generate maps and start a vote. MapVoter.Manager allows an admin to use all the features. Commands: /mvote : Opens the plugin’s main GUI. /startvote After selecting which maps will appear on the vote, starts the vote. MapVoter.generate <Number of maps to generate> <seed> <voting duration in minutes>. voteresult : Shows which map had won the vote. Mapvoter.reload reload the plugin. MapVoter.stopvoting : stops ongoing voting. Discord commands: !vote !generate <Number of maps to generate> <seed> <voting duration in minutes>. Configuration { "Commands": { "Open MapVoter UI": "mvote", "Generate Mpas": "MapVoter.generate", "vote result": "voteresult" }, "Options": { "Select random maps from rustmaps filter id instead of generating random maps on wipe day (true/false)": true, "How many pages the plugin looks up per search request(every page has 30 maps": 10, "Enable Discord bot (true/false)": true, "Only players with permission MapVoter.Vote can vote (true/false)": false, "Map size": 3500, "Disable UI": false, "RustMaps API key": "https://rustmaps.com/user/profile", "staging": false, "barren": false, "Stop voting after (minutes)": 60, "avatar url": "", "Discord footer": "", "filter Id": "Visit https://rustmaps.com/ and adjust your map requirements. In the red box above the settings hit the Share button,the string at the end of the URL is the filterId.Example URL: https://rustmaps.com/?share=gEU5W6BUuUG5FpPlyv2nhQ the string at the end in this case {gEU5W6BUuUG5FpPlyv2nhQ} is the filterId." }, "Discord Settings": { "Discord Webhook": "https://support.discordapp.com/hc/en-us/articles/228383668-Intro-to-Webhooks", "Discord Apikey": "BotToken", "Discord Command Prefix": "!", "Discord Channels": [ { "Discord Channel ID": "", "Commands": [ "generate", "vote", "mapwipe", "bpwipe", "cancelwipe", "stopvoting", "update", "cancelupdate" ] } ], "Discord Command Role Assignment (Empty = All roles can use command.)": { "generate": [ "DiscordRoleName", "DiscordRoleName2" ], "vote": [ "DiscordRoleName", "DiscordRoleName2" ], "mapwipe": [ "DiscordRoleName", "DiscordRoleName2" ], "bpwipe": [ "DiscordRoleName", "DiscordRoleName2" ], "cancelwipe": [ "DiscordRoleName", "DiscordRoleName2" ], "stopvoting": [ "DiscordRoleName", "DiscordRoleName2" ], "update": [ "DiscordRoleName", "DiscordRoleName2" ], "cancelupdate": [ "DiscordRoleName", "DiscordRoleName2" ] } }, "Auto Vote": { "Auto start vote": true, "Only Authenticated users can vote through discord": true, "Start voting at (HH:mm) 24-hour clock (UTC)": "17:00", "Number of maps to generate": 4 }, "Auto Wipe": { "Custom Map": { "Custom map": false, "Map URL": "" }, "Map Wipe schedule": [ 7, 14, 21, 28 ], "BP Wipe schedule": [ 0 ], "Enable Auto wipe": true, "Wipe BPs at forced wipe day": true, "Forced Wipe time (HH:mm) 24-hour clock (UTC)": "19:00", "Wipe time (HH:mm) 24-hour clock (UTC)": "19:00" } } Contact kaysharp#2008$15.00- 15 comments
- 2 reviews
-
- 2
-
-
- #plugin
- #admin tool
- (and 7 more)
-

Version 1.0.5
440 downloads
This is a simple tool for developers who want to make custom items, this allows you to chose a item name (Workshop Name) and item image anywhere on your computer (.png) and upload it to your rust steam workshop. This will allow you to get the workshop ID in which you use to create a "custom" item. Requirements - Must have steam running - Must have rust in steam library Installation Download the zip and extract the folder to chosen location Run the unity game named, Rust Custom Icons.exe Tips I recommend running this in windowed which you can get to by pressing ALT + ENTER GIF of how it work$10.00 -
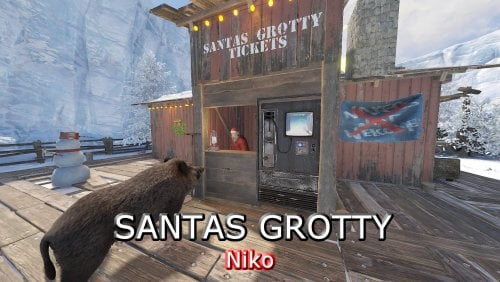
Version 64 251122
24 downloads
Santa's Grotty is a challenging puzzle to gain all the loot, presents are hidden and can even be purchased for scrap. BAHH HUMBUG, Santa's Grotty (not grotto) is the place where Bad Santa lives, he taken all the loot from the naughty door campers, naked murders, roof campers and griefers and stashed all the loot in his dirty little grotty home. Santa's not home but the puzzle is a bit of a challenge and you will need help to get it all. (2 person puzzle) You can also buy presents for scrap, just remember Santa is in it for his own gain. INSTRUCTIONS Place the contents of the Loot Folder in the LootPresets folder wherever your RustEdit is installed Place the contents of the Vending Folder in the VendingPresets folder wherever your RustEdit is installed Place the other files in your usual prefab folder Merry Christmas from Niko, Enjoy If you have any problems you can contact me via Discord https://discord.gg/r84Cg84 https://www.youtube.com/channel/UCA7CIAlTCL-grVynuXt5D9g?view_as=subscriber Finally, please make yourself aware of the TOS-Restrictions for use. Thanks Niko$9.98 -
Version 1.0.0
52 downloads
No Building Debris is a plugin that will help improve players client fps a lot by getting rid of the gibs on Building Blocks destruction. I provided 4 options so if you want to keep some gibs on you can! These will work on all objects that are considered building blocks, such as high external walls! PLEASE READ BEFORE BUYING! For this to work it requires the server to disable sandbox, it uses Harmony code which allows me to modify the server code to allow this to be possible. You can find out how to disable sandbox below. After disabling, you can drop the plugin in the plugin folder like normal. To disable Sandbox, head to your RustDedicated_Data/Managed folder and create a file called oxide.disable-sandbox then restart your server to apply the change. Config { "Remove Admin Kill Gibs?": true, "Remove Stability Gibs?": true, "Remove Demolish Gibs?": true, "Remove Killed Gibs?": true }$10.00 -

Version 1.0.9
39 downloads
This is a plugin that has been long awaited but this plugin officially gets rid of roof camping. Have you ever been tired of players just sitting on there roof with a bolt action rifle? This can completely eliminate that and make sure players have to leave there base. Must know Before Buying: In order for some monuments to pass monument check, monument must have the Building and Monument Topology! Features: - Stop players from being able to sit on roof and camp - Checks for if player is not associated with base, allowing players above someones door to be able to shoot. - Check if player is within players base, allowing them to roofcamp if player sneeks in compound - Glitch Free (Tested all possible ways for a player to exploit roof camp) Configuration: { "Roofcamp Distance": 40.0, "Roofcamp Height": 1.0, "Roofcamp Kill Time (Secs)": 120, "Deal damage to roofcamper": true, "Damage Retuned (This value is divied by the damage done)": 2.0, "Allow roofcamp for heli": true, "Heli Roofcamp Disable Time (Mins)": 5, "Allow roofcamp when getting raided": true, "Raid Roofcamp Disable Time (Secs)": 120, "List of shortnames to start raid time if damaged": [ "door.hinged.wood", "door.hinged.metal", "door.double.hinged.metal", "door.double.hinged.toptier", "wall.frame.garagedoor", "window.bars", "floor.ladder.hatch", "wall.frame.shopfront.metal", "shutter", "gates.external.high.wood", "wall.external.high.wood" ] }$30.00 -

Version 0.6.5
173 downloads
StructureUpgrade allows players to upgrade entire structures, regardless of size, quickly, efficiently and securely using as much of Rust's code as possible to maintain stability. StructureUpgrade was built for performance from the ground up, and resolves many issues in free alternatives such as exploits, client & server crashes, and extreme lag. In addition, due to issues a lot of plugins suffer from, I offer a 6 month support guarantee with maximum 7 day turnaround (including for updates to fix the plugin if functionality is lost due to updates) for all support handled through Codeflings support system. If I can't get the plugin into a working condition or provide a reasonable level of support through Codeflings support requests within 7 days, I'll refund what you paid for the plugin if within the 6 month guarantee period. Support is provided in many places other than Codeflings support system, and I encourage everyone to ask on the forums or our discord first for the fastest response times. Click here to join my discord. Features Upgrades entire buildings, regardless of size, without causing lag in batches. Determines upgrade costs, handles taking costs from player inventory, dominating tool cupboard, and soon, storages inside the structure. Several checks ensure payment is taken correctly, and when refunding is added even more checks will be implemented. Resumes upgrading efficiently where it left off after a server crash or plugin reload. Supports a virtually infinite queue with optimized queue storage, jobs are stored and tracked in a data file and worked one at a time. Players are notified when their job starts. Unlike the simpler free alternative this plugin is optimized to prevent crashing on upgrading large structures, optimized to eliminate server lag, only a small frame drop for players looking at the structure. Uses Rusts existing building system rather than a janky, laggy alternative. We don't to build lists of entities because Rust already maintains that for us. We're just manipulating and using that information. Free alternative has an exploit allowing players to unintentionally upgrade nearby structures that aren't theirs, StructureUpgrade resolves that issue. Permissions structureupgrade.admin - Allows the player to upgrade structures without being authenticated on the tool cabinet. structureupgrade.free - Allows the player to bypass the upgrade costs when upgrading. They still must be authenticated on the tool cabinet. structureupgrade.up - Allows the player to use the /tc command. structureupgrade.uptc - Allows the player to use the /uptc command. structureupgrade.ups - Allows the player to use the /ups command. structureupgrade.norefund - Disables refunding cost when using /down for that player. Chat Commands Up Command Adds an upgrade job to queue after verifying and taking payment from the players inventory. Usage: /up {NewGrade} Usage Example: /up 2 (Upgrades structure to Stone Tier) Parameters NewGrade - What grade you'd like to upgrade to. 0 = Twig, 1 = Wood, 2 = Stone, 3 = Sheet Metal, 4 = High Quality Conditions For Use If using NoEscape Plugin - Player is not currently RaidBlocked. Provided NewGrade variable is inside supported range; currently 0 - 4. Command is run by a player. Player is inside building privilege. Player is authenticated on dominating tool cabinet, or has permission structureupgrade.admin. Player has upgrade costs in inventory, or has permission structureupgrade.free. Down Command Adds an downgrade job to queue after verifying and refunding cost to the players inventory. (Disable refund by giving player structureupgrade.norefund permission) Usage: /down {NewGrade} Usage Example: /down 2 (Downgrades structure to Stone Tier) Parameters NewGrade - What grade you'd like to downgrade to. 0 = Twig, 1 = Wood, 2 = Stone, 3 = Sheet Metal, 4 = High Quality Conditions For Use If using NoEscape Plugin - Player is not currently RaidBlocked. Provided NewGrade variable is inside supported range; currently 0 - 4. Command is run by a player. Player is inside building privilege. Player is authenticated on dominating tool cabinet, or has permission structureupgrade.admin. Player has space for refunded resources in main inventory, or has permission structureupgrade.norefund. UpTc Command This command functions like /up except payment is taken out of the dominating tool cupboard. Usage: /uptc {NewGrade} Usage Example: /uptc 2 (Upgrades structure to Stone Tier) Parameters NewGrade - What grade you'd like to upgrade to. 0 = Twig, 1 = Wood, 2 = Stone, 3 = Sheet Metal, 4 = High Quality Conditions For Use If using NoEscape Plugin - Player is not currently RaidBlocked. Provided NewGrade variable is inside supported range; currently 0 - 4. Command is run by a player. Player is inside building privilege. Player is authenticated on dominating tool cabinet, or has permission structureupgrade.admin. Player has upgrade costs in inventory, or has permission structureupgrade.free. UpS Command Upgrades the structure, takes payment from storages attached to the structure. Usage: /ups {NewGrade} Usage Example: /ups 2 (Upgrades structure to Stone Tier) Parameters NewGrade - What grade you'd like to upgrade to. 0 = Twig, 1 = Wood, 2 = Stone, 3 = Sheet Metal, 4 = High Quality Conditions For Use If using NoEscape Plugin - Player is not currently RaidBlocked. Provided NewGrade variable is inside supported range; currently 0 - 4. Command is run by a player. Player is inside building privilege. Player is authenticated on dominating tool cabinet, or has permission structureupgrade.admin. Player has upgrade costs in building storages, or has permission structureupgrade.free. Configuration Default Configuration { "BatchSize": 1, "AllowUpgradeFromTc": true, "AllowUpgradeFromStorages": true, "UpgradeFrequency": 0.025, "HidePrefixWithPluginNameInMessages": false } AllowUpgradeFromTc - If enabled the /uptc command is registered, if disabled /uptc is not registered and will result in an unknown command error. AllowUpgradeFromStorages - If enable the /ups command is registered, if disabled /uptc is not registered and will result in an unknown command error. BatchSize - Determines how many building blocks are upgraded every UpgradeFrequency. WARNING! :: Increasing this value does considerably reduce time to upgrade a structure. However for every 1 (one) increment players in the area will see a reduced 15 fps average. Setting this to 3 may kill fps by up to 30 in addition to the normal 20 or so. It is strongly recommended to modify UpgradeFrequency instead. HidePrefixWithPluginNameInMessages - If enabled the [StructureUpgrade] branding is removed from all player communications, as this is attached programatically rather than through the lang file. UpgradeFrequency - This is the frequency in fractions of a second that upgrades structures (quantity defined by BatchSize). This is optimized by default, lowering it too far will still cause lag. By default 1 block is upgraded every 25ms, or 0.025 seconds. For Developers Currently no API or Hooks exposed. This will be changed in the future, suggestions welcome. Future Features Want a feature not listed? Please suggest it as I'd love to continue expanding and increasing on the already substantial feature sets of StructureUpgrade. Command Aliases (in configuration) Logging all usages with statistics to log file Additional payment and block statistics to aid in future refunding functionality and abuse protection /upundo command to undo an upgrade. GUI in inventory screen detailing cost and duration, with buttons for grade and upgrade. Partial upgrades. Changeable chat icon. FAQ Where can I get support and interact with the community & developer? Codefling provides a support and discussion tab that's perfect for that. Additionally you're welcome to join my discord for faster more direct support: Click here to join! What checks are conducted to prevent abuse when upgrading? There are a few checks in addition to the checks defined for each command in the commands section above. Does the building block still exist? Is the building blocks grade higher than desired value? Skip.$10.00 -
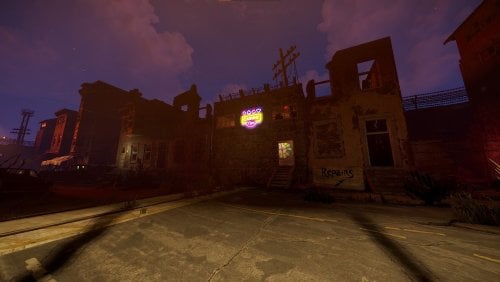
Version 1.7.34
100 downloads
Casino for resources, players also want to increase their holdings. The casino has a built-in video surveillance camera on which you can watch what is happening in it. Also spawn cameras can be disabled in the configuration. You can specify any resources. Nice UI and alerts The plugin requires CopyPaste (It will load and spawn the building) https://i.imgur.com/3arzCqK.mp4 Sorry but video in Russian -$17.00 -
Version 1.0.5
118 downloads
Voice Levels is a plugin that allows players to modify how far they can be heard. At the execution of command the player can switch between a select of voice distances created through the config file of the server owner. The UI Fades in and Fades Out smoothly which can be edited in the .cs file. Each voice level has ability to be permission locked, if that's something of interest. EXAMPLE VIDEO PLEASE READ BEFORE BUYING! For this to work it requires the server to disable sandbox, it uses Harmony code which allows me to modify the server code to allow this to be possible. You can find out how to disable sandbox below. After disabling, you can drop the plugin in the plugin folder like normal. To disable Sandbox, head to your RustDedicated_Data/Managed folder and create a file called oxide.disable-sandbox then restart your server to apply the change. Permission voicelevels.use - Allow creating and deleting of Store Clerks Commands /switch or /sv - Switch between voice levels Features Permission for using voice levels plugin Add/Remove Voice Levels Lock voice levels behind a permission Fully Configurable! Config { "Require Permission?": false, "Permission": "voicelevels.use", "Voice Levels": [ { "requiresPermission": false, "permission": "voicelevels.whisper", "LevelDisplayName": "WHISPERING", "voiceDistance": 5.0, "color": "#068016" }, { "requiresPermission": false, "permission": "voicelevels.normal", "LevelDisplayName": "NORMAL", "voiceDistance": 25.0, "color": "#805706" }, { "requiresPermission": false, "permission": "voicelevels.yell", "LevelDisplayName": "YELLING", "voiceDistance": 100.0, "color": "#630505" } ] }$20.00